
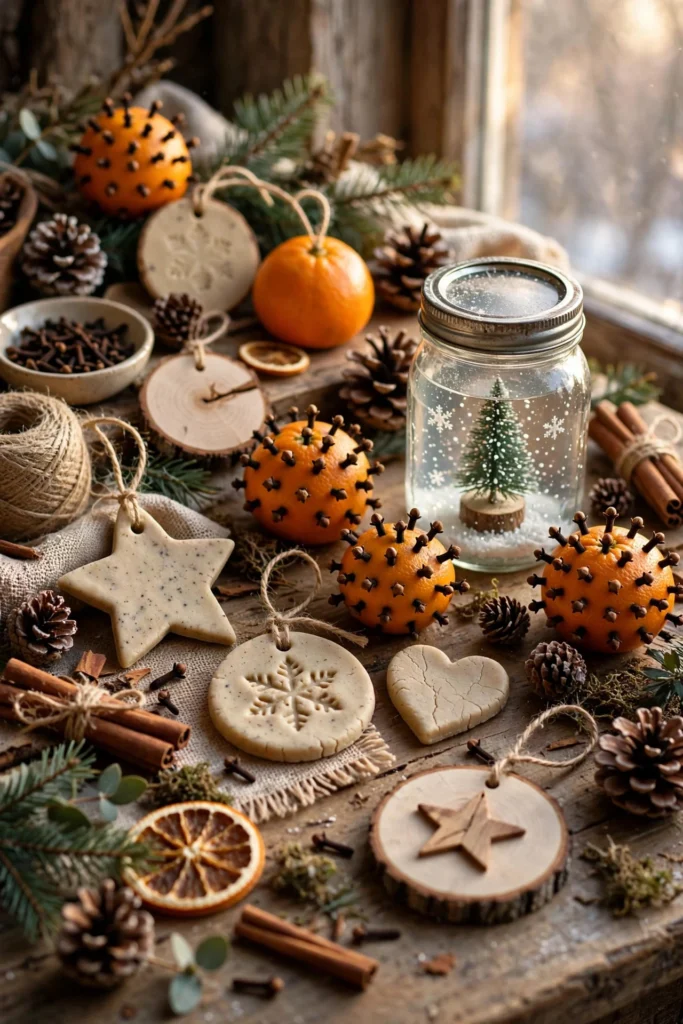
There’s a special kind of satisfaction in pointing at your mantel and saying “I made that.” DIY Christmas decorations aren’t about saving money (though you will) — they’re about having things in your home that nobody else has. A handmade ornament carries a story; a store-bought one carries a receipt.
These 19 projects are genuinely easy — no power tools, no advanced skills, nothing that takes more than an afternoon. Most use supplies you already own or can grab for a few dollars. Pick two or three, put on some music, and make a day of it.
1. Clove-Studded Citrus Pomanders
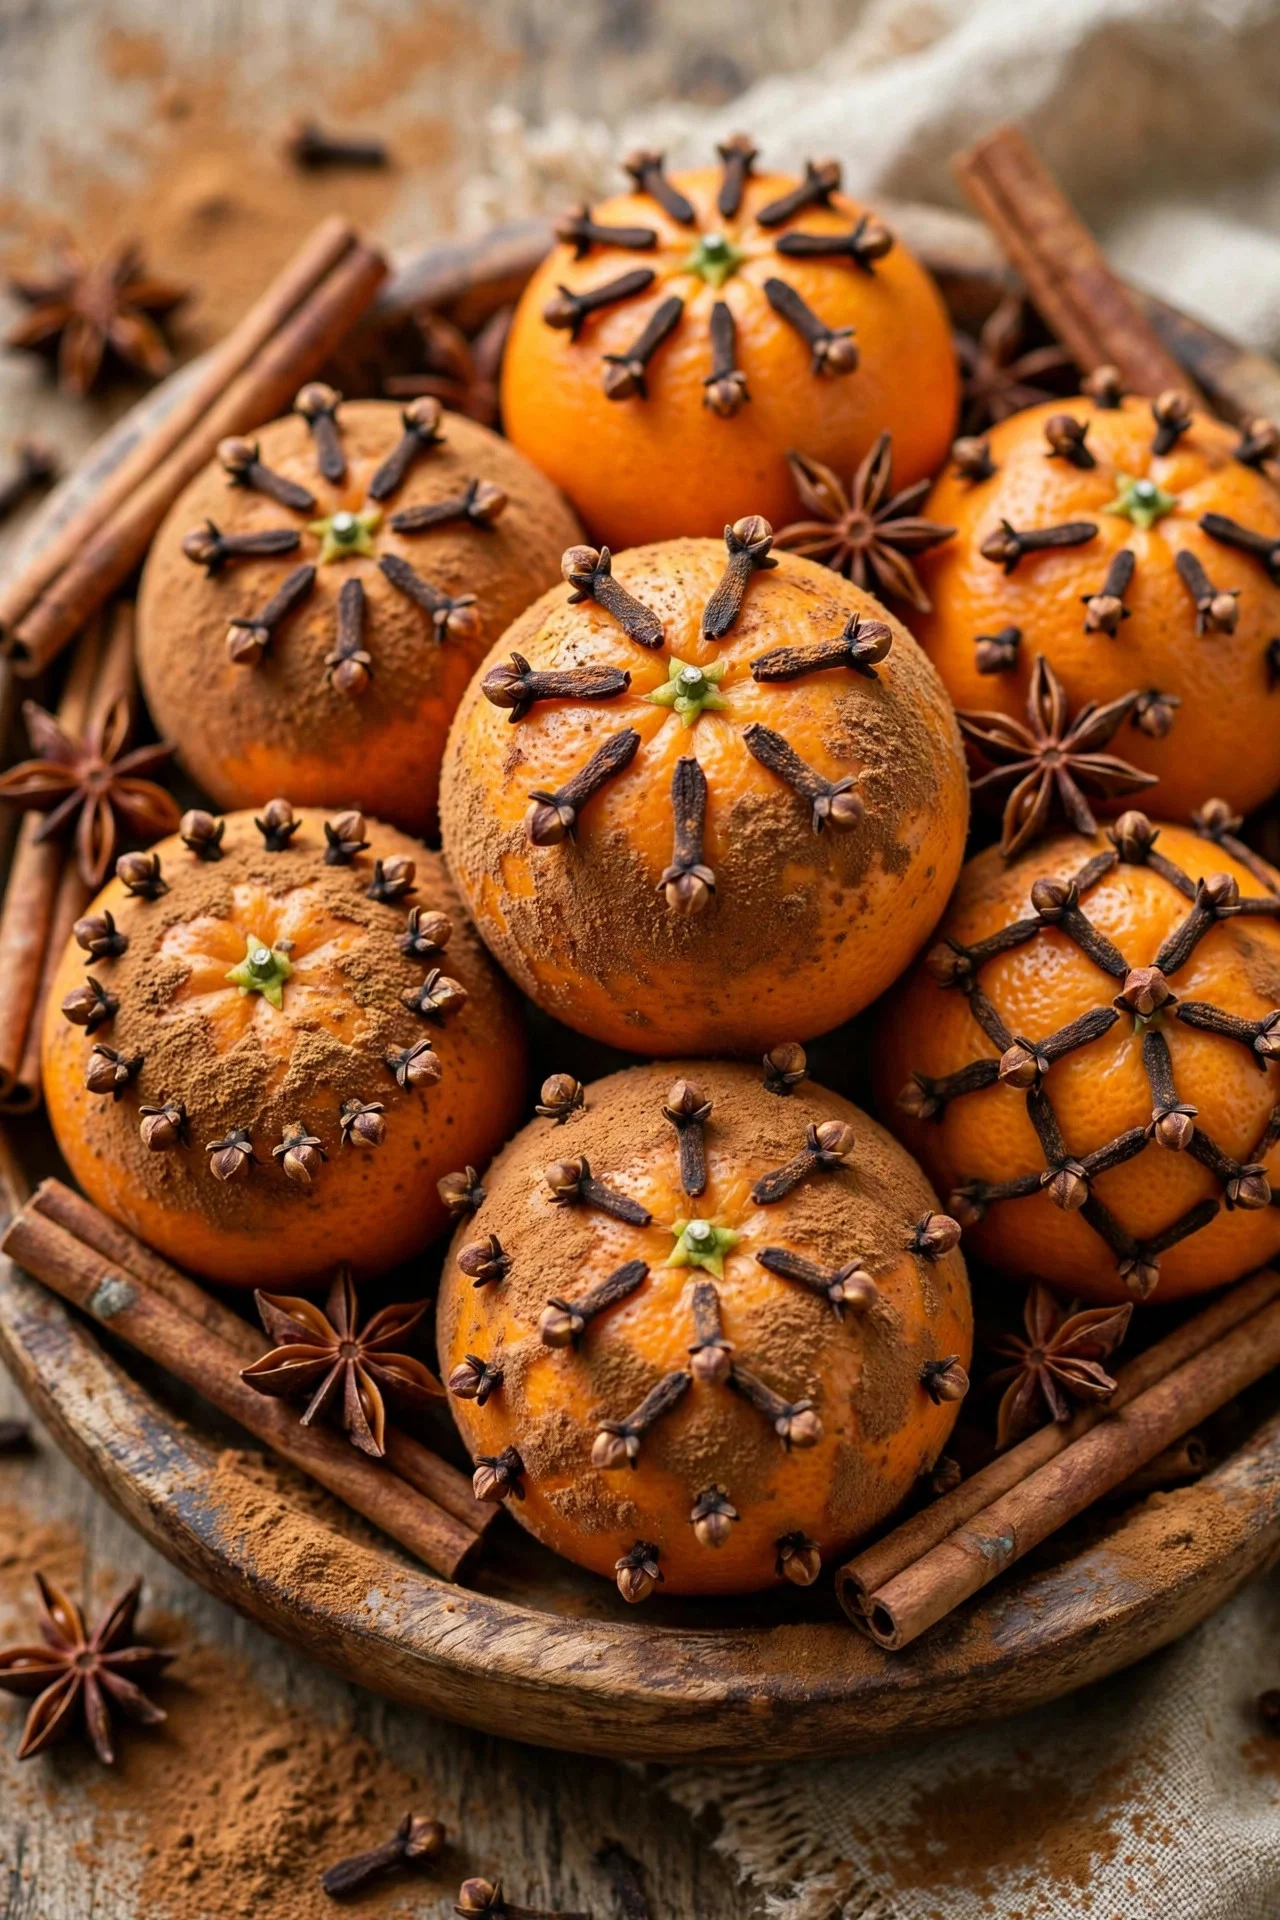
This is the oldest DIY Christmas decoration in the book, and it still works: push whole cloves into oranges in any pattern you like — stripes, spirals, or a full covering — and roll the finished orange in cinnamon. The result smells like Christmas for a month and looks like something from a colonial Williamsburg catalog.
Use a toothpick to poke starter holes if the orange skin is tough; your thumbs will thank you. Display pomanders in a wooden bowl with extra cinnamon sticks and star anise, or tie ribbon around them and hang from the tree. They slowly dry out and harden, lasting for years.
Try this: Make a dozen as gifts — nestle two pomanders in a kraft box with tissue for a present that costs under $3.
2. Salt Dough Ornaments That Actually Last
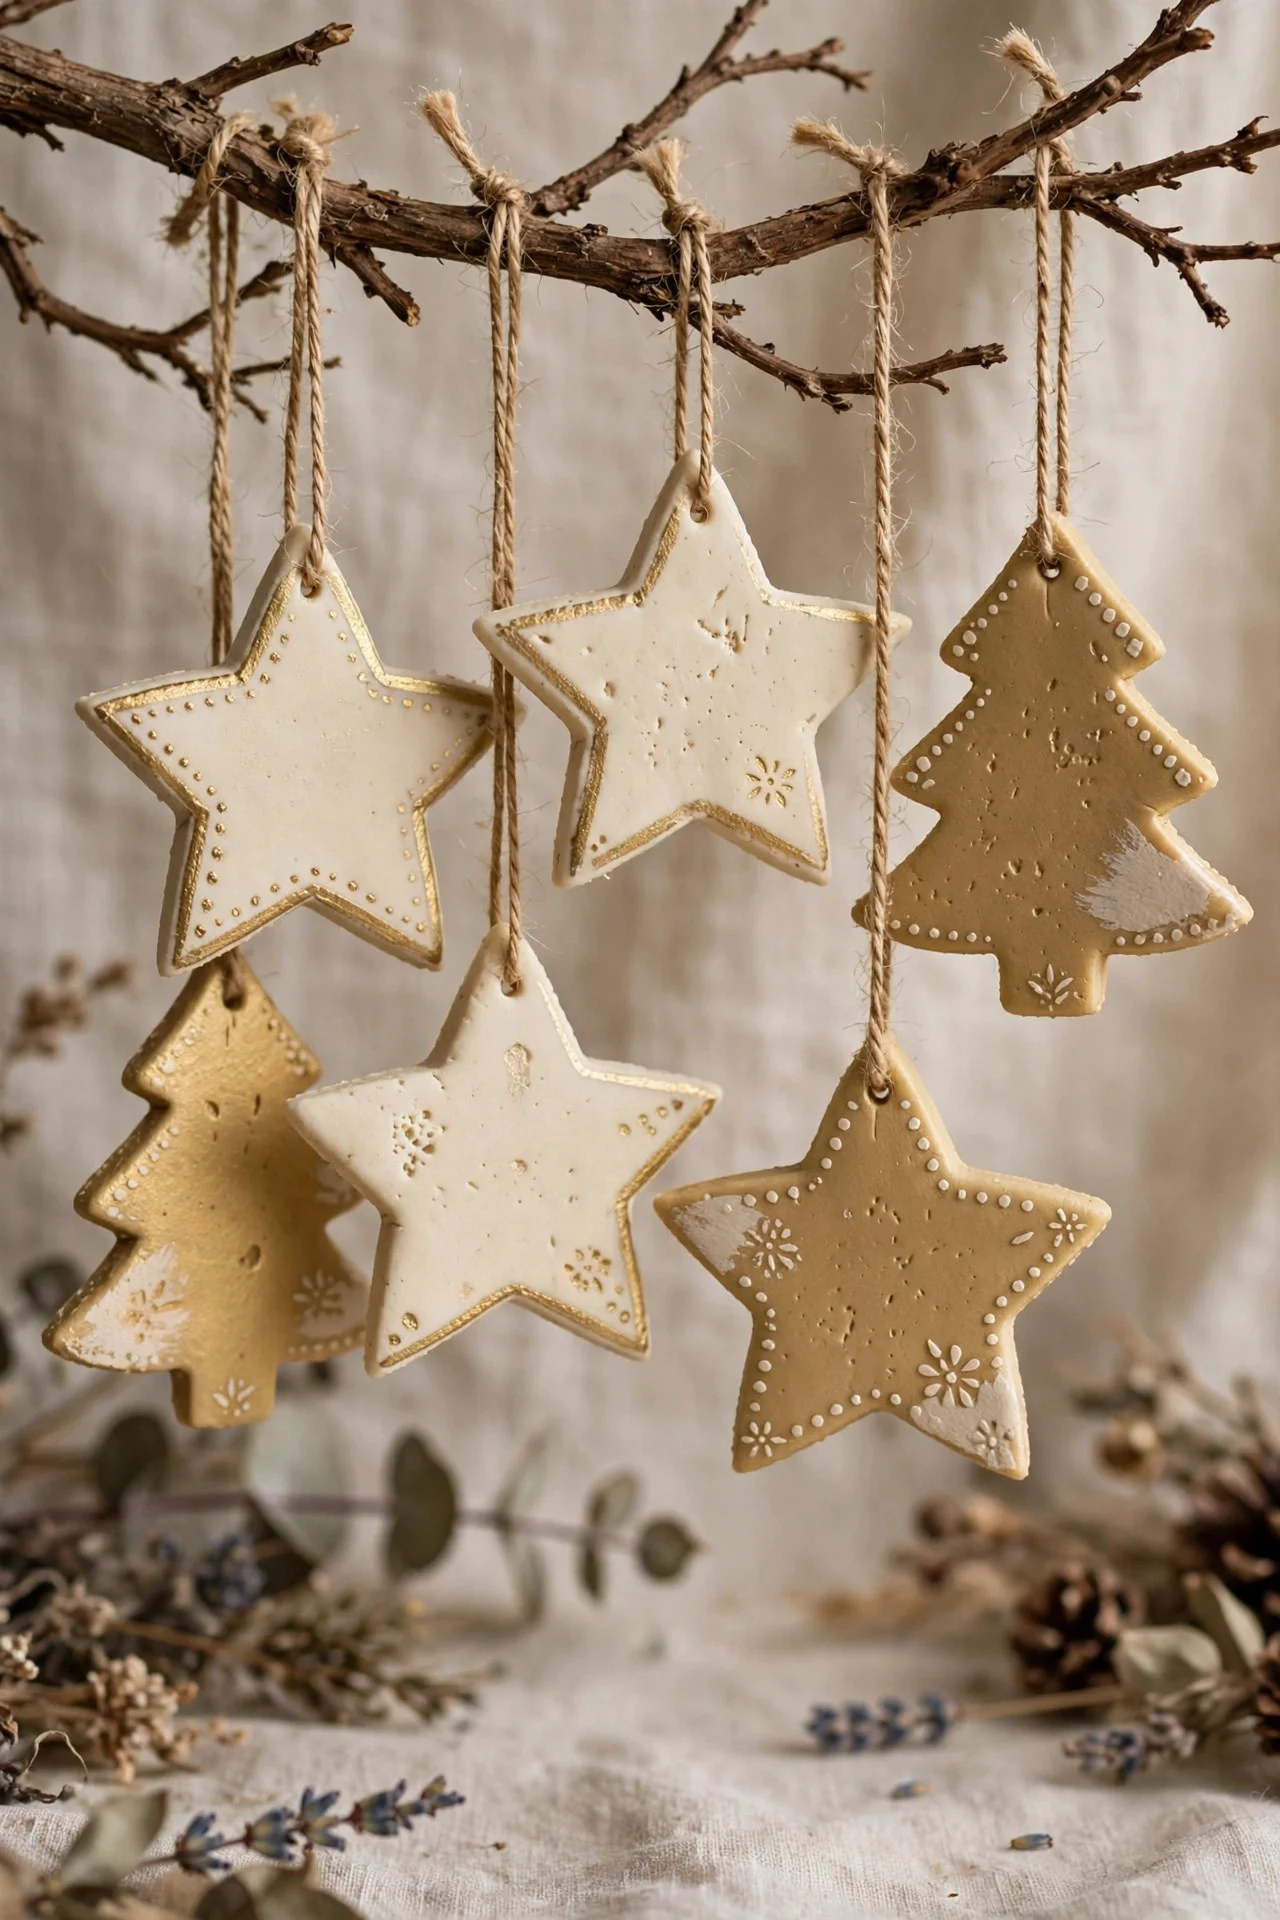
Mix two cups of flour, one cup of salt, and one cup of water, knead for five minutes, roll to a quarter-inch thick, and cut with cookie cutters. Bake at 200°F for two to three hours until completely hard. That’s it — ornaments your kids will hang on their own trees someday.
The secret to non-crafty results: stick to simple shapes (stars, circles, trees), paint them in one sophisticated color like matte cream or antique gold, and stamp or carve a date into the back before baking. Poke the hanging hole with a straw before baking, not after.
Try this: Press a sprig of cedar or a lace doily into the dough before baking for an embossed pattern — no painting required.
3. Cinnamon Stick Bundles Tied With Twine
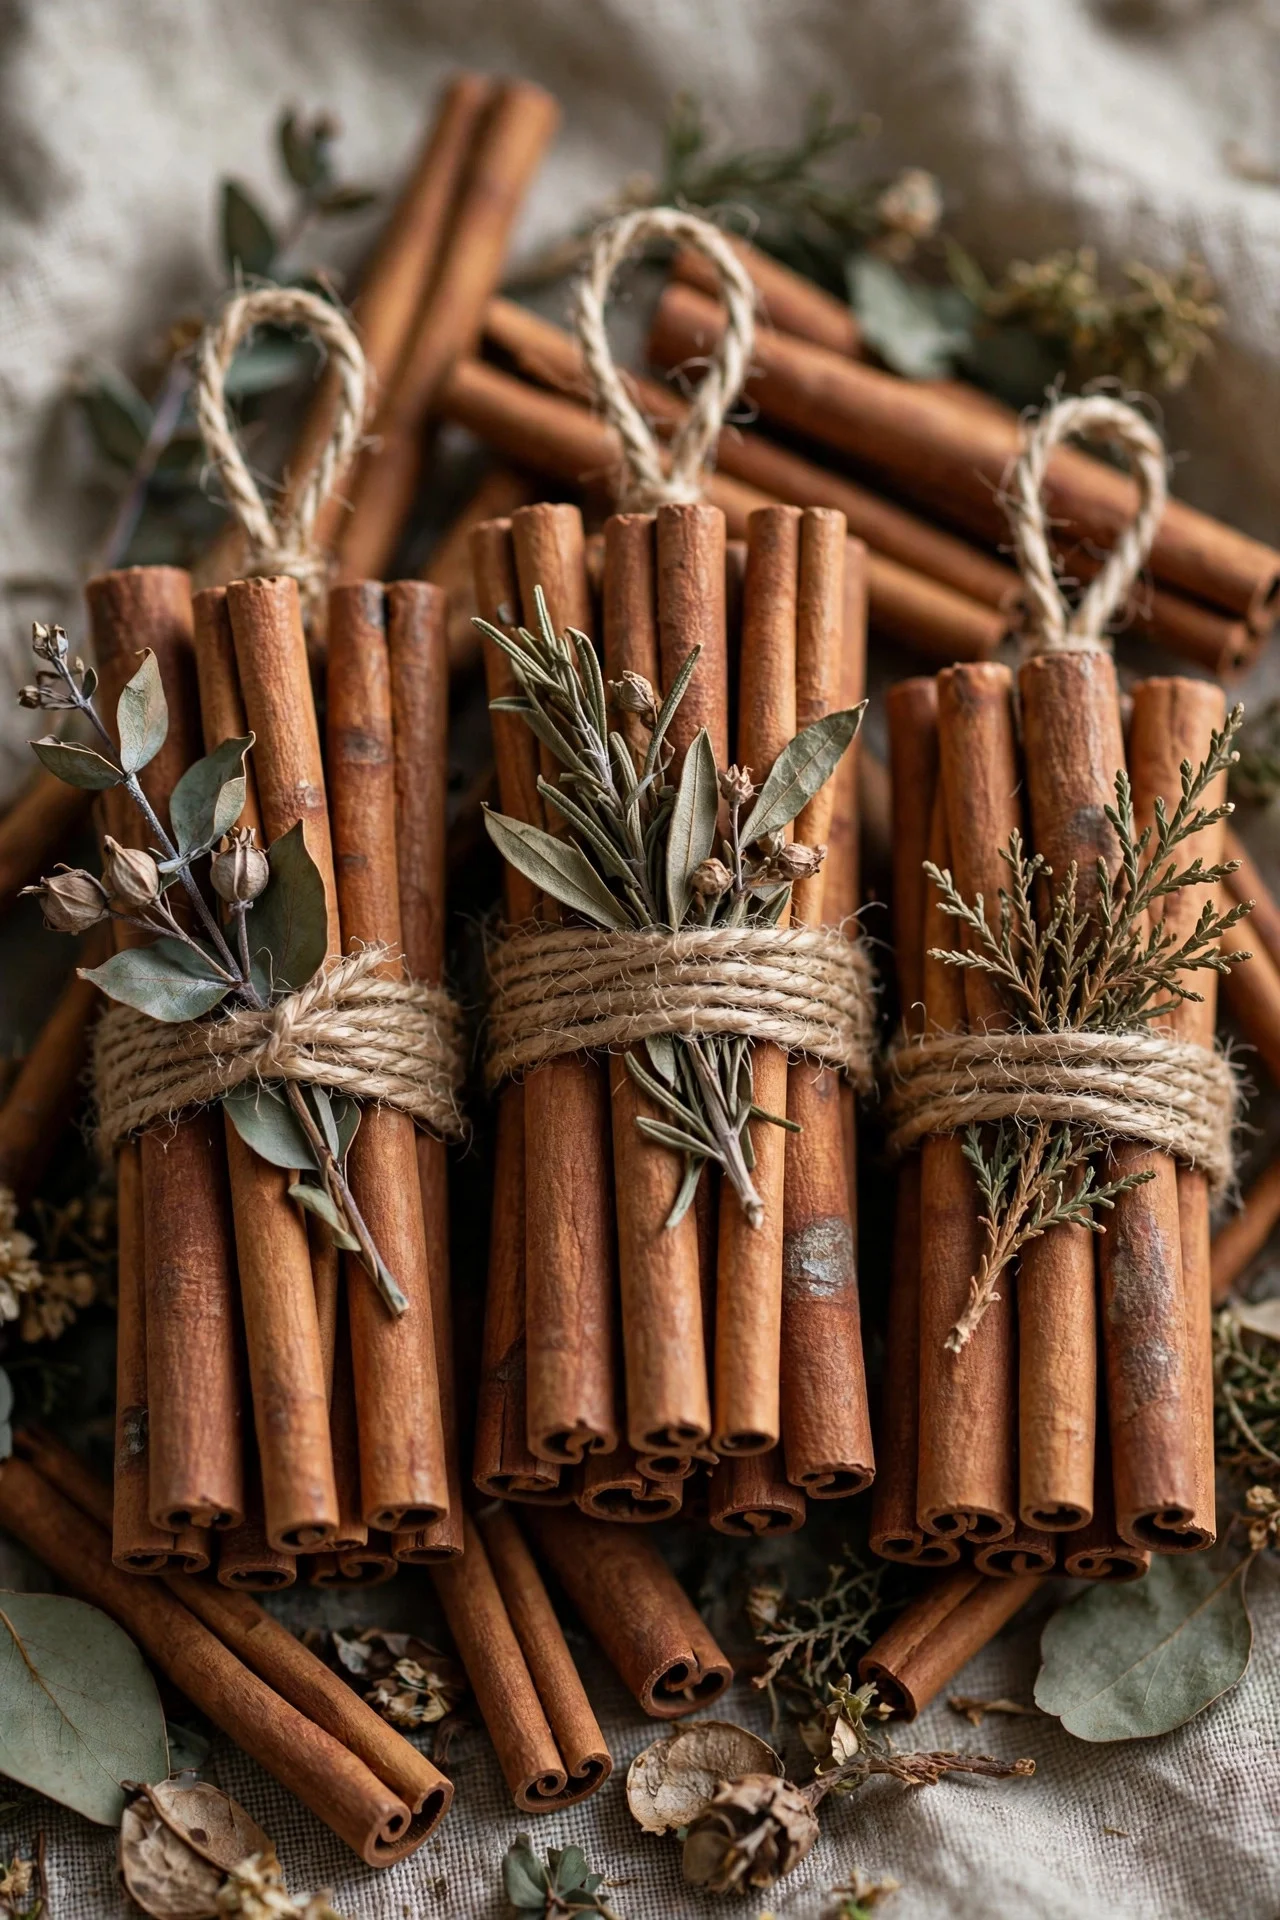
Bundle five or six cinnamon sticks with natural twine, tuck in a sprig of dried greenery or a small pinecone, and you have an ornament, a gift topper, and a fire starter all in one. A bag of cinnamon sticks costs a few dollars and makes 15 to 20 bundles.
Hang them on the tree with the twine loop, lay them across napkins at the table, or tie them onto wrapped gifts. They scent the whole tree faintly — stand near it and you’ll catch warm spice every time. For a fancier version, dip one end in gold paint and let dry before bundling.
Try this: Toss a bundle into the fireplace (in a real fire, not near LED candles) for instant Christmas smell.
4. Evergreen Swags From Yard Clippings
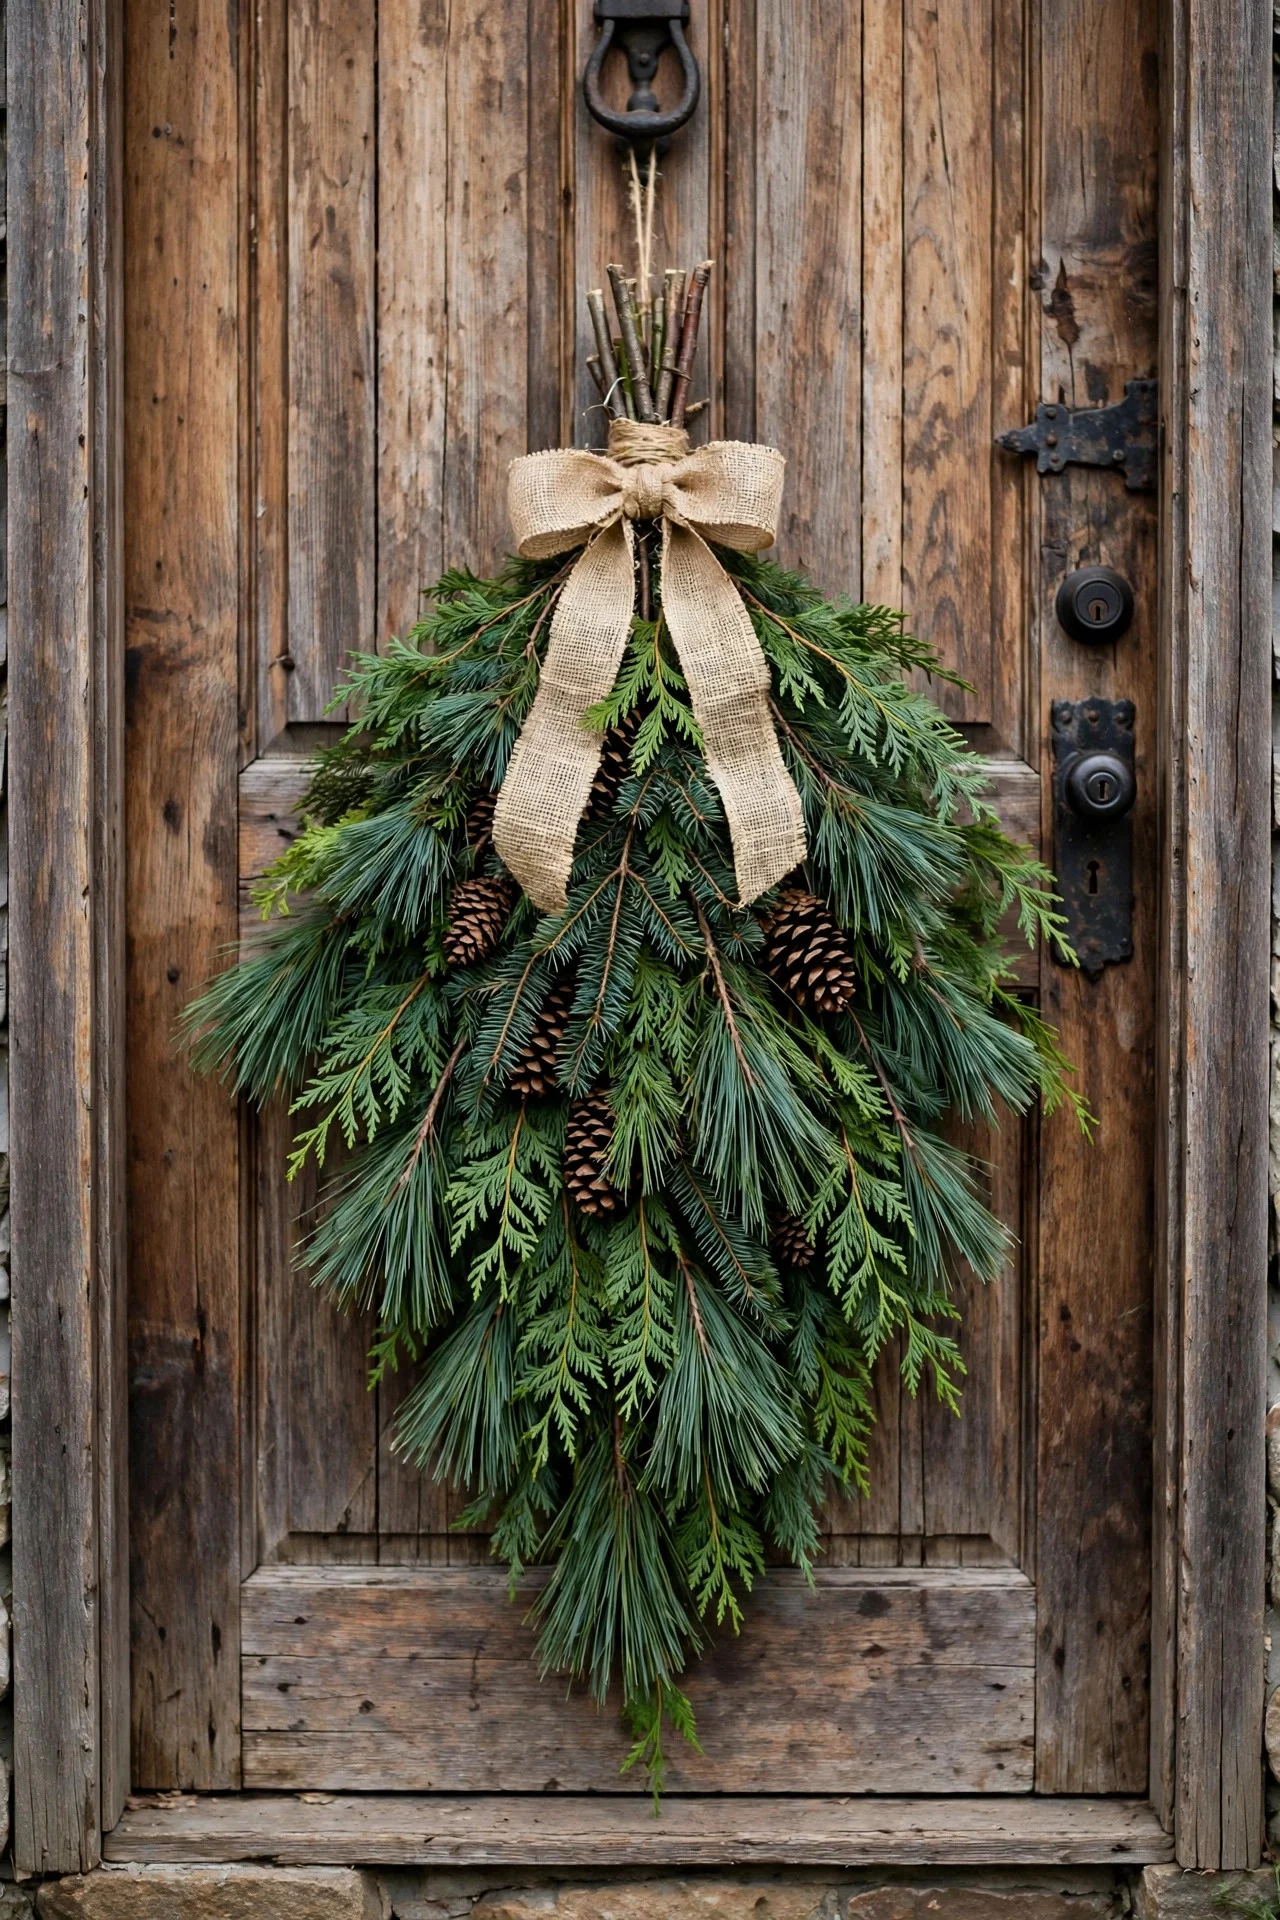
You don’t need a forest — a few pruned branches from your yard or a neighbor’s make gorgeous door swags. Lay three to five branches in a fan shape, longest in back, wire the stems together tightly, and cover the binding with a burlap or velvet bow. Hang one on each side of the front door or over a mirror.
Mix branch types if you can: pine for structure, cedar for drape, something with berries for color. Mist the finished swag every few days and it’ll look fresh through New Year’s. Total cost: one spool of floral wire and a bow.
Try this: Add three dried orange slices or a cluster of pinecones wired into the center for a finished, floral-shop look.
5. Mason Jar Snow Globes
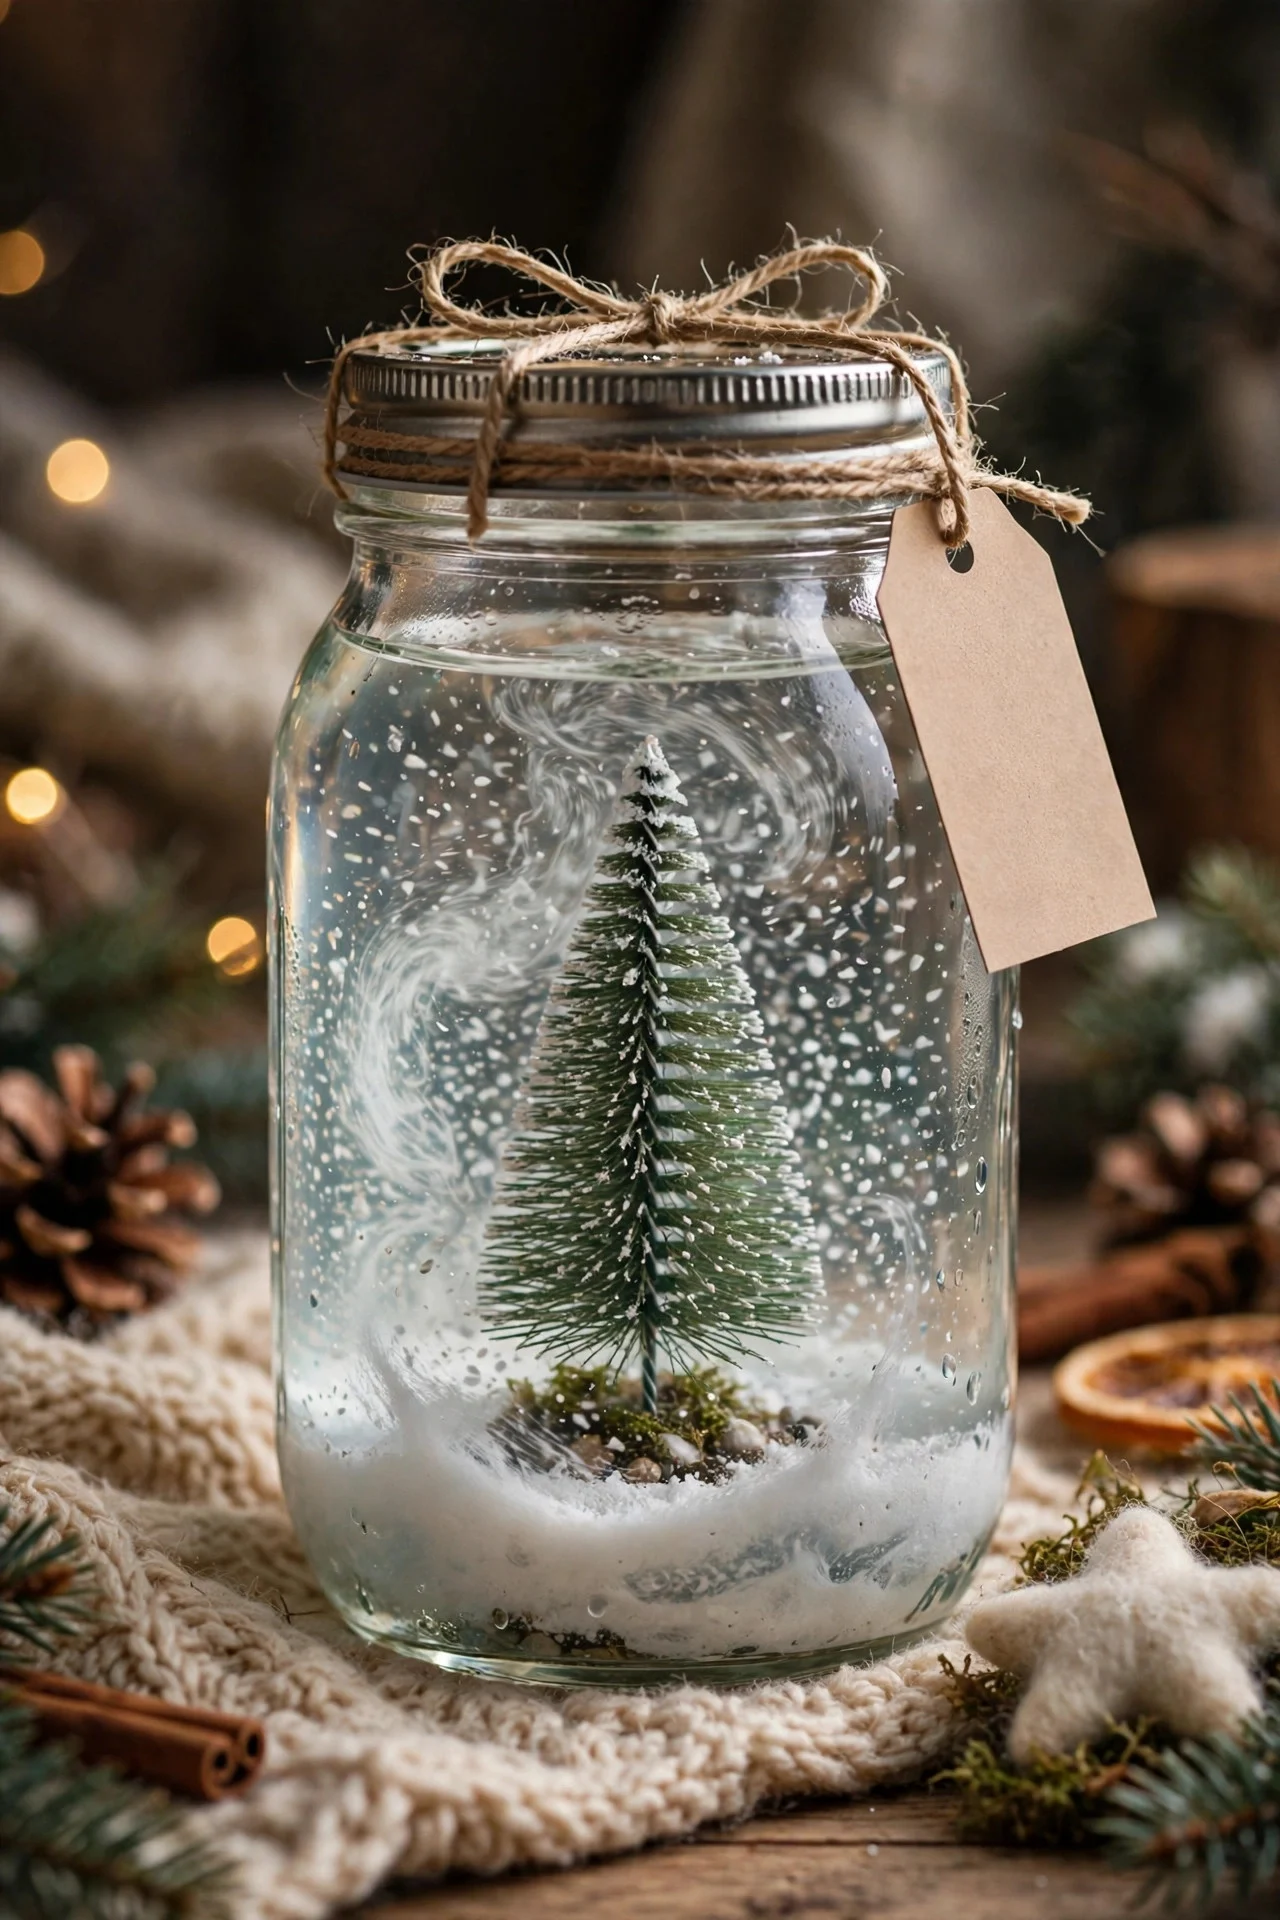
Glue a small bottle-brush tree or ceramic figurine to the inside of a mason jar lid with waterproof epoxy, fill the jar with distilled water and a teaspoon of glycerin, add a tablespoon of fake snow or glitter, screw the lid on, and flip. Instant snow globe, endlessly customizable.
Distilled water keeps it crystal clear (tap water clouds over time), and the glycerin slows the snowfall to a dreamy drift. Use wide-mouth pint jars — they’re the easiest to arrange and photograph beautifully. Seal the lid edge with a thin line of silicone so little hands can’t open it.
Try this: Tie twine around the lid and add a handwritten gift tag — these make wonderful teacher and neighbor gifts.
6. Wood Slice Ornaments With Wood-Burned Designs
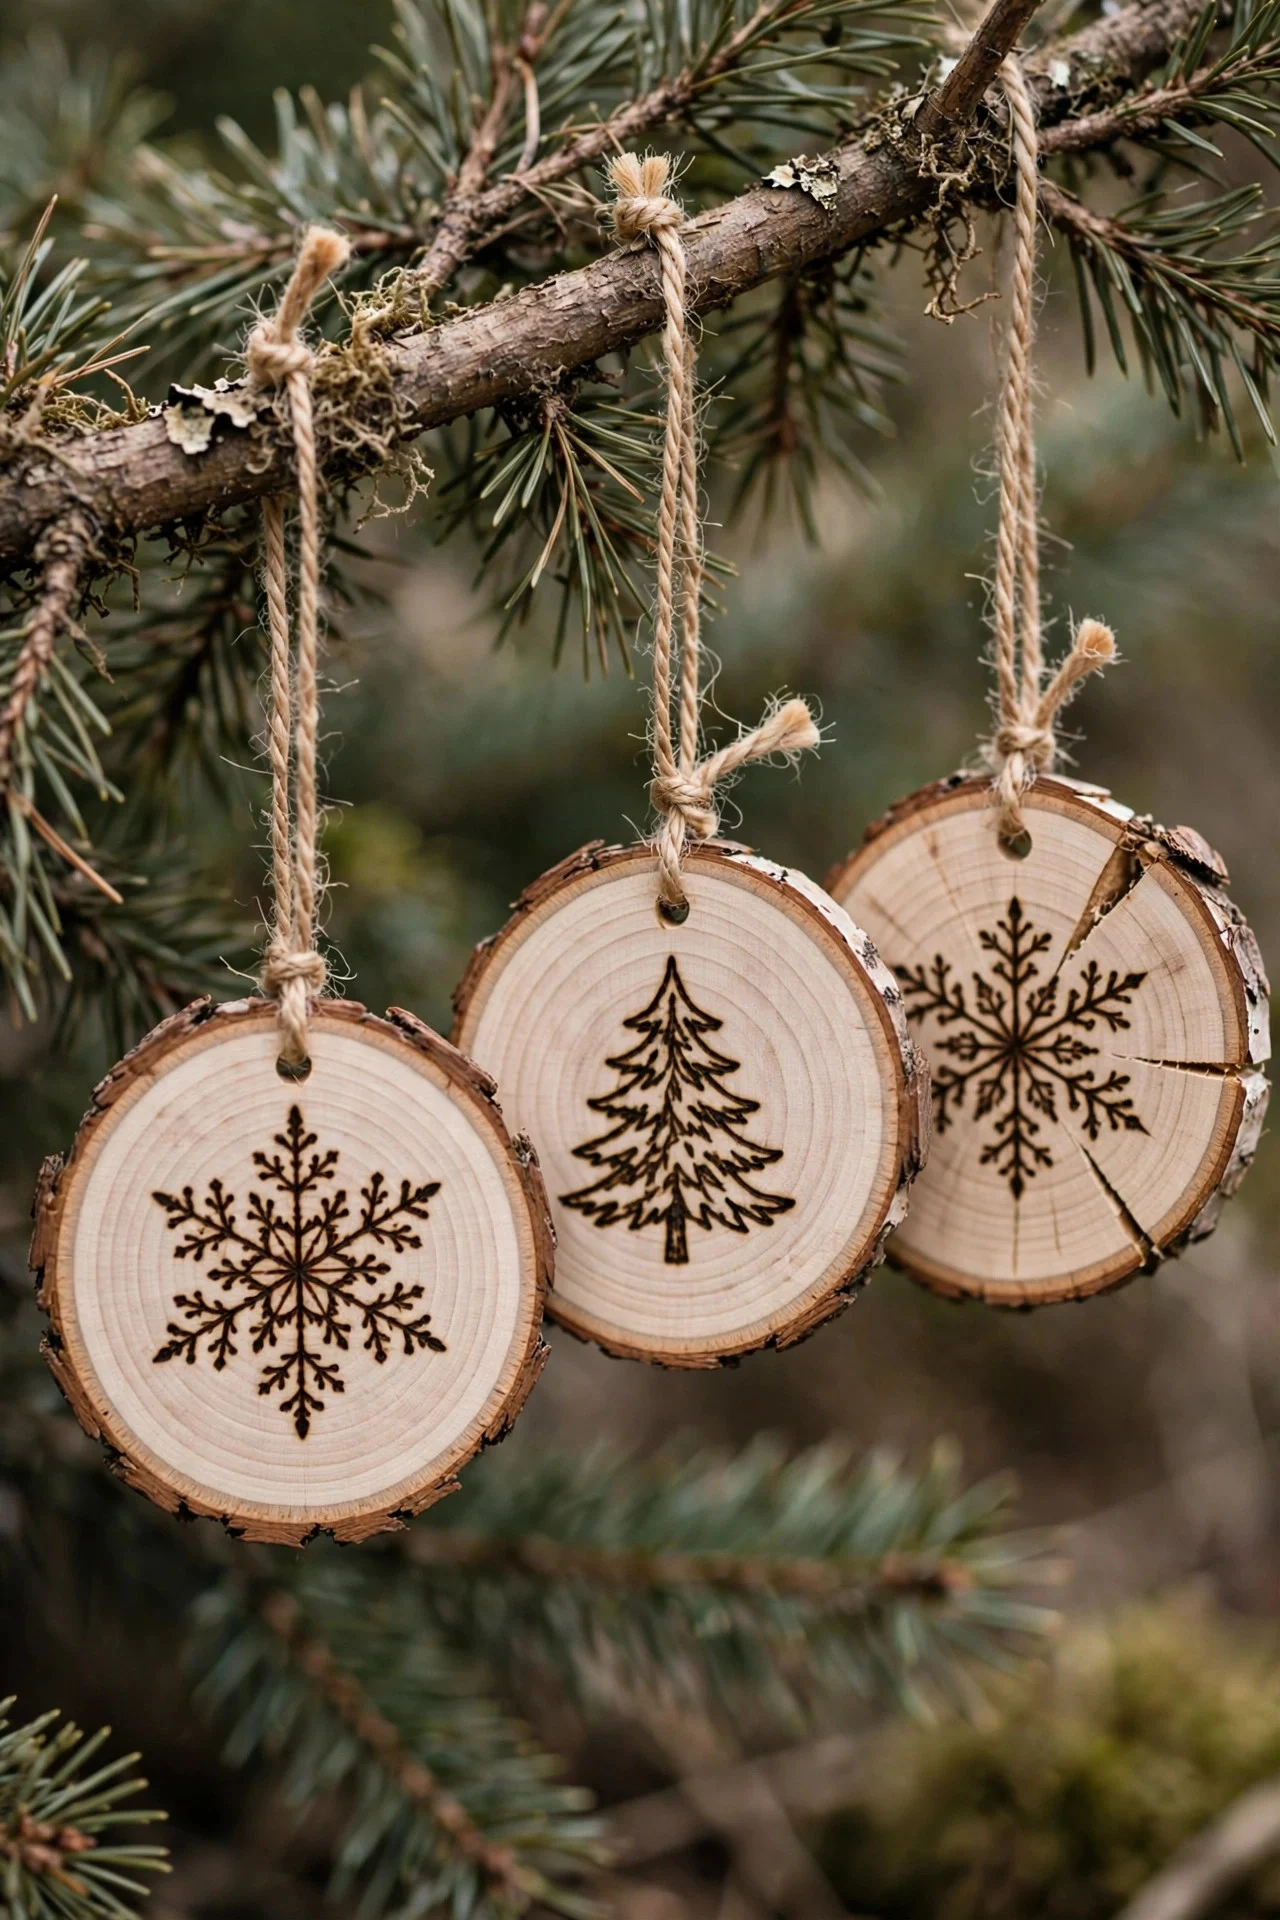
Buy a bag of pre-cut wood slices (about $10 for 30) or cut your own from a fallen branch with a handsaw. Sand lightly, then draw simple designs — snowflakes, trees, initials, the year — with a wood-burning pen ($15 at any craft store) or just a dark permanent marker for the commitment-phobes.
The rustic wood does most of the aesthetic work; keep designs minimal and let the grain show. Drill a small hole near the edge before decorating, thread with twine or leather cord, and seal with a light coat of clear matte spray so they don’t stain the tree.
Try this: Wood-burn one family ornament per year with everyone’s initials — in a decade you’ll have a timeline on the tree.
7. A Muffin Tin Advent Calendar
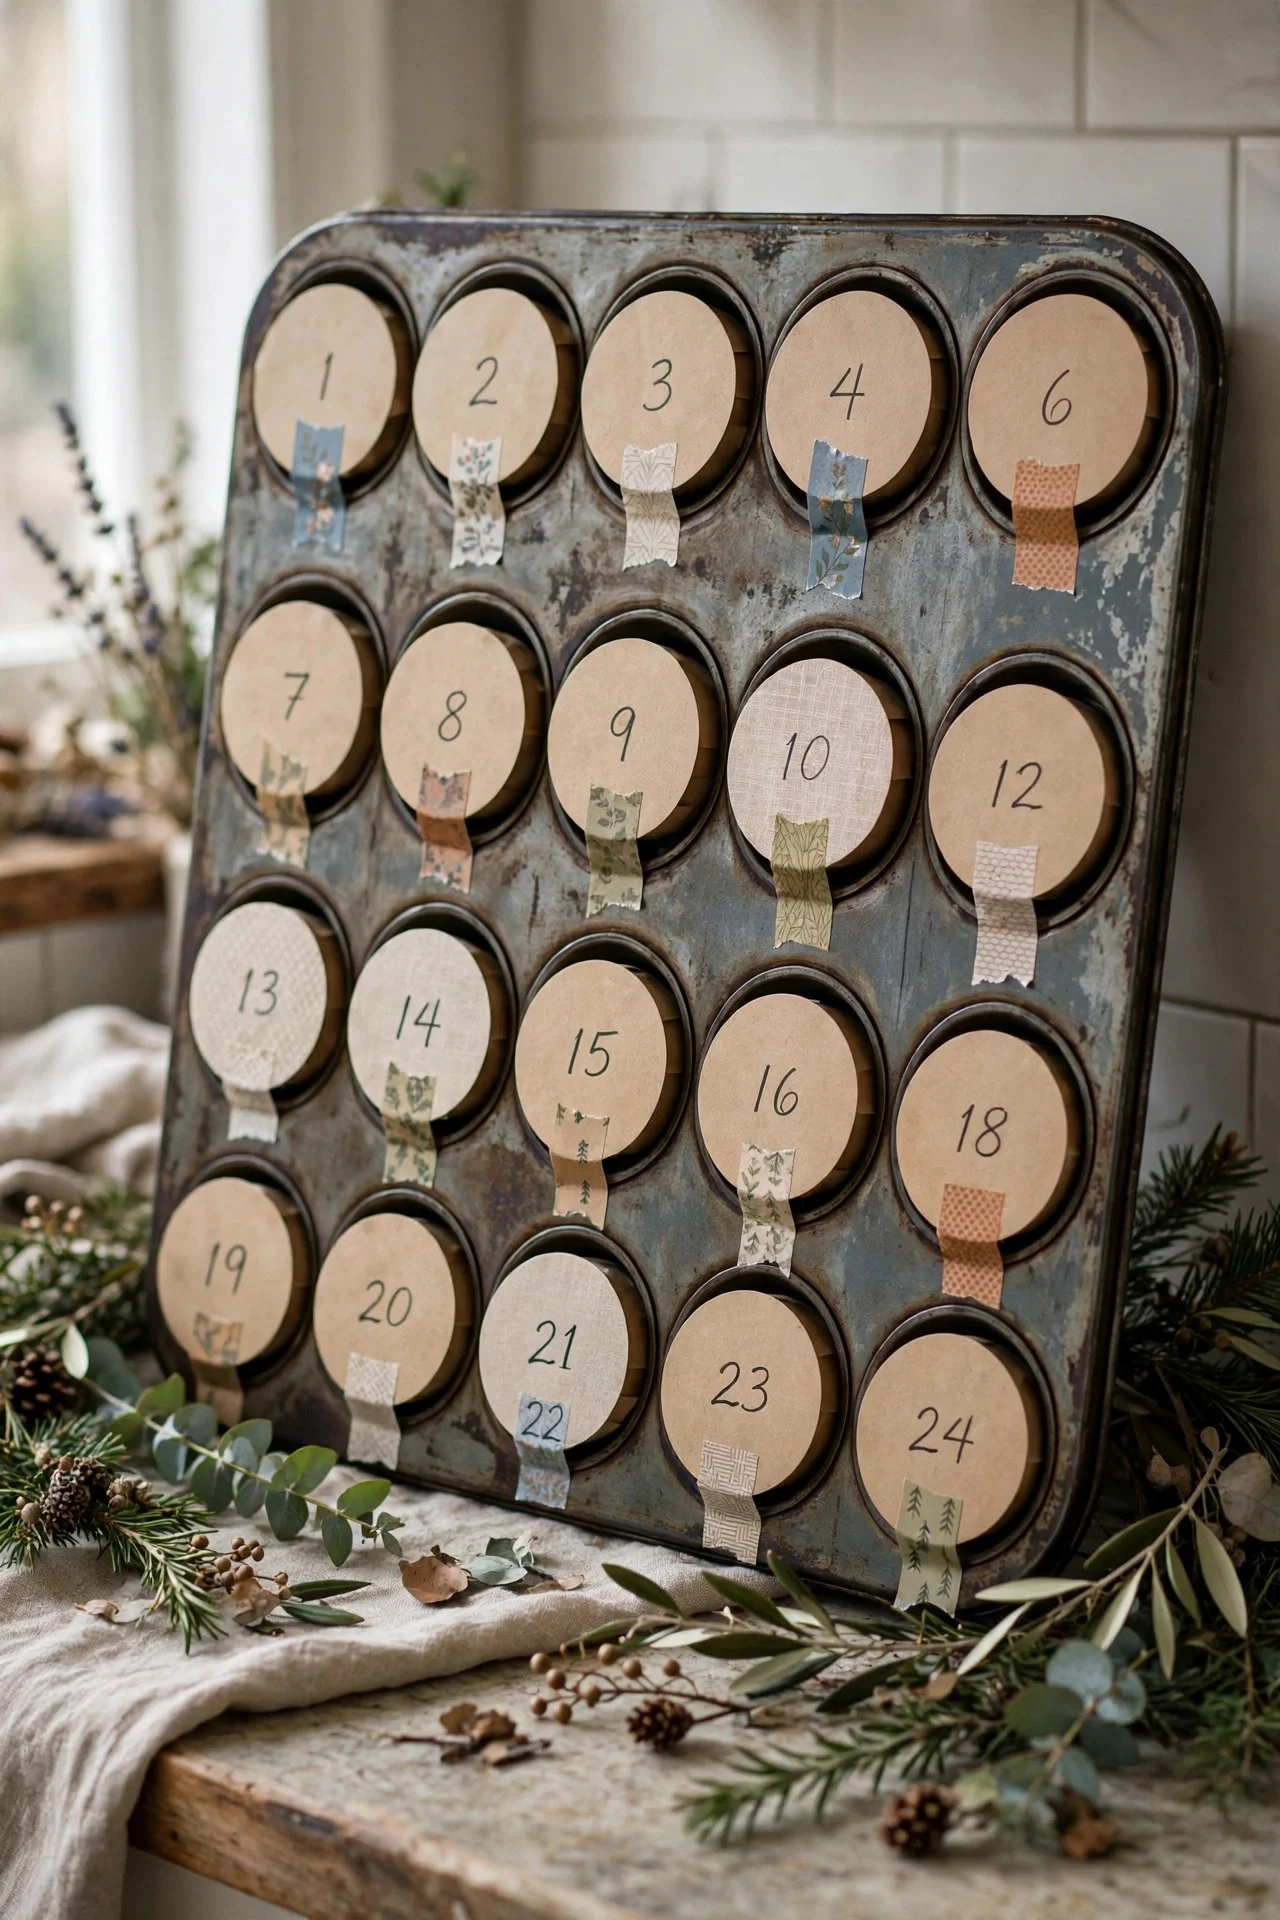
Forget flimsy paper calendars: fill a vintage-style muffin tin’s 24 cups with treats, tiny notes, or trinkets, cover each cup with a numbered circle of kraft paper secured with washi tape, and lean the whole tin on the counter. It’s an Advent calendar and a conversation piece.
Number the circles with a gold paint pen and vary the washi tape patterns — the mixed patterns look charming, not messy. Kids peel one circle per day; the tin itself becomes a December fixture. Thrift stores always have muffin tins for a dollar or two.
Try this: Put “coupons” in a few cups — “pick the movie tonight,” “extra bedtime story” — they’re the ones kids remember.
8. Epsom Salt Frosted Pinecones
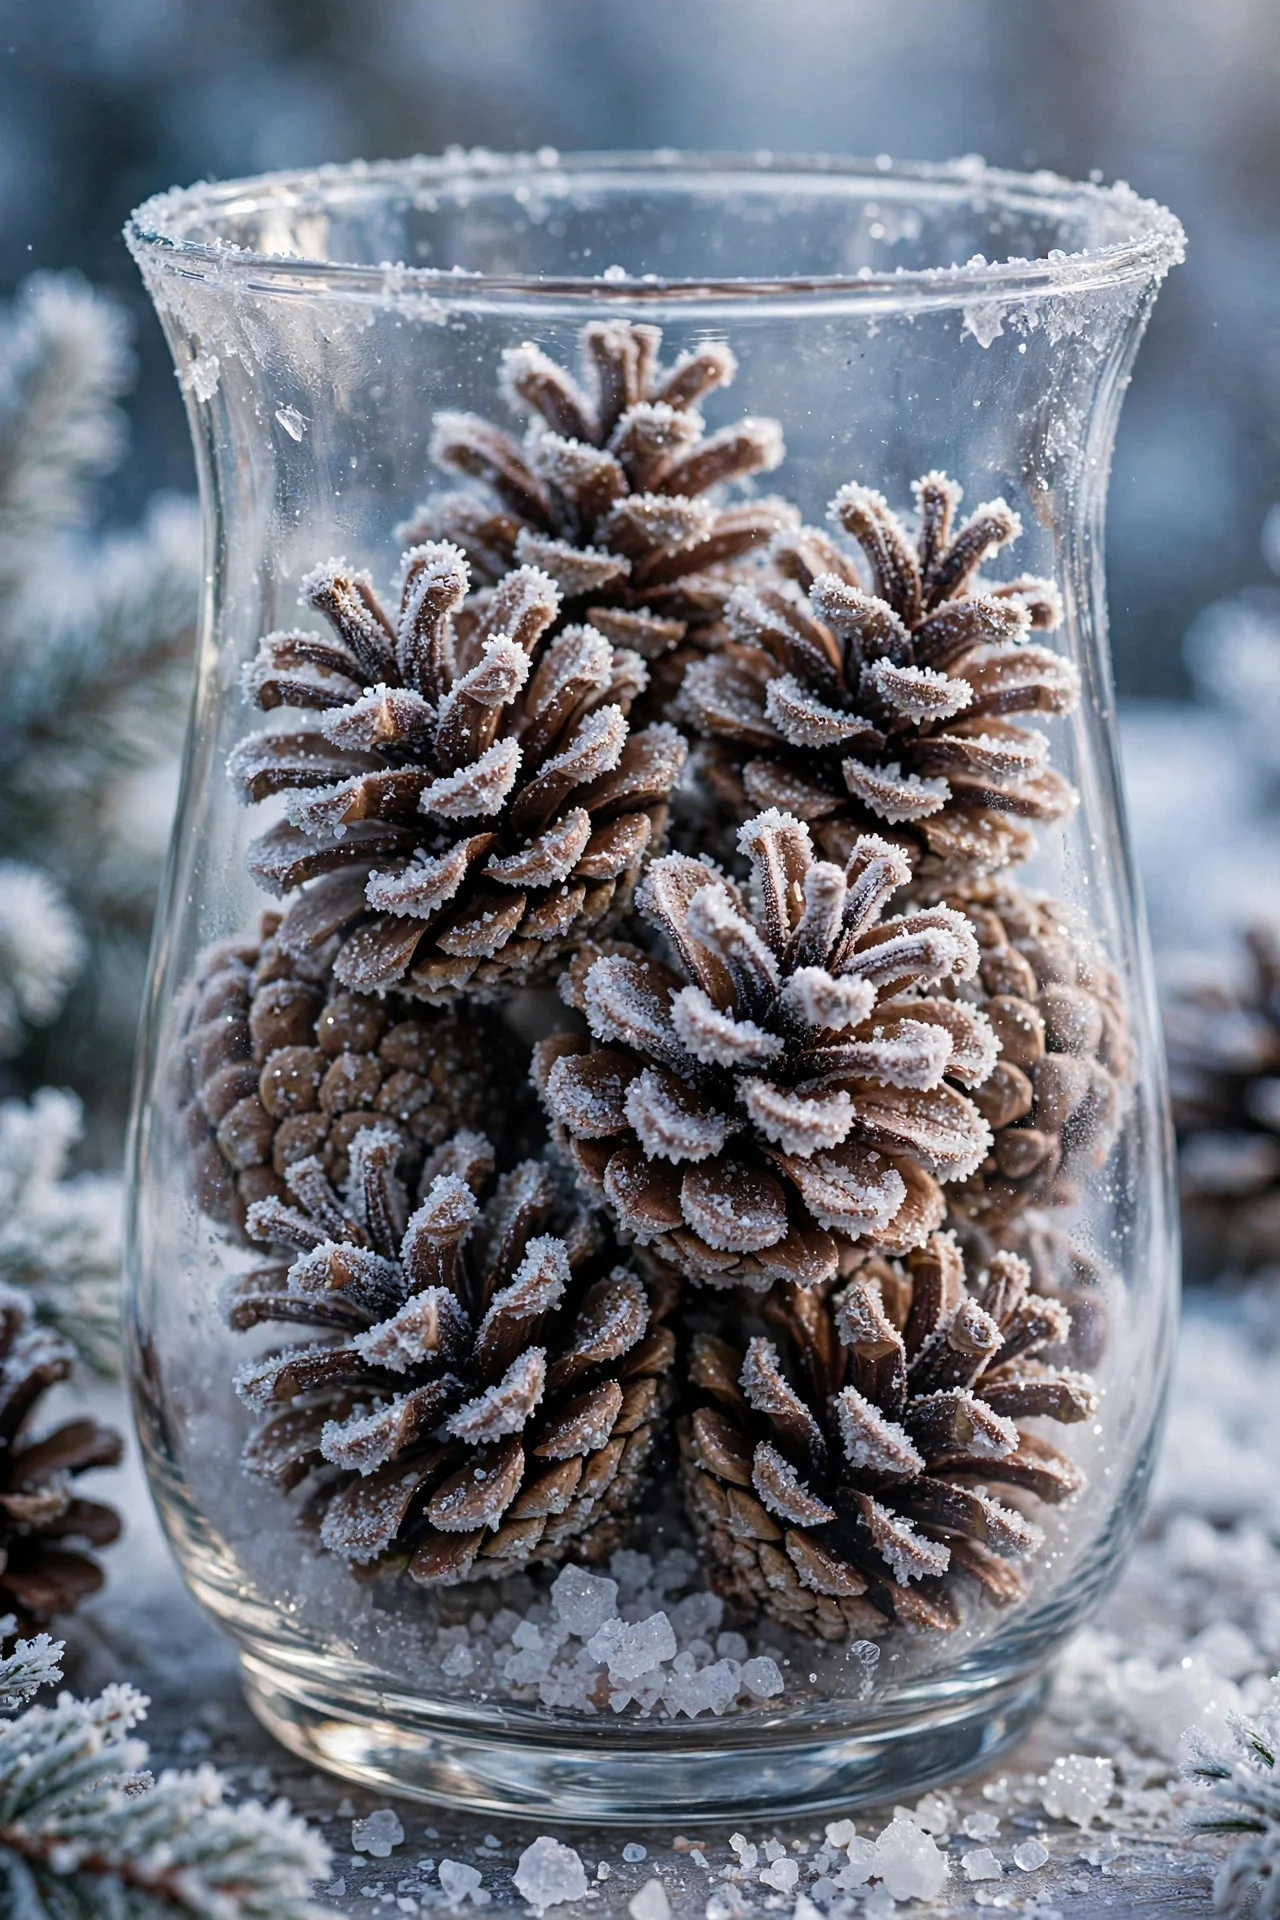
Brush pinecones with white craft glue thinned with a little water, then roll them in Epsom salt while the glue is wet. The result looks exactly like frost — sparkly, crystalline, and far more convincing than white spray paint. Let them dry on wax paper overnight.
Use tweezers to hold the pinecone by its stem so your fingers stay clean. Pile the finished pinecones in a glass hurricane vase or scatter them along the mantel over greenery. One $4 bag of Epsom salt frosts about 30 pinecones.
Try this: Mix a few drops of peppermint essential oil into the glue for pinecones that smell like a winter forest.
9. Book Page Paper Trees
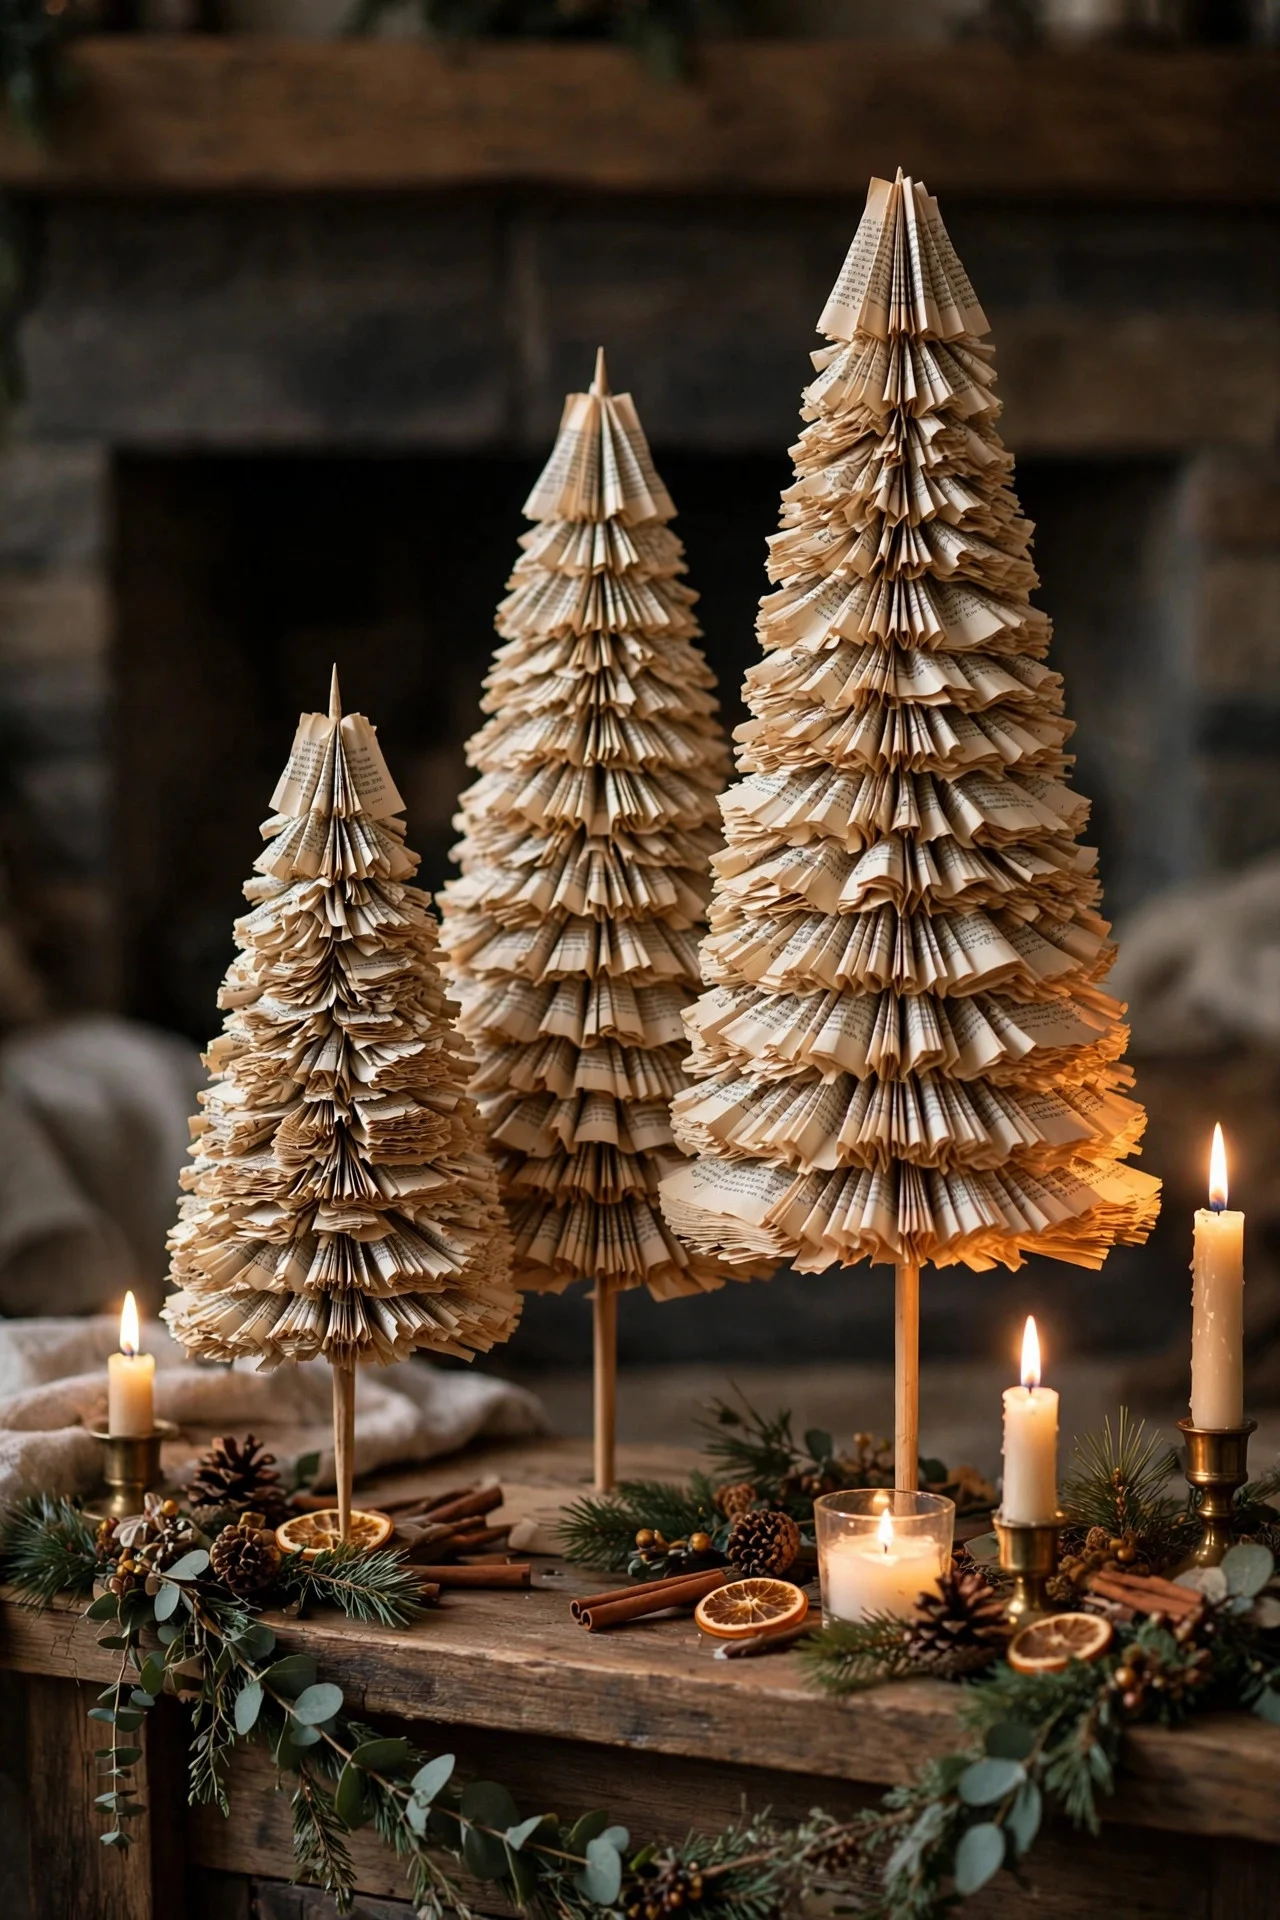
Rescue a damaged book from the donation pile and turn it into cone-shaped Christmas trees: cut pages into graduated circles, stack them largest to smallest on a wooden skewer stuck in a small base, and fluff. The printed text gives them a vintage, literary charm that plain paper can’t match.
Make them in three heights — 8, 12, and 16 inches — and group them on the mantel or a side table. Use books with yellowed pages for an antique look; the aging is a feature. A light dusting of gold spray paint on the edges takes them from crafty to classy.
Try this: Top each tree with a single star anise instead of a star — it looks intentional and smells amazing.
10. A Twig Starburst for the Wall
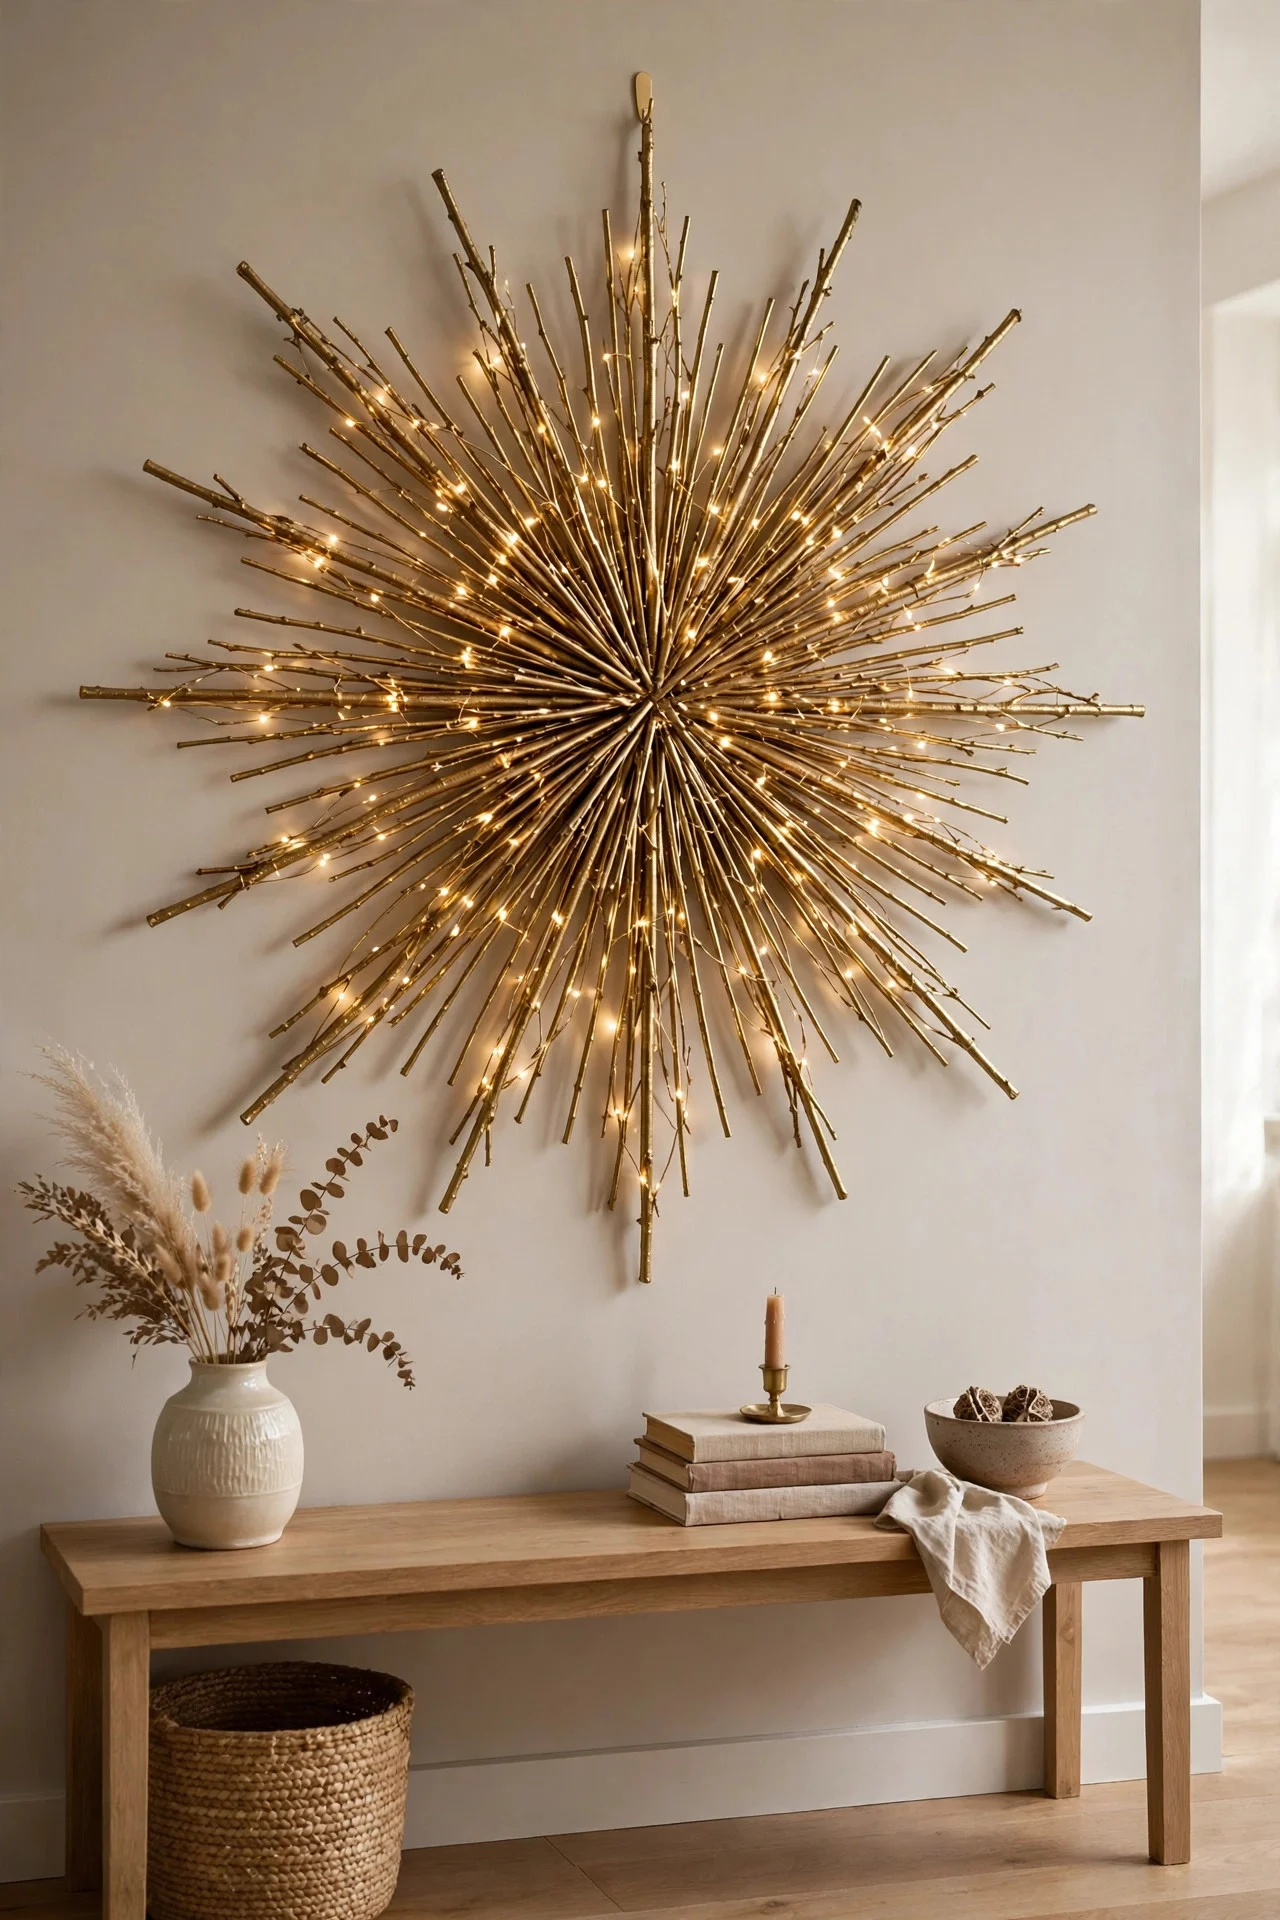
Gather straight twigs about 18 inches long, bundle them at the center with wire, and fan them into a starburst — then hang it on the wall like a piece of art. Spray it gold, leave it natural, or dust it with fake snow. It’s the kind of thing that looks like it came from a boutique.
Secure the bundle tightly with floral wire in two places so twigs don’t shift. Hang from a single nail with fishing line; the starburst should sit flat against the wall. Make two in different sizes and hang them as a pair for real impact.
Try this: Weave a short strand of battery fairy lights through the twigs before hanging — instant glowing wall art.
11. Fabric Scrap Garlands
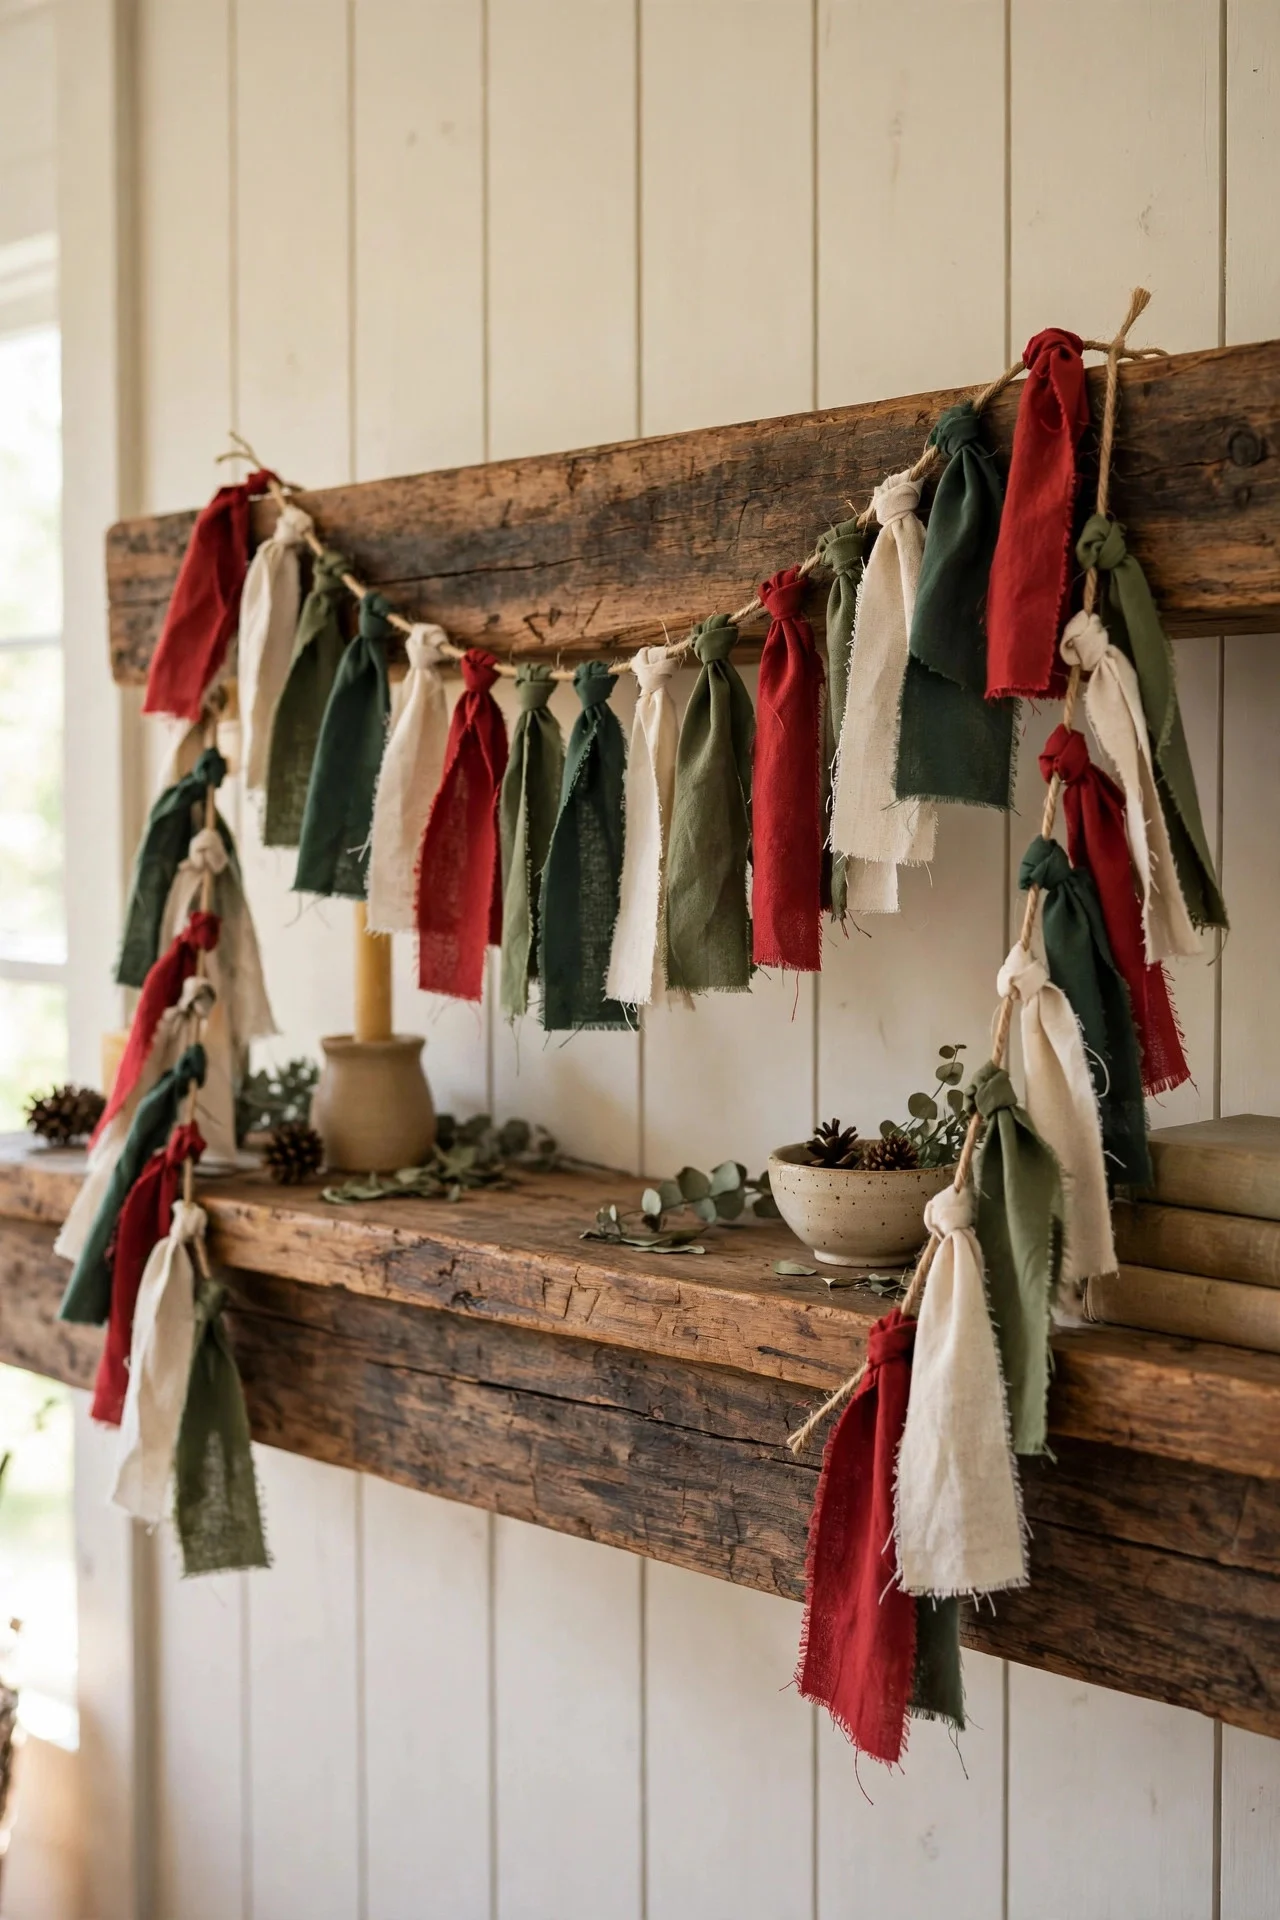
Dig out the fabric bin: cut or tear old shirts, sheets, and quilting scraps into strips about 1 inch wide and 8 inches long, then tie them one by one onto a length of twine. The result is a soft, shabby-chic garland in whatever colors your scraps happen to be.
For a Christmas palette, sort scraps into reds, greens, creams, and plaids before you start — a sorted garland looks designed, a random one looks like laundry. Push the tied strips close together for fullness; a six-foot garland needs about 100 strips and an hour in front of the TV.
Try this: Use pinking shears on the strip ends so they don’t fray into fuzz over the season.
12. Painted Mason Jar Luminaries
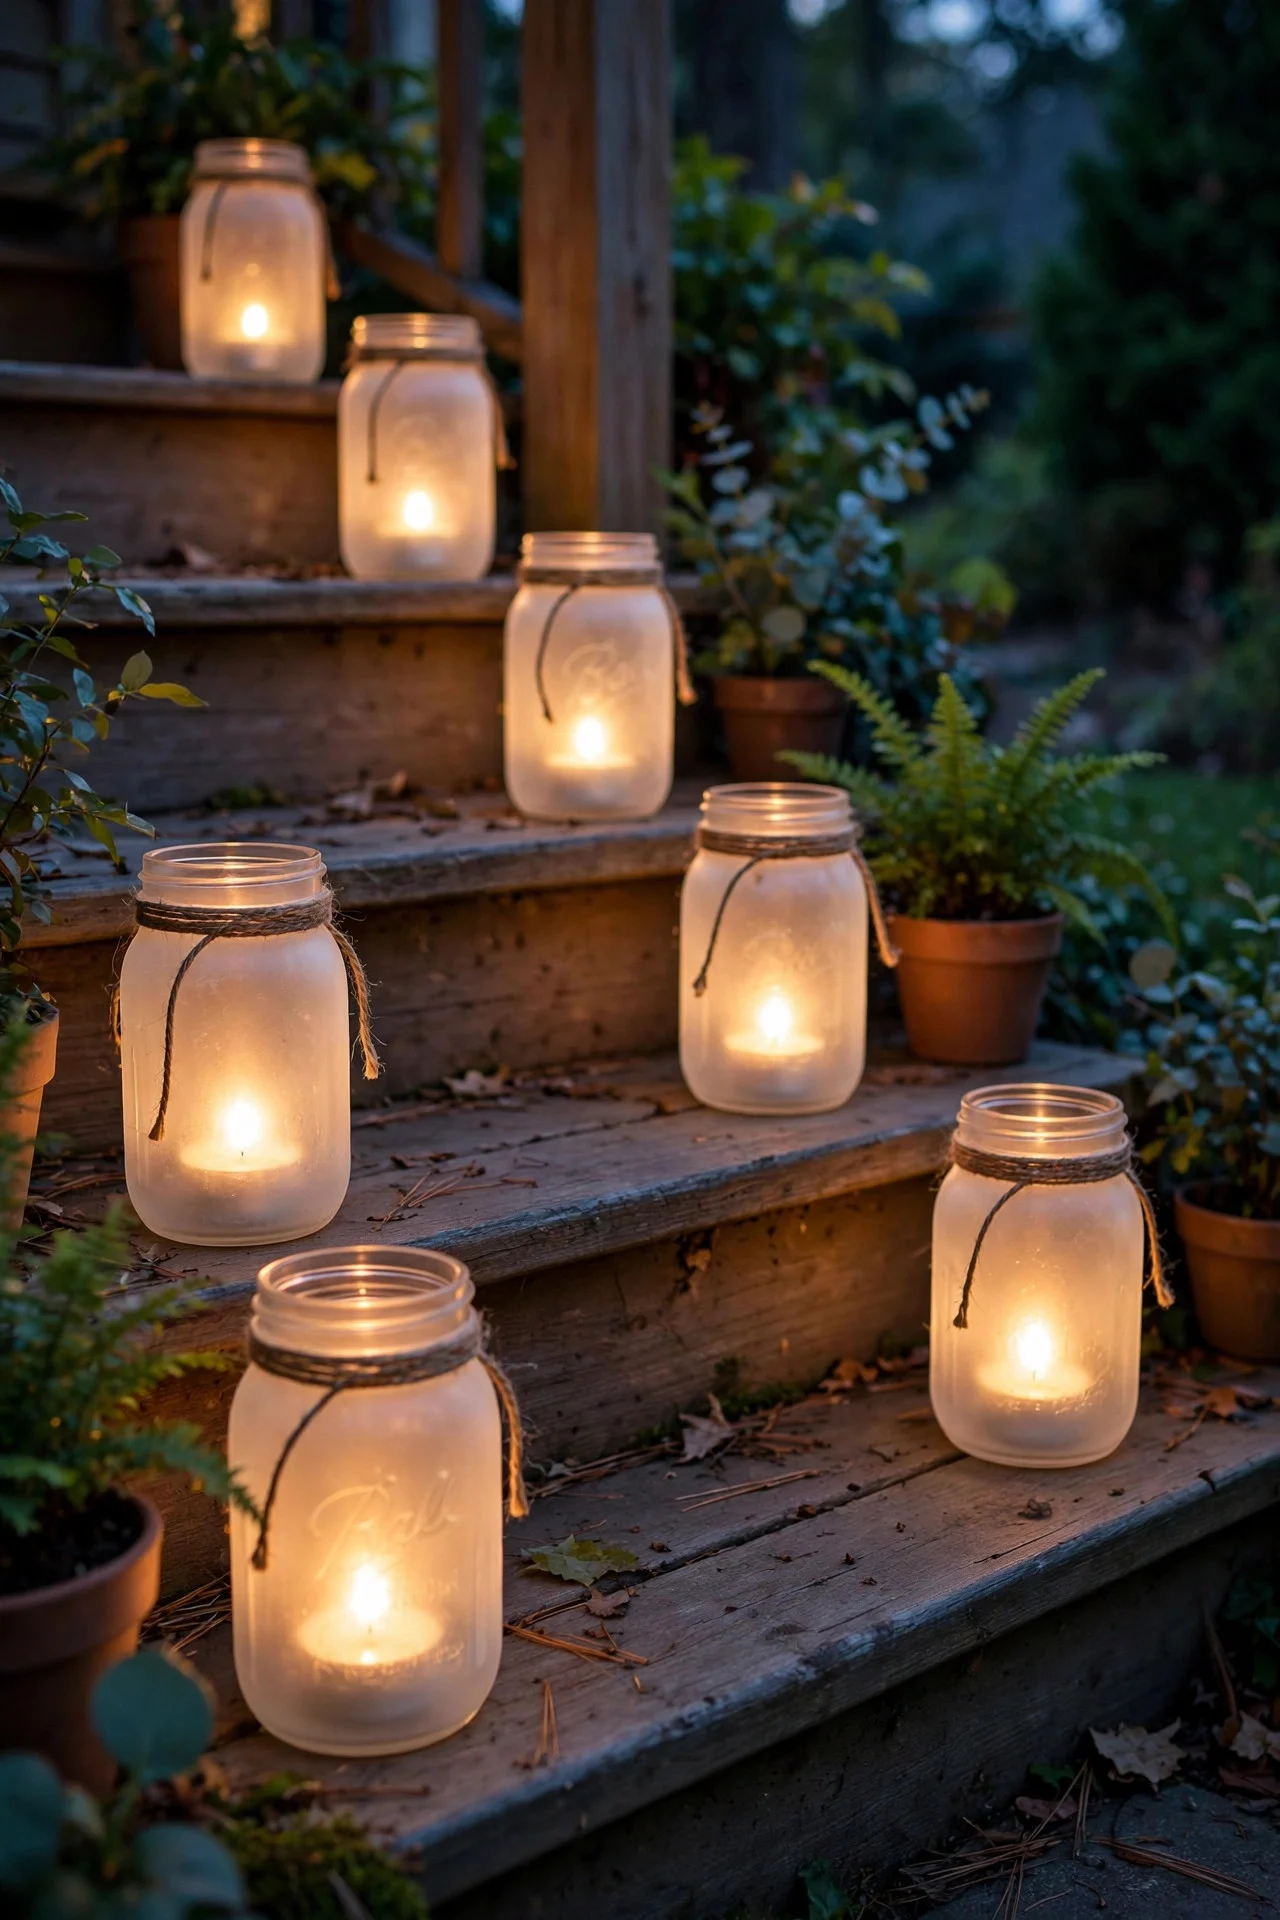
Coat the inside of mason jars with frosted-glass spray paint (two light coats), let dry, then wrap the outside with twine or burlap ribbon and drop in a battery tea light. The frosted glass diffuses the light into a soft, even glow — no harsh LED dots visible.
Line them down the center of the table, along porch steps, or on windowsills. Pint jars are the sweet spot — big enough to glow, small enough to cluster. The frosted finish hides the plastic tea light completely, which is the whole trick.
Try this: Press a leaf or snowflake sticker onto the jar before spraying, then peel it off after — it leaves a clear silhouette that shines.
13. Embroidery Hoop Wreaths
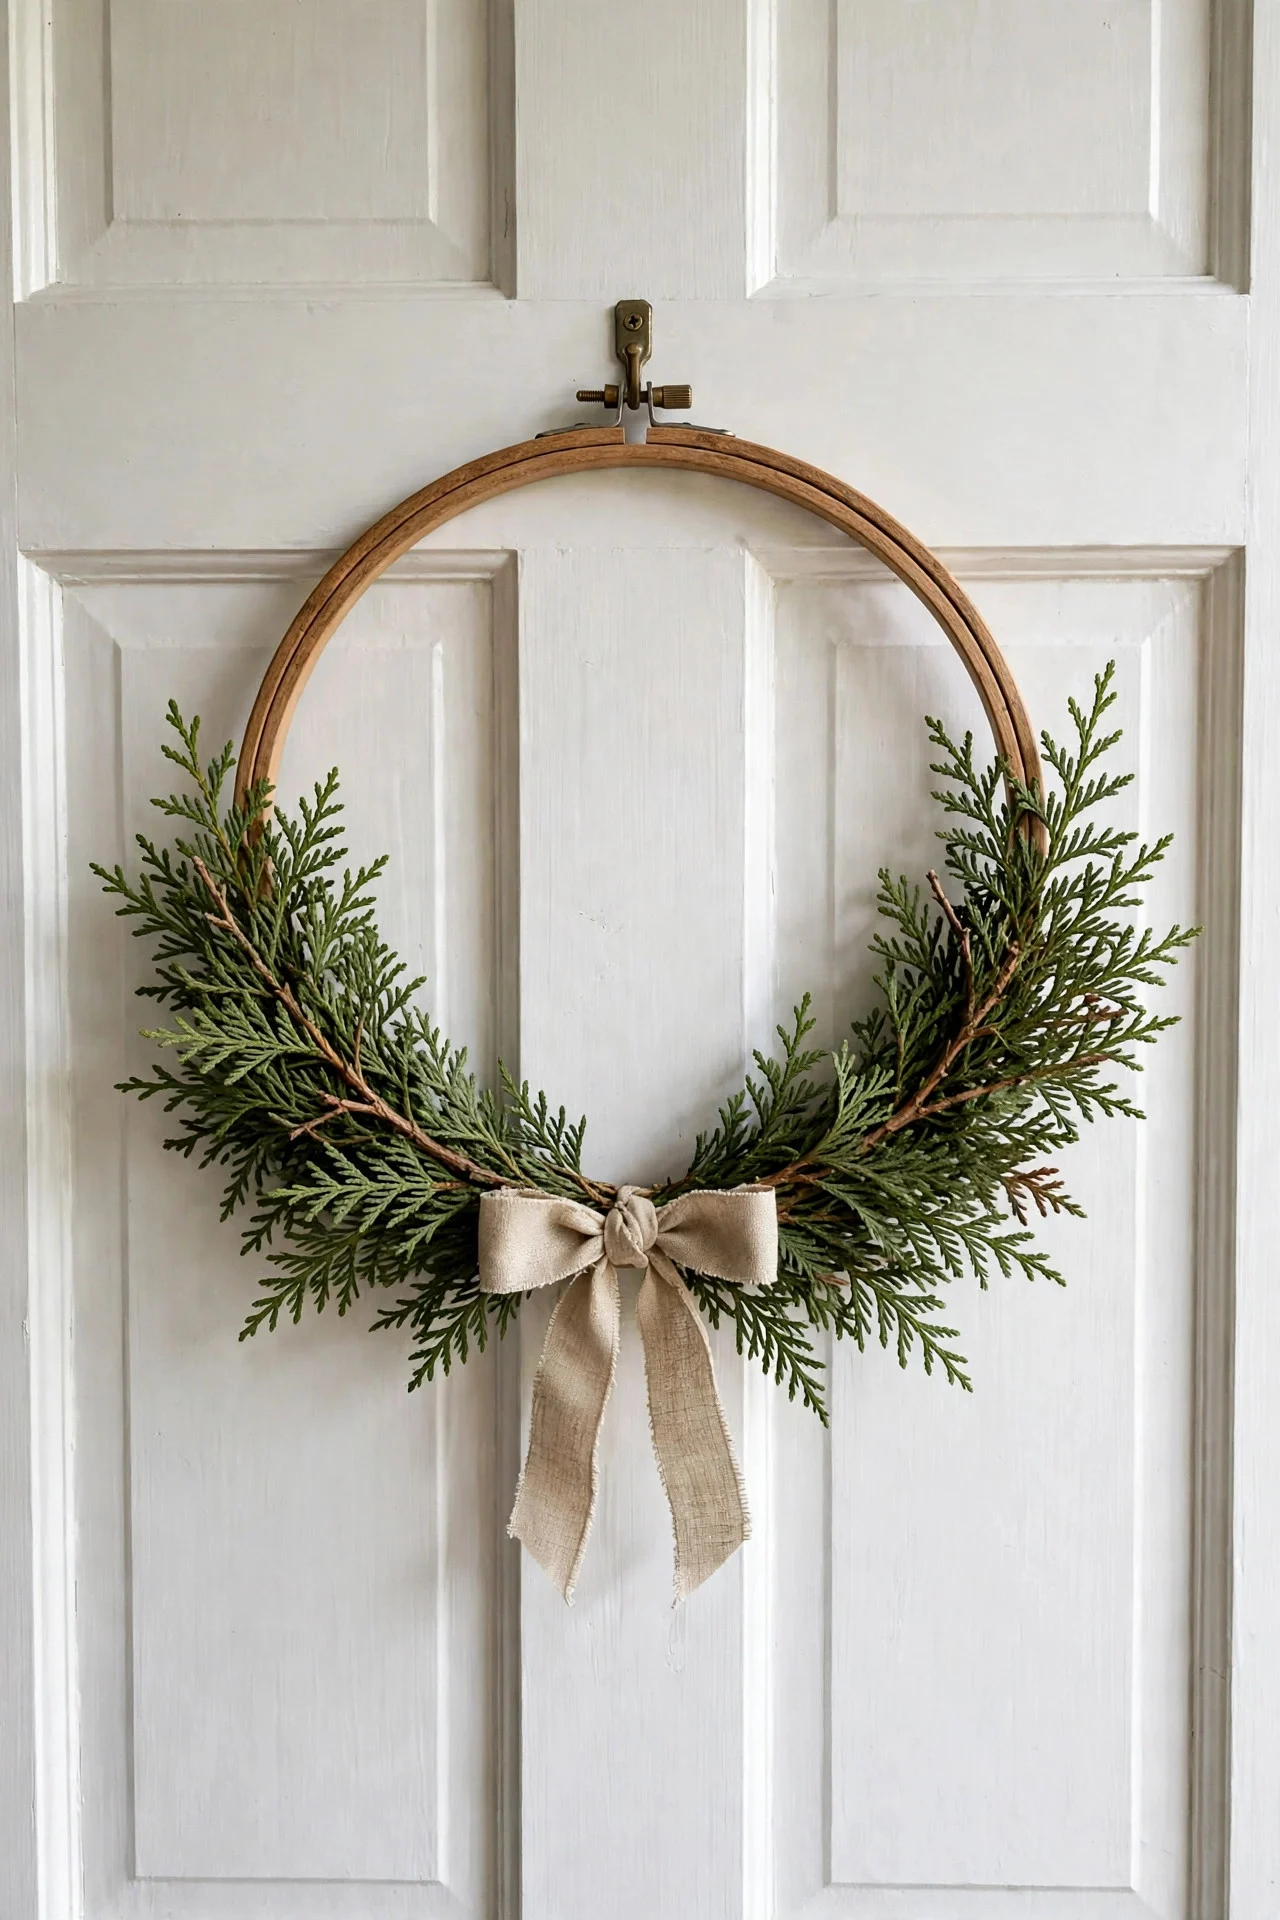
A $3 wooden embroidery hoop is a perfect minimalist wreath base. Wrap the bottom half with fresh greenery secured by floral wire, tie a simple bow where the greenery ends, and hang by the hoop’s own screw. It takes fifteen minutes and looks like Scandinavian design.
Use 10- or 12-inch hoops for doors, 6-inch ones for chair backs and windows. Cedar and eucalyptus are the easiest greenery to wire because the stems are flexible. Leave the top half of the hoop bare — the negative space is the design.
Try this: Hang three small hoops in a vertical line on a narrow wall — a gallery of wreaths.
14. No-Sew Burlap Stockings
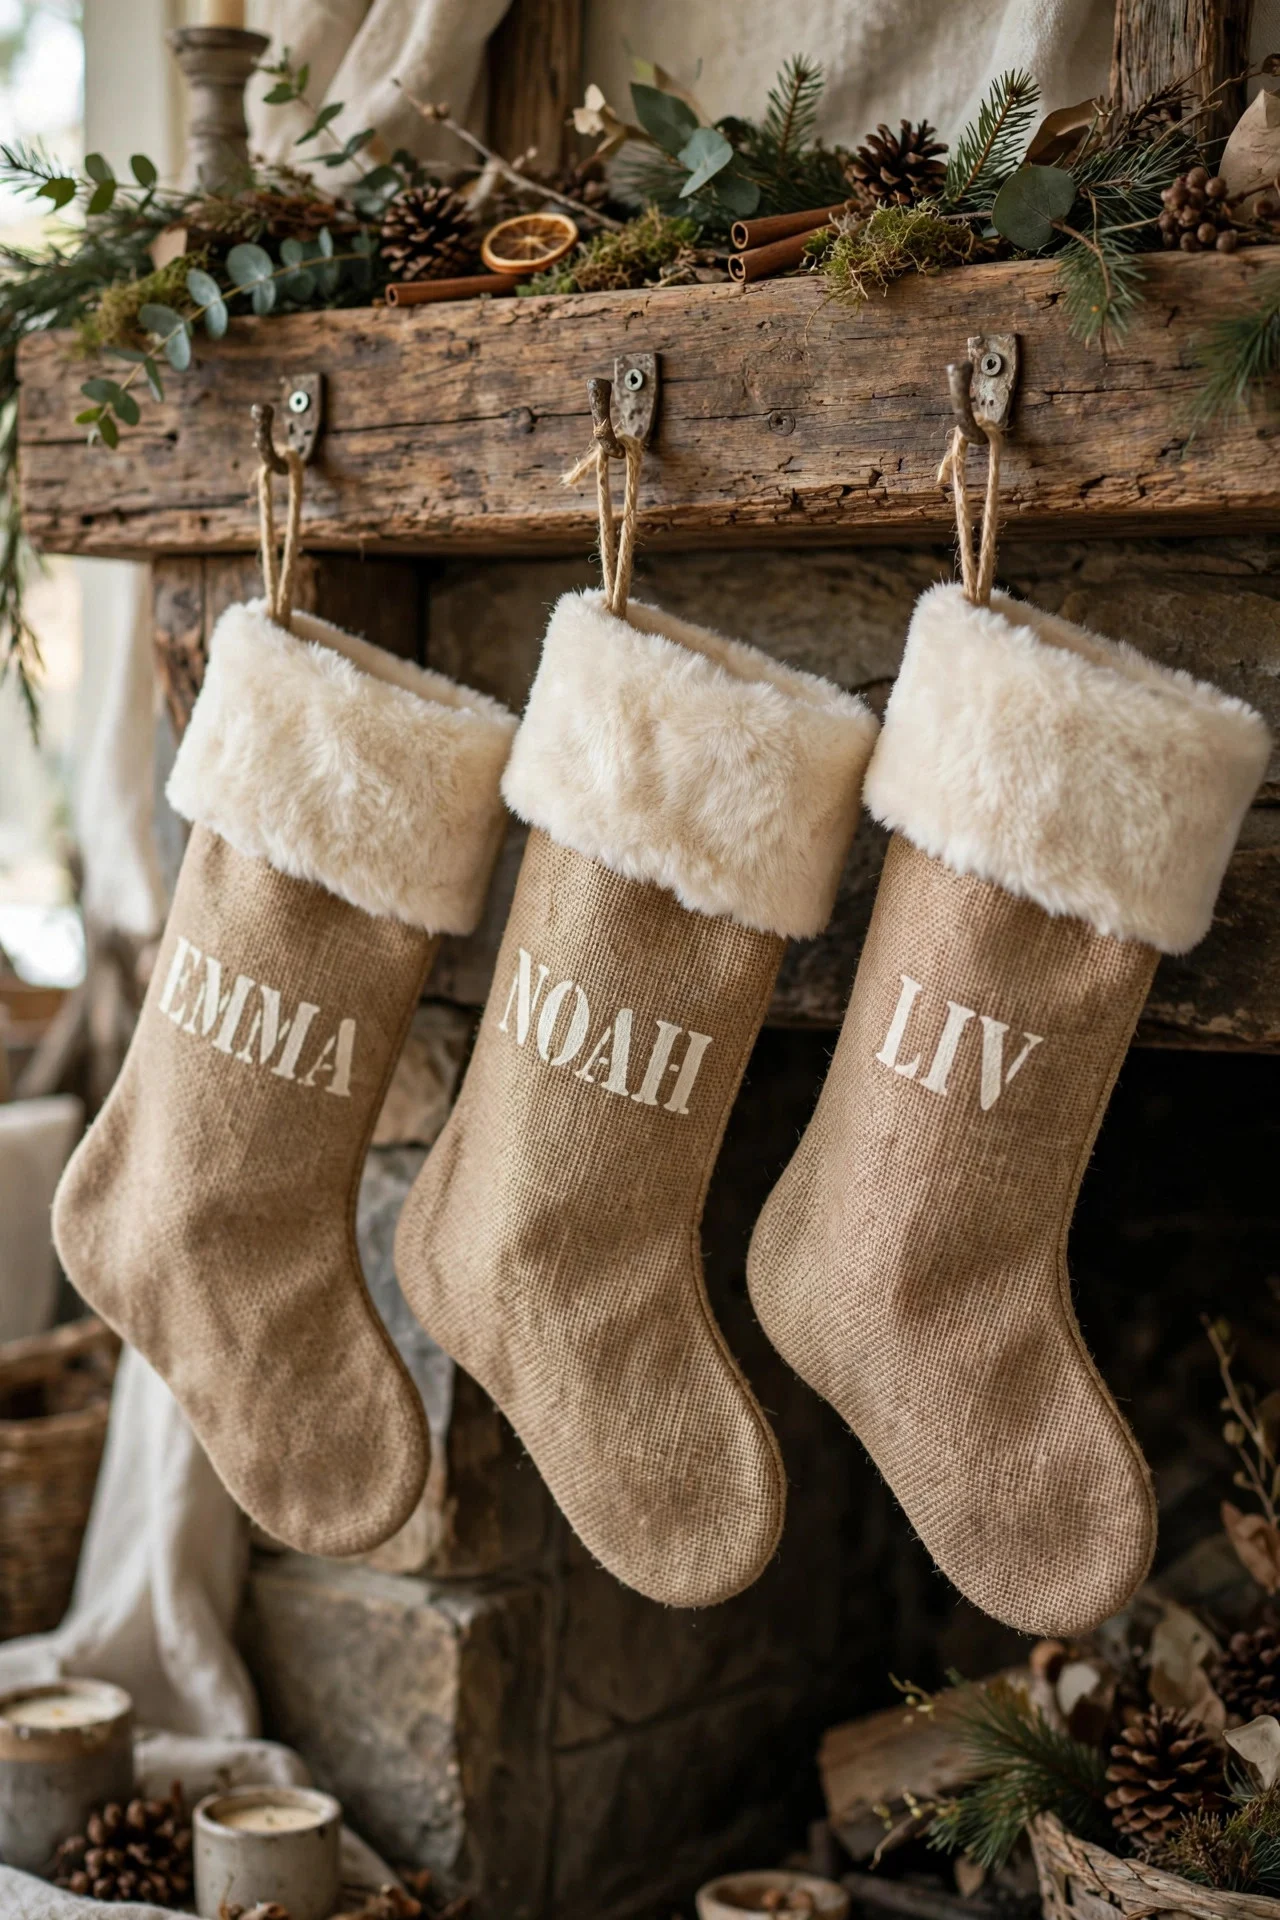
Cut two stocking shapes from burlap, glue the edges with hot glue (leaving the top open), fold down a cuff of cream faux fur or flannel, and stencil a name with craft paint. They look authentically rustic — the frayed burlap edges are the whole aesthetic.
Cut the stocking 18 inches long; anything smaller looks like a decoration rather than a real stocking. Reinforce the hanging loop with an extra dab of hot glue — stockings get heavy. The uneven, handmade look is exactly right for burlap; don’t aim for perfection.
Try this: Stencil names with freezer-paper stencils and gold craft paint for a personal, polished finish.
15. Wooden Bead Garlands
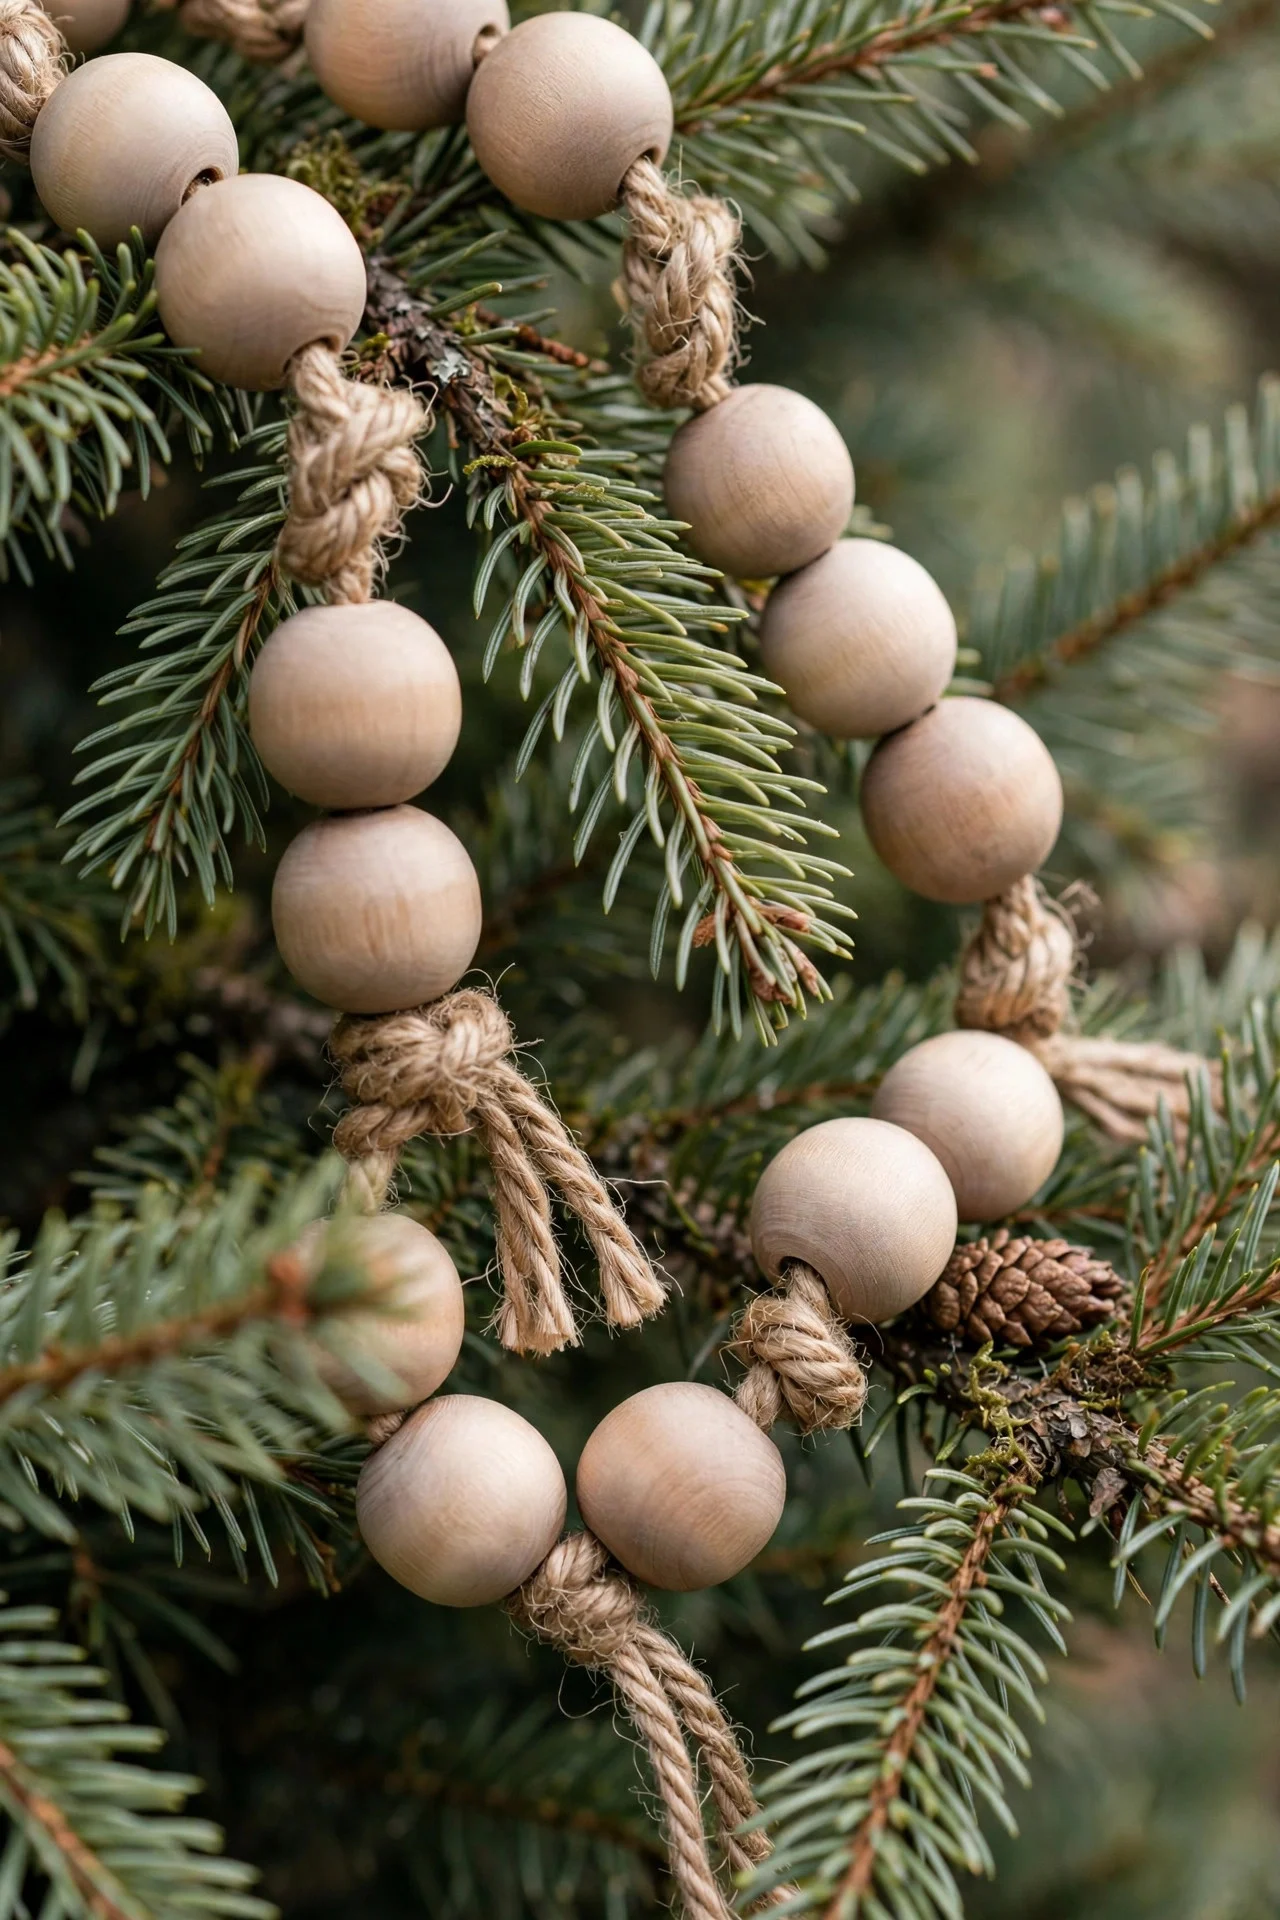
Thread natural wooden beads (about $6 for a bag of 100) onto jute twine, knotting the twine between every fifth bead so they don’t all slide together. Drape the finished garland on the tree, across the mantel, or around a wreath — the matte wood texture is a beautiful break from all the shine.
Mix bead sizes — 16mm and 20mm — for a handcrafted look, and leave a 6-inch tail of twine at each end for tying. One bag makes about 8 feet of garland. For a dressier version, stain half the beads with a walnut wood stain before threading for a two-tone effect.
Try this: Make a matching short strand to wrap around pillar candles as a rustic candle ring.
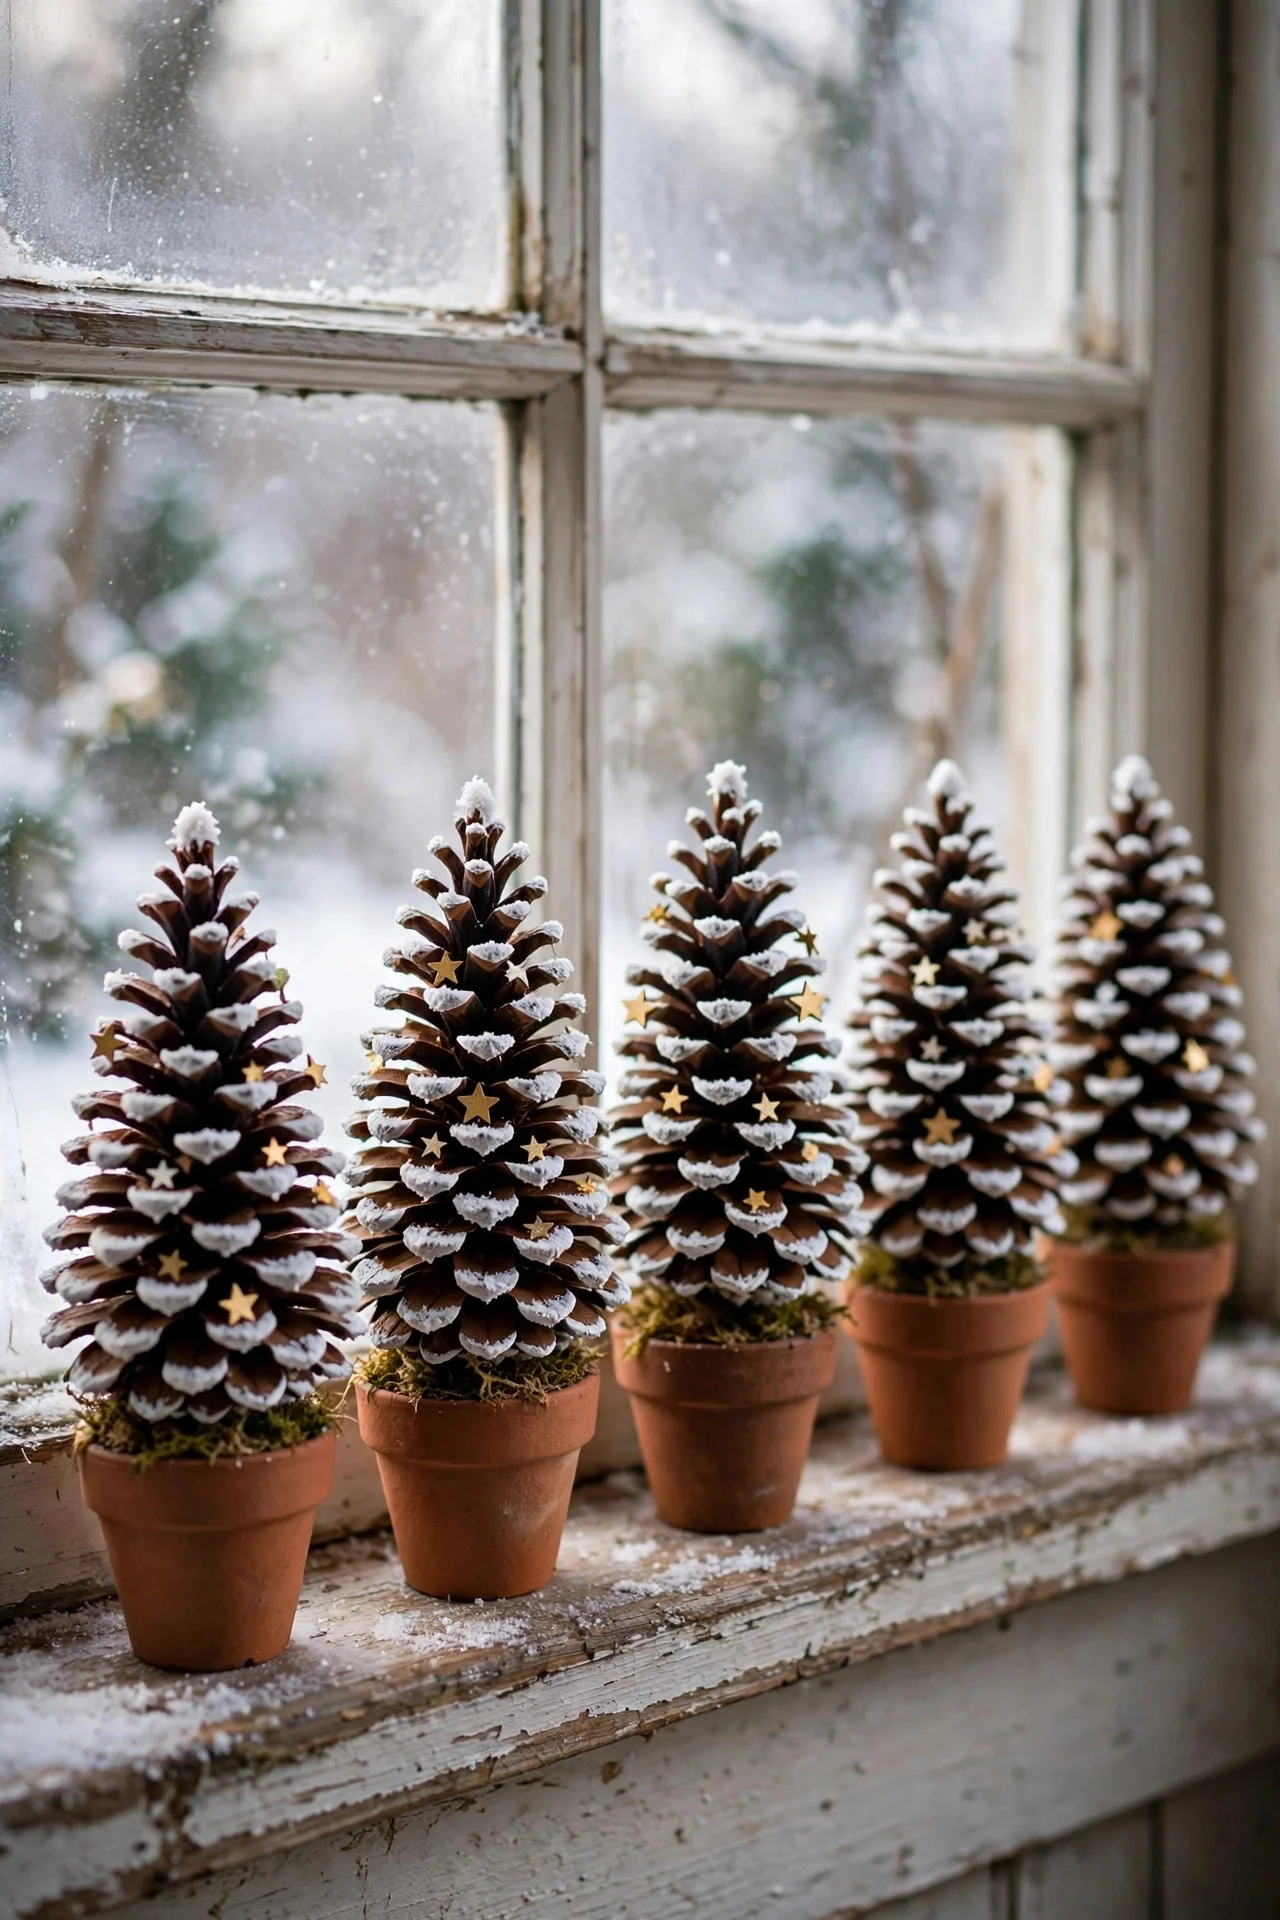
16. Painted Pinecone Christmas Trees
Stand large pinecones upright in small terracotta pots (the 2-inch size), dab the scale tips with white or gold craft paint using a stiff brush, and top with a tiny star. They look like miniature snowy Christmas trees — charming on a windowsill, a desk, or as place card holders.
Choose pinecones with a flat-ish base so they stand steady, and hot-glue them into the pots for insurance. A dab of glue on top holds a small wooden star or a single cranberry. Make them in a batch — they’re addictive, and everyone wants one.
Try this: Write guests’ names on tiny kraft tags and tie them to the pots — instant place cards that double as favors.
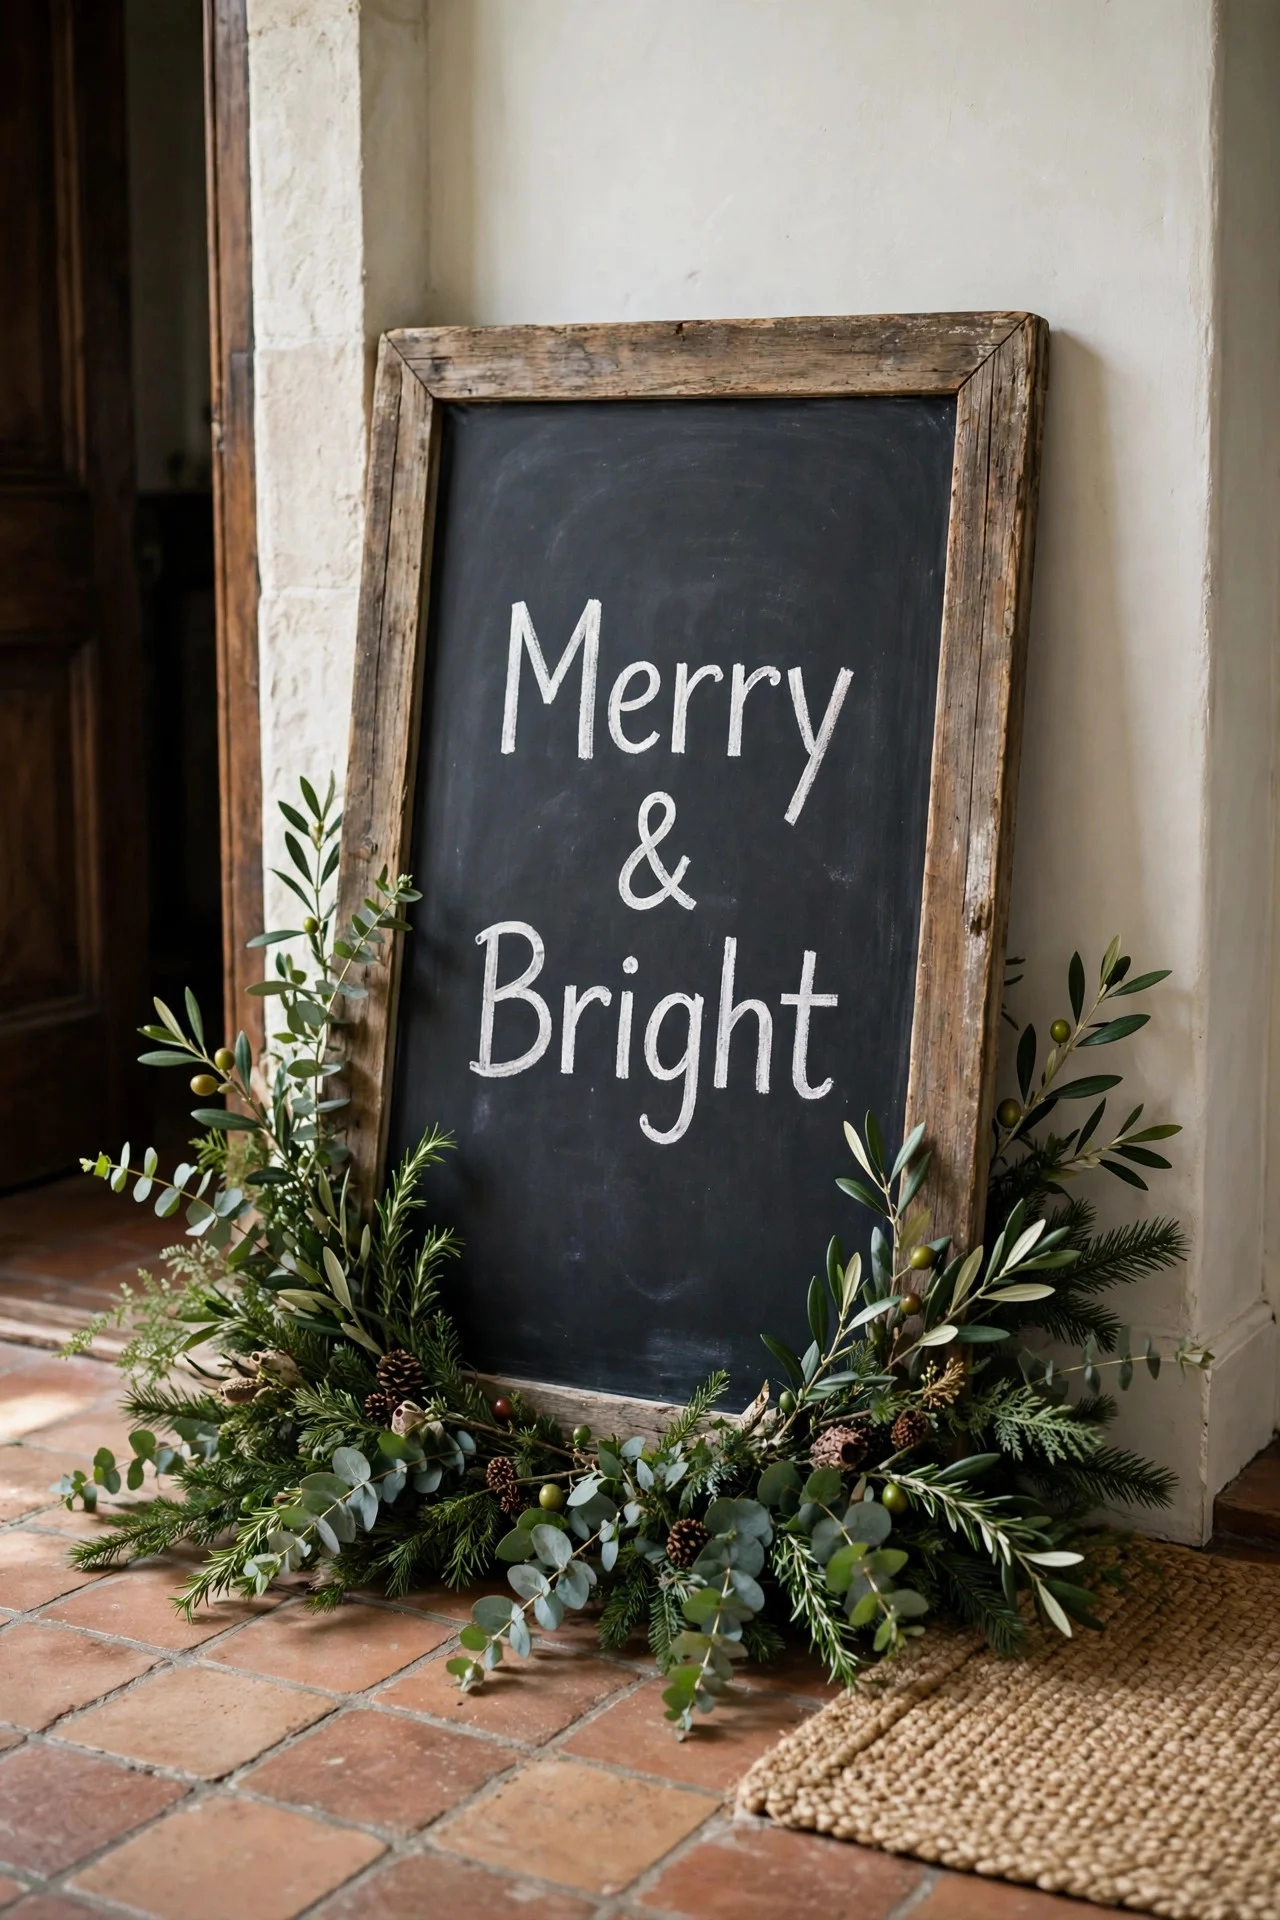
17. A Chalkboard Welcome Sign for the Entryway
Buy a $5 chalkboard from the craft store (or chalkboard-paint an old frame), letter a simple “Merry & Bright” or your family name with a chalk marker, and lean it in the entryway surrounded by greenery. Swap the message through the season — it’s decor that never gets stale.
Chalk markers (not regular chalk) give you crisp lines that don’t smudge when bumped. Sketch the layout lightly in pencil first if your handwriting isn’t naturally pretty. Add a simple drawn wreath or border — even wobbly hand-drawn lines look charming.
Try this: Write the Christmas dinner menu on it on the 25th — guests love the restaurant touch.
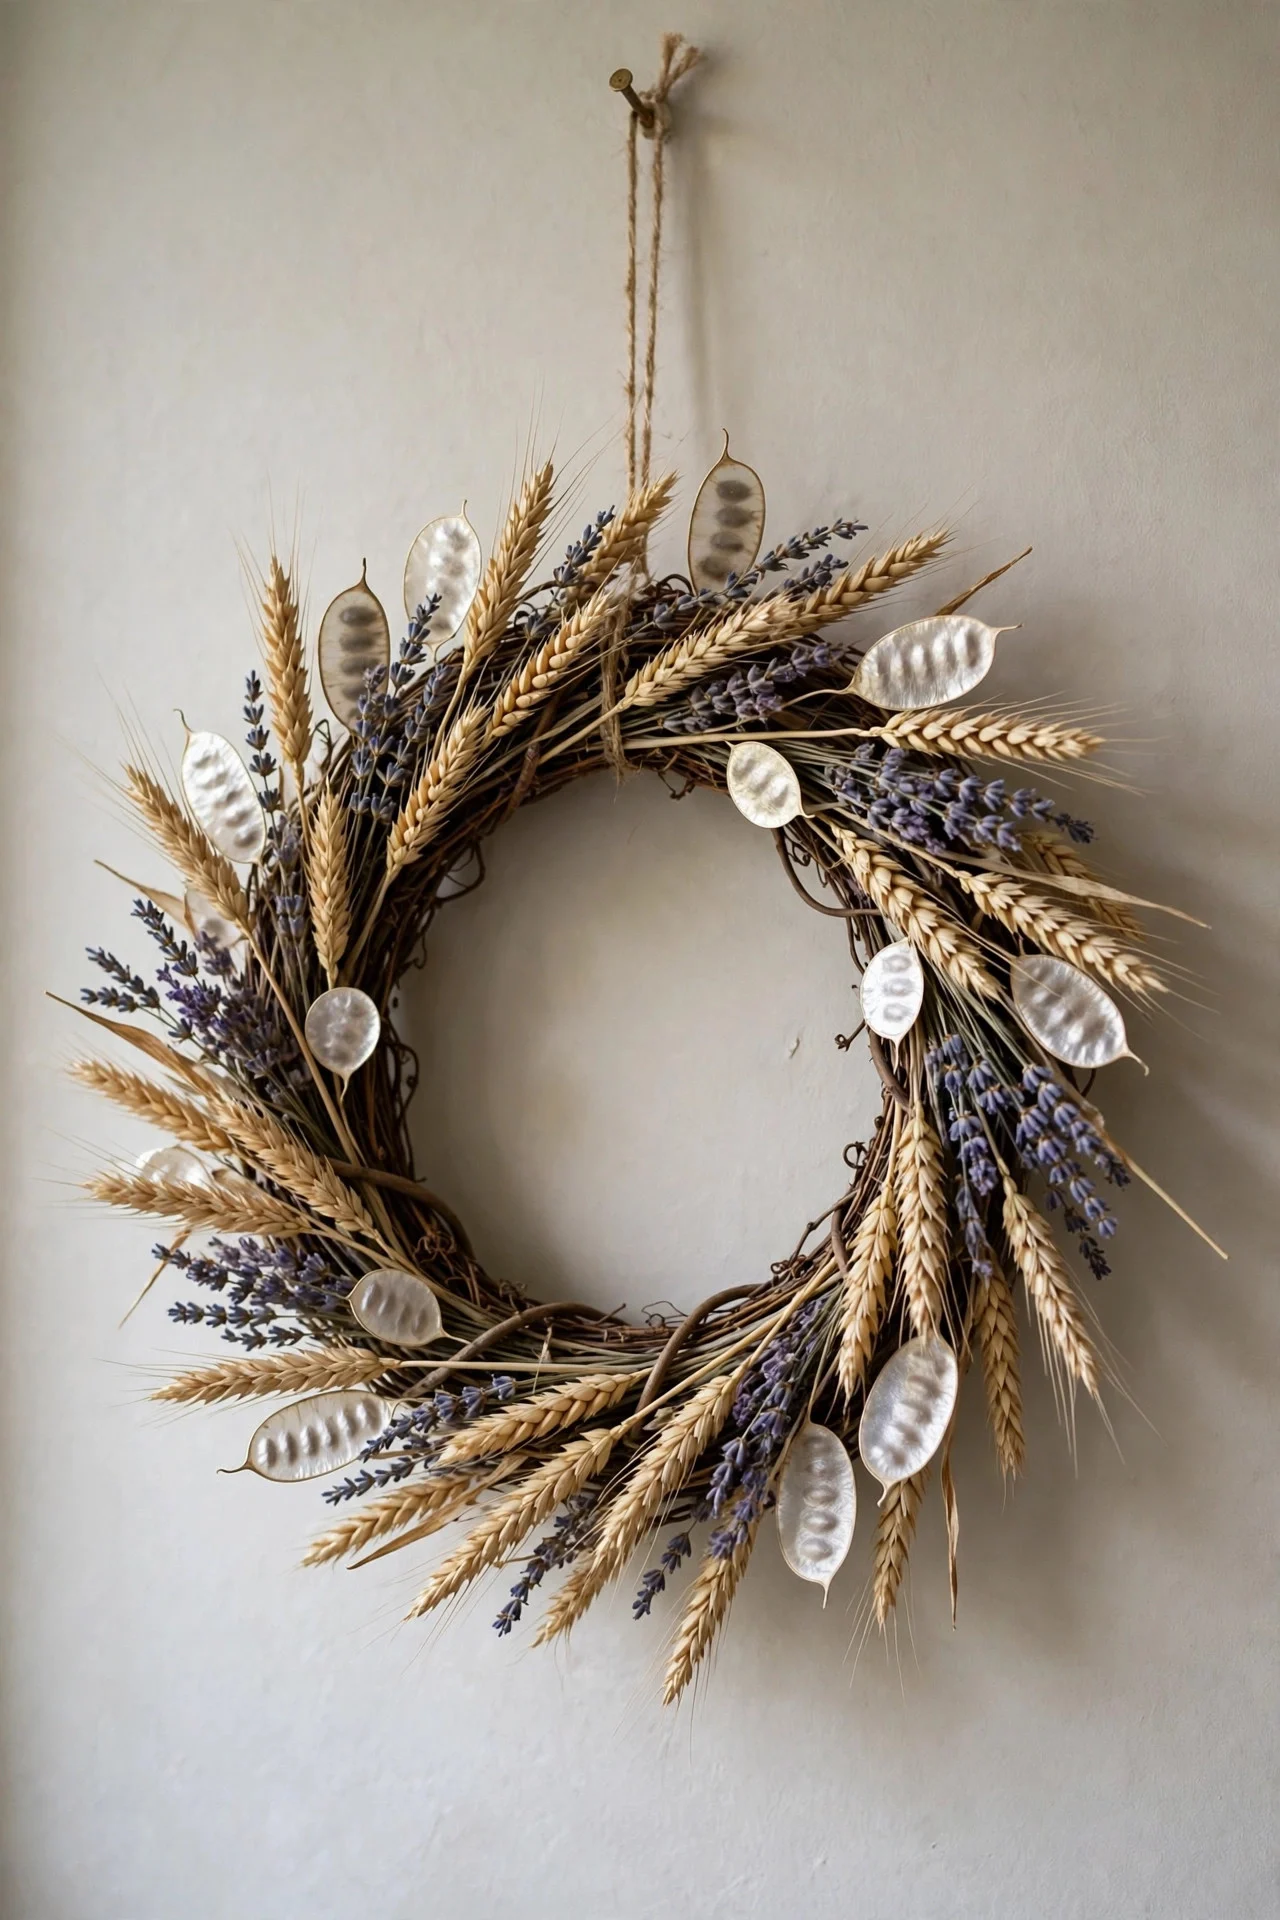
18. A Dried Wheat and Lunaria Wreath
Skip the evergreens entirely: bundle dried wheat stalks, lunaria (the “silver dollar plant” with translucent seed pods), and dried lavender onto a grapevine base with floral wire. The result is a neutral, textural wreath in golds and creams that lasts for years and suits any decor style.
Work in small bunches of five to seven stems, wiring each bunch to the base and overlapping so no wire shows. Lunaria is the star — its papery silver discs catch light beautifully. Hang it indoors to protect it from weather; dried materials and rain don’t mix.
Try this: Tuck in three dried orange slices for a whisper of traditional Christmas color.
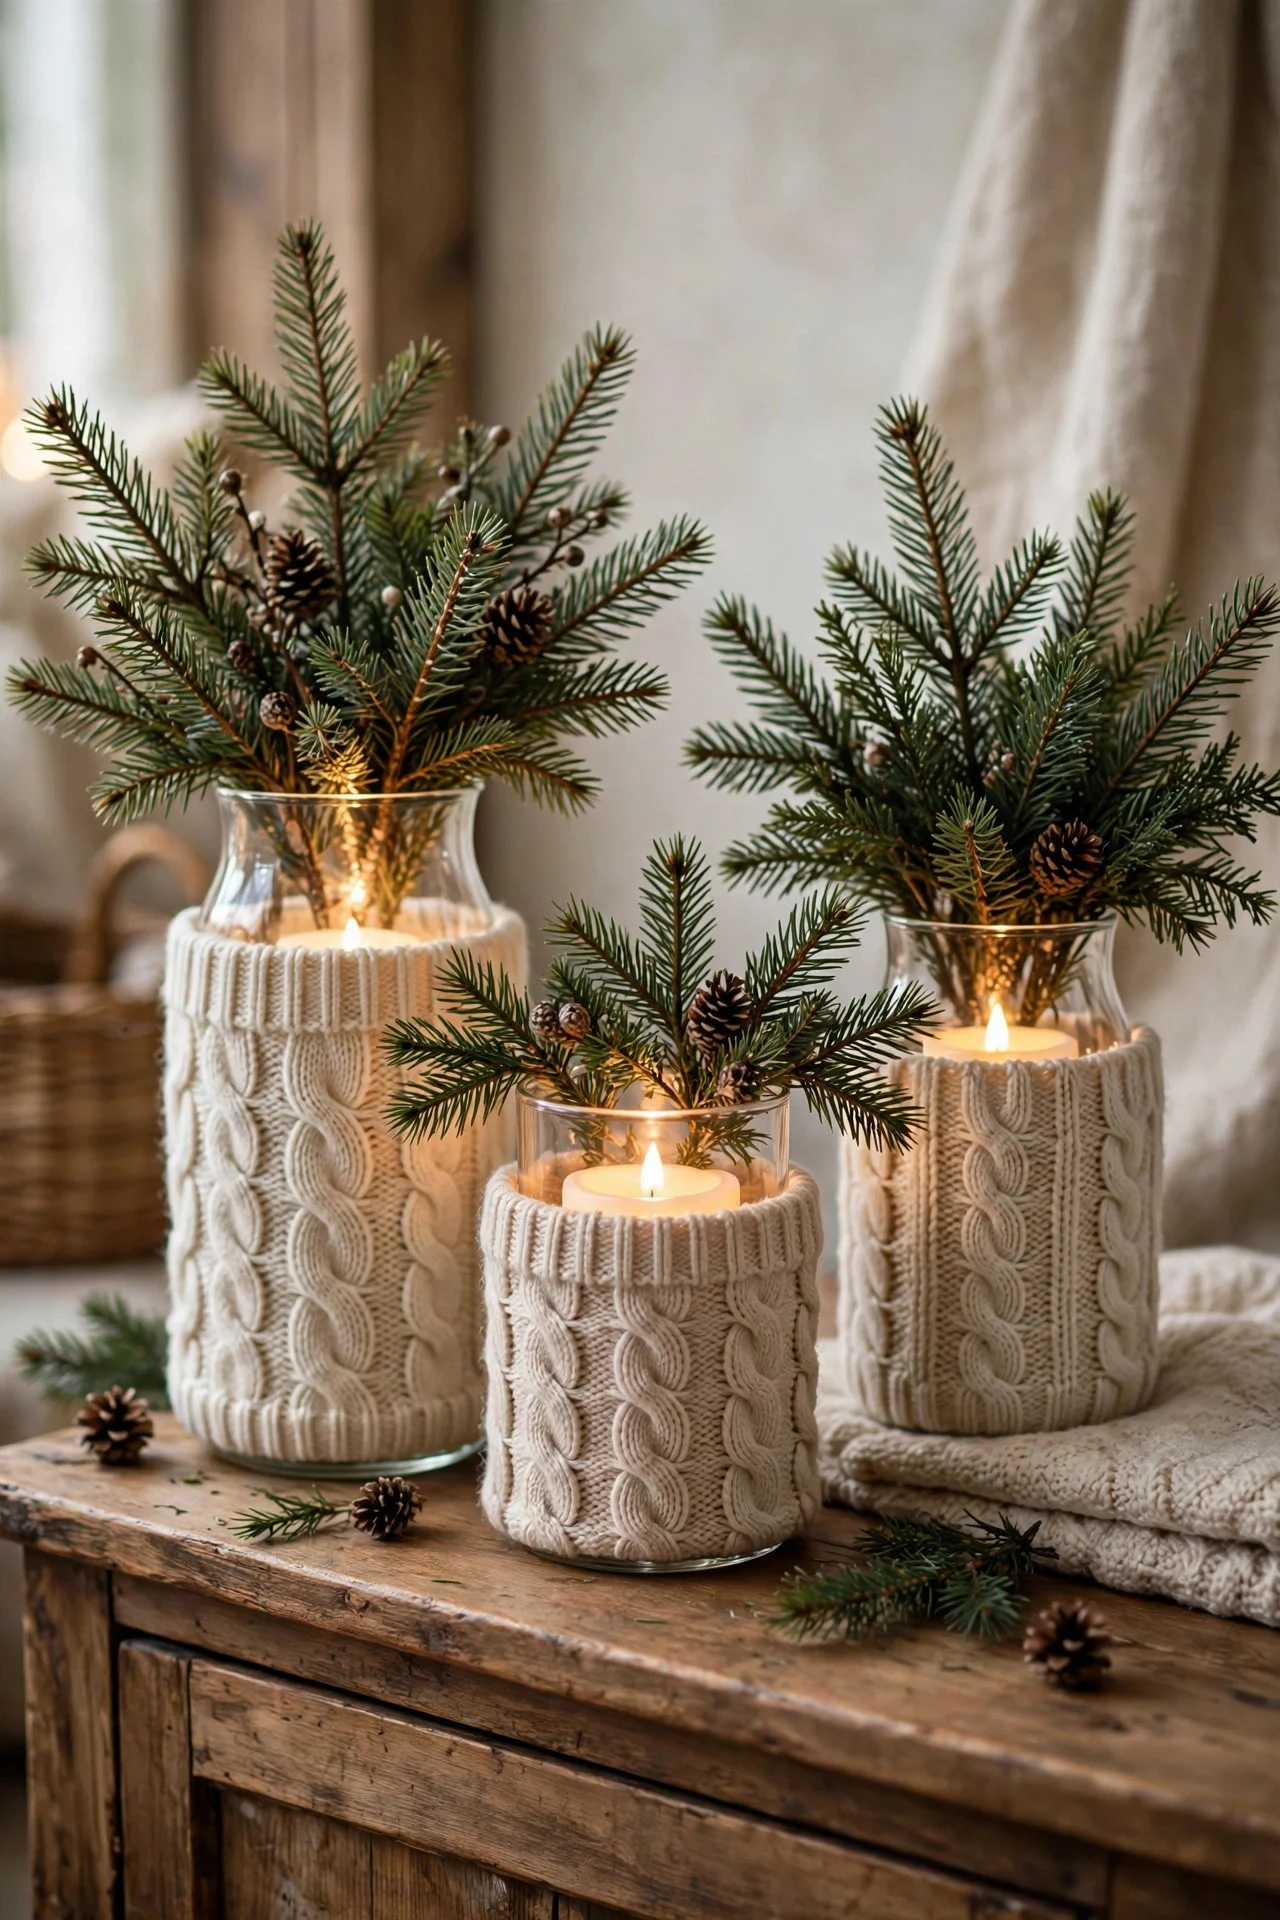
19. Sweater-Wrapped Vases and Candle Holders
That pilled sweater in the donation bag has one more job: cut off the sleeves, slide them over glass vases or candle holders, and fold the cuff neatly at the top. Instant cozy texture — cable-knit sleeves around pillar candles look like they came from a lodge catalog.
Use sleeves that fit snugly; a loose sleeve slides and looks sloppy. The cuff ribbing should sit at the top edge for a finished look. Keep fabric away from real flames — this one’s for LED candles only, or vases holding greenery.
Try this: Wrap a tall vase in a sweater body, add pine branches, and you have a winter arrangement with zero florist skills.
Frequently Asked Questions
What are the easiest DIY Christmas decorations for beginners?
Start with pomanders, cinnamon bundles, and Epsom-salt pinecones — no special tools, under 30 minutes each, and hard to mess up. Salt dough ornaments and mason jar snow globes are the next step up and still very forgiving.
How far in advance can I make DIY Christmas decorations?
Most dried and preserved projects (wood slices, bead garlands, fabric garlands, wheat wreaths) can be made any time and stored. Fresh greenery projects should wait until mid-December. Salt dough and pomanders keep for years once fully dried.
Are DIY Christmas decorations actually cheaper than buying?
Usually yes, especially for multiples — one bag of supplies often makes 15 to 30 pieces. The real savings are in things like garlands, ornaments, and gift toppers, where handmade versions cost pennies against dollars.
What DIY Christmas decorations make good gifts?
Mason jar snow globes, pomander gift boxes, simmer-pot ingredient bags, and painted pinecone trees all make wonderful handmade gifts. Anything scented or personalized tends to be the biggest hit.
Final Thoughts
The best DIY Christmas decorations share one quality: they look like someone cared, not like someone crafted. Keep your palette tight, your designs simple, and your finishes natural — and don’t aim for store-perfect. The slight wobble in a hand-tied bow is the whole point. That’s what makes it yours.
