
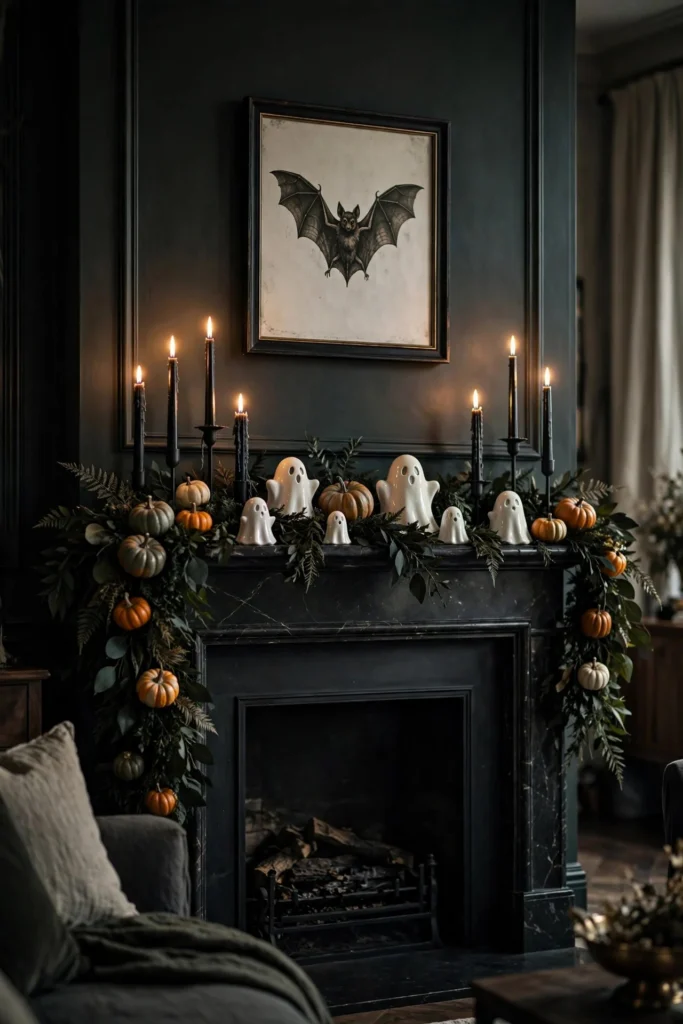
Every October, the mantel becomes the hardest-working surface in the house. It is the first thing guests notice when they walk into your living room, the backdrop of every cozy photo, and the one spot where a few well-chosen pieces can completely change the mood of a room.
But there is a fine line between spooky-chic and a cluttered costume shop. Spooky-chic means curated and intentional: a restrained color palette, natural textures, candlelight instead of plastic glare, and just enough playful Halloween personality to make it fun. Think dried botanicals instead of fake cobwebs, ceramic pumpkins instead of foam ones, and candlelight that makes everything glow. These 15 halloween mantel decor ideas will help you build a fireplace display that feels elegant first and spooky second — the kind guests photograph before they even sit down.
1. Drape an Asymmetrical Dried Floral Garland
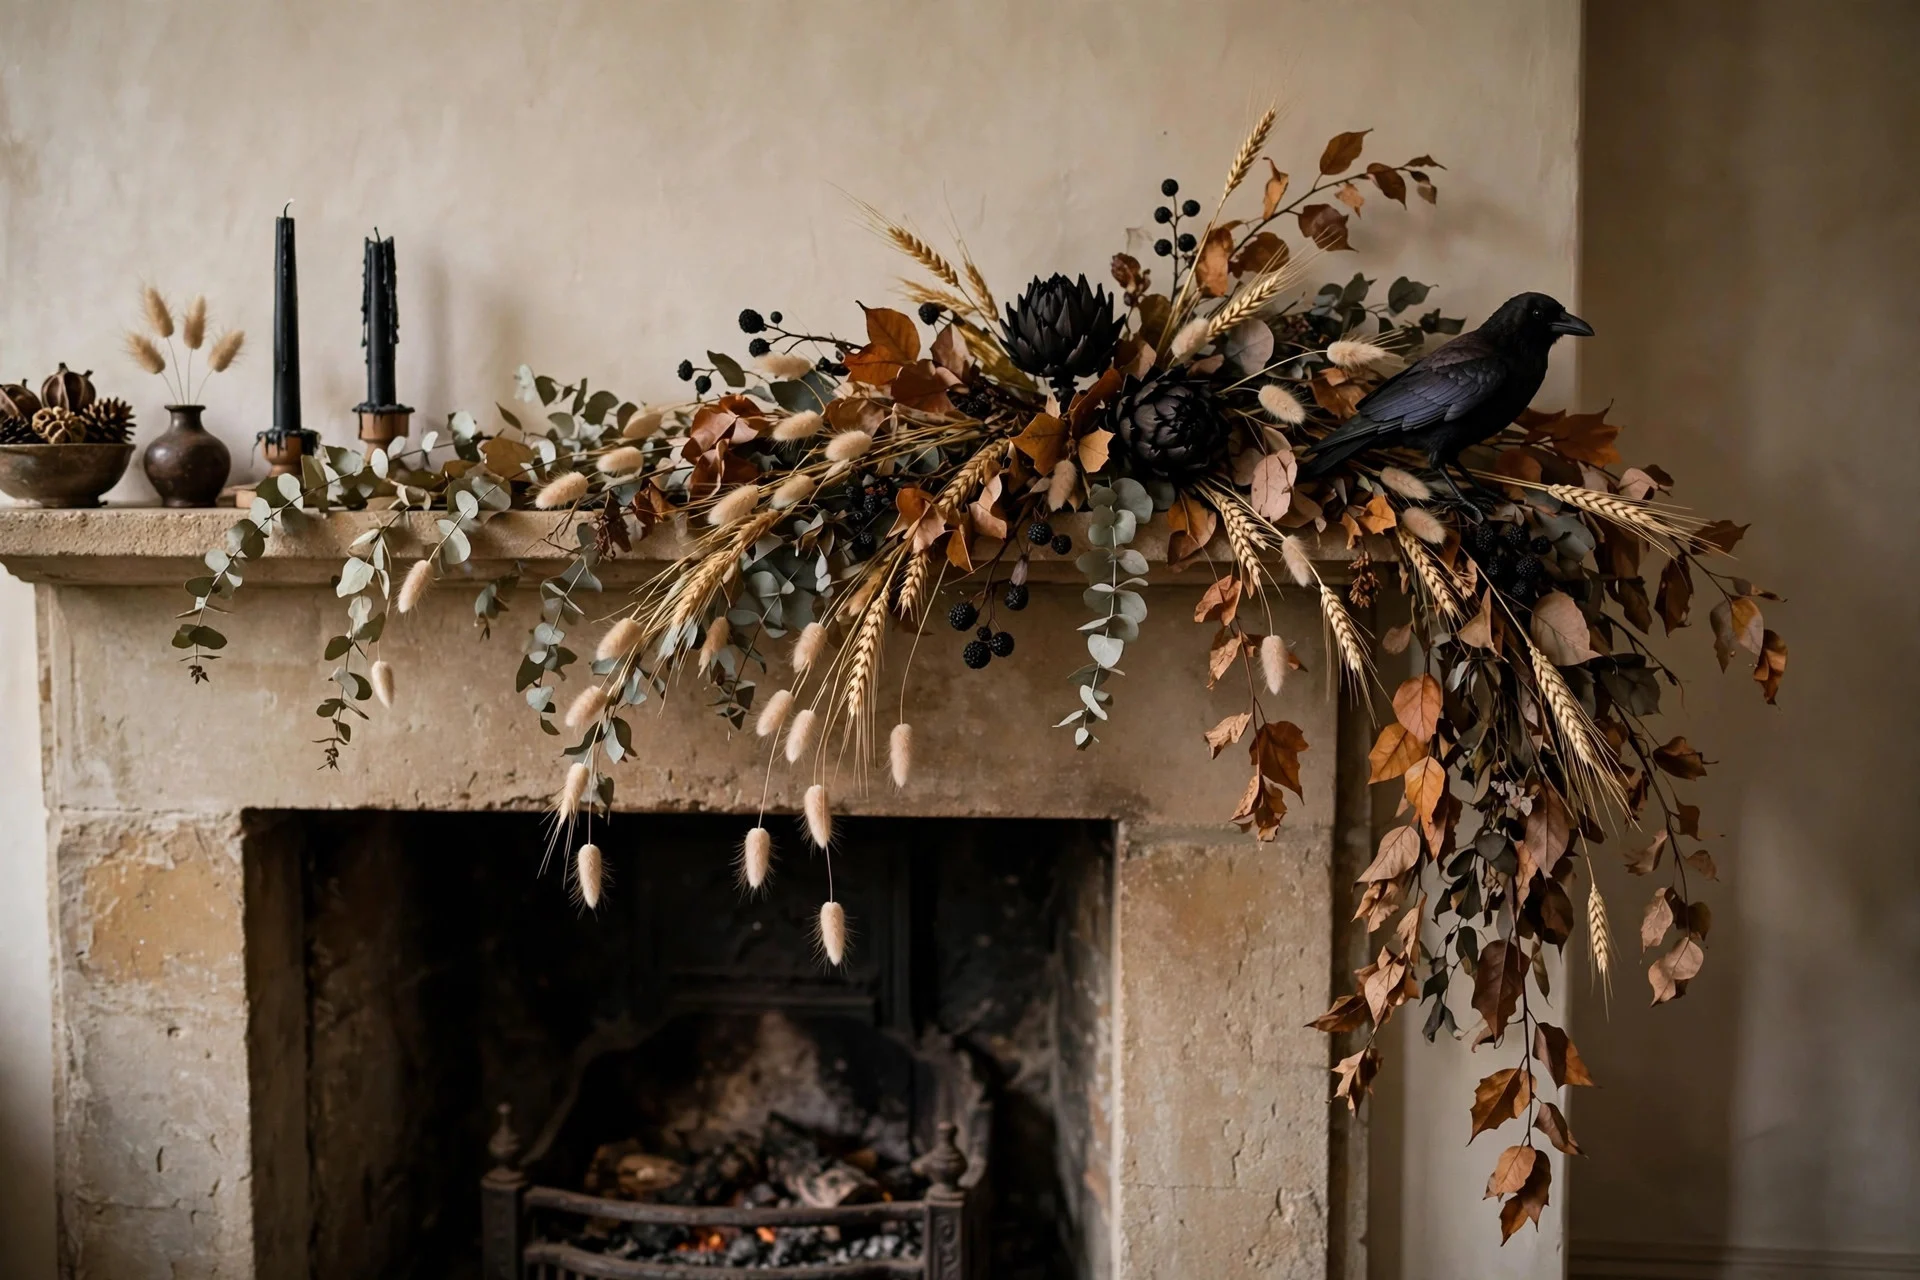
A garland is the backbone of almost every great mantel, and for Halloween, dried florals beat fresh greenery every time. Dried eucalyptus, bunny tail grass, wheat stalks, and preserved autumn leaves bring warm, muted tones that feel seasonal without screaming “fall festival.” Drape the garland so it hangs lower on one side than the other — asymmetry is what makes it look styled rather than store-bought. Let a few stems trail down past the mantel edge for that effortless, gathered-from-the-garden feel.
Tuck in small black or deep-plum accents to push it toward Halloween: miniature dried artichokes spray-painted matte black, dark berries, or even a few faux crows perched along the length. Keep the base of the garland full and let it taper at the ends so the eye travels naturally across the mantel, securing it with small removable hooks or museum putty.
Try this: Start with a plain eucalyptus garland as your base, then wire in three to five “hero” stems — pampas plumes, black-painted branches, or dried lunaria — spacing them unevenly for a designer look.
2. Build a Candle Cluster in Three Heights
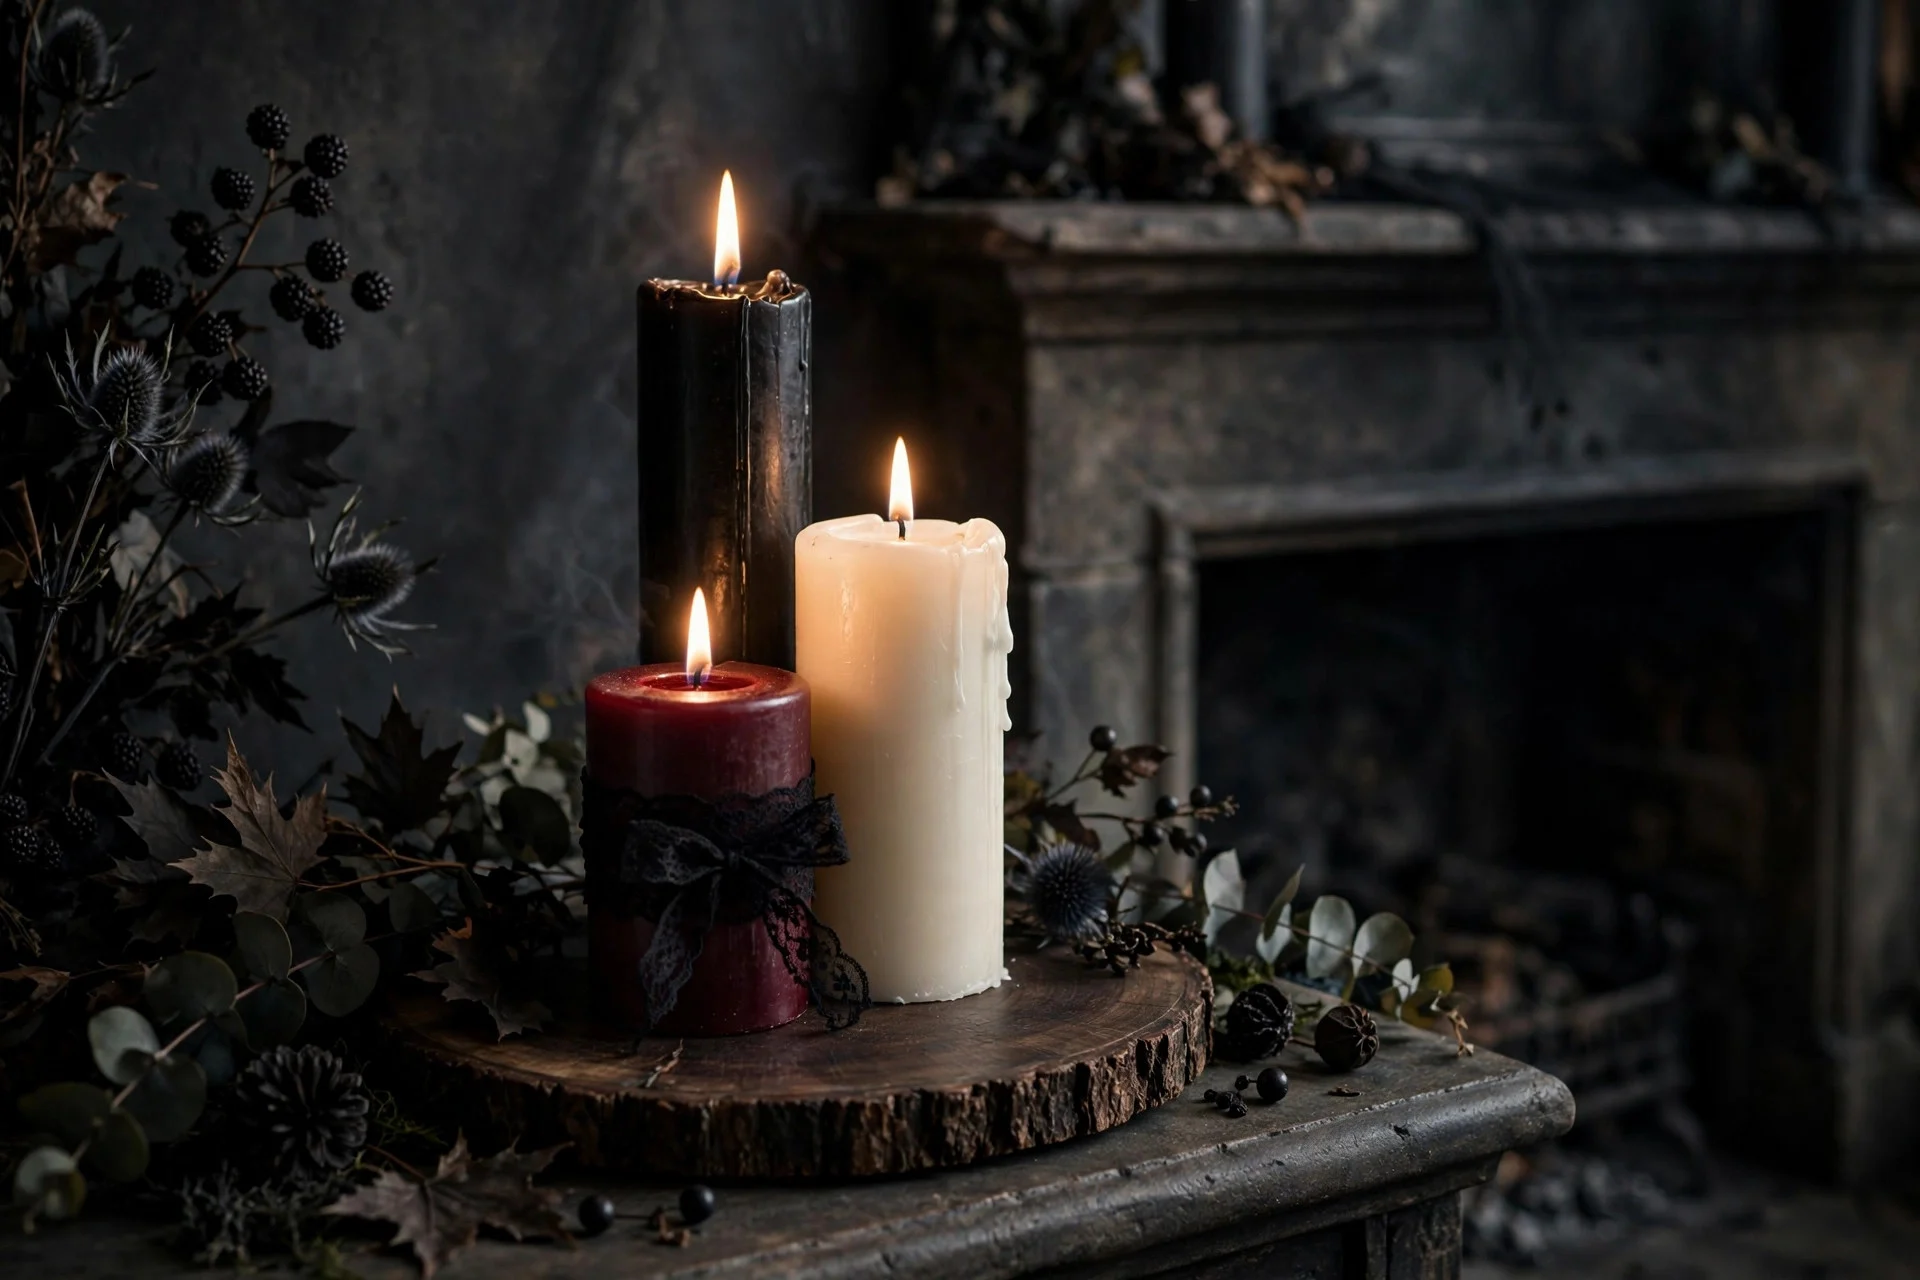
Nothing says Halloween like candlelight, and a cluster of pillar candles instantly adds drama to a mantel. The trick is grouping candles in odd numbers at three distinct heights: tall, medium, and short. Use black, ivory, and deep burgundy pillars for a moody palette, and mix in a few LED candles if you plan to leave them glowing for hours. Real flame looks best, but flameless candles are the safer call when the arrangement sits near dried garlands.
Ground the cluster on a tray or a slice of dark wood to contain the look and catch any wax. Place the tallest candle toward the back and step the heights forward so every flame is visible.
Try this: Wrap one pillar candle with a strip of black lace or velvet ribbon and secure it with a dot of hot glue for a five-minute gothic upgrade.
3. Line Up a Mini Pumpkin Parade
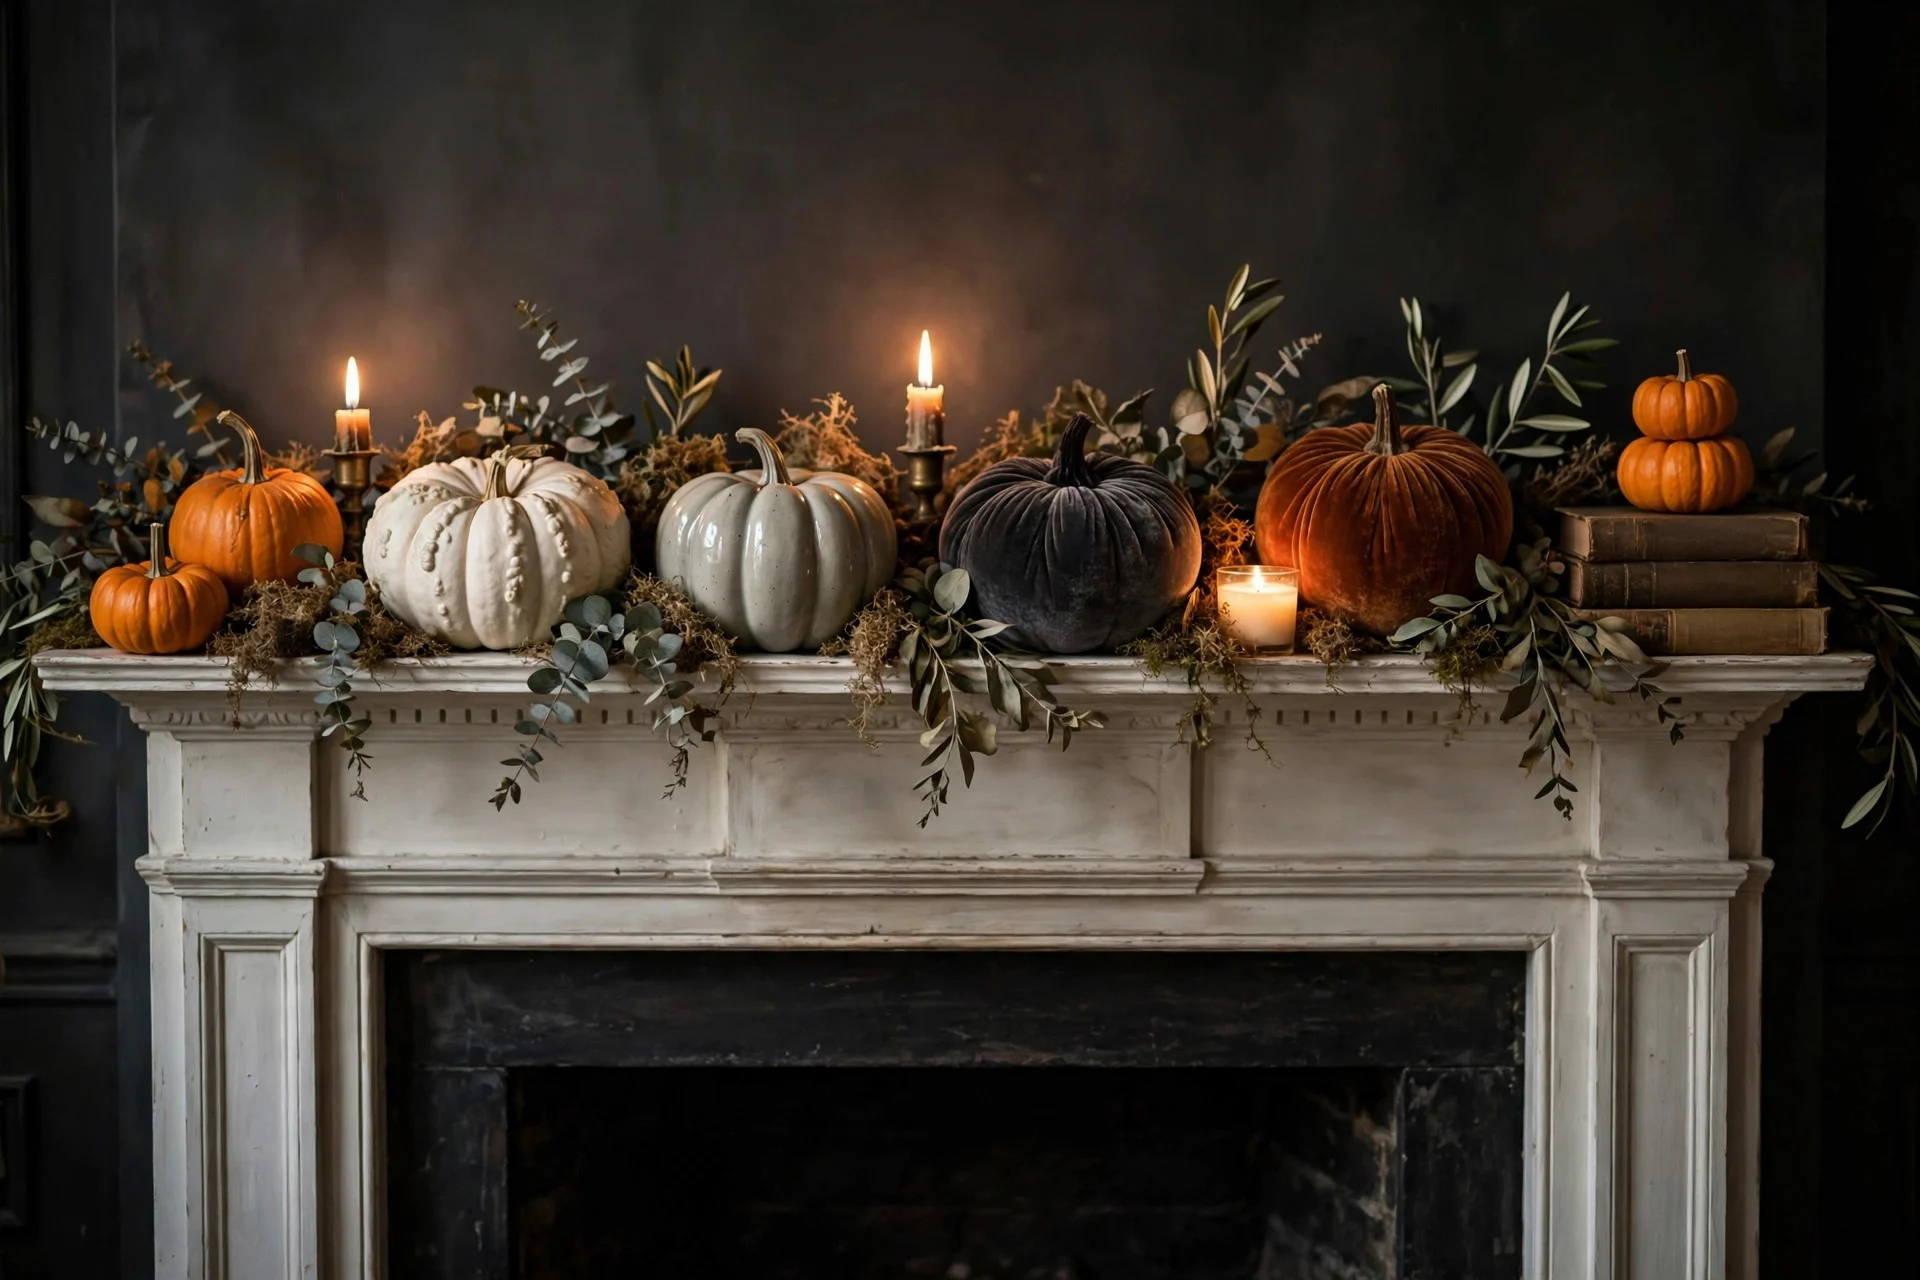
Mini pumpkins are the workhorses of Halloween mantel decor, but the secret is mixing materials instead of lining up a dozen identical orange ones. Combine heirloom-style white pumpkins, velvet pumpkins in charcoal and rust, ceramic pumpkins with a matte glaze, and a few real mini pumpkins for organic texture. The variety keeps the arrangement interesting even in a single color family.
Arrange them in a loose, uneven row along the mantel front, varying the sizes so no two neighbors match. Tuck dried moss or small sprigs of eucalyptus between them to fill gaps and make the row feel connected.
Try this: Stack two or three mini pumpkins on a small stack of vintage books at one end of the mantel to create instant height variation.
4. Send a Paper Bat Swarm Up the Wall
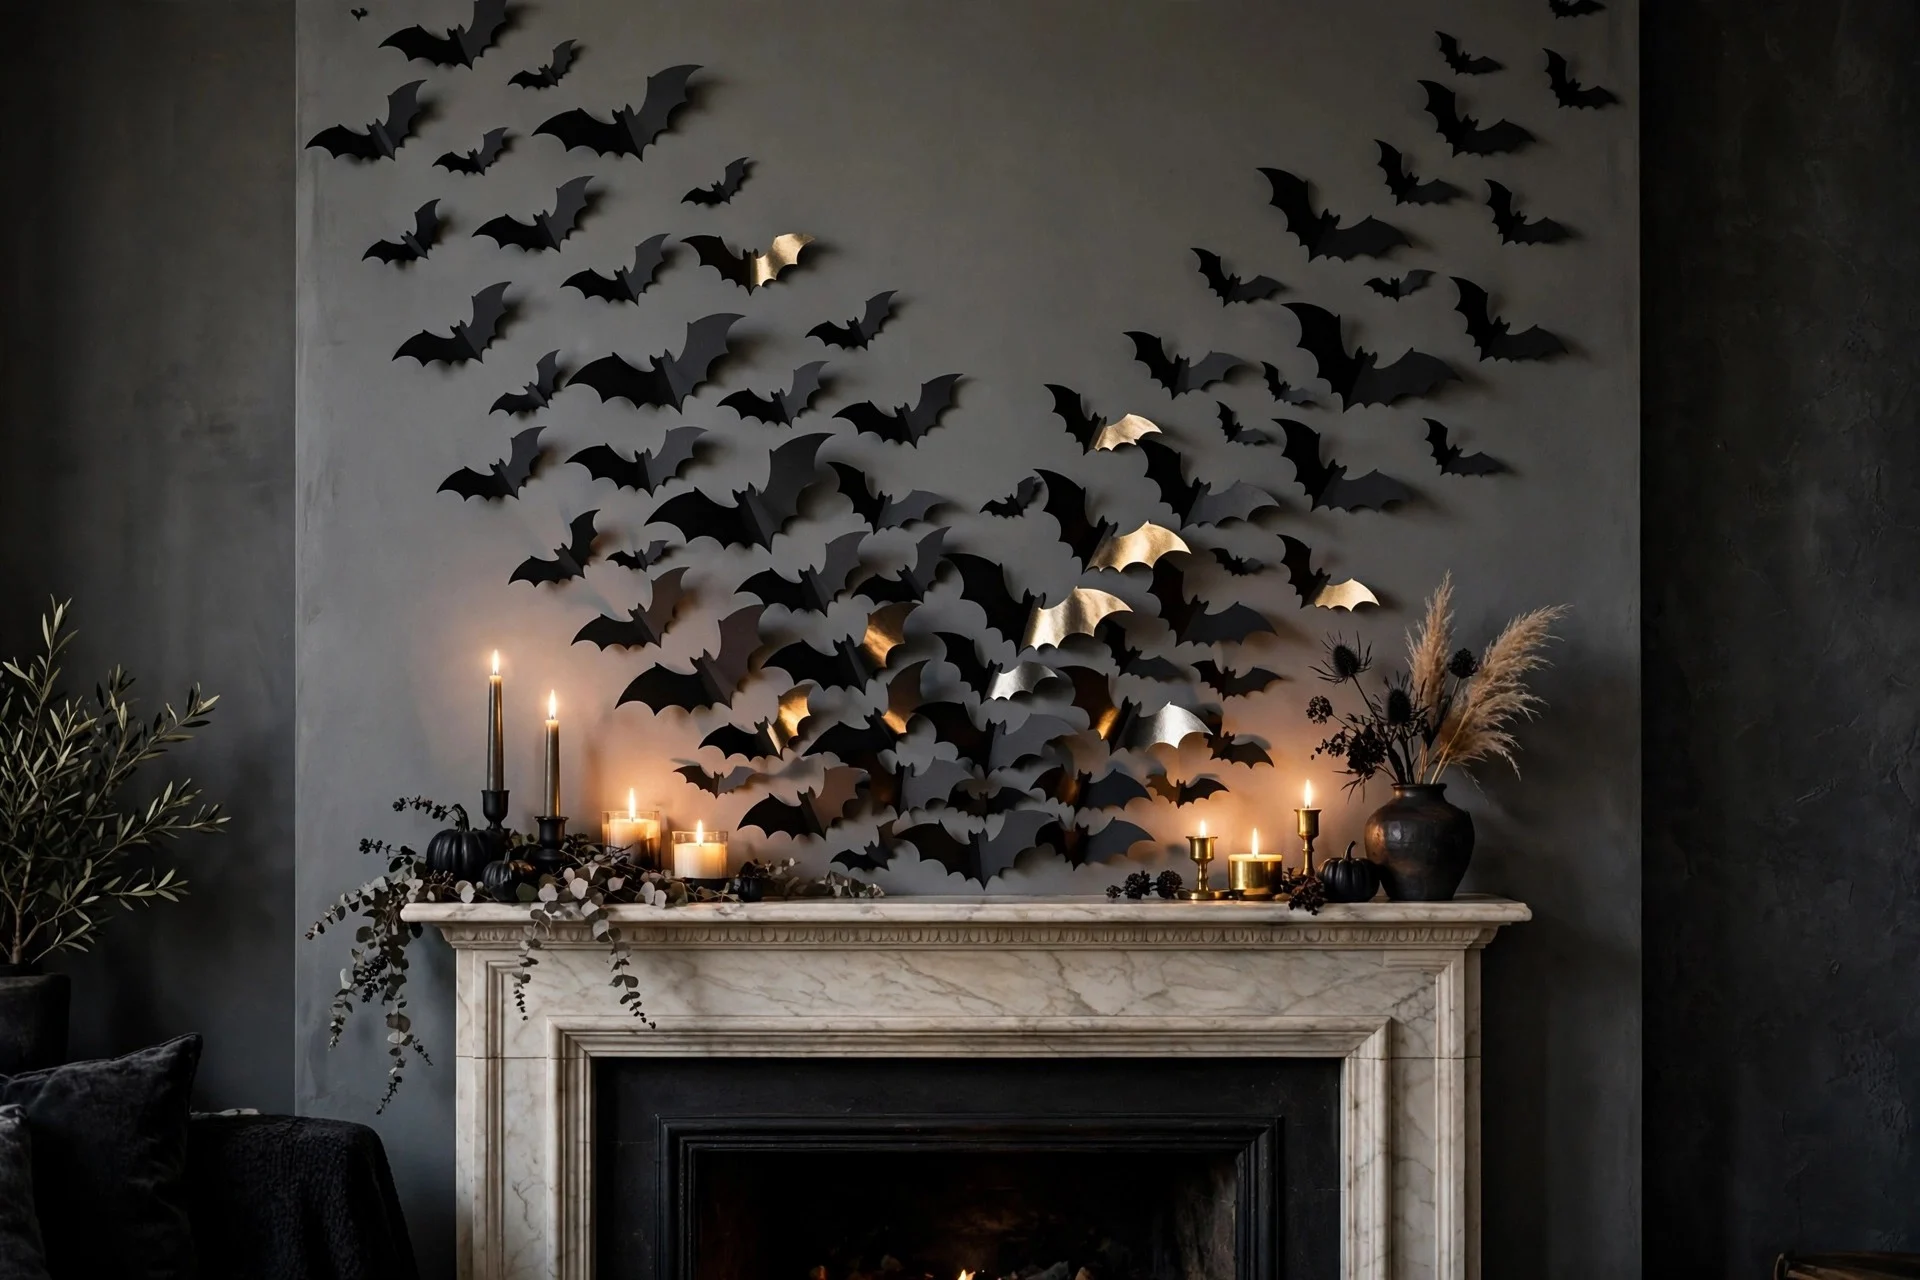
Bats are the easiest high-impact Halloween accent because they cost almost nothing and look fantastic in multiples. Cut bat silhouettes from black cardstock in three sizes, fold each slightly down the middle so the wings catch the light, and mount them with removable adhesive dots. Start the swarm just above the mantel and let it scatter upward and outward across the wall, as if the bats are taking flight.
Density is everything: cluster the bats tightly near the mantel and space them wider as they rise, which creates natural movement and keeps the wall from looking polka-dotted. When the season ends, they peel right off with no damage.
Try this: Use a mix of matte and slightly metallic black cardstock — the metallic ones catch candlelight and add subtle shimmer to the swarm.
5. Float Cheesecloth Ghost Figures
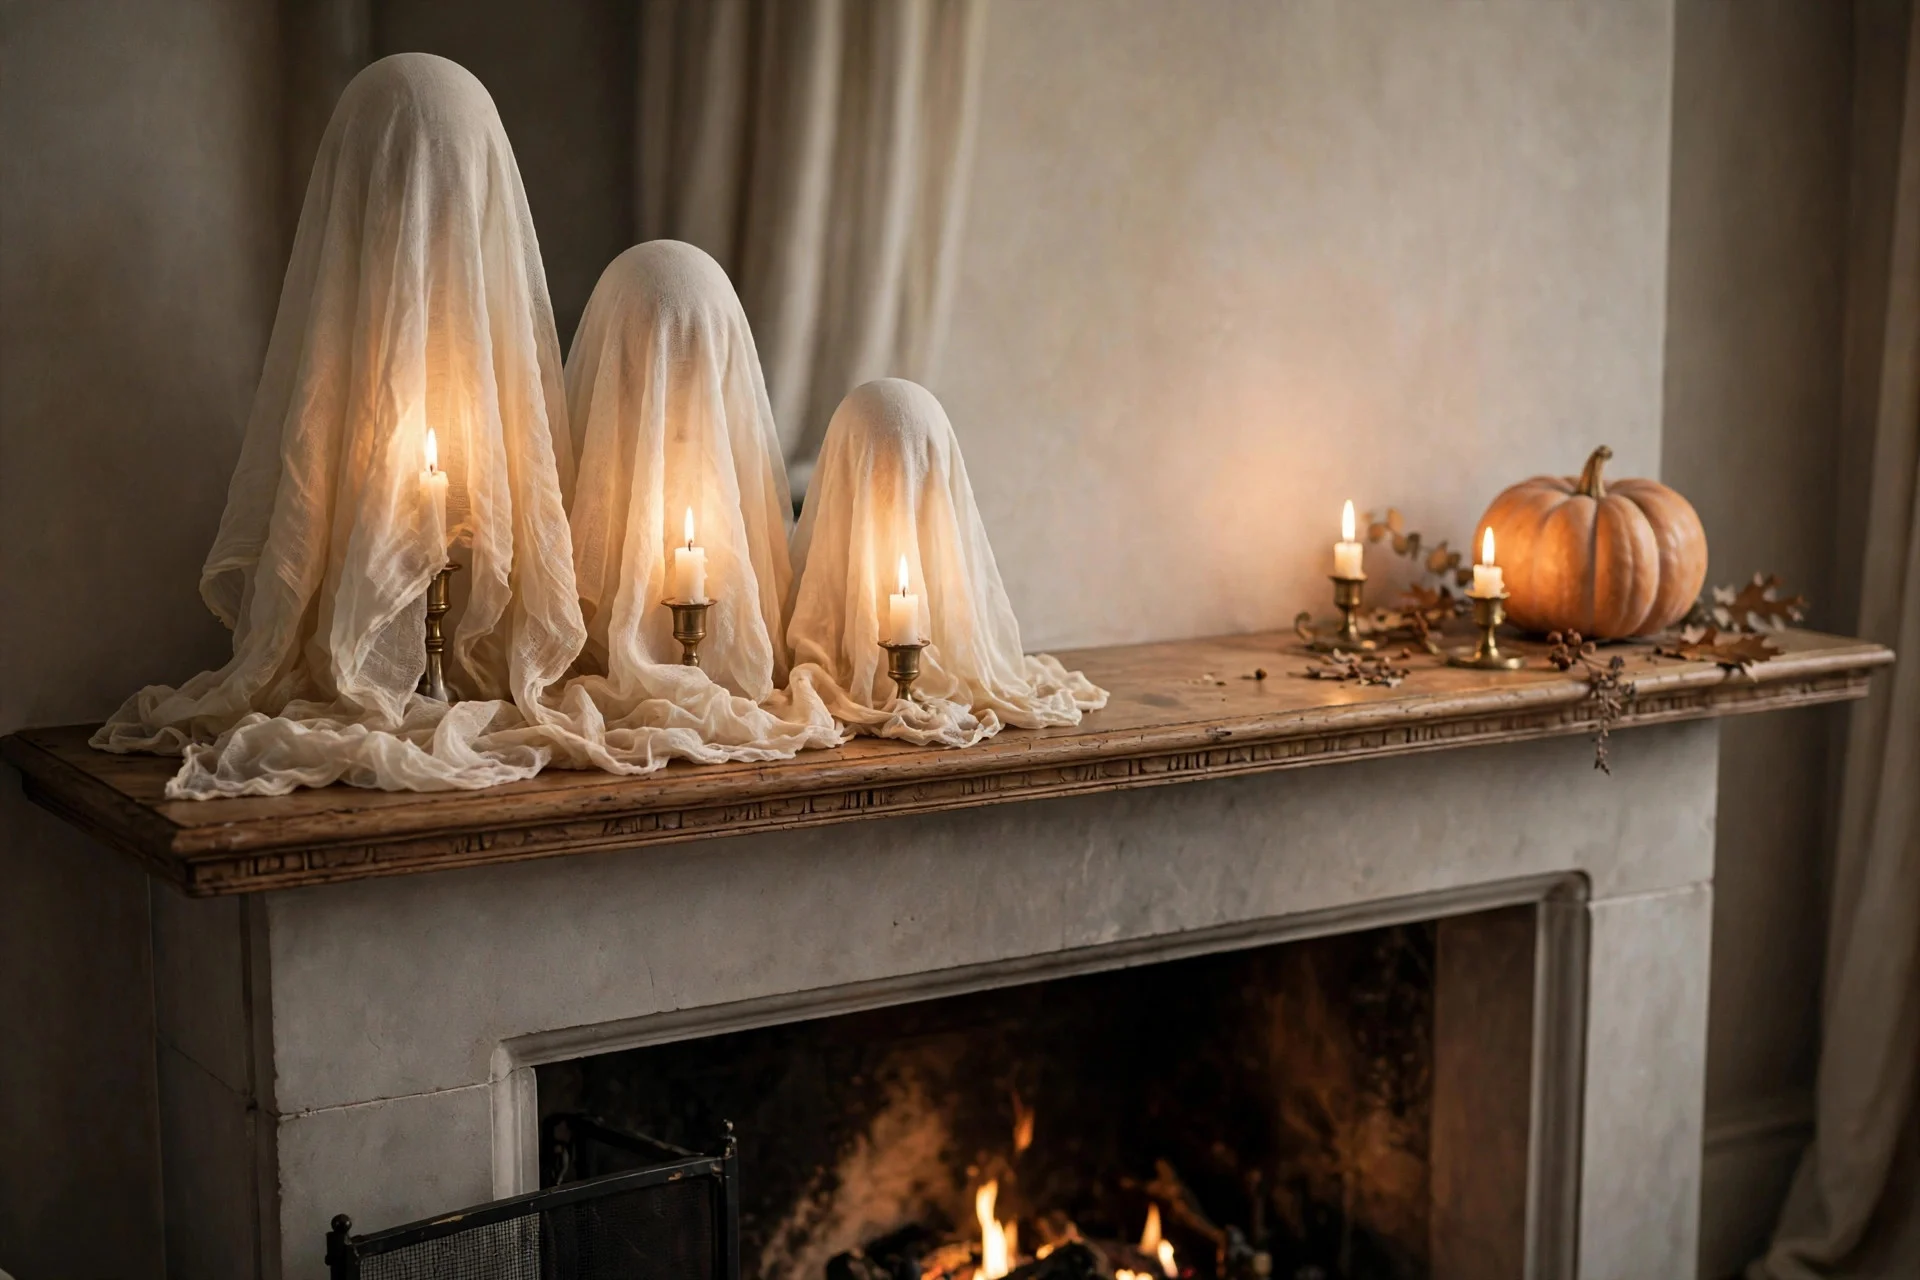
Cheesecloth ghosts are a classic for a reason: they are cheap, fast, and genuinely eerie when done right. Drape white or ivory cheesecloth over a balloon or a small foam ball mounted on a candlestick, letting the fabric puddle naturally at the base. A light misting of fabric stiffener holds the shape so the ghost stands on its own once dry.
Style two or three ghosts of different heights on one side of the mantel, keeping the other side simpler for balance. Skip the cartoon faces — faceless ghosts read far more sophisticated and a little more haunting.
Try this: Tea-stain the cheesecloth in strong black tea for ten minutes before draping for an aged, vintage-ghost look instead of bright white.
6. Layer Framed Vintage-Style Art
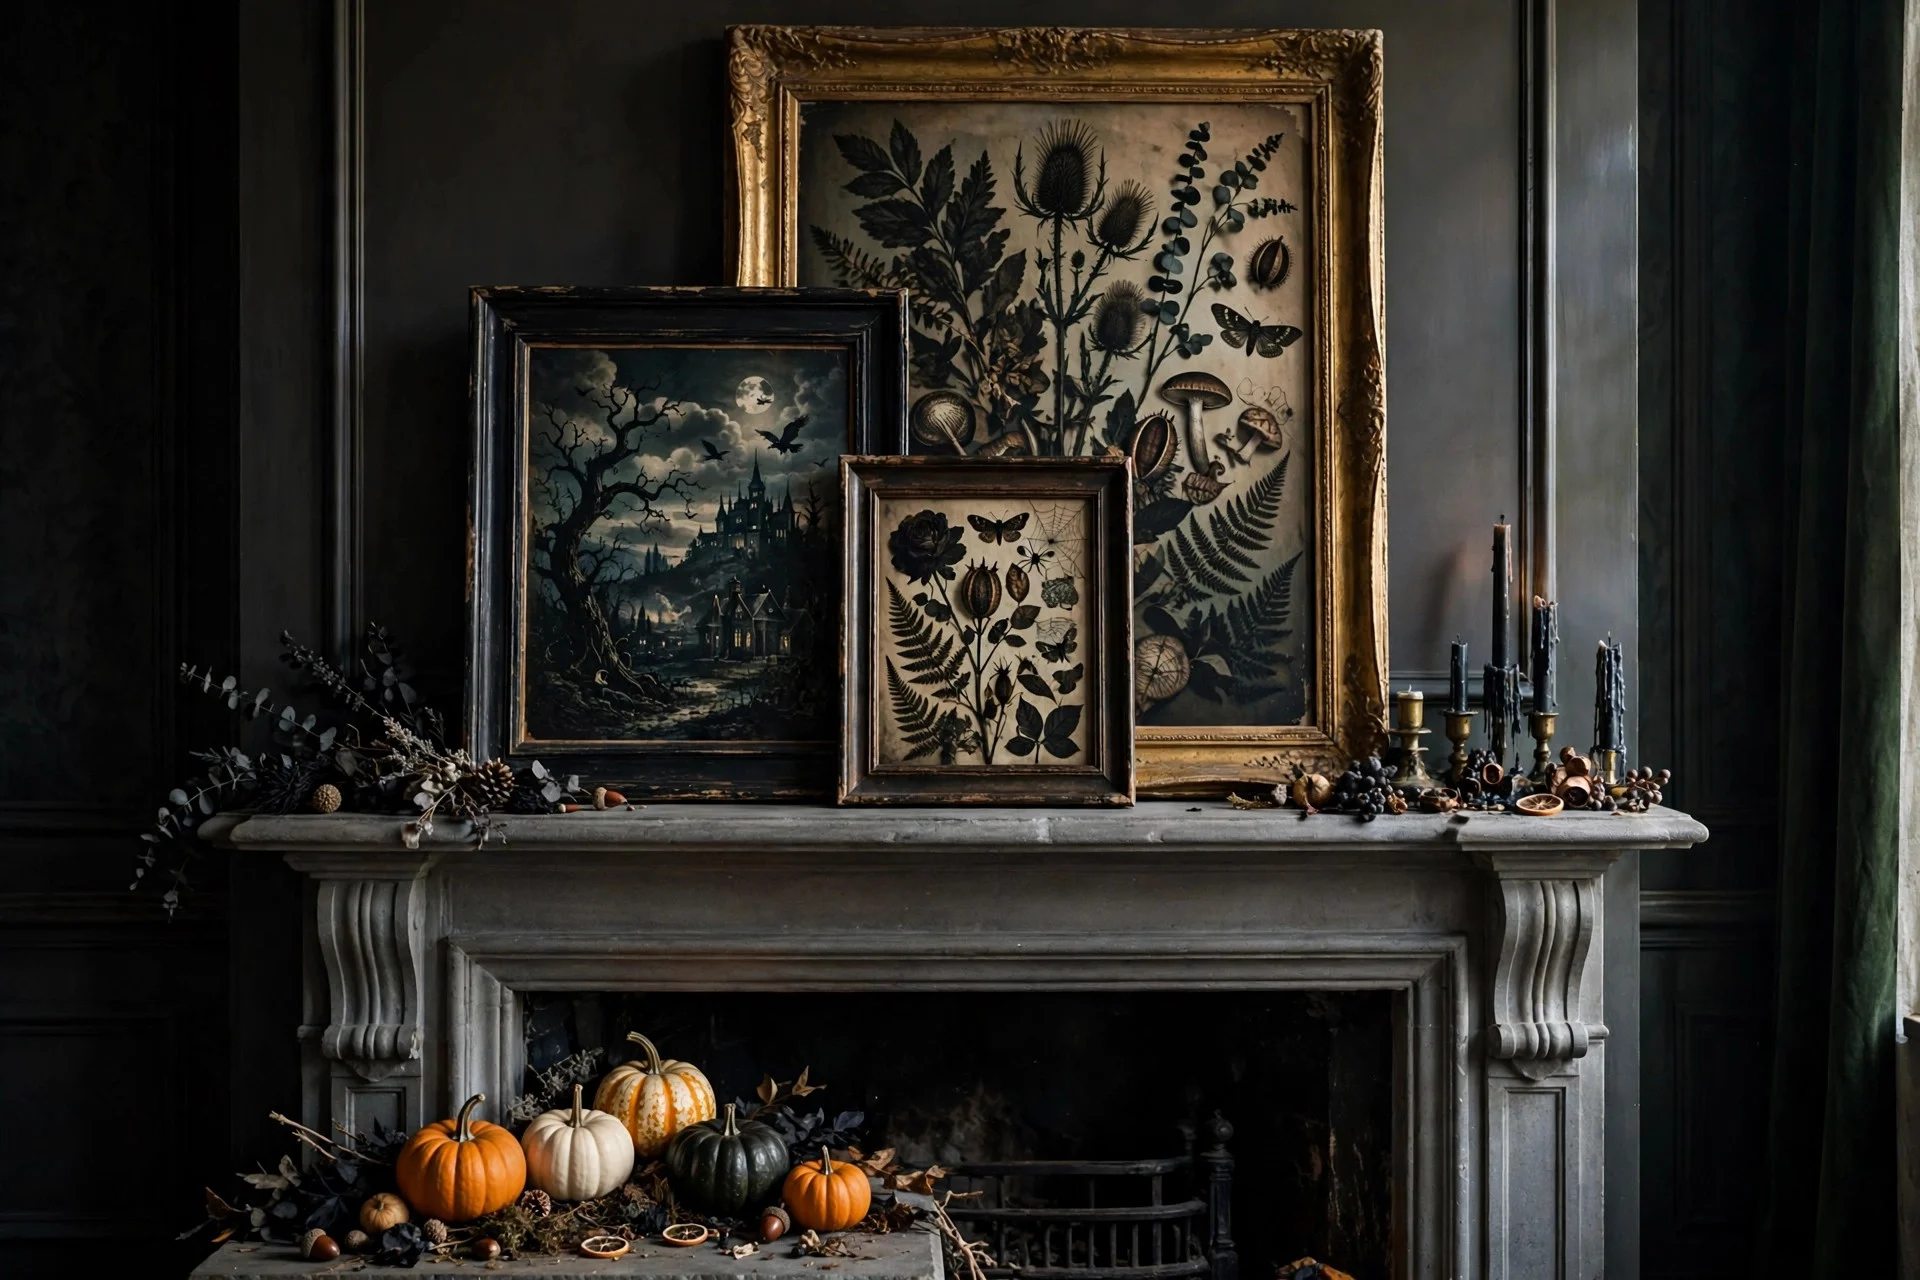
Framed art is the fastest way to give your mantel a collected, intentional feel. For Halloween, look for vintage-style prints: moody landscapes, botanical illustrations of nightshade plants, antique portraits, or old-fashioned Halloween postcard designs. Thrift stores and printable shops are full of options that cost a fraction of framed retail art.
Layer two or three frames of different sizes, leaning the largest against the wall and overlapping smaller ones in front. Mismatched frames — black wood, aged gold, dark bronze — add to the curated look as long as the art inside shares a moody color story.
Try this: Slip a Halloween printable into a frame you already own, swapping out your everyday art for the season instead of buying new frames.
7. Weave Warm Fairy Lights Through Everything
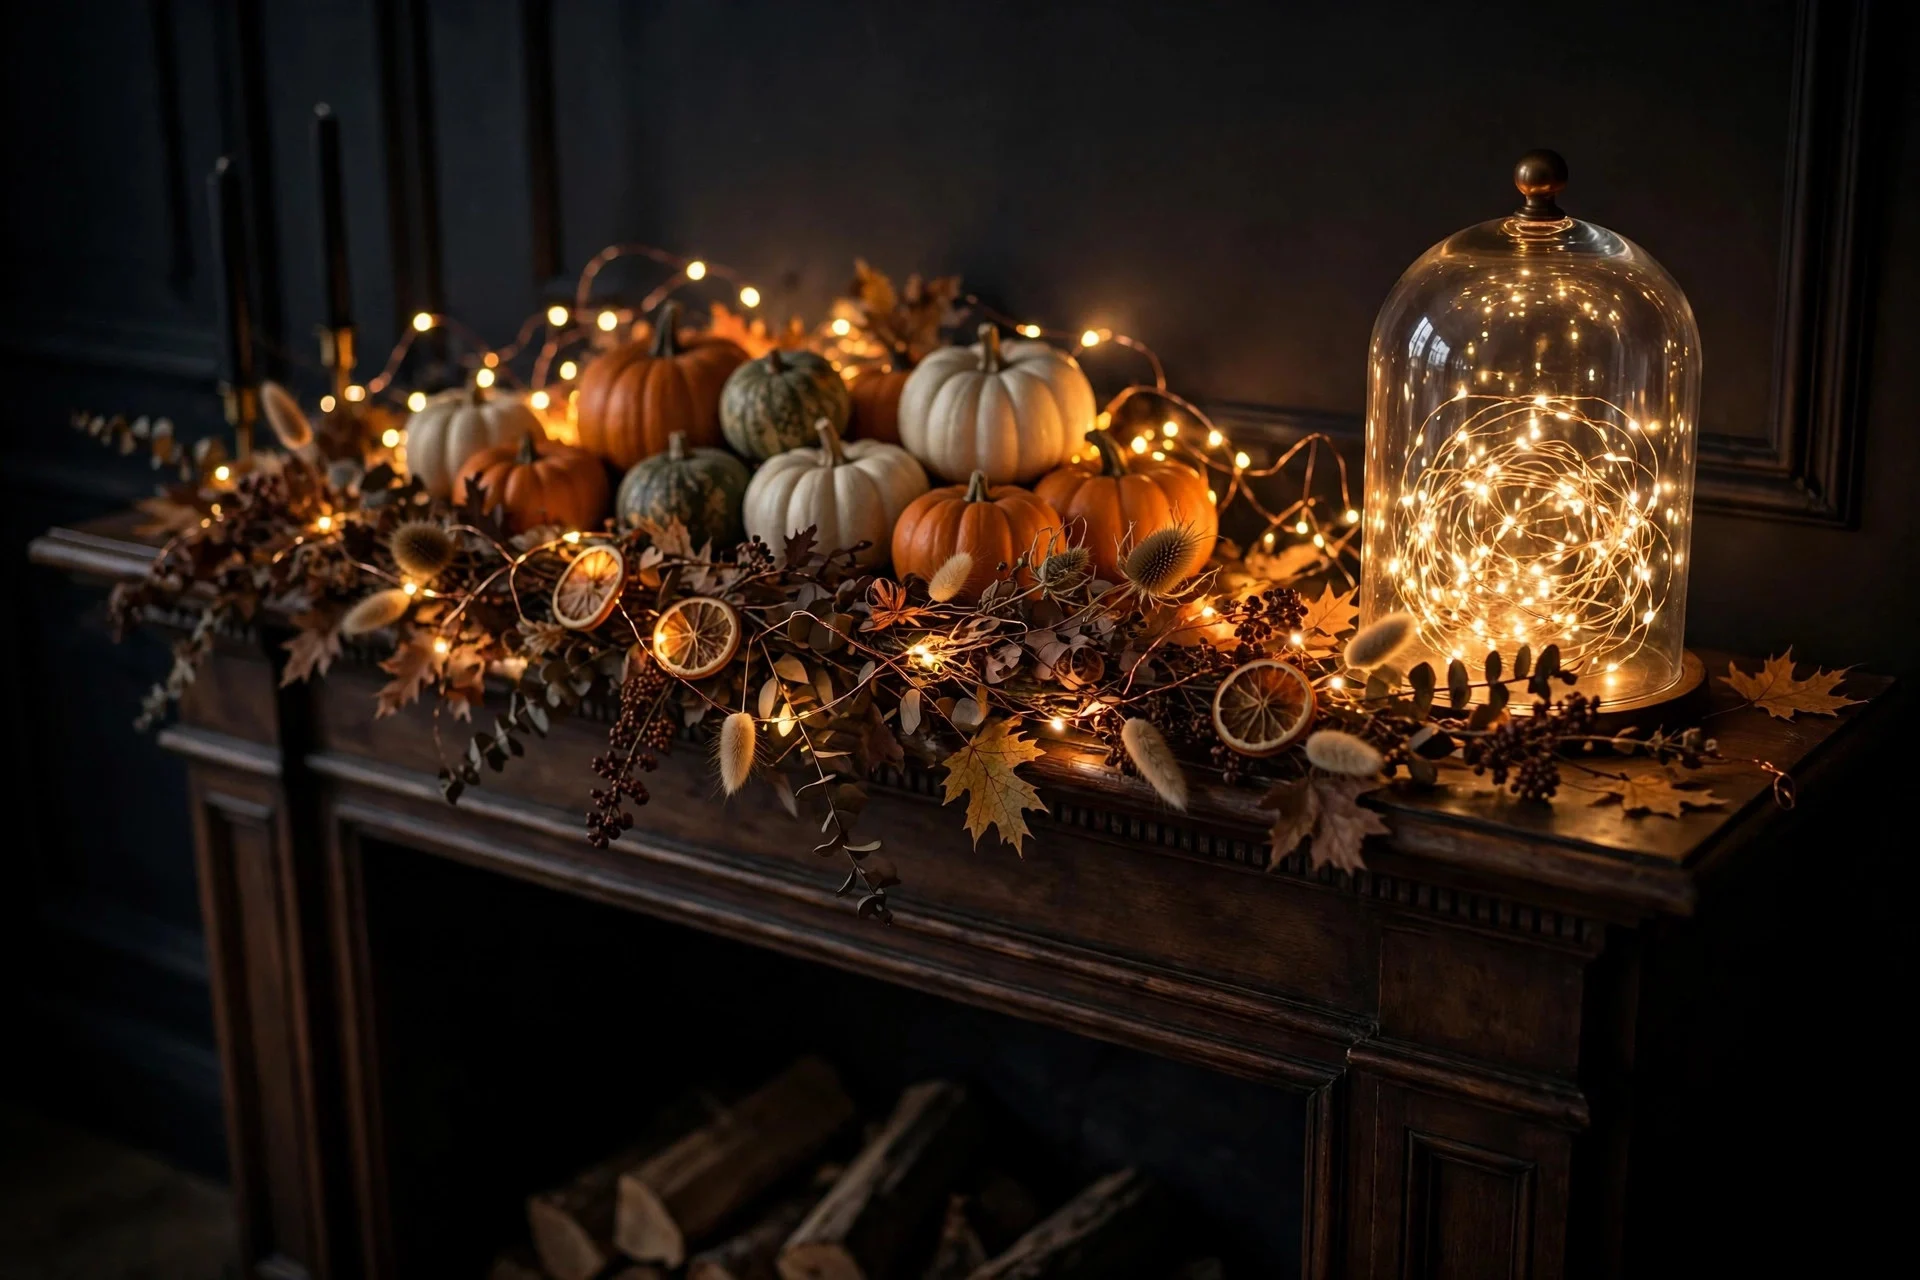
String lights are the glue that pulls a Halloween mantel together after dark. Choose warm-white fairy lights on thin copper or dark wire — they practically disappear during the day and cast a magical glow at night. Weave them through your garland, trail them behind pumpkin arrangements, and coil a strand inside a glass cloche or apothecary jar for a captured-fireflies effect.
Keep the lights on a timer so they switch on at dusk automatically. Avoid multicolor or orange-only strands if you are going for spooky-chic — warm white flatters every material and keeps the palette sophisticated.
Try this: Hide the battery pack behind the largest pumpkin or inside a lidded jar so no plastic disrupts the display.
8. Style an Apothecary Jar Collection
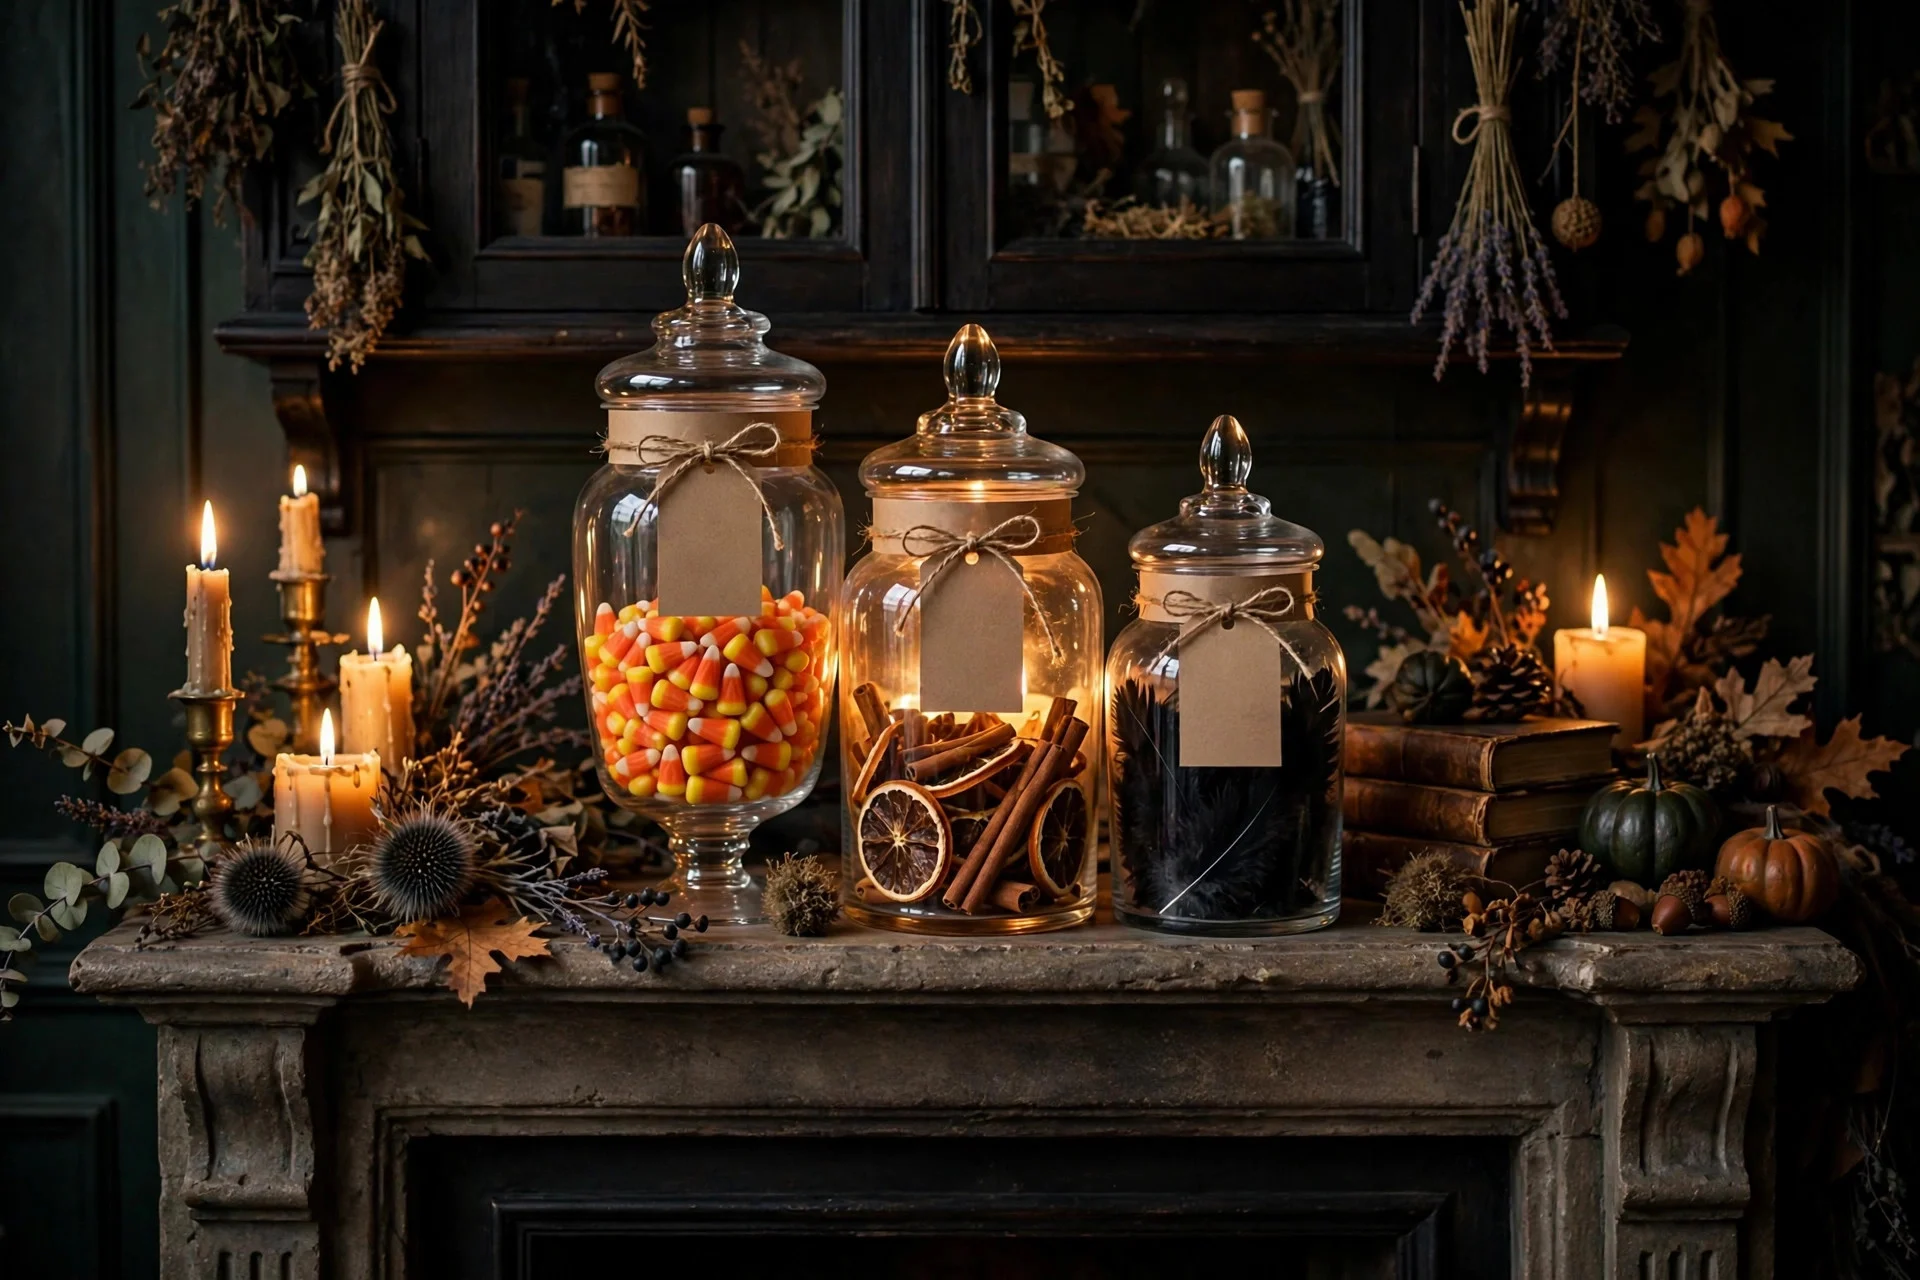
Glass apothecary jars filled with seasonal contents bring a witchy-cabinet feel to the mantel without any kitsch. Fill them with candy corn, black jelly beans, dried orange slices, cinnamon sticks, or faux potion ingredients like “dried bat wings” (black feathers) with handwritten labels. The glass catches the light beautifully and adds height variation for free.
Group jars in threes with mixed heights, and keep the contents simple — one ingredient per jar reads cleaner than a jumble. Handwritten kraft-paper labels tied with twine complete the old-world apothecary look.
Try this: Fill one jar with wrapped candy and leave it open for guests — decor that doubles as a treat station is always a hit.
9. Hang a Statement Mirror as the Backdrop
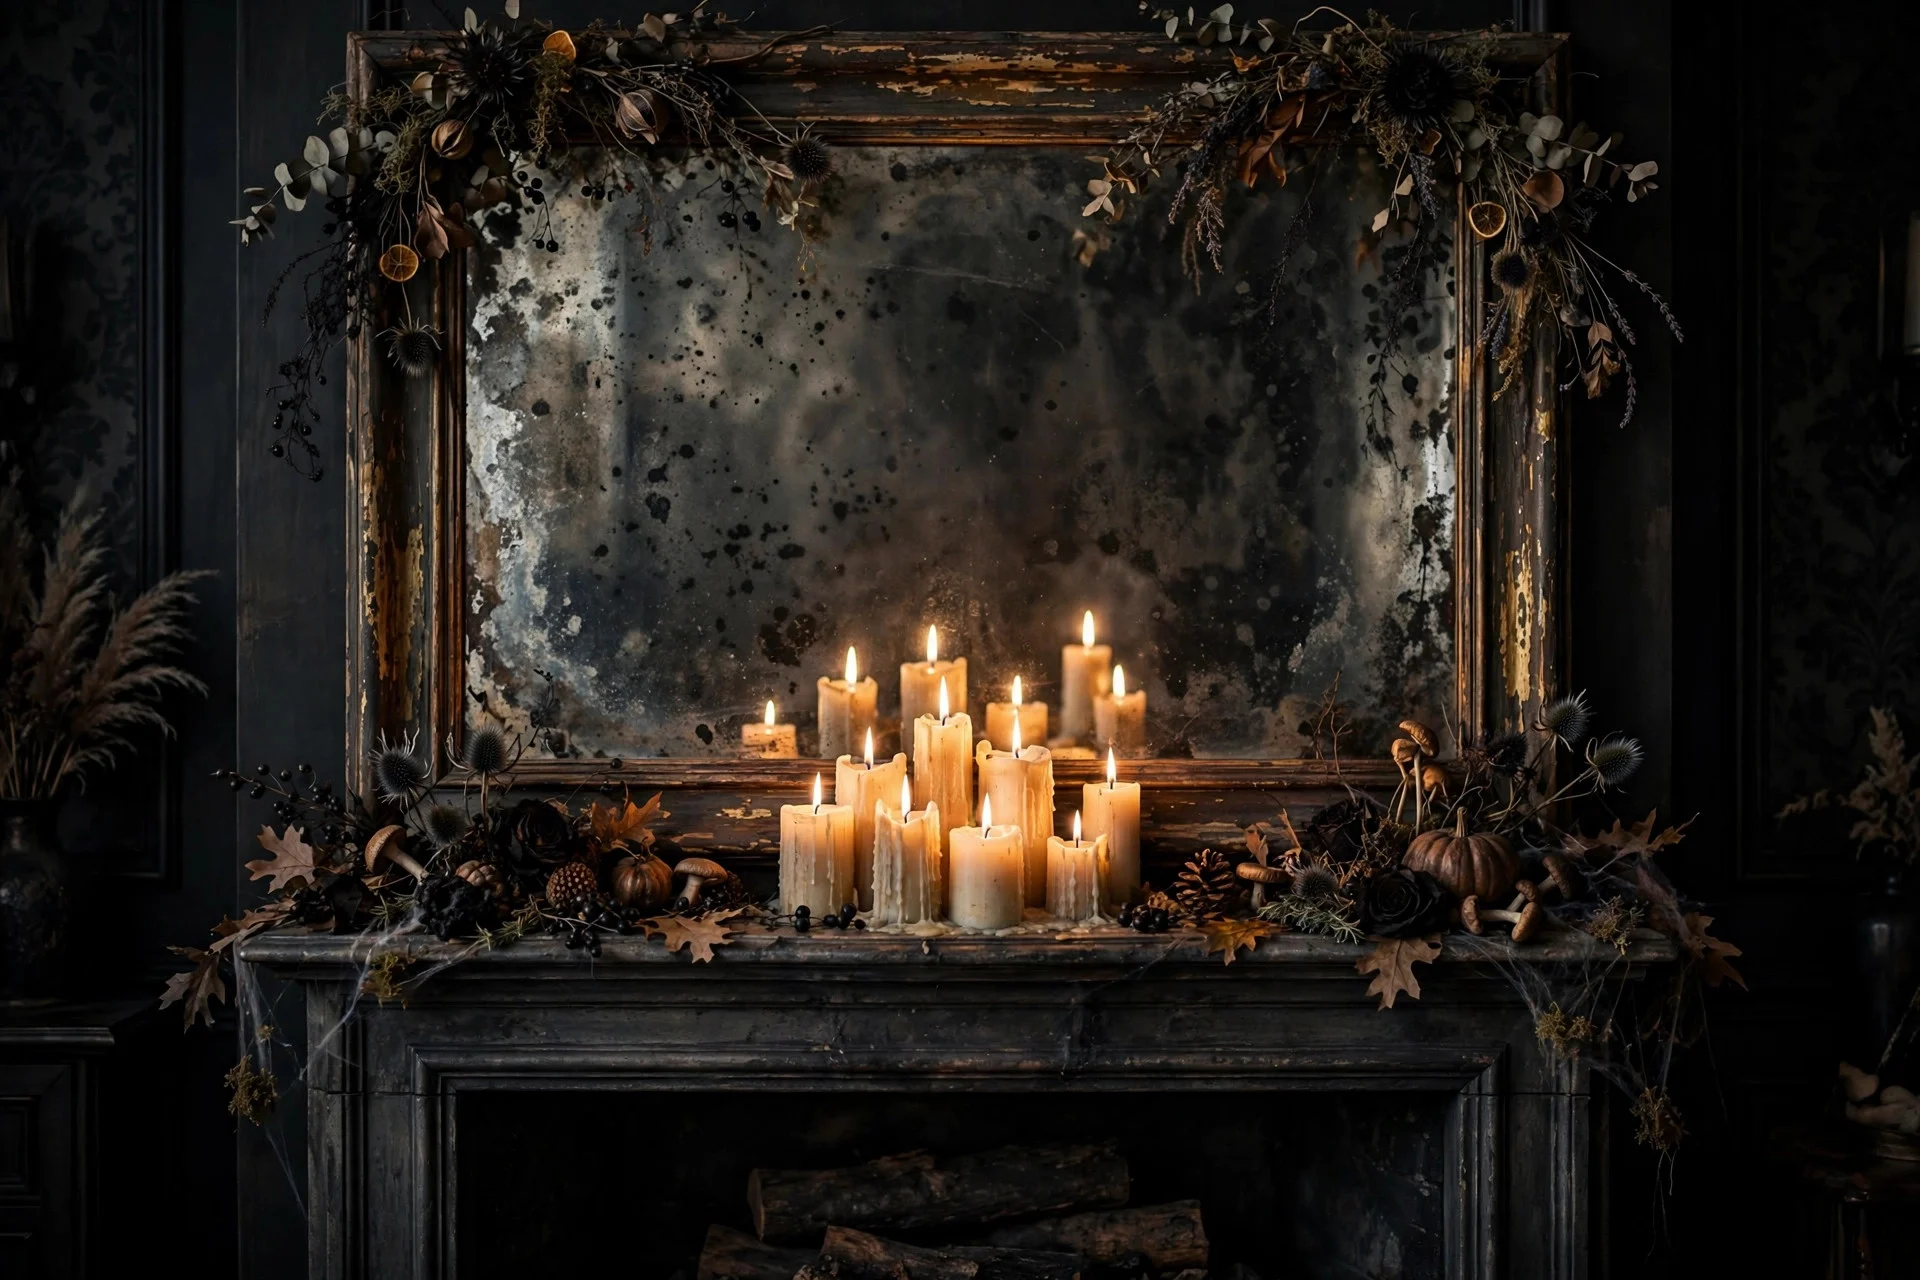
A large mirror above the mantel doubles your candlelight and makes the whole display feel deeper and more dramatic. For Halloween, dress the mirror itself: add removable window decals of bare branches, a light dusting of faux cobweb in one corner (kept minimal and intentional), or drape a small garland across the top frame. The reflection multiplies every flame and fairy light you have styled below.
An aged or antiqued mirror works especially well for Halloween, since the foxed glass already looks haunted. Just be sure the mirror is secured; mantel mirrors should always have a wall anchor, not just gravity.
Try this: Place your candle cluster directly in front of the mirror so each flame reflects — it instantly doubles the glow with zero extra candles.
10. Tie In Velvet Ribbon and Oversized Bows
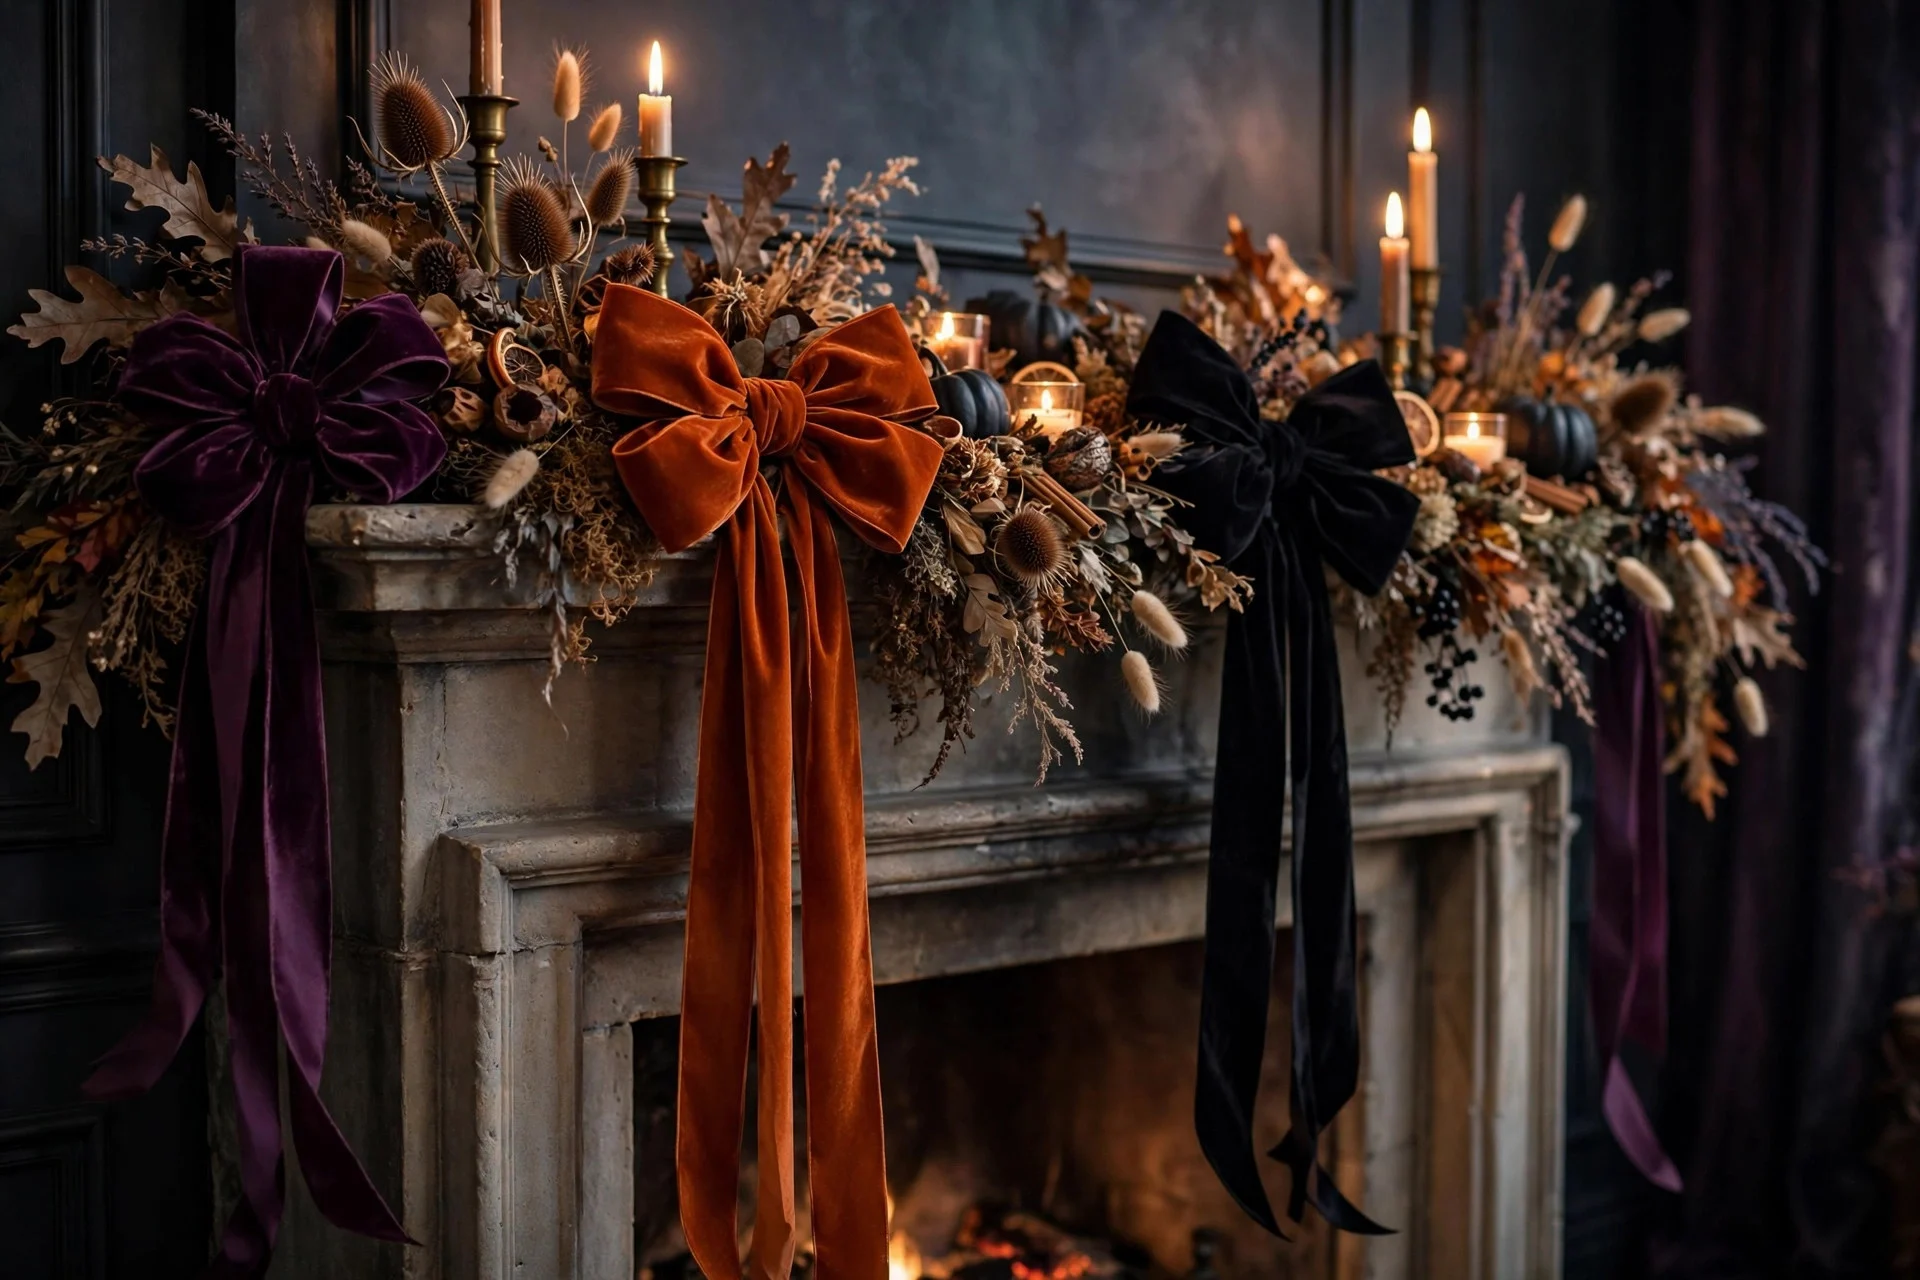
Velvet ribbon is the detail that makes a Halloween mantel look expensive. Tie oversized bows in black, burnt orange, or deep plum velvet and wire them into your garland at uneven intervals, letting the tails trail down the mantel front.
You can also tie ribbon around pillar candles, jar necks, and pumpkin stems for a cohesive thread that ties every element together — literally. Wide ribbon (at least two inches) photographs far better than thin, and wired ribbon holds its shape instead of flopping. This is one of the simplest upgrades with the biggest visual payoff.
Try this: Make a double-loop bow with long trailing ends and tuck it where your garland meets the mantel edge — it hides the mechanics and looks professionally styled.
11. Add One Sculptural Skull (Just One)
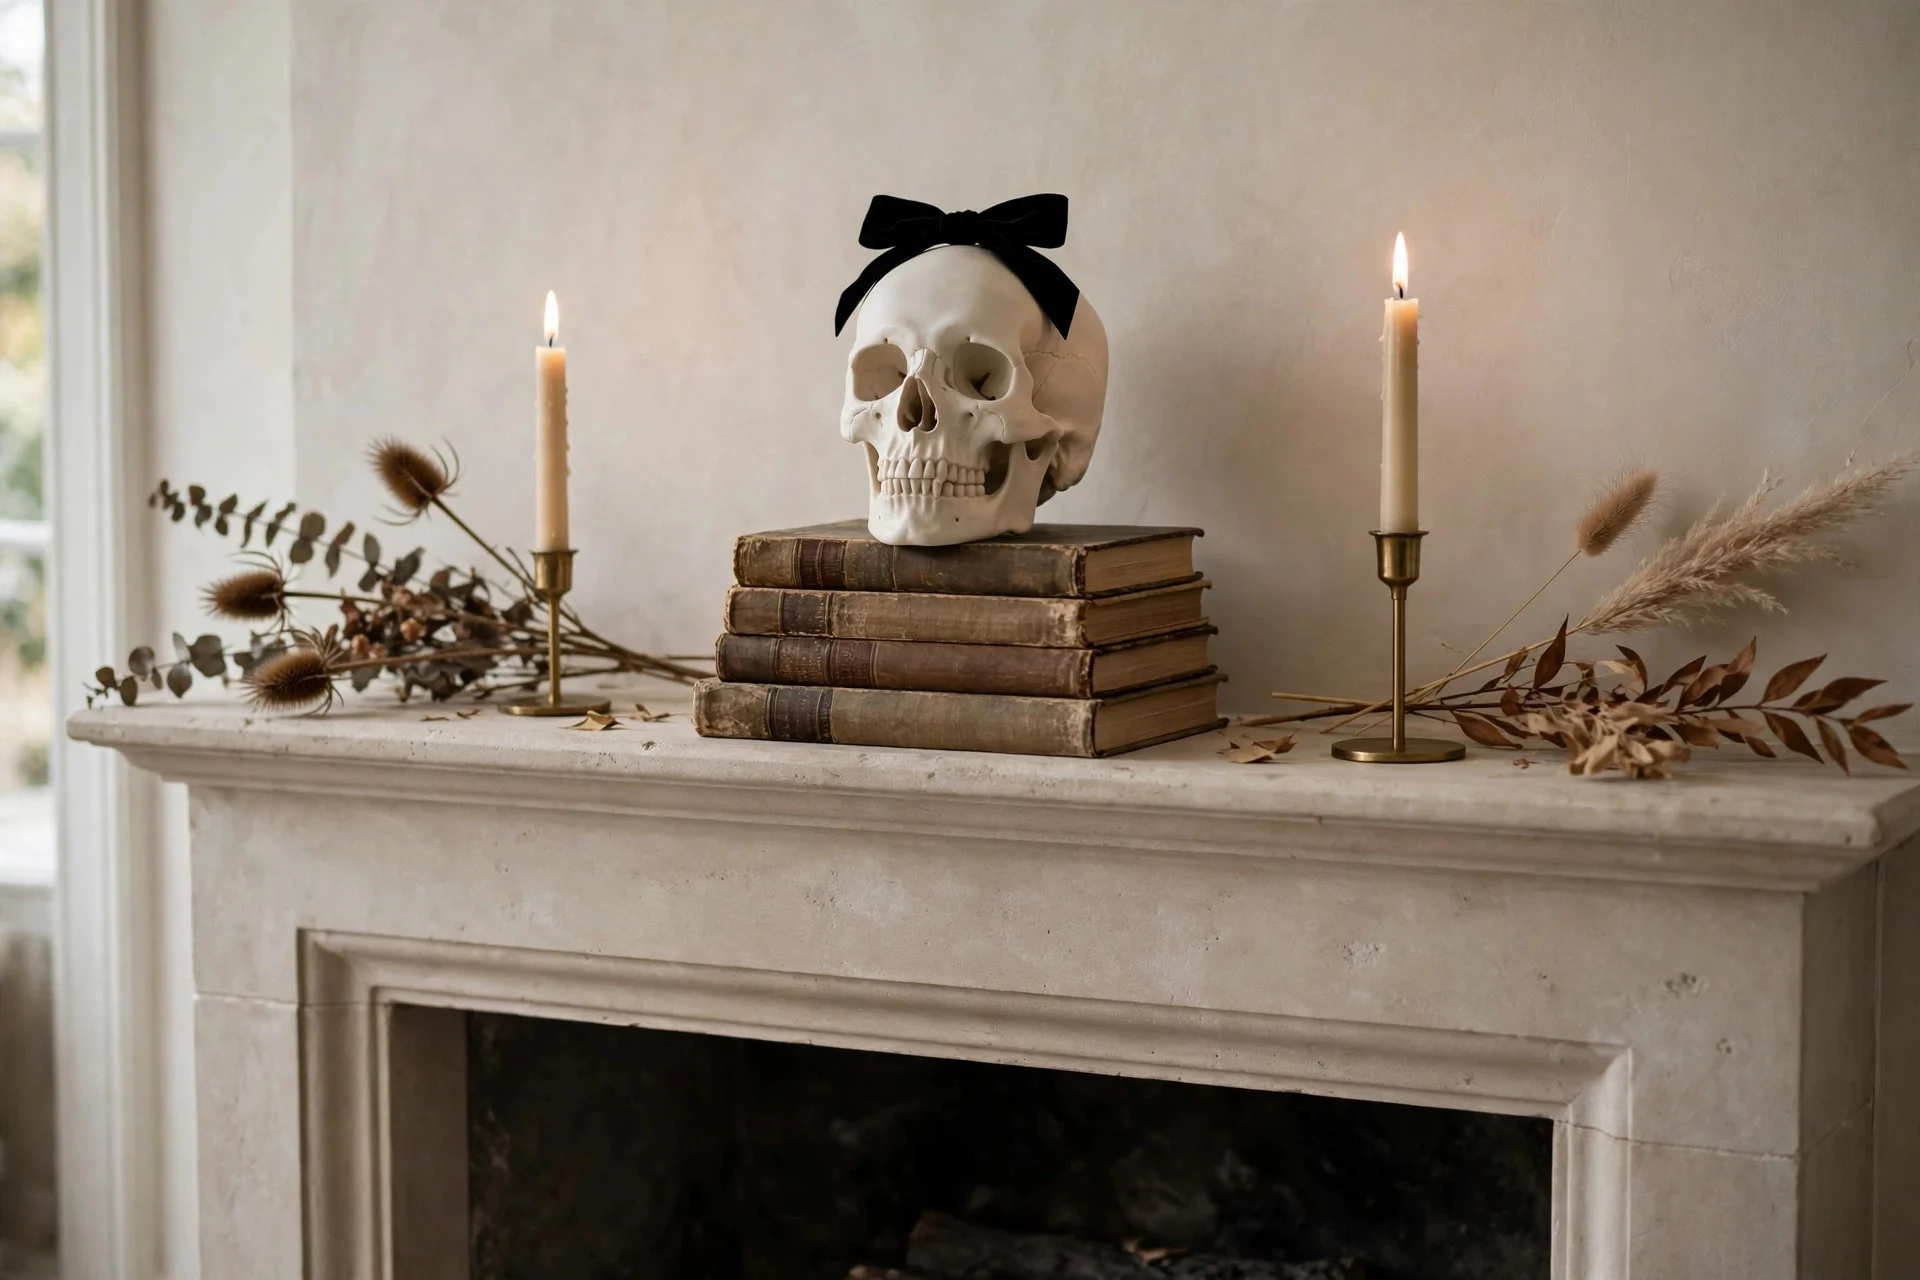
A single well-chosen skull adds instant Halloween credibility without tipping into haunted-house territory. Choose one in an interesting material — matte ceramic, aged stone, carved wood, or black glass — and treat it like art, not a prop. Place it on a stack of books, nestle it into the garland, or give it pride of place at the center of the mantel flanked by candles.
Ivory, charcoal, or weathered finishes look far more sophisticated than glossy white plastic. And resist the urge to add more — one skull is chic, five skulls is a theme park.
Try this: Top the skull with a small velvet bow or a sprig of dried flowers for a playful “dressed-up skeleton” moment that guests will love.
12. Master the Symmetrical Classic Layout
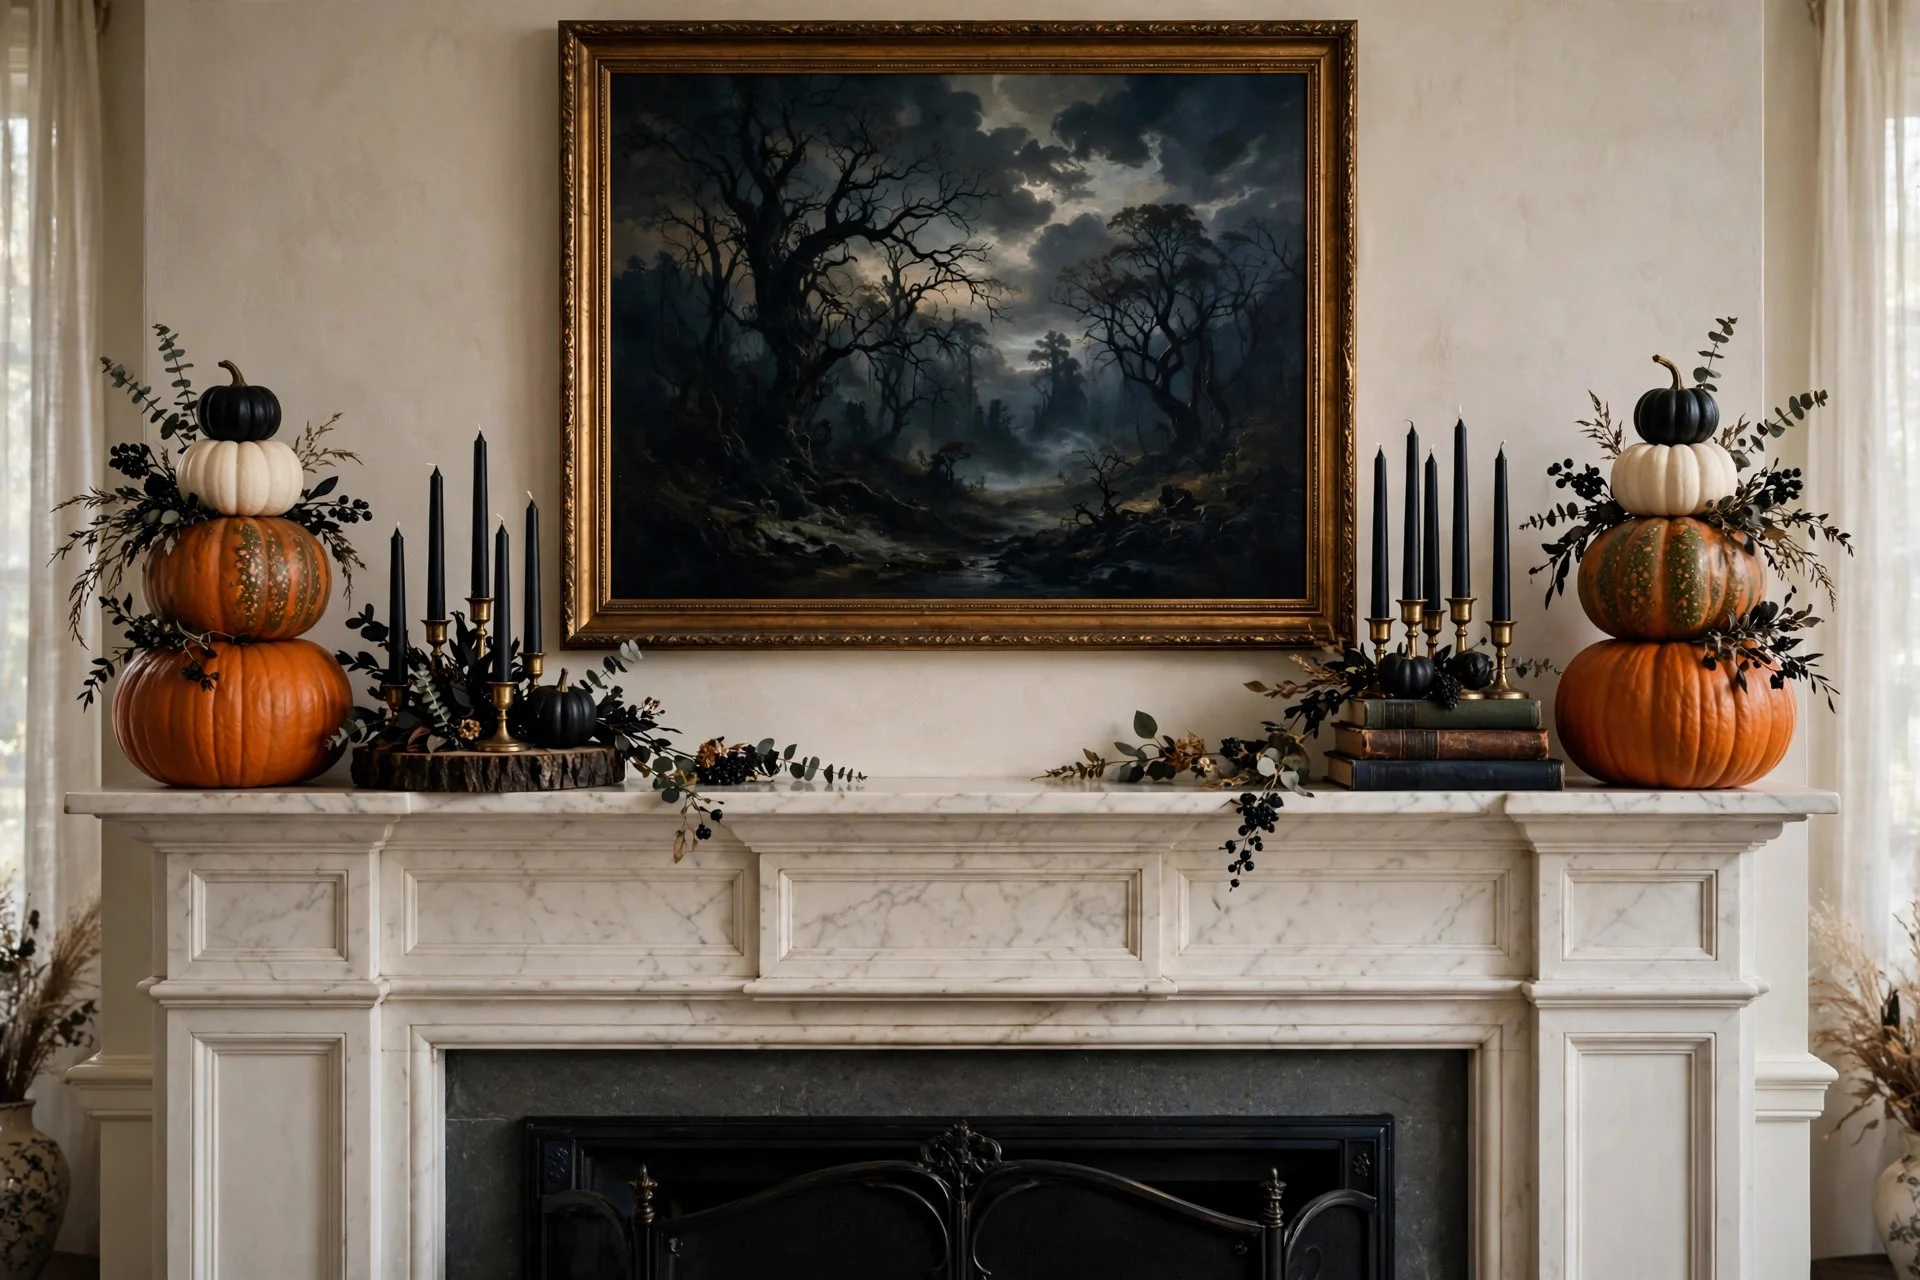
If asymmetry feels intimidating, a symmetrical layout never fails. The formula is simple: anchor the center with your tallest piece (framed art, a mirror, or a large wreath), then mirror matching elements on each side — two candle clusters, two pumpkin stacks, two lanterns. Symmetry reads formal and intentional, which is exactly the elegance that “spooky-chic” promises.
The key to keeping symmetry from looking stiff is varying textures within the mirrored pairs. Both sides might hold candles, but one side’s candles sit on a wood slice while the other’s rest on a stack of books.
Try this: Photograph your mantel and flip the image — if both halves look balanced in the photo, your symmetry is working.
13. Style a Small Mantel for Big Impact
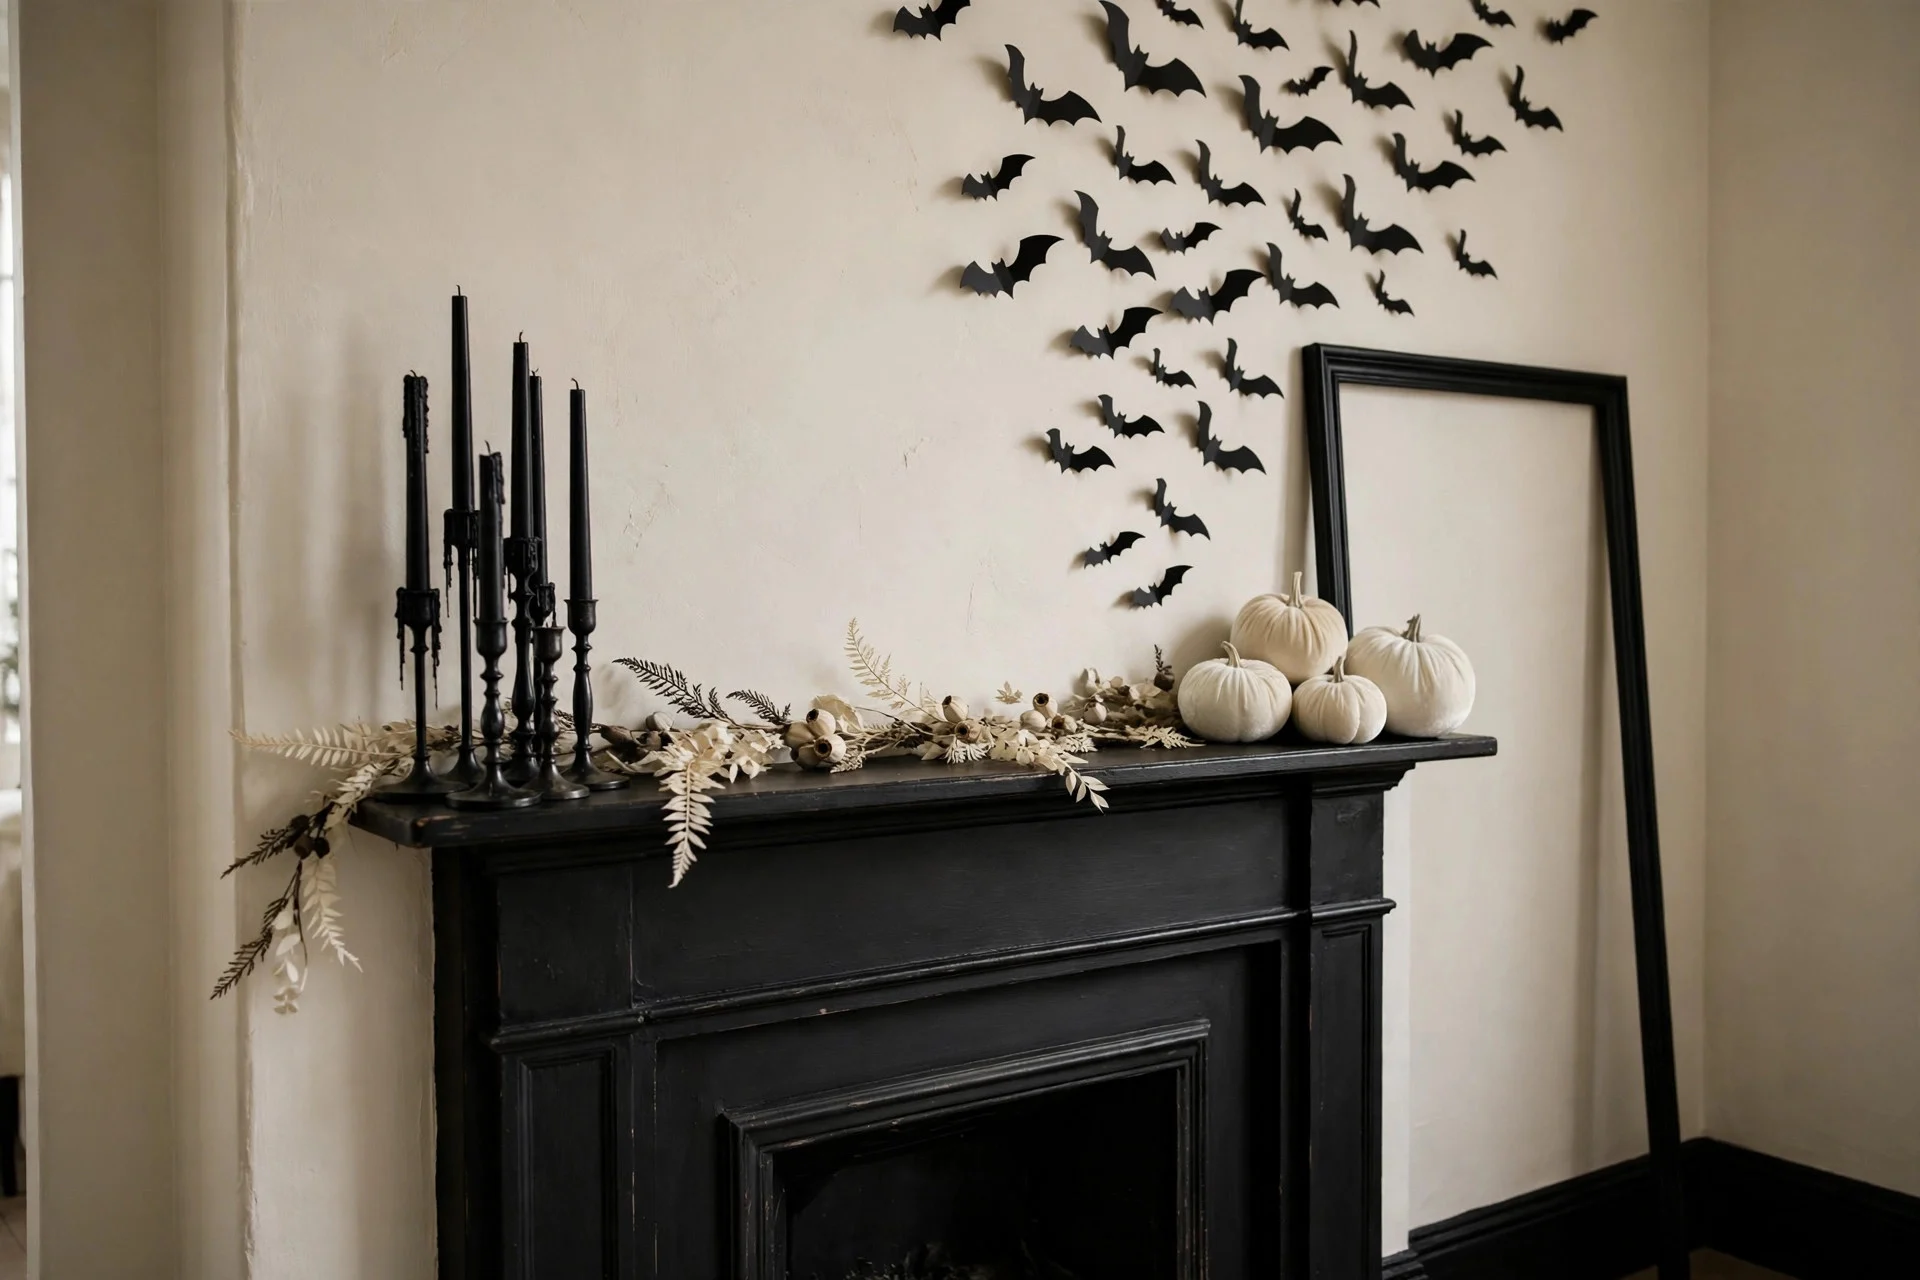
Narrow mantels and apartment fireplaces can’t hold a sprawling display, so edit ruthlessly: three elements, well-chosen, beat ten crowded ones. A slim garland across the back, one candle cluster on one end, and a small pumpkin grouping on the other is a complete look. Going vertical is your best friend — tall candlesticks and a leaning frame draw the eye up and make the mantel feel larger.
Keep pieces shallow so nothing crowds the front edge, and choose a tight two-color palette to avoid visual clutter.
Try this: Extend the display onto the wall above with your bat swarm or hanging art — vertical styling makes a petite mantel feel grand.
14. Create a Faux Mantel on a Console Table
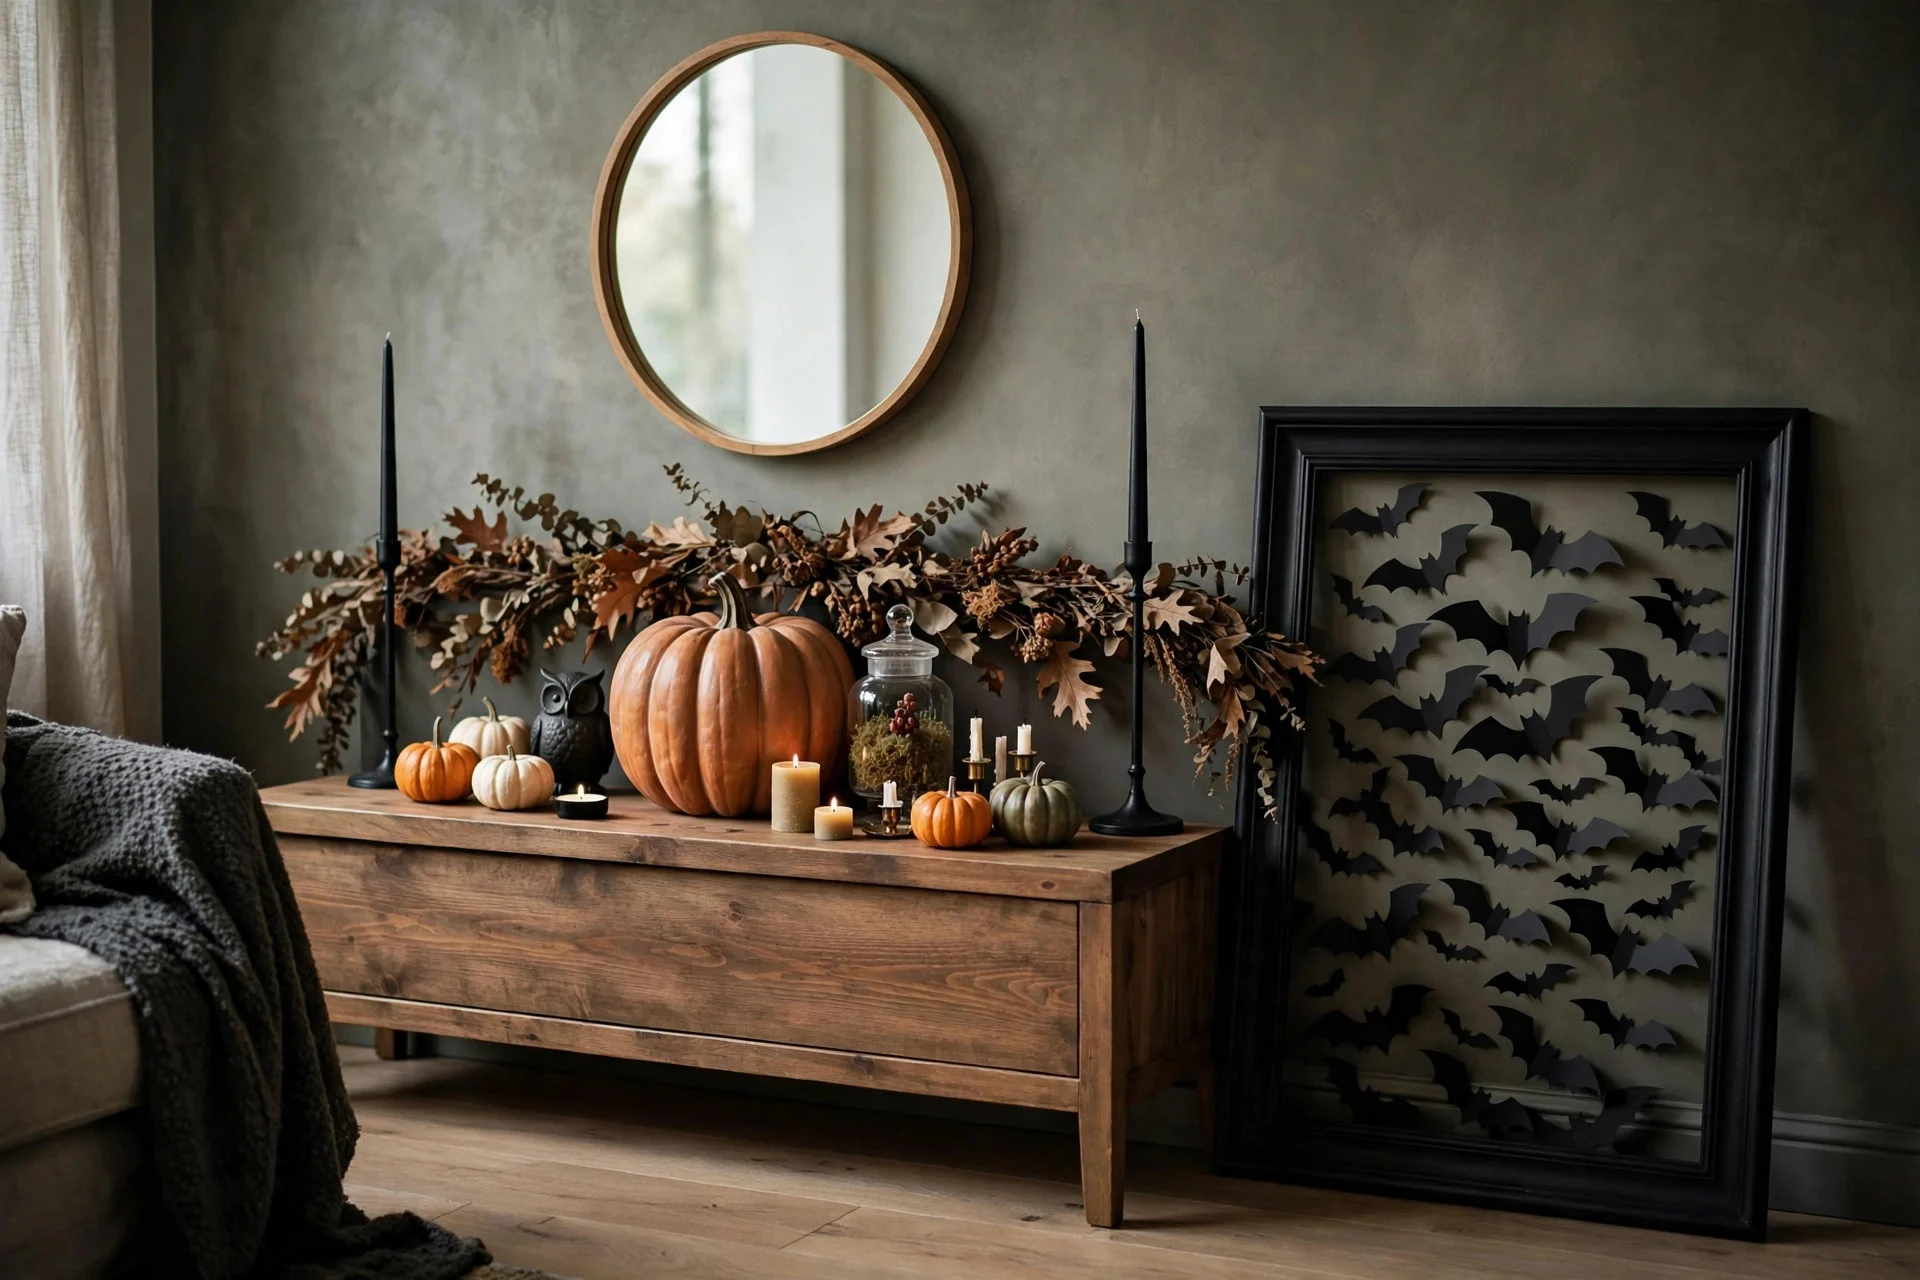
No fireplace? No problem. A console table, dresser, or even a bookshelf top can become a faux mantel with the same styling rules. The key is defining the “mantel zone”: hang art or a mirror on the wall above to create the backdrop a firebox would normally provide, then style the surface exactly as you would a real mantel — garland across the back, heights at the ends, statement piece in the center.
Because a console is deeper than most mantels, you have room to layer front-to-back: garland at the back edge, medium pieces in the middle, and small pumpkins or candles near the front.
Try this: Lean a large empty frame against the wall above the console and fill the opening with your bat swarm — it reads as “art” and anchors the whole display.
15. Commit to a Black-and-Gold Glam Color Story
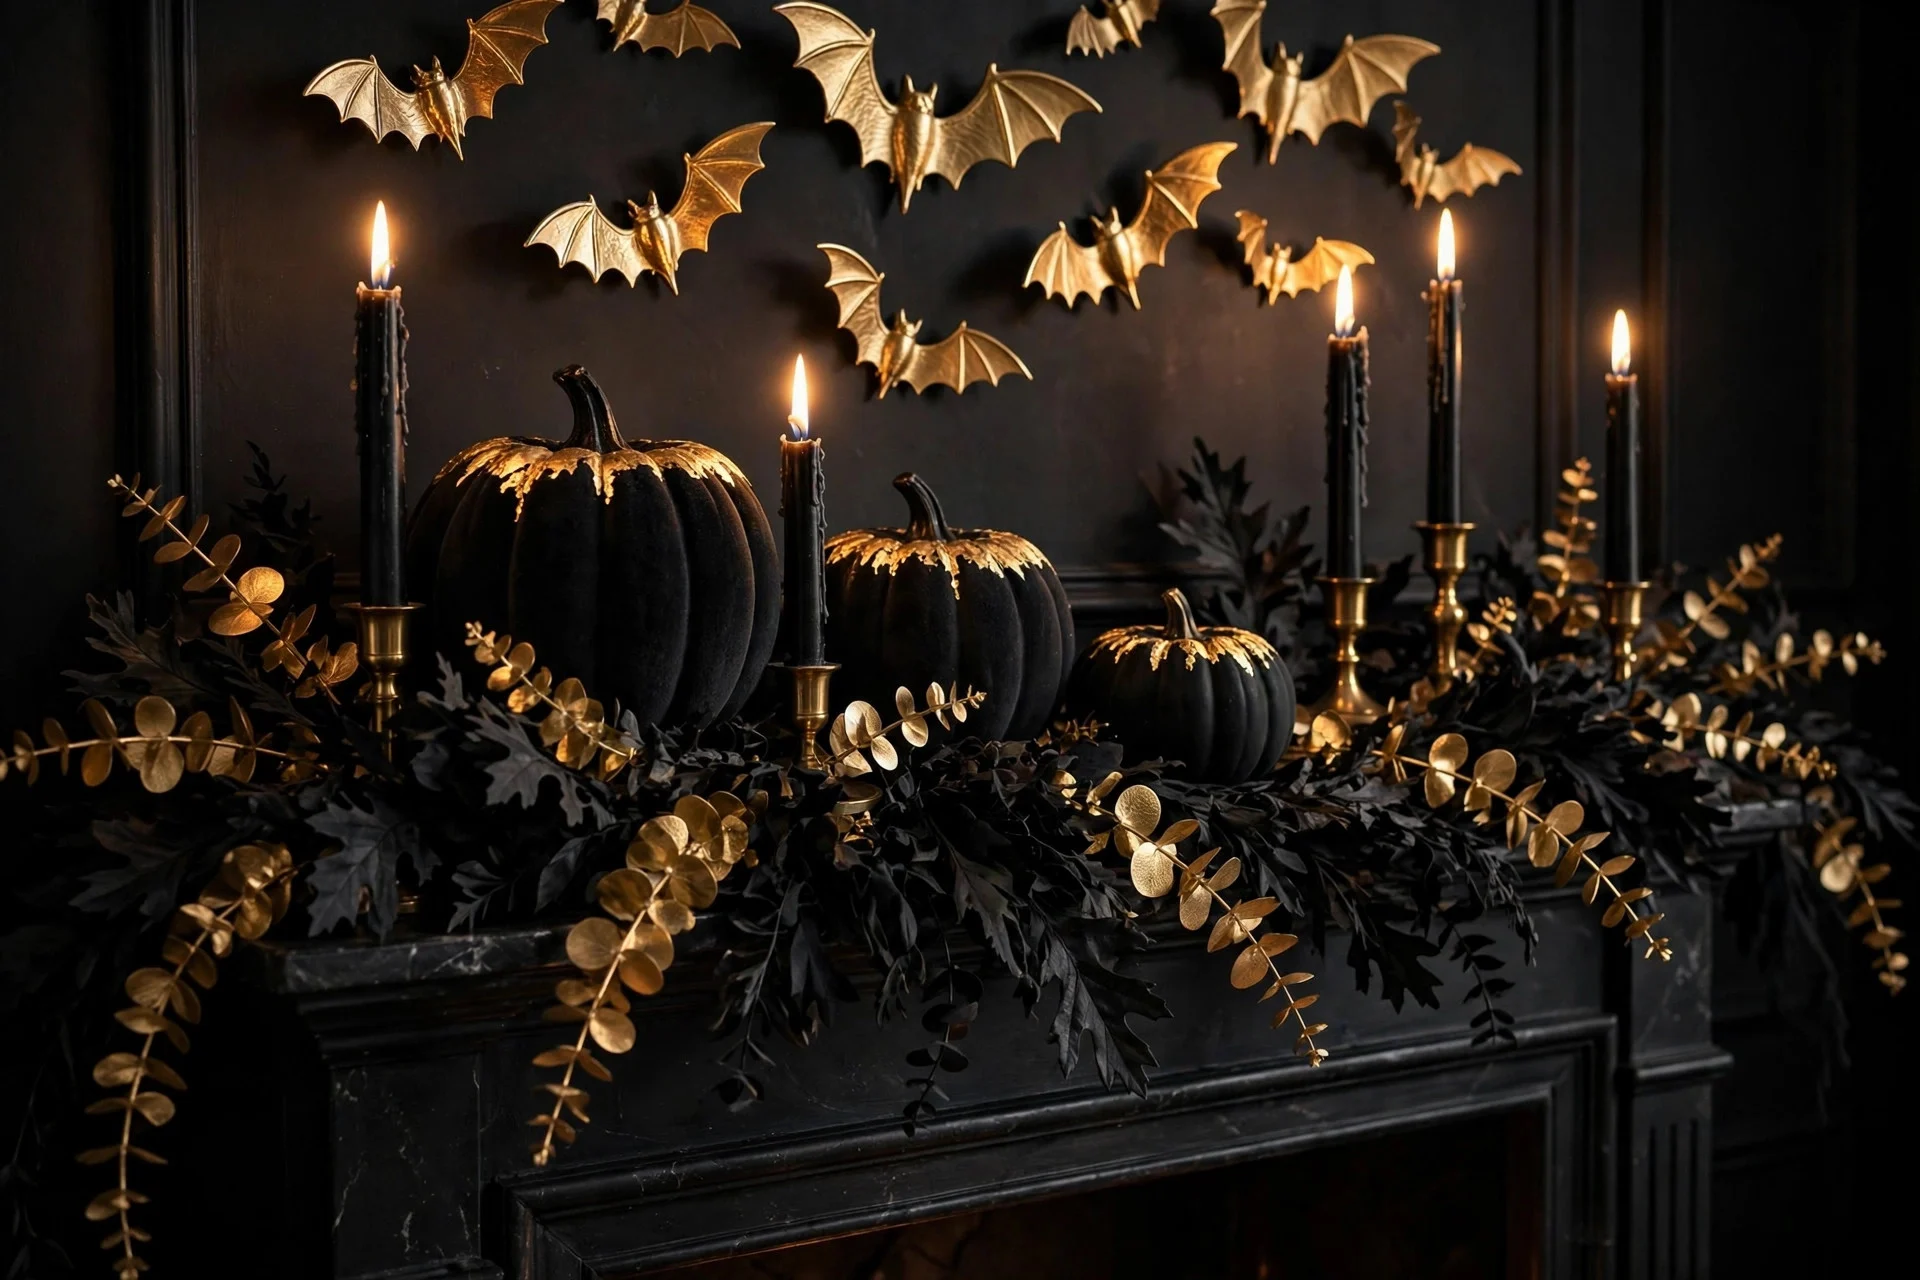
If you love Halloween but live for glam, build your entire mantel around black and gold. Black taper candles in brass holders, gold-rimmed black pumpkins, a black garland base with gold eucalyptus sprigs, and metallic gold bats on the wall above — the combination is moody, luxurious, and unmistakably festive. Metallics reflect candlelight beautifully, so this palette practically glows after dark.
Keep the ratio roughly two-thirds black to one-third gold so the metallics read as accents rather than competing for attention. Matte black pieces keep the look grounded while the gold adds celebration.
Try this: Spray-paint a few mini pumpkins matte black and add gold leaf to just one side of each — an easy DIY that looks boutique-bought.
Frequently Asked Questions
How do I decorate my mantel for Halloween without it looking cluttered?
Pick a tight color palette of two to three colors, then edit your display down to three layers: a back layer (garland or art), a middle layer (candles and jars), and a front layer (pumpkins and small accents). If you can’t see mantel surface between pieces, remove one item from each section.
What colors work best for a spooky-chic Halloween mantel?
Start with black and warm neutrals (cream, ivory, natural wood) as your base, then add one rich accent: burnt orange, deep plum, burgundy, or moss green. Metallics like brass and gold elevate the whole look instantly.
Are real candles safe on a Halloween mantel?
Real candles look best but keep them at least a foot away from dried garlands, cheesecloth, paper bats, and any fabric. Never leave burning candles unattended, and consider flameless LED candles for arrangements with lots of dried botanicals.
How early should I decorate my mantel for Halloween?
Late September to early October is ideal — a full month to enjoy the display and plenty of time to photograph it for Pinterest while Halloween searches peak. Build your base with autumn neutrals, Halloween-ify it with bats and darker accents in October, then strip those back for Thanksgiving in November.
Final Thoughts
A spooky-chic Halloween mantel isn’t about owning the most decorations — it’s about choosing a mood and committing to it. Start with your garland and candlelight, layer in pumpkins and one or two playful Halloween accents, and step back often to check the balance. Whether you go moody and symmetrical or wild and asymmetrical, the mantels people remember are the ones that feel personal, not perfect. Light the candles, pour something warm, and enjoy the glow — happy haunting.
