
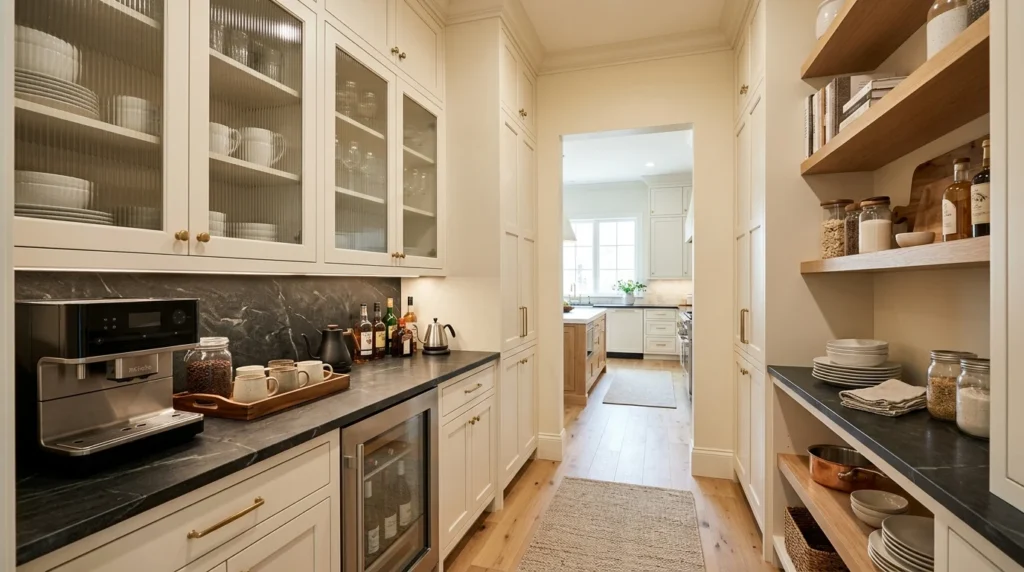
I didn’t grow up with the term “butler’s pantry,” and honestly, when I first heard my sister mention hers during her kitchen renovation, I pictured something almost comically old-fashioned, a narrow servants’ passage from a period drama rather than anything relevant to a modern home. It wasn’t until I actually stood in her finished space, a narrow room tucked between her kitchen and dining room, holding extra dishware, small appliances, and a hidden coffee station, that I understood exactly why this once old-fashioned feature has made such a strong comeback in modern home design. Watching how much that single room simplified her actual daily routine, keeping clutter and mess out of her main kitchen while still having everything close at hand, genuinely changed how I think about kitchen layout altogether.
If you’re considering adding or renovating a butler’s pantry of your own, here are 26 ideas, each explained in detail, based on what I saw work beautifully in my sister’s space and what I’ve researched and observed in other modern homes since.
1. Define the Space’s Primary Purpose First
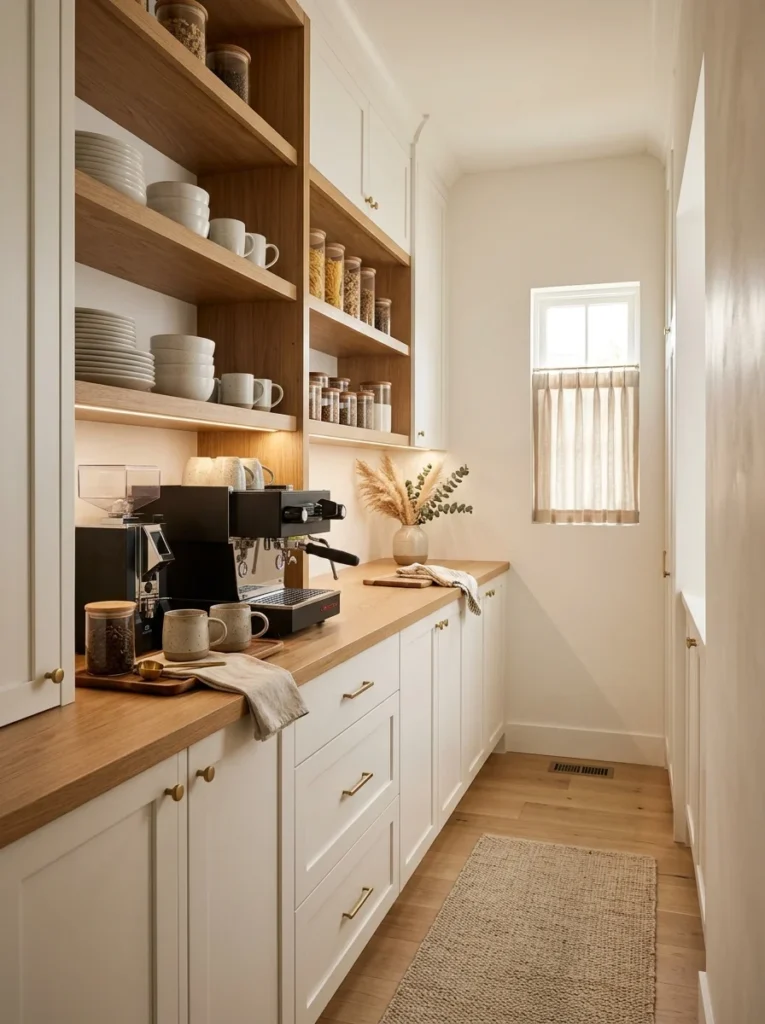
Before choosing a single cabinet finish or countertop material, deciding what your butler’s pantry is actually going to be used for shapes every other decision that follows, and this is the step my sister spent the most time on before her contractor ever started demolition. Some butler’s pantries function primarily as overflow storage for dishware and small appliances that don’t fit in the main kitchen, while others become a dedicated coffee and beverage station, a wrapping and gift station, or even a small home office nook tucked into unused space. My sister’s pantry ended up being a hybrid, primarily extra storage and a coffee station, but she deliberately avoided trying to make it do everything at once, which would have resulted in a cramped, poorly functioning space rather than a genuinely useful one. I’d recommend making a simple list of your top two or three actual daily frustrations with your current kitchen, whether that’s counter clutter, insufficient storage, or lack of a dedicated prep space, and letting that list guide your pantry’s primary function rather than designing based purely on aesthetics you’ve seen in photos.
2. Choose a Layout That Fits Your Available Space
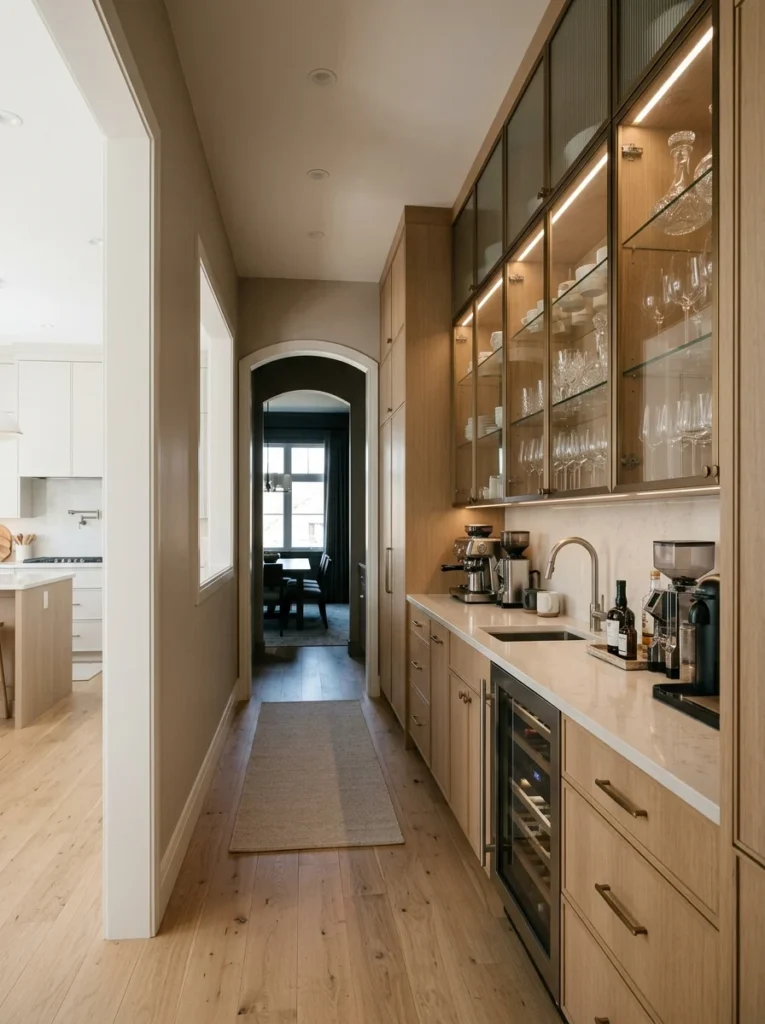
Butler’s pantries typically fall into a few common layout categories, a single-wall galley style, a U-shaped configuration if the space allows, or a narrow walk-through passage connecting the kitchen and dining room, and the layout you choose should really be dictated by your available square footage rather than forced to match whatever configuration looks best in inspiration photos. My sister’s space is a narrow single-wall layout, since the room itself is only about four feet wide, and rather than fighting that constraint, she designed around it with floor-to-ceiling cabinetry along the one available wall. A U-shaped layout, if you have the square footage for it, offers considerably more counter and storage space but requires a room with enough width that a person can comfortably work between cabinets on multiple sides without feeling cramped. I’d recommend measuring your available space carefully and researching layout options specifically suited to those dimensions, rather than assuming any particular configuration will automatically work regardless of your room’s actual size and shape.
3. Install Floor-to-Ceiling Cabinetry
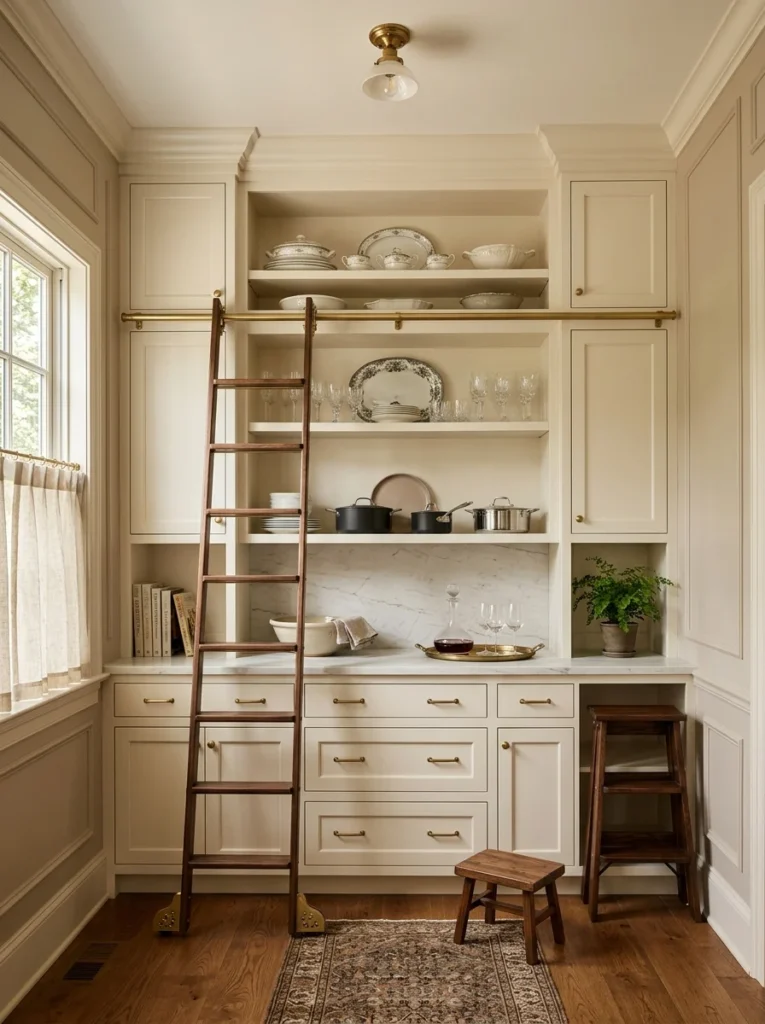
Because butler’s pantries tend to be relatively small rooms, maximizing every inch of vertical storage through floor-to-ceiling cabinetry makes a significant difference in overall storage capacity compared to standard-height upper cabinets that leave several feet of wasted space near the ceiling. My sister’s cabinets extend completely to the ceiling, with a small rolling step stool tucked in a corner specifically for accessing the highest shelves where she stores items used only a few times a year, holiday serving dishes, extra vases, and seasonal entertaining pieces. This approach requires slightly more planning around exactly what gets stored where, since the highest shelves are genuinely less convenient to access regularly, making them best suited for infrequently used items rather than daily essentials. I’d recommend organizing your floor-to-ceiling storage with the most frequently accessed items at eye level and within easy reach, then working outward from there, both upward and downward, toward increasingly infrequent-use items as the shelves become less convenient to reach.
4. Add Glass-Front Cabinet Doors
Glass-front upper cabinets, whether clear, seeded, or fluted glass, let you display curated dishware and glassware while still keeping items protected from dust behind an actual door, striking a balance between fully open shelving and completely closed, opaque storage. My sister used fluted glass on her upper cabinets specifically because the texture obscures enough detail to keep things looking tidy even when the shelves inside aren’t perfectly organized, while still allowing enough light and visual interest through that the cabinets don’t feel like a solid, closed-off wall. This works particularly well in a butler’s pantry specifically because the room typically holds your nicer, more curated serving pieces, items you’re proud to display, rather than everyday, mismatched kitchen items better suited to fully opaque storage. I’d recommend reserving glass-front cabinets for your most visually appealing dishware and reserving solid cabinet doors elsewhere in the same room for less attractive but still necessary storage, like small appliances or bulk pantry goods that don’t need to be on display.
5. Incorporate a Dedicated Coffee Station
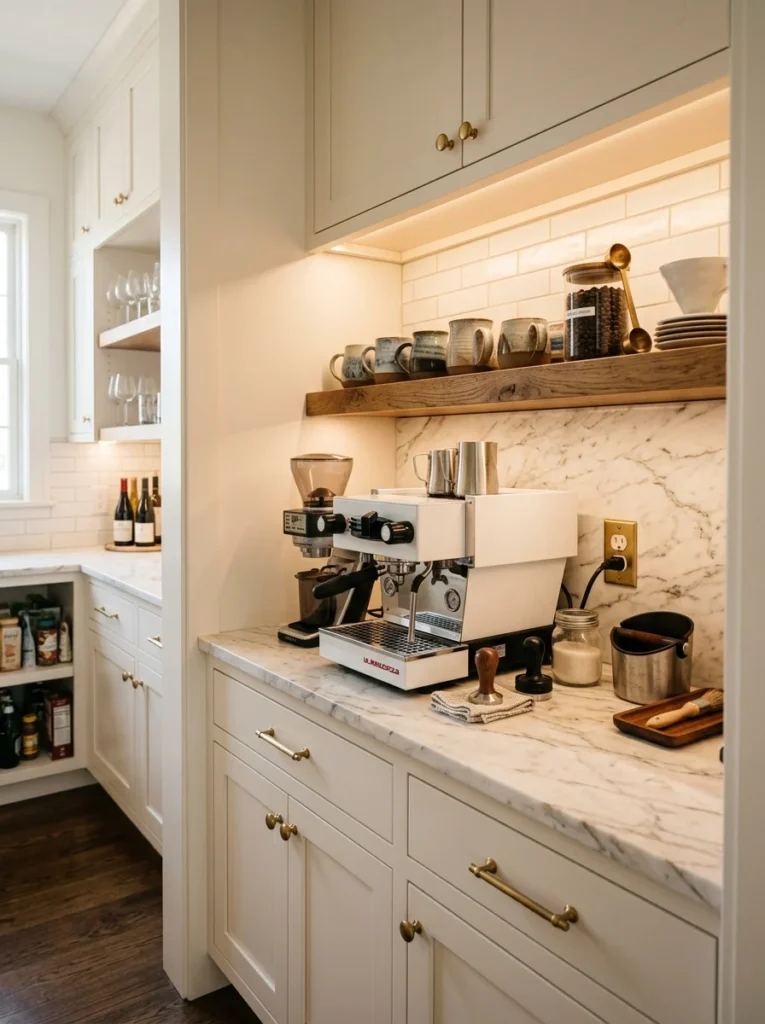
A built-in coffee station, complete with a designated spot for the coffee maker, a small drawer for filters and accessories, and open shelving for mugs and coffee beans, has become one of the most popular butler’s pantry features in modern homes, and it’s genuinely the section of my sister’s pantry that gets used the most every single day. Keeping this entire routine, from grinding beans to brewing to grabbing a mug, contained within the pantry rather than spread across the main kitchen counter keeps that daily clutter out of the primary cooking and entertaining space. I’d recommend positioning the coffee station near an outlet specifically dedicated to that appliance, along with a small water source or at least easy access to filling water nearby, to make the whole daily routine as frictionless as possible. This is one of those features that seems like a minor convenience on paper but genuinely changes daily habits once it’s actually built and being used consistently, based purely on how much my sister has mentioned enjoying this specific part of her renovation.
6. Add a Beverage Refrigerator or Wine Cooler
A slim, undercounter beverage refrigerator or wine cooler built into your butler’s pantry cabinetry keeps drinks cold and accessible without taking up valuable space in your main kitchen refrigerator, particularly useful for entertaining when you need quick access to chilled beverages without repeatedly opening your primary fridge in front of guests. My sister installed a dual-zone wine cooler specifically because she and her husband have different preferences for red versus white wine storage temperatures, and having both zones available in one appliance meant she didn’t need two separate units taking up additional space. This addition works particularly well in a butler’s pantry positioned between the kitchen and dining room, since it keeps beverages genuinely close to where they’re actually being served during meals and gatherings, cutting down on the number of trips back and forth to the main kitchen. I’d recommend measuring your available cabinet space carefully before purchasing, since undercounter refrigeration units come in a range of widths, and choosing one that fits your specific layout without requiring cabinet modifications will simplify the installation process considerably.
7. Choose a Durable, Statement Countertop
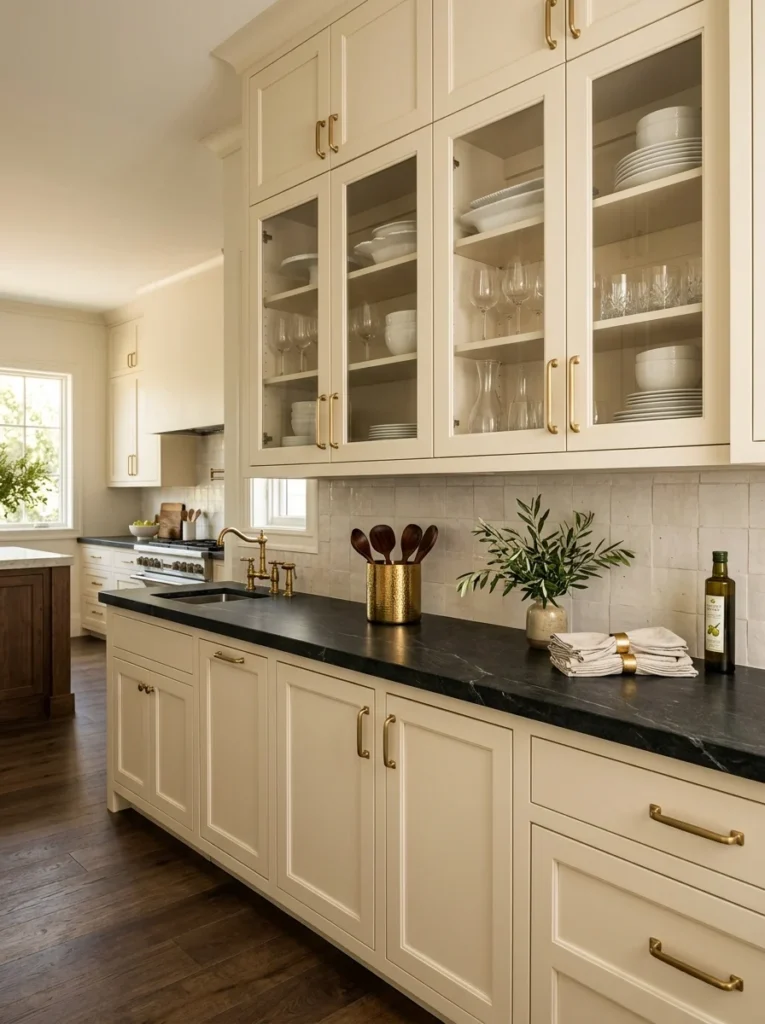
Because a butler’s pantry often handles genuine prep work, staging dishes before serving, mixing drinks, unpacking groceries, the countertop material needs to balance durability with the visual impact you want this smaller, more intimate space to have. My sister chose a bold, dark soapstone countertop, a deliberate contrast to her lighter main kitchen counters, which gives the pantry its own distinct visual identity while still handling the daily wear of actual use without much concern. This is actually a good opportunity to experiment with a more dramatic material or color than you might choose for your primary kitchen, since a smaller countertop area in a secondary space represents less financial risk and commitment than covering your entire main kitchen in the same bold choice. I’d recommend selecting a material that can handle regular contact with wine, coffee, and general food prep without excessive staining concern, natural stone with a proper sealant, quartz, or a durable laminate are all reasonable options depending on your budget and the specific look you’re going for in this secondary space.
8. Install Open Shelving for Everyday Access Items
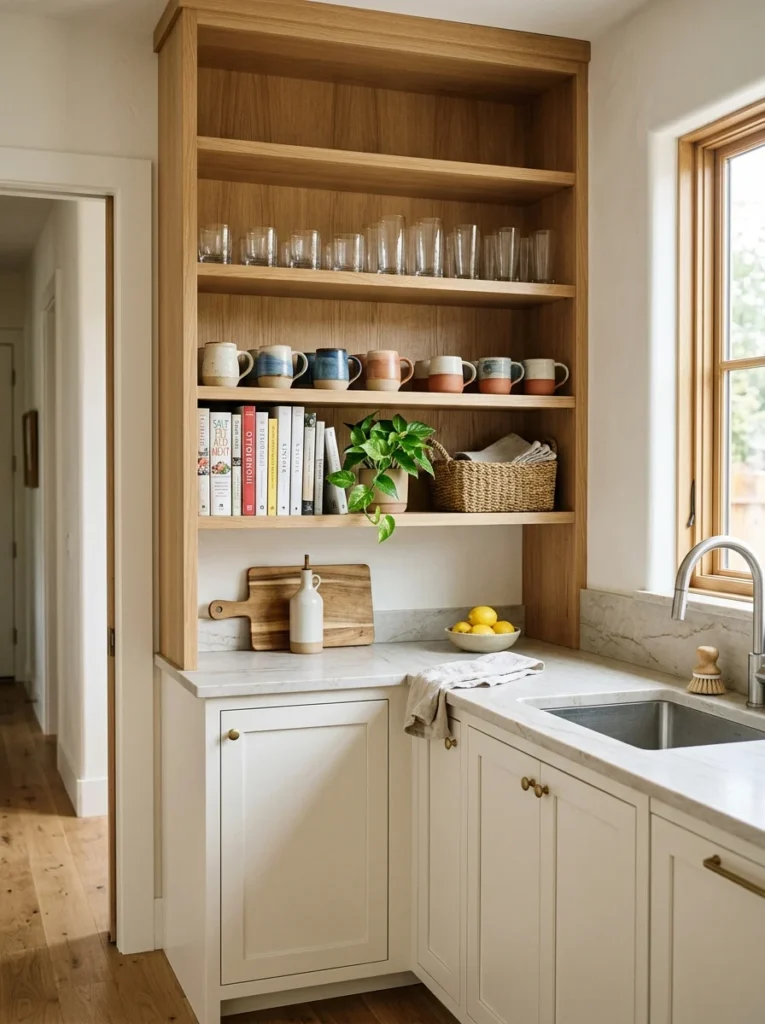
While closed cabinetry works well for less frequently used or less visually appealing items, incorporating at least one section of open shelving for genuinely everyday items, glasses used daily, a favorite set of mugs, cookbooks in active rotation, keeps those pieces easily accessible without requiring you to open a cabinet door multiple times throughout the day. My sister dedicated one shelf specifically to her family’s daily-use water glasses, positioned at a height her kids can reach independently, which has genuinely reduced how often she’s asked to get a glass down for them throughout the day. This mix of open and closed storage, rather than committing entirely to one approach or the other, gives you the practical accessibility benefits of open shelving exactly where you need quick daily access, while still maintaining closed storage for items you’d rather keep out of sight or that don’t need to be handled multiple times a day. I’d recommend identifying your genuine highest-frequency items first, then dedicating open shelving specifically to those, rather than making the open shelving decision purely based on which items happen to look nicest on display.
9. Add a Prep Sink
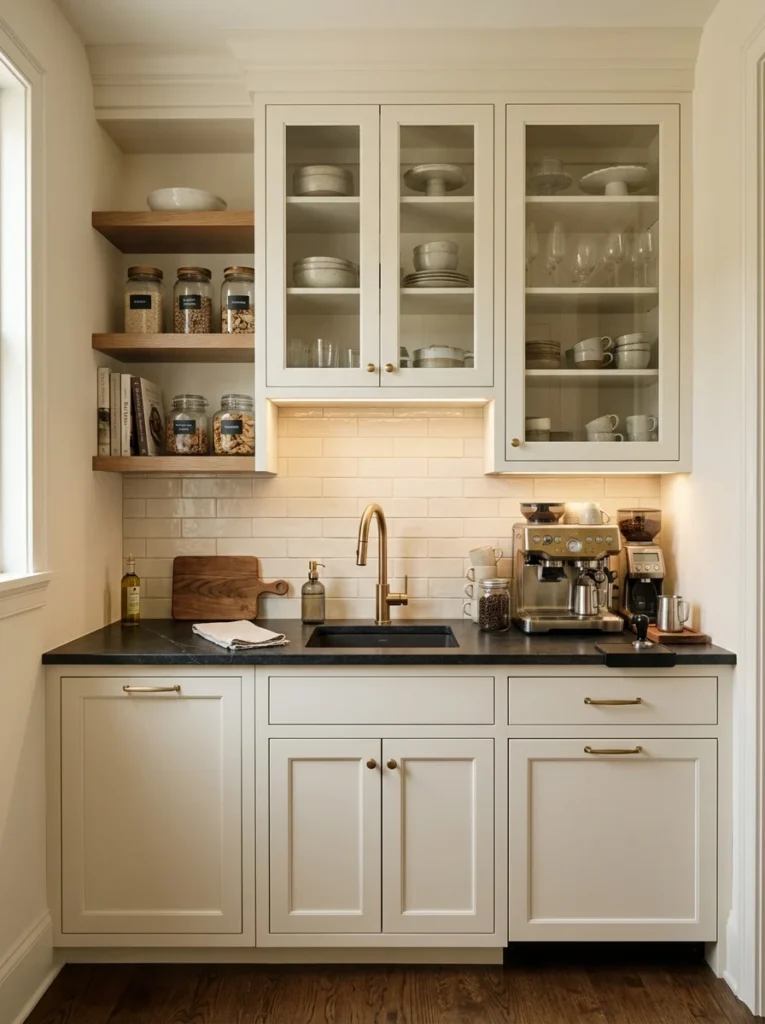
A small secondary sink within your butler’s pantry, separate from your main kitchen sink, allows for tasks like rinsing glassware, filling a coffee maker’s water reservoir, or arranging flowers without needing to walk back into the primary kitchen or interrupt whatever cooking is happening there simultaneously. My sister’s prep sink has become particularly useful during holiday gatherings, when her main kitchen sink is constantly occupied with actual cooking and cleanup, giving guests and family members a separate spot to rinse a glass or fill a water pitcher without crowding the main workspace. This requires plumbing work during the renovation process, adding meaningfully to both the cost and complexity of the project compared to purely cosmetic pantry upgrades, making it more realistic as part of a planned renovation from the start rather than a simple later addition. I’d recommend positioning the prep sink near your beverage station or coffee setup specifically, since those are the tasks most likely to benefit from quick water access without competing for space at your main kitchen sink.
10. Include a Small Prep Counter for Staging
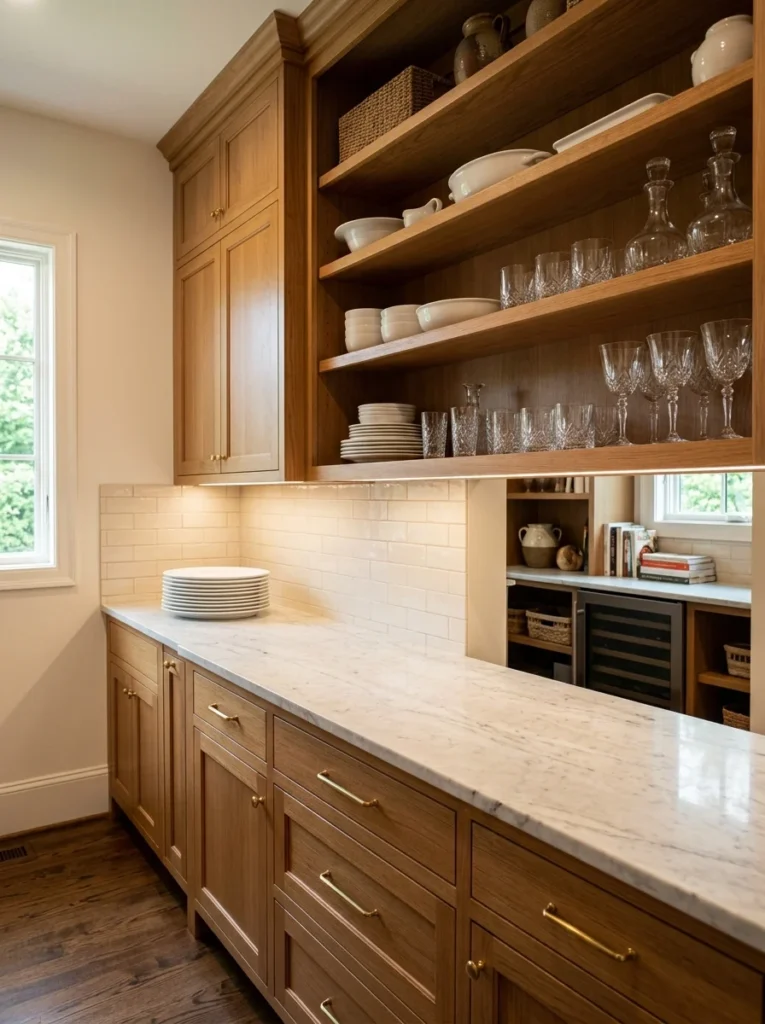
Beyond storage, a dedicated section of open counter space specifically for staging dishes before they’re carried to the dining table, or for setting out serving platters during a large meal’s preparation, gives you a functional workspace that doesn’t compete with your main kitchen counters during the busiest moments of hosting a meal. My sister keeps roughly three feet of clear counter space specifically reserved for this purpose, resisting the temptation to fill it permanently with small appliances or decor, since its value comes specifically from remaining clear and available during actual meal preparation and serving. This is a detail that’s easy to overlook when planning a butler’s pantry, since it’s essentially a decision to leave space empty rather than adding another storage or display feature, but the functional benefit during actual hosting becomes obvious the first time you use it during a genuinely busy holiday meal. I’d recommend resisting the urge to fill every available surface with permanent decor or appliances, deliberately preserving at least a small stretch of counter specifically for this staging function.
11. Add Under-Cabinet Lighting
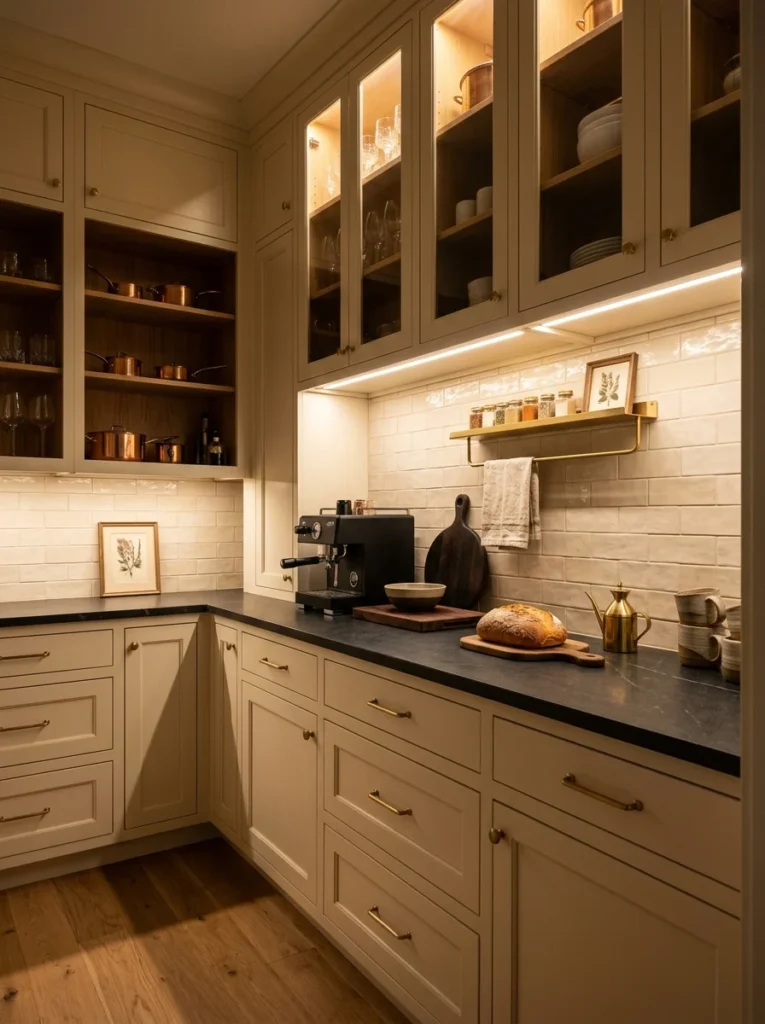
Similar to lighting considerations in a small laundry room or kitchen, under-cabinet lighting installed beneath your upper cabinetry illuminates your counter and prep space directly, which matters considerably in a butler’s pantry that often lacks the same amount of natural light as a primary kitchen positioned near larger windows. My sister’s pantry has no windows at all, making the under-cabinet lighting essential rather than purely decorative, providing genuine task lighting for pouring coffee or arranging serving dishes without relying entirely on a single overhead fixture. Warm-toned LED strips tend to feel more inviting in a space meant to feel like an extension of your home’s overall design, while still providing enough brightness for the detailed tasks that actually happen at counter height in this room. I’d recommend this as a near-essential addition for any butler’s pantry, since these spaces are frequently positioned in interior areas of a home without direct access to natural light, making thoughtful artificial lighting considerably more important than it might be in a naturally sunlit primary kitchen.
12. Incorporate a Statement Light Fixture
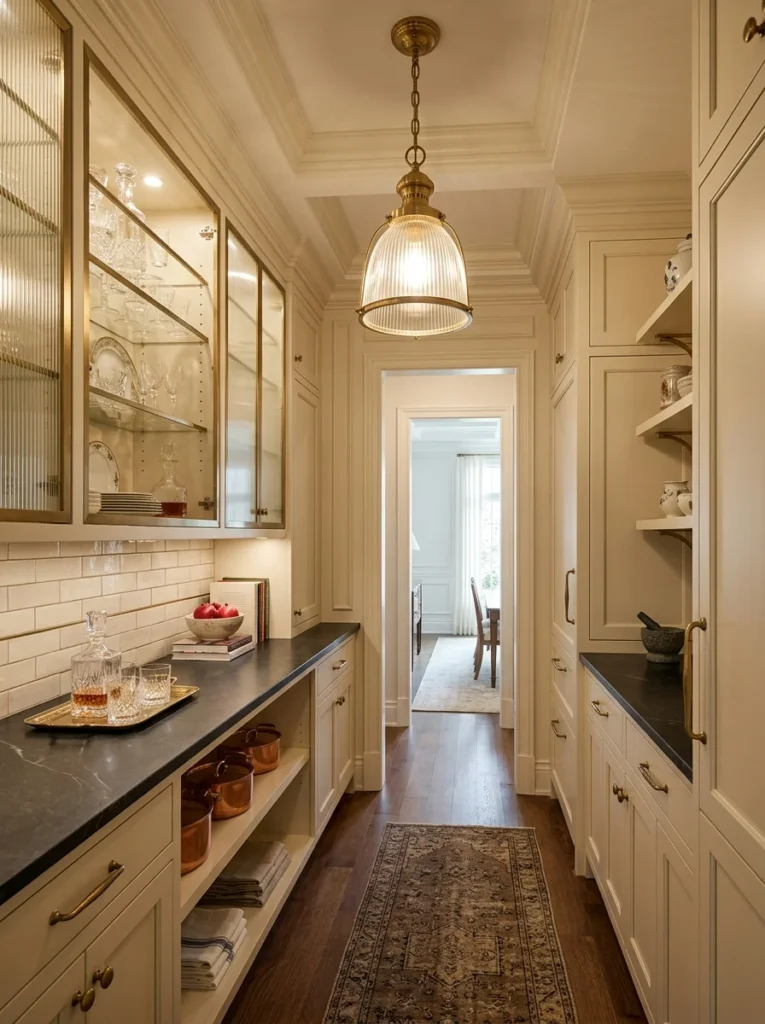
Beyond purely functional under-cabinet lighting, a single decorative overhead fixture, a small chandelier, an interesting pendant, or a distinctive flush-mount design, gives the butler’s pantry its own design personality separate from the main kitchen’s lighting choices. My sister chose a small brass pendant with a fluted glass shade, distinctly different from her main kitchen’s more minimal recessed lighting, and that fixture alone gives the pantry a slightly more special, considered feeling compared to a purely utilitarian storage space. Because butler’s pantries are typically much smaller than a primary kitchen, this is a good opportunity to choose a more delicate or intricate fixture than might work at a larger scale elsewhere in the home, since the room’s smaller proportions can support finer, more detailed design choices without feeling out of scale. I’d recommend choosing a fixture finish that either matches or intentionally contrasts with your main kitchen’s fixtures, similar to the same intentional metal-mixing principle that applies to hardware throughout a home, rather than choosing something that feels randomly unrelated to your overall design language.
13. Use a Bold Wallpaper or Paint Color
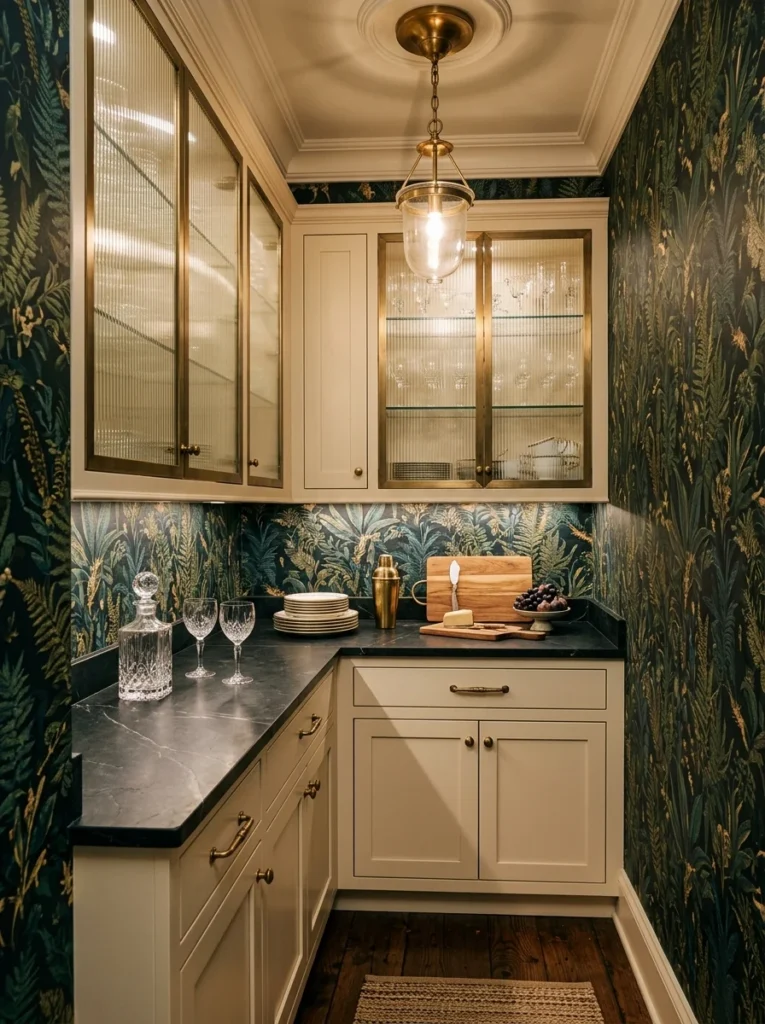
Because a butler’s pantry is typically a smaller, more enclosed, and often hidden space compared to your main kitchen, it’s an excellent opportunity to experiment with a bolder wallpaper pattern or paint color than you might feel comfortable committing to in a larger, more visible room. My sister wallpapered her pantry in a deep, dramatic botanical print that she genuinely loved but felt was too intense for her main kitchen’s larger surface area, and the smaller, more contained space handles that same bold pattern beautifully without becoming overwhelming. This idea of treating secondary spaces as lower-risk opportunities for bold design choices applies broadly across a home, powder rooms, closets, and butler’s pantries all share this quality of being smaller, more private spaces where a dramatic choice feels special and intentional rather than risky. I’d recommend genuinely embracing this opportunity if you’ve been wanting to try a bold wallpaper or paint color elsewhere in your home but have hesitated due to the scale or visibility of a larger room, since a butler’s pantry is precisely the kind of contained space designed for this sort of experimentation.
14. Add a Small Built-In Desk or Message Center
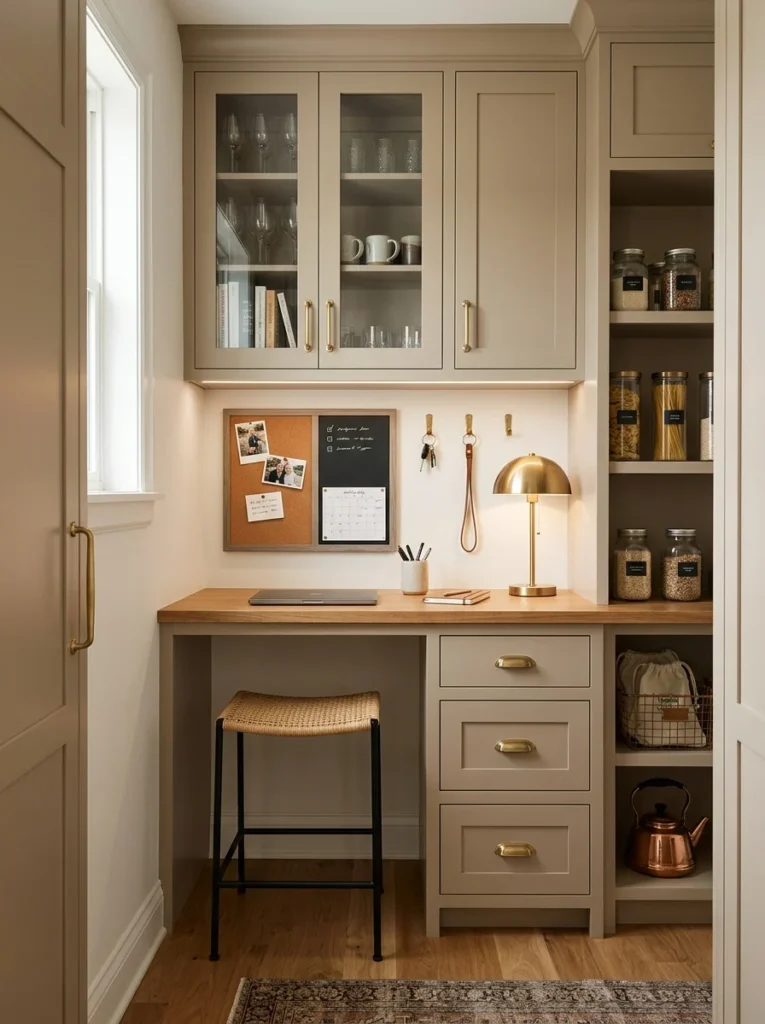
For households that need a small dedicated spot for mail sorting, homework, or quick administrative tasks, incorporating a compact built-in desk or counter section into your butler’s pantry layout gives that function a defined home without cluttering your main kitchen counter, which is where these tasks often end up happening by default in homes without a better alternative. My sister included a narrow section of counter with a stool tucked beneath it specifically for this purpose, and having that dedicated, if small, workspace has genuinely kept mail and school papers from accumulating on her main kitchen island the way they used to before her renovation. This works particularly well combined with a small cork board or the cloth message board style mentioned in the dining room decor ideas, giving the space a spot for notes and reminders in addition to the physical desk surface itself. I’d recommend this specifically for households where mail and paperwork clutter has been an ongoing frustration in the main kitchen, since giving that function its own dedicated, if compact, space in the butler’s pantry addresses the root cause rather than just repeatedly cleaning up the same recurring clutter.
15. Include a Trash and Recycling Pull-Out
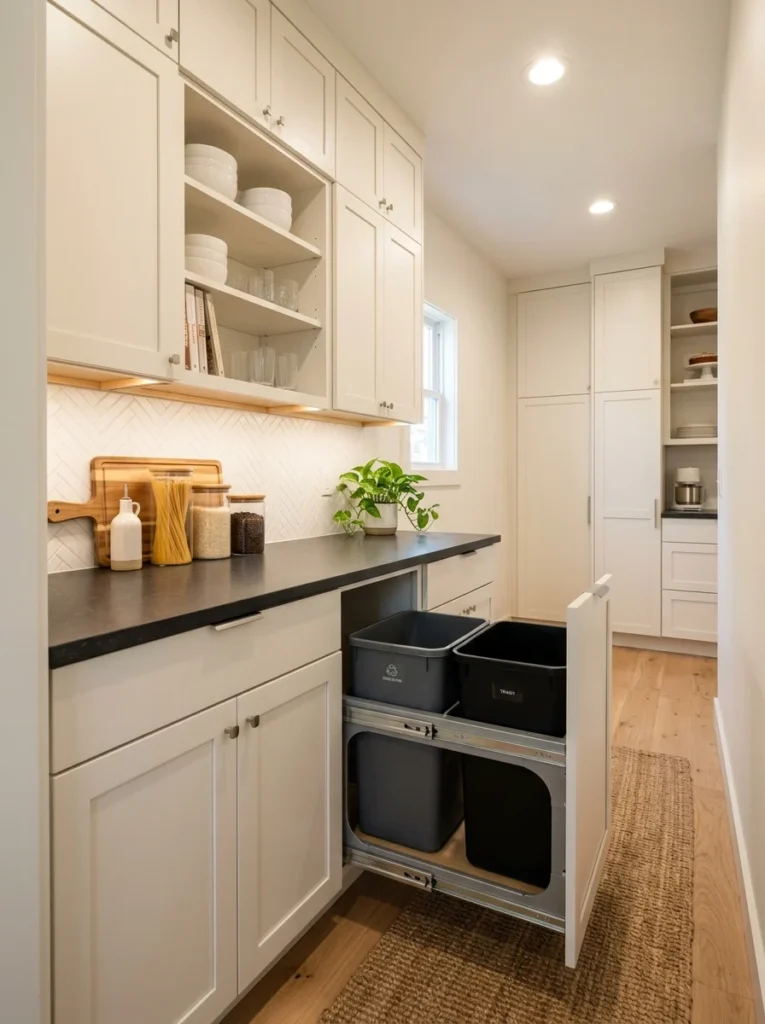
Concealing trash and recycling bins within a pull-out cabinet in your butler’s pantry, rather than in your main kitchen, keeps that particular chore and its associated smell contained within the secondary space while freeing up valuable cabinet space in your primary kitchen for other uses. My sister moved her trash and recycling entirely into her pantry specifically for this reason, and while it does mean a few extra steps when actually disposing of something while cooking, she’s mentioned that the main kitchen feels noticeably cleaner and less cluttered without those bins visible in that more frequently used space. This works particularly well if your butler’s pantry connects directly to your main kitchen through a doorway or open passage, minimizing the actual distance and inconvenience of walking the extra few steps compared to having trash immediately within reach at all times. I’d recommend a pull-out design with separate compartments for trash, recycling, and potentially compost if your household sorts waste that way, keeping all of these functions consolidated within a single cabinet rather than scattered awkwardly around the room.
16. Add a Microwave or Second Small Appliance Nook
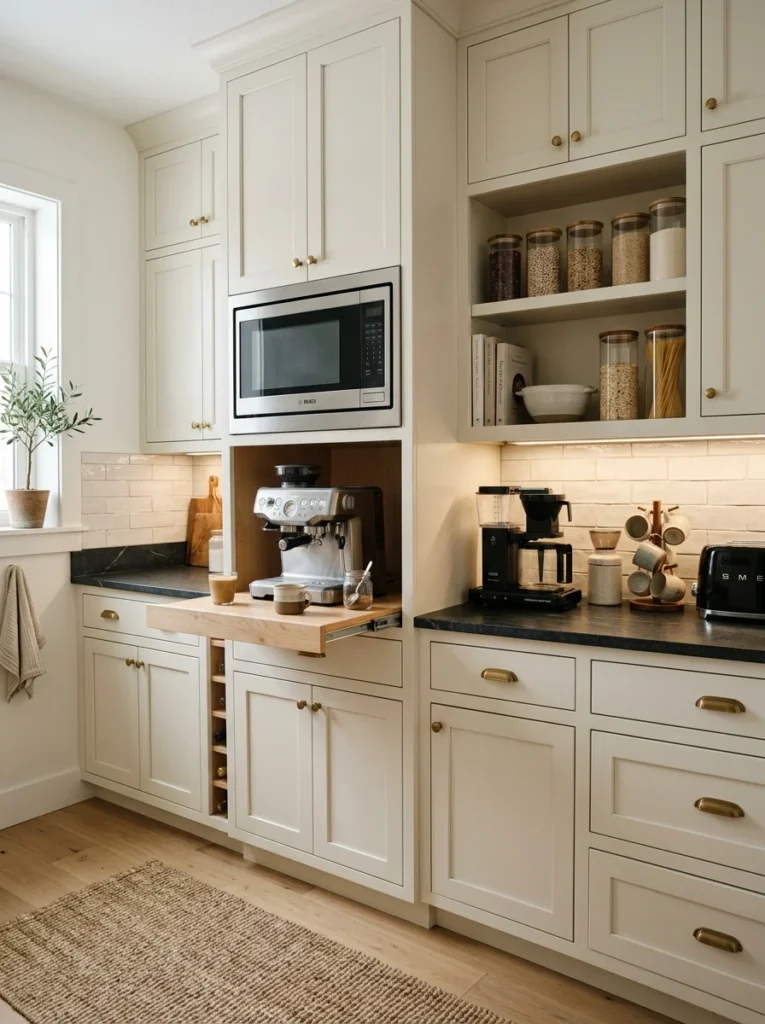
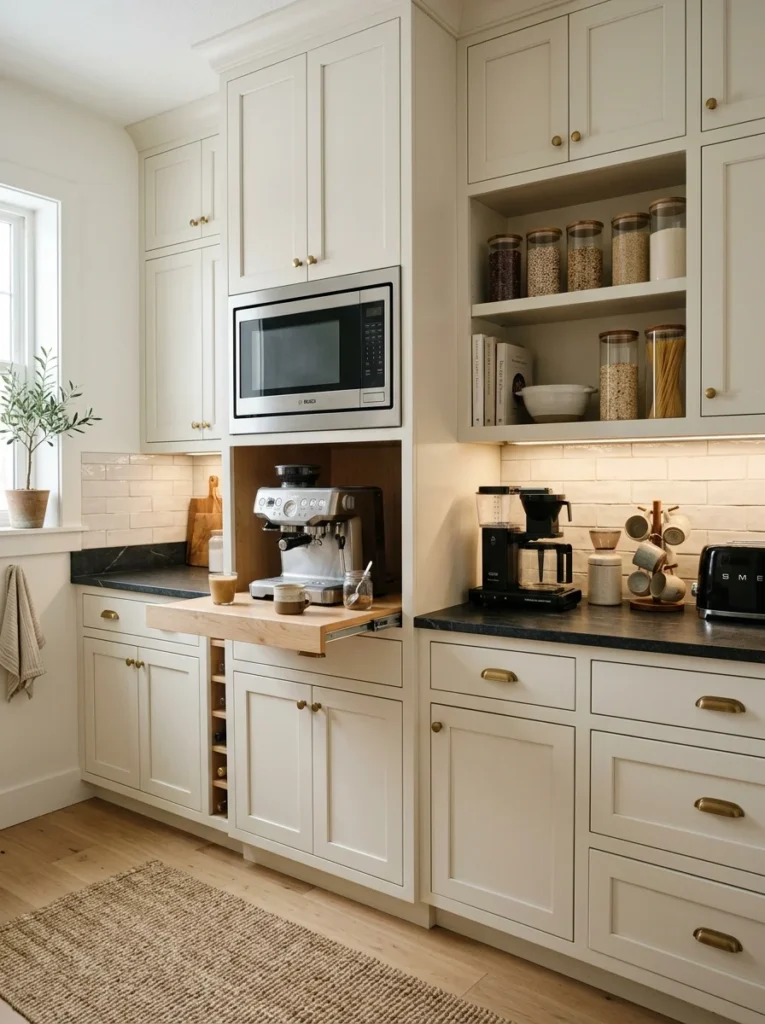
Relocating a microwave, toaster oven, or other small appliance into your butler’s pantry, rather than keeping it on your main kitchen counter, is one of the most effective ways to reclaim genuine counter space in your primary cooking area while still keeping that appliance easily accessible nearby. My sister built a dedicated appliance nook with a pull-out shelf for her microwave, positioned at a comfortable height rather than stacked awkwardly above her main oven, which had been her previous setup before the renovation. This approach works particularly well for appliances that don’t need to be used during actual active cooking at your main stove and counters, microwaves, toaster ovens, slow cookers, since relocating them to an adjacent room doesn’t meaningfully disrupt your core cooking workflow while still providing significant counter space benefits in your primary kitchen. I’d recommend identifying which small appliances genuinely get used daily versus occasionally, prioritizing daily-use items for the most convenient, easily accessible spots within your pantry’s appliance storage, while less frequently used items can be tucked into less convenient cabinet space.
17. Incorporate a Hidden Trash Compactor or Bin System
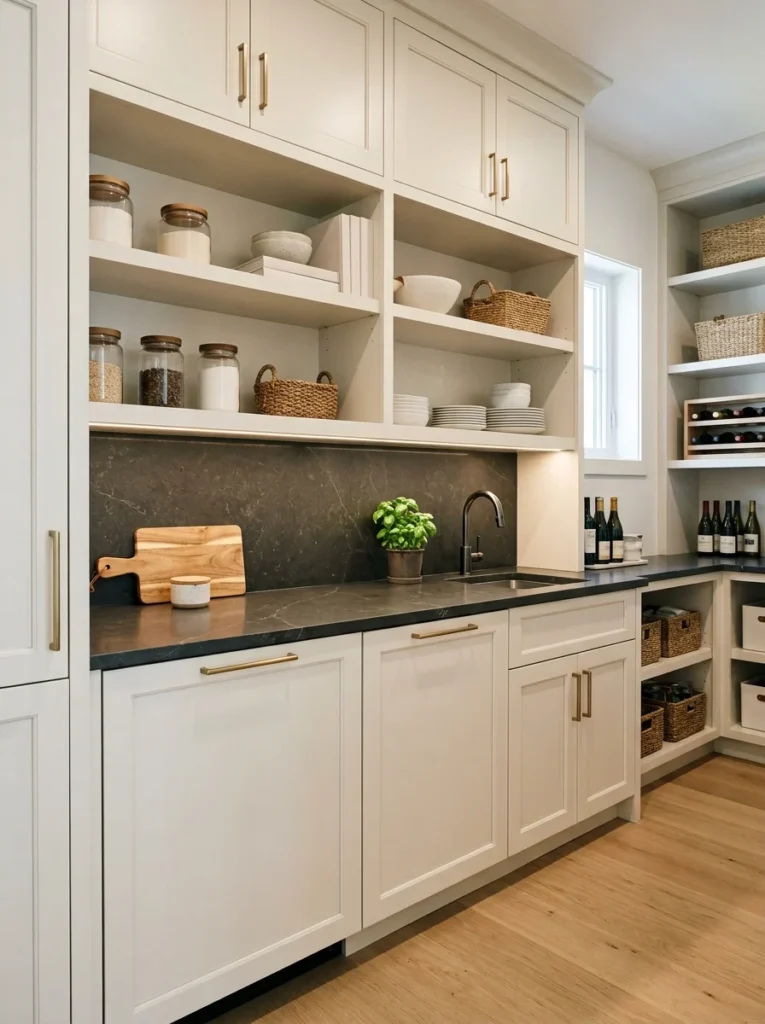
For households generating significant kitchen waste regularly, a built-in trash compactor concealed within your butler’s pantry cabinetry reduces how frequently you need to take out the trash while keeping the entire system out of sight within the secondary space rather than visible in your main kitchen. While this is a less common addition than a simple pull-out bin, given the higher cost of a dedicated compactor appliance, it’s worth considering for larger households or anyone who specifically wants to minimize how often this particular chore needs attention. My sister didn’t go this route herself, opting for the simpler pull-out bin system instead, but she mentioned a friend who did include a compactor and has genuinely appreciated not needing to take out trash nearly as often as a standard bin system would require. This is a more significant investment than most other ideas on this list, both in terms of the appliance cost itself and the specific cabinetry modifications needed to accommodate it, making it a reasonable consideration primarily for larger households or anyone specifically prioritizing this particular convenience.
18. Use Consistent Hardware Finishes Throughout
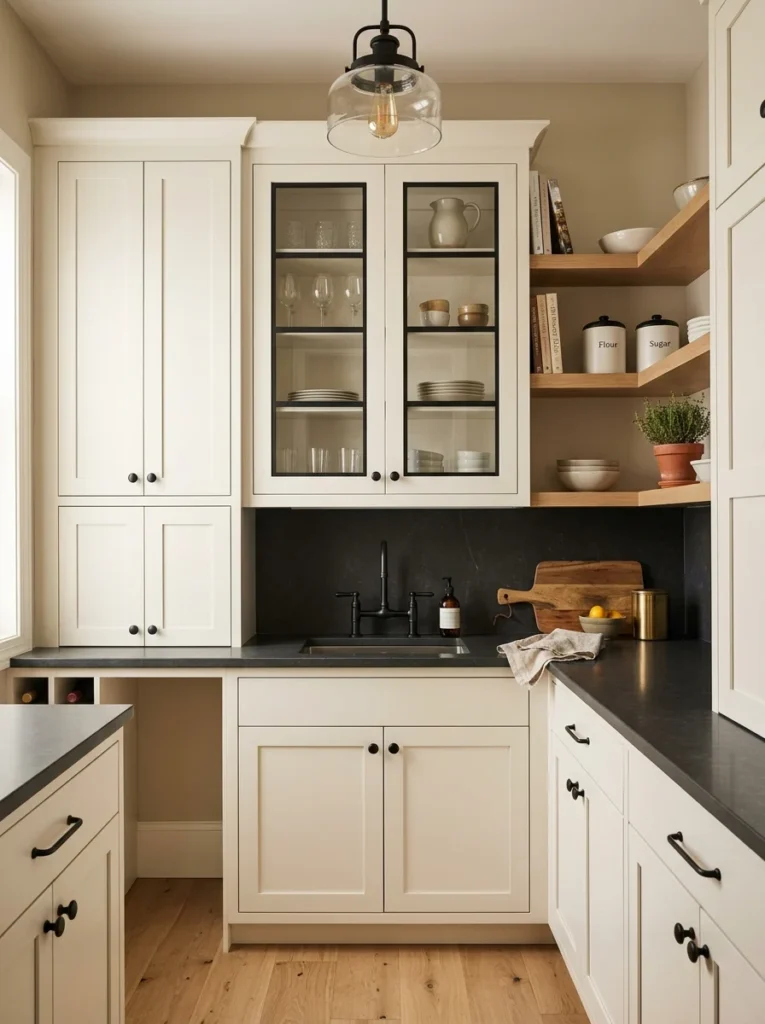
Just as with any other room in a home, choosing a single consistent hardware finish, or at most two intentionally coordinated finishes, across all your butler’s pantry’s cabinet pulls, faucet, and light fixtures ties the whole space together as a cohesive design rather than a collection of individually chosen pieces that happen to share a room. My sister used matte black hardware consistently throughout her pantry, on cabinet pulls, the faucet, and even the frame of her glass cabinet doors, which creates that same sense of intentional cohesion that consistent hardware achieves in any well-designed room throughout a home. This is a detail that’s easy to overlook when you’re focused on the bigger decisions, cabinet layout, countertop material, appliance placement, but mismatched hardware finishes are consistently one of the most common reasons a finished space feels slightly “off” without anyone being able to immediately identify why. I’d recommend deciding on your hardware finish early in the planning process, ideally before ordering any individual pieces, so that every subsequent purchase can be selected specifically to match or intentionally coordinate with that established choice.
19. Add Under-Shelf Wine Glass Storage
A hanging wine glass rack installed beneath an upper cabinet or shelf makes efficient use of otherwise unused vertical space while keeping stemware both accessible and displayed in an organized, visually appealing way rather than stacked precariously on a flat shelf where glasses can be more prone to chipping or tipping over. My sister installed this specifically beneath her open shelving section near the wine cooler, creating a cohesive beverage service area where everything from the wine itself to the glasses needed to serve it lives within the same small section of the room. This is a relatively simple, inexpensive addition in the context of a larger butler’s pantry renovation, typically just requiring a length of hanging rack hardware mounted to the underside of an existing shelf or cabinet. I’d recommend positioning this specifically near your wine storage or beverage station, following the same principle of keeping related functions physically grouped together, rather than scattering wine glass storage in a completely different section of the room from where the wine itself is actually kept.
20. Include a Small Ice Maker
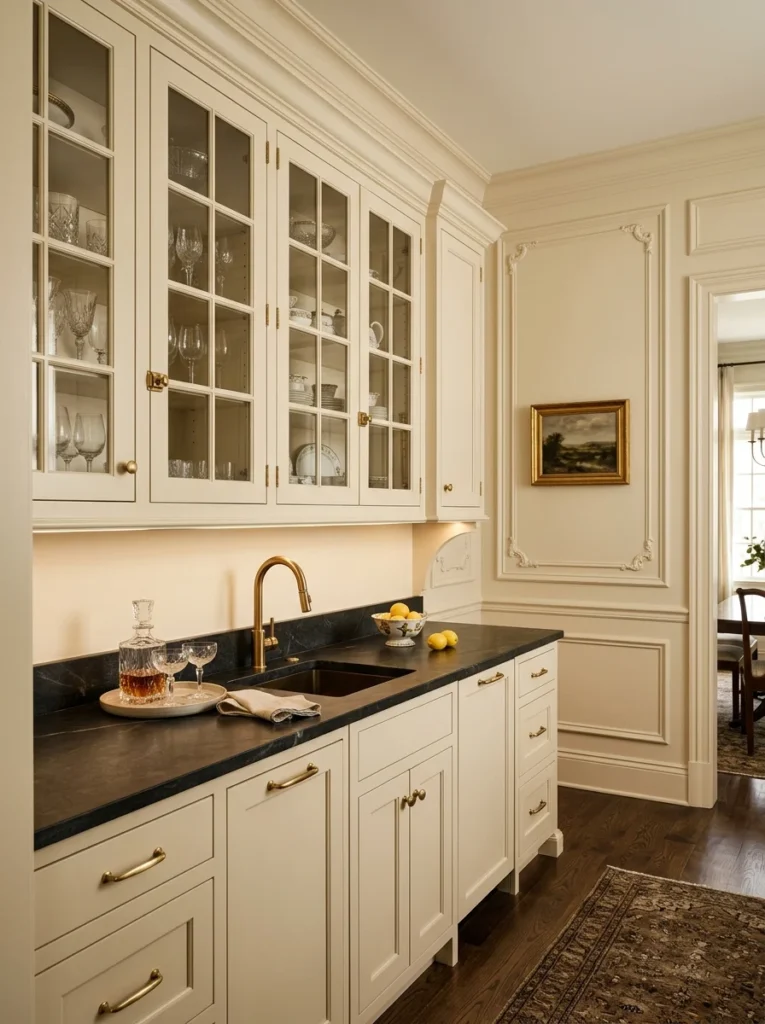
A dedicated undercounter ice maker within your butler’s pantry, separate from your main refrigerator’s ice dispenser, provides an additional, often faster-producing ice source specifically for entertaining, when a single refrigerator’s ice maker frequently can’t keep up with demand during a larger party or gathering. My sister added this specifically because she’d repeatedly run out of ice during holiday gatherings using just her main refrigerator’s dispenser, and having a dedicated undercounter unit in the pantry, positioned right next to her beverage station, has genuinely solved that recurring frustration during larger events. This is a moderately significant investment in terms of both the appliance cost and the plumbing and electrical work required for proper installation, making it a reasonable consideration primarily for households that entertain regularly enough to justify the expense, rather than a near-universal recommendation like some of the more affordable ideas elsewhere on this list. I’d recommend this specifically if running out of ice during gatherings has been a recurring, genuine frustration in your own home, rather than adding it purely because it’s a popular feature in inspiration photos without a clear personal use case behind it.
21. Add Decorative Molding or Trim Detail
Incorporating decorative trim, whether that’s simple picture-frame molding on the walls or more detailed cabinet door profiles, adds an architectural finish to the butler’s pantry that elevates it beyond a purely utilitarian storage room and into a genuinely designed space that feels intentional rather than like an afterthought tucked between more important rooms. My sister added simple picture-frame style molding to her pantry’s walls before painting, and that small architectural detail, combined with her bold wallpaper choice on just the upper portion above the molding, gives the room a level of finish that a plain, flat wall simply wouldn’t have achieved on its own. This type of detail work adds relatively modest cost to an overall renovation budget, particularly compared to appliances, plumbing, or custom cabinetry, but it contributes meaningfully to how finished and considered the final space feels once everything comes together. I’d recommend this specifically if your butler’s pantry connects visually to a more architecturally detailed room, like a formal dining room with its own crown molding or wainscoting, since matching or complementing that existing detail level helps the pantry feel like a natural extension of your home’s overall design language rather than a plainer, secondary afterthought.
22. Choose a Flooring Material That Handles Wear
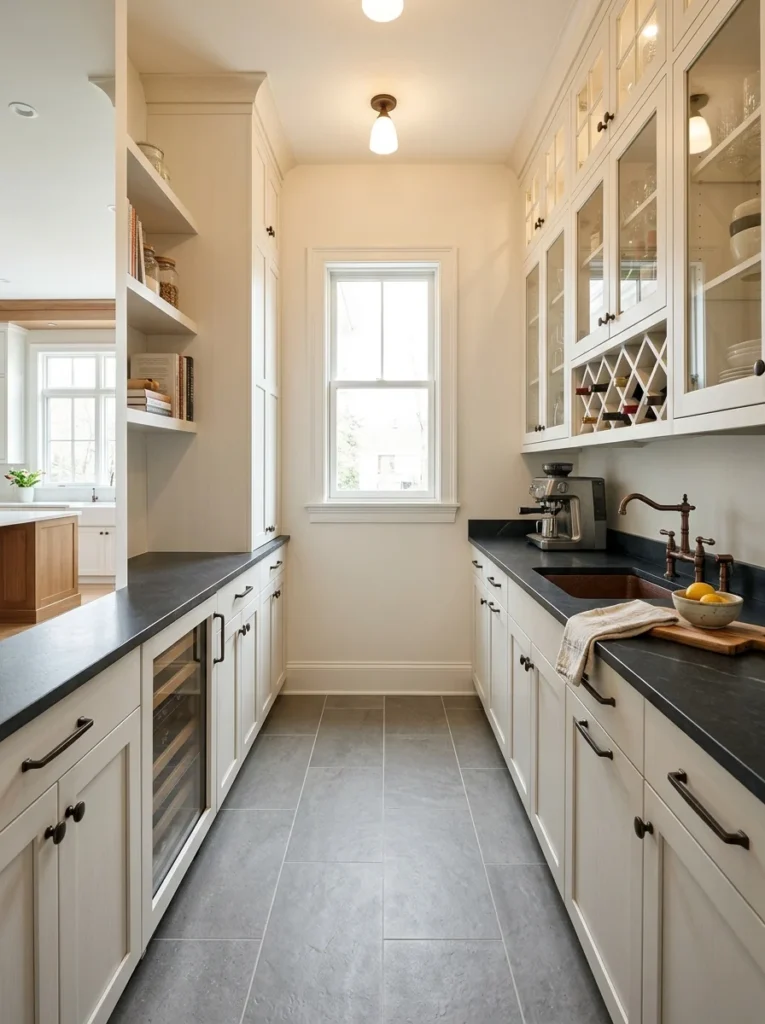
Because a butler’s pantry deals with genuine daily foot traffic, occasional spills, and the wear of carrying dishes and appliances in and out regularly, choosing a durable flooring material, whether that matches your main kitchen or intentionally contrasts with it, matters considerably for the room’s long-term appearance and function. My sister extended the same tile flooring from her main kitchen directly into the pantry, creating a seamless visual transition between the two spaces rather than an abrupt change that might make the pantry feel like a disconnected, separate area. Alternatively, some homeowners intentionally choose a different flooring material for their butler’s pantry specifically to create a distinct sense of separation from the main kitchen, treating the pantry as its own distinct room with its own design identity rather than a direct extension of the primary space. I’d recommend prioritizing durability and moisture resistance regardless of which visual approach you choose, since this room’s function genuinely demands flooring that can handle regular wear without showing damage prematurely, similar to the practical considerations that matter in a kitchen or laundry room.
23. Add a Small Built-In Bar Area
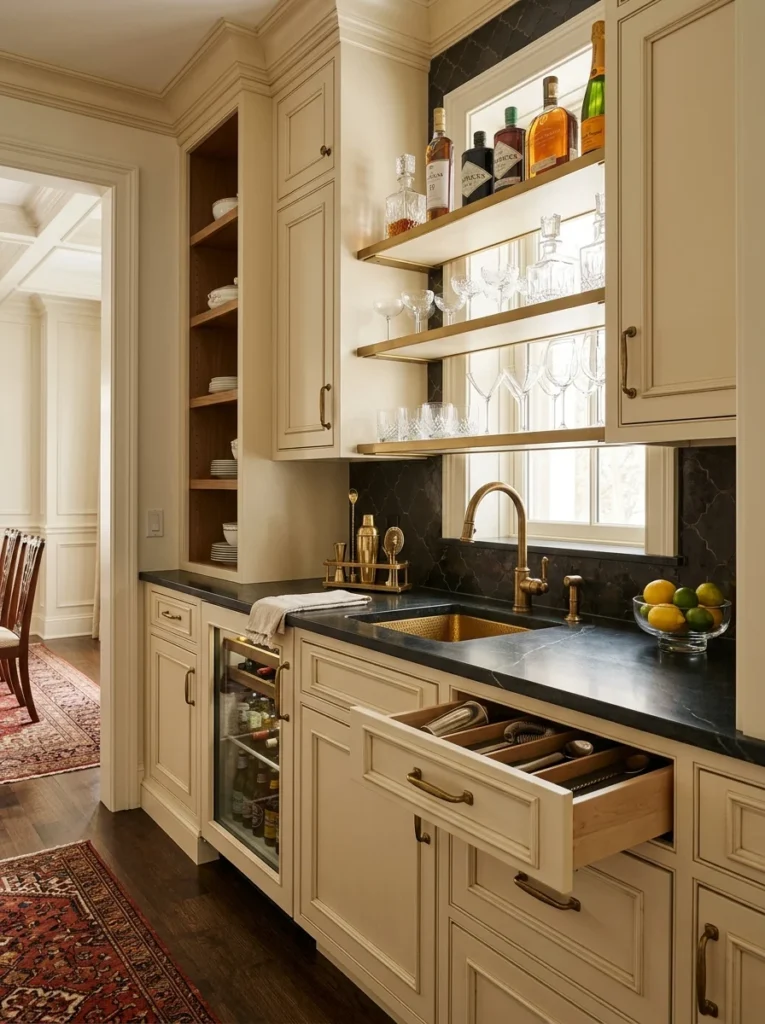
For households that entertain regularly, incorporating a small dedicated bar section within the butler’s pantry, complete with a designated spot for spirits, mixers, and bar tools, creates a genuine cocktail-making station separate from both the main kitchen and the beverage refrigerator mentioned earlier. My sister included a narrow section with a small bar sink, a few shelves for spirits displayed in their original bottles, and a drawer specifically organized for bar tools, and it’s become a genuine gathering point during parties, with guests naturally congregating there while she finishes food preparation in the main kitchen nearby. This works particularly well combined with several other ideas already mentioned, the beverage refrigerator, the ice maker, and the prep sink, essentially consolidating everything needed for serving drinks into one cohesive section of the pantry rather than scattering these functions throughout the room. I’d recommend this specifically for households that host regularly and have found themselves wanting a dedicated bar setup, rather than as a universal recommendation, since it does require dedicating meaningful space and budget specifically to a function that not every household will use often enough to justify the investment.
24. Display Cookbooks as Decor
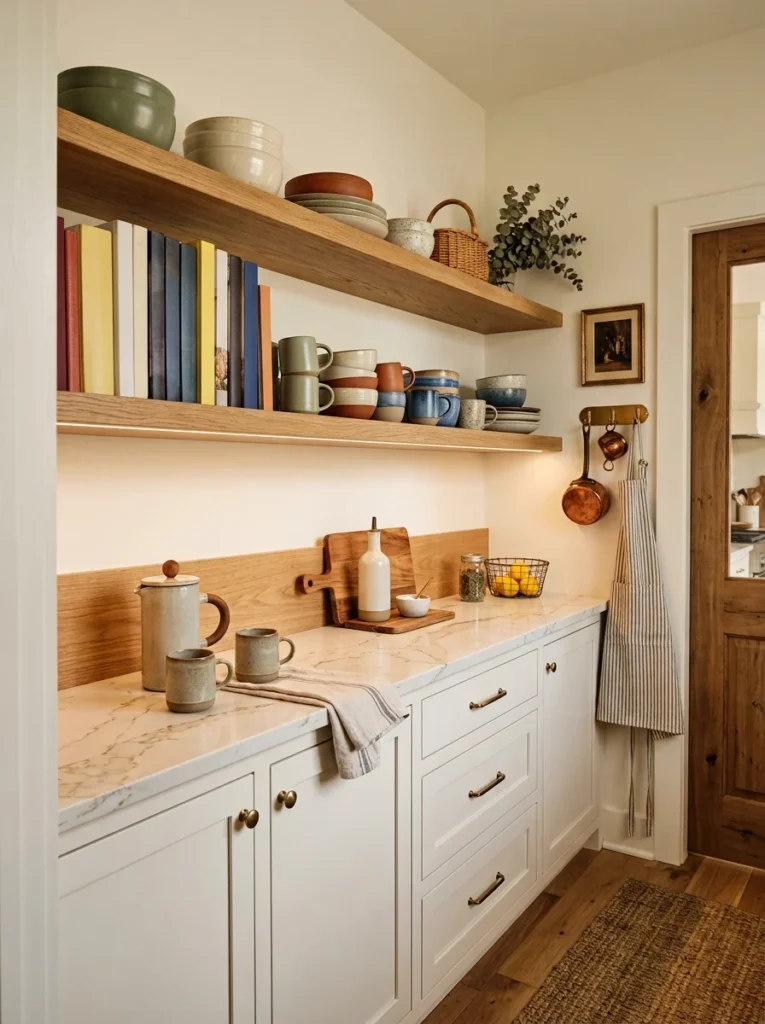
Rather than storing cookbooks completely out of sight in a closed cabinet, a dedicated open shelf specifically for displaying an actively used cookbook collection adds both genuine visual warmth through the variety of book spines and covers, and practical accessibility for cookbooks you actually reference regularly while cooking or planning meals. My sister keeps her most-used cookbooks on open shelving at eye level within her pantry, organized loosely by cuisine type, and beyond the practical convenience, the collection of colorful spines adds a genuinely personal, collected feeling to the space that’s difficult to replicate with purely purchased decor items. This works particularly well as a way to fill open shelving with something that’s both decorative and genuinely useful, rather than choosing purely ornamental objects that don’t serve any actual function within the room. I’d recommend curating this display to your genuinely most-used cookbooks specifically, rather than every cookbook you own, since a smaller, actively used collection reads as more intentional than an overwhelming, comprehensive display of books you rarely actually open.
25. Add Personal Touches Through Art or Collected Objects
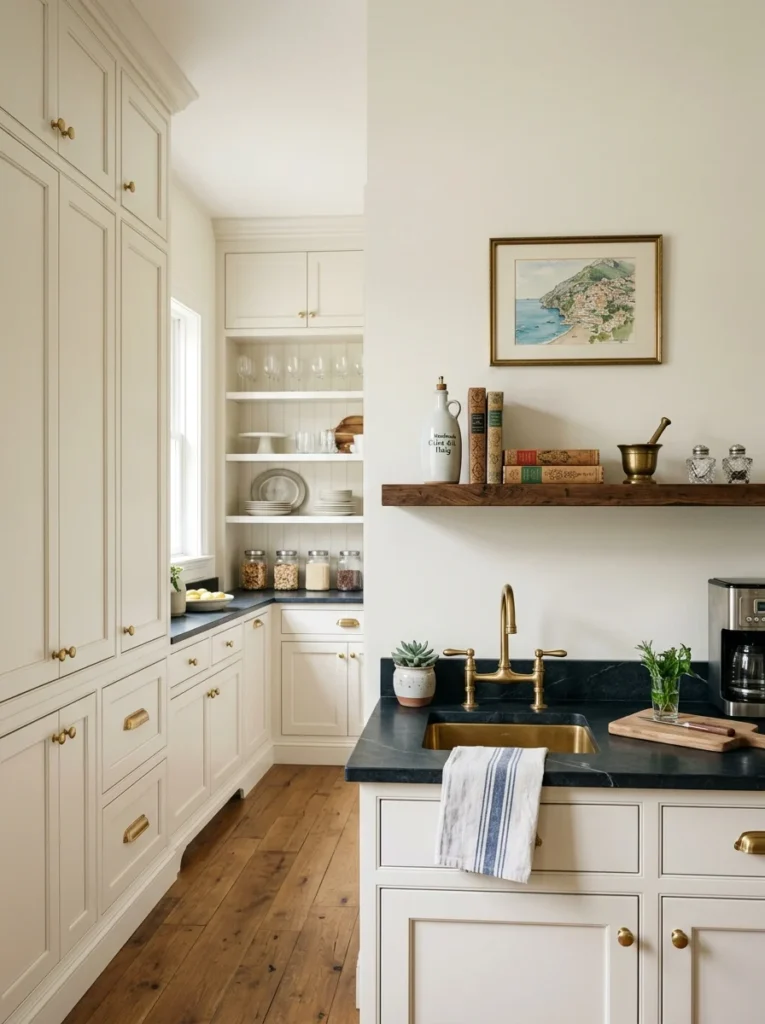
Just as with any other room in a home, incorporating a small piece of art, a meaningful collected object, or a family photo somewhere within the butler’s pantry prevents the space from feeling purely utilitarian, reminding you that even a secondary, functional room deserves the same personal, intentional touch as more prominent spaces throughout your home. My sister hung a small framed print she picked up while traveling on the one section of wall not occupied by cabinetry, and that single personal touch genuinely changes the feeling of the room from purely functional storage into a space that still reflects her own taste and history, even though it’s not a room guests spend much time in directly. I’d recommend identifying even just one small spot within your own pantry layout specifically reserved for something personal rather than purely functional, whether that’s a piece of art, a meaningful object, or a small collection displayed on open shelving, since that detail is really what separates a genuinely designed space from one that merely serves its intended storage function without much additional consideration.
26. Keep the Space Genuinely Curated, Not Just Additional Storage
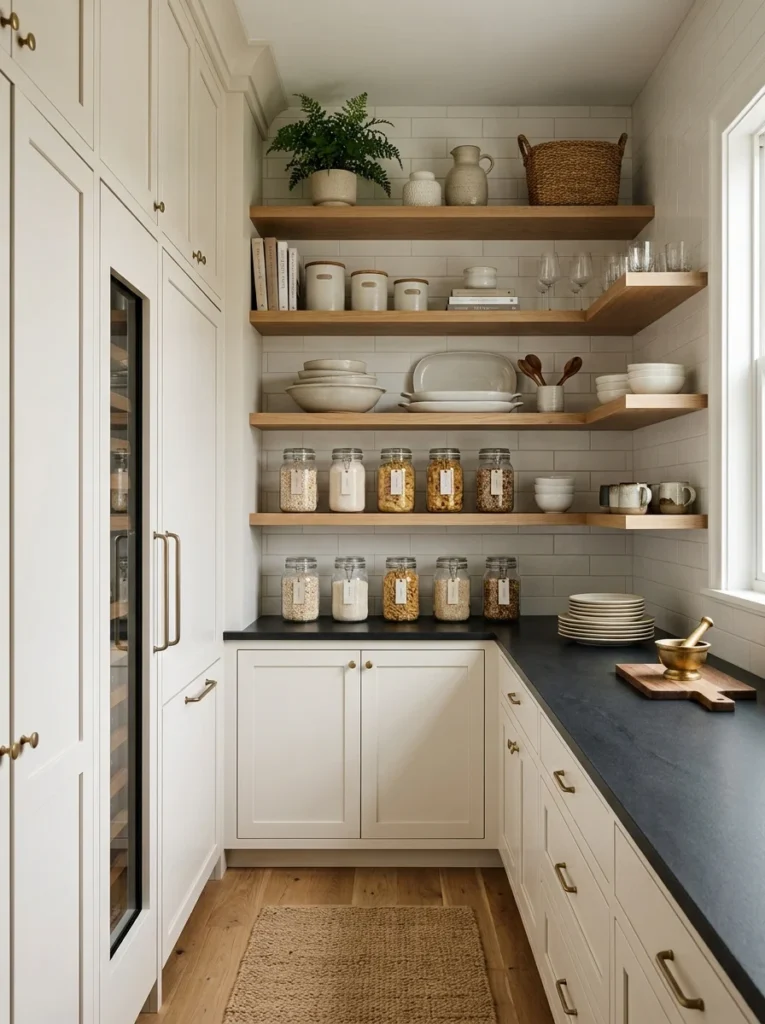
The final and perhaps most important piece of advice is resisting the temptation to treat your entire butler’s pantry as simply overflow storage for anything that doesn’t fit elsewhere in your home, since that approach quickly turns a genuinely well-designed secondary space into a cluttered catch-all that undermines every other intentional decision made throughout the renovation. My sister has been genuinely disciplined about this, periodically reassessing what’s actually stored in the pantry and removing items that have drifted in simply because there was available space, rather than because they truly belong in that specific, carefully designed room. This requires ongoing maintenance rather than a one-time decision made during the initial renovation, similar to the “one in, one out” principle mentioned in several other rooms throughout this broader series of ideas, since it’s remarkably easy for any storage space, however well-designed initially, to slowly accumulate items that don’t actually serve the room’s original intended purpose. I’d recommend periodically walking through your own pantry, perhaps every few months, and honestly assessing whether everything currently stored there still belongs, based on your original vision for the space, rather than letting it slowly drift into becoming simply another catch-all storage area disconnected from that initial intentional design.
Final Thoughts
Looking back at my initial, admittedly outdated mental image of a butler’s pantry, it’s genuinely surprising how relevant and useful this once old-fashioned feature has become in a modern home, watching my sister’s daily routine shift so noticeably once her own space was finished. Between all 26 of these ideas, the underlying theme is really about giving specific, often-overlooked kitchen functions, coffee, beverages, staging, storage, their own dedicated space, rather than letting all of that activity and clutter compete for room within your primary kitchen.
If you’re considering your own butler’s pantry project, I’d suggest starting with the first idea on this list, honestly defining what specific frustrations or functions you actually want this space to address, before getting caught up in cabinet finishes or appliance choices. That’s exactly the approach that made my sister’s renovation feel so genuinely successful once finished, a space designed around her actual daily habits rather than purely aspirational inspiration photos, and it’s advice I’d pass along to anyone considering this kind of project in their own home.
