
The master bathroom occupies a unique position in the home. It is the most private room in the house, used exclusively by the people who live in it rather than guests, and visited multiple times every single day. It is the room where the day begins and where it ends — the space where the transition from sleep to wakefulness happens in the morning, and where the transition from the demands of the day back to rest happens in the evening. No other room in the home serves these two functions with the same consistency and intimacy.
Given this role, the master bathroom deserves more deliberate design attention than it typically receives. Most bathrooms are designed primarily around function — where the plumbing runs, how the fixtures fit, what the budget allows — with aesthetic considerations addressed afterward with whatever space and money remain. This approach produces bathrooms that work adequately but rarely feel genuinely restorative. The opportunity to create a space that functions as a genuine personal retreat — a room that restores rather than merely serves — is missed because the design process was driven by constraints rather than by a clear vision of what the room could be.
This guide approaches master bathroom design the other way around. It starts with the vision — what a genuinely relaxing, well-designed master bathroom feels like and why — and works toward the practical decisions that bring that vision into reality. It covers every element of master bathroom design in the order they need to be addressed: layout planning first, then the primary fixtures, then storage, then lighting, then materials, and finally the finishing details that distinguish a bathroom that is merely functional from one that feels genuinely exceptional.
Whether you are designing a new master bathroom from scratch, renovating an existing one, or working within a fixed layout that cannot be structurally changed, this guide gives you the framework and the specific knowledge to make every design decision with clarity and confidence.
Section 1: Layout Planning — The Foundation of Everything
Start With the Room’s Dimensions and Fixed Points
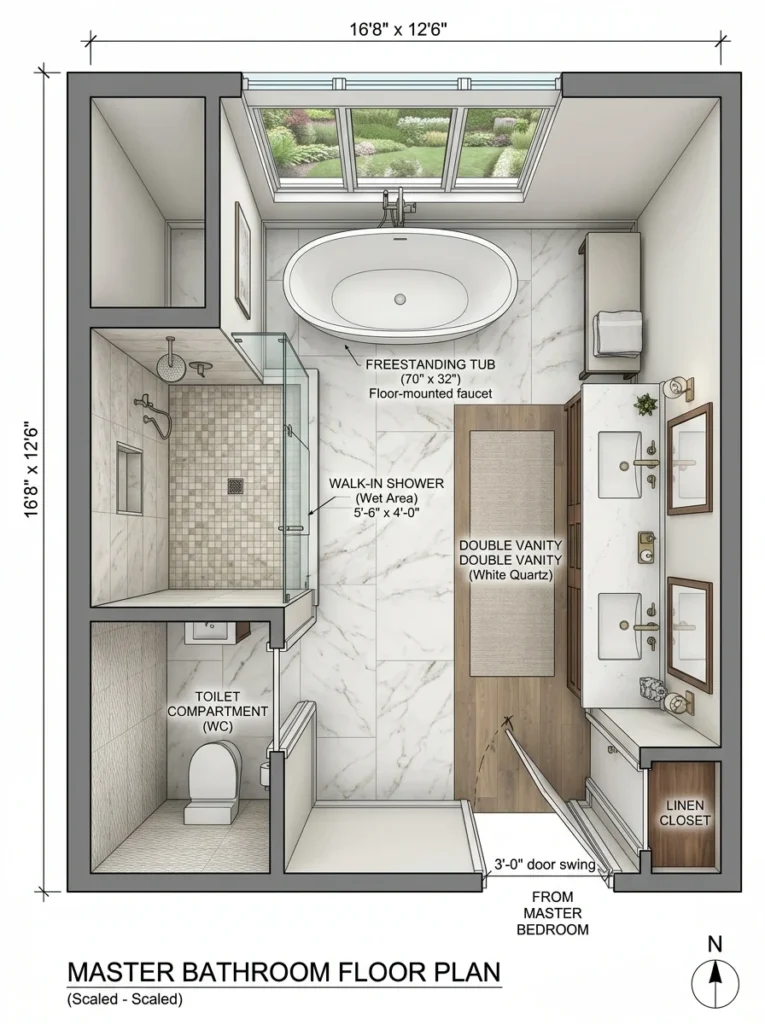
Before any fixture is chosen or any aesthetic decision is made, the layout of the master bathroom needs to be planned carefully and accurately. Layout planning begins with an accurate floor plan of the room — a drawing to scale that shows every wall, every door, every window, and every existing plumbing connection.
The plumbing connections — the positions of the existing water supply lines and waste pipes — are the most significant constraint in any bathroom layout. Relocating plumbing is expensive, disruptive, and in some cases structurally complex. In most bathroom renovations, the most cost-effective approach is to keep the primary wet zones — the shower, the bath, and the basin — in approximately the same positions relative to the existing plumbing, making adjustments within those zones rather than moving the zones themselves.
If the budget and the scope of the renovation allow for plumbing relocation, the additional cost is often justified by the improvement in layout efficiency and flow that a better-positioned fixture arrangement can achieve. This decision needs to be made at the earliest stage of planning — changing the plumbing layout after other design decisions have been made is the most expensive form of design revision.
The Primary Layout Decisions
Every master bathroom layout involves the same set of primary decisions, made in relation to each other and in relation to the room’s dimensions, windows, doors, and plumbing positions.
The first decision is the shower position. The shower is the fixture used most frequently in the master bathroom and the one that generates the most steam, heat, and moisture. Positioning the shower adjacent to a window — ideally a window that can be opened for ventilation — reduces moisture accumulation and the associated risk of mold growth. Positioning the shower away from the bathroom entry door reduces the visual impact of the wet zone on the room’s overall impression when the door is opened.
The second decision is whether to include a bathtub and, if so, where to position it. This decision is covered in detail in the bathtub section below, but the layout implication is that a freestanding bathtub — the most popular choice in master bathroom design — requires clear space on multiple sides for both visual effect and practical access, which consumes a significant proportion of the room’s floor area. In rooms where the square footage does not comfortably accommodate both a large walk-in shower and a freestanding bathtub, choosing between them — rather than compromising the quality of both to fit them both in — typically produces a better result.
The third decision is the vanity position. The vanity is the fixture used most frequently after the shower, and its position relative to the natural light source — the window — significantly affects its function as a grooming surface. Positioning the vanity where natural light falls on the face of the person using it, rather than behind them, provides the best lighting conditions for grooming activities.
The fourth decision is the toilet position. The toilet benefits from some degree of visual separation from the other fixtures — positioned behind a partial wall, in a separate compartment, or at least angled so that it is not the first element visible when the bathroom door opens. In larger master bathrooms, a separate toilet compartment with its own door is the most functional and most aesthetically considered approach, providing privacy within the bathroom that is particularly appreciated when two people share the space.
Minimum Space Requirements
Understanding the minimum space requirements for each fixture helps establish whether a planned layout is practically workable before any purchasing or installation decisions are made.
A shower requires a minimum internal dimension of 36 by 36 inches for a single person to use comfortably, with 36 by 48 inches being more generous and 48 by 48 inches or larger being genuinely comfortable. A walk-in shower without a door — the increasingly popular open shower format — requires a minimum of 36 inches of depth from the shower head wall to the open entry point to prevent water from spraying into the main bathroom area.
A freestanding bathtub requires clear space of at least 12 to 18 inches on every side it will be accessed from — typically three sides — for both visual effect and practical access. A built-in bathtub requires clear space on the long side from which entry and exit will occur, typically at least 24 inches of clear floor width.
A double vanity — two basins on a single countertop — requires a minimum vanity width of approximately 60 inches to accommodate two basins with adequate countertop space between them. A single vanity with adequate countertop space for one person requires a minimum of 36 inches of vanity width, with 48 inches being more generous.
The toilet requires a minimum clear space of 15 inches from the center of the bowl to any adjacent wall or fixture on both sides, with 18 inches being the more comfortable standard. In front of the toilet, a minimum of 24 inches of clear space is needed for comfortable use, with 30 inches being preferable.
Section 2: The Vanity — The Room’s Primary Work Surface
Single Versus Double Vanity
The decision between a single and a double vanity in a master bathroom is one of the most significant practical decisions in the room’s design, and it should be driven by how the bathroom is actually used rather than by what seems most impressive or most typical of a master bathroom.
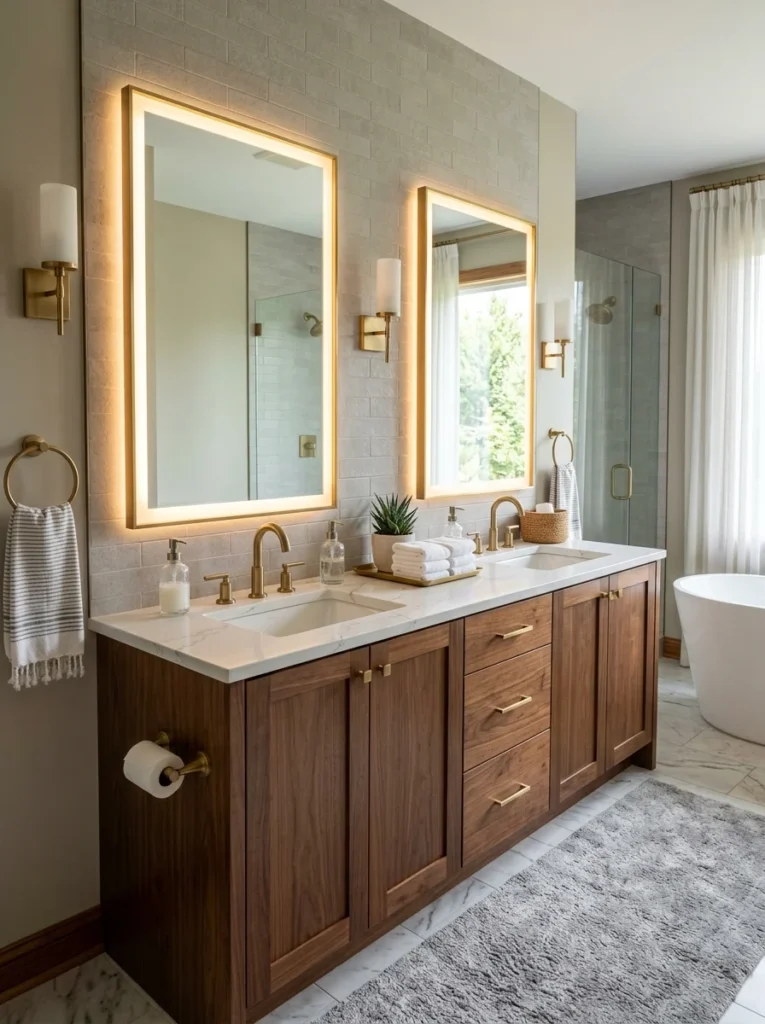
A double vanity — with two basins and sufficient countertop space between them for two people to use simultaneously — is genuinely valuable when two people regularly use the bathroom at the same time. The ability to use the sink, the mirror, and the countertop simultaneously without competing for space or waiting for each other makes a measurable difference to the daily experience of sharing a bathroom. The double vanity is worth the additional space and cost it requires when two people actually use it.
A single vanity — with one basin and ample countertop space on one or both sides — is the more appropriate choice when the bathroom is used by one person primarily, or when two people have sufficiently different morning routines that they rarely need the bathroom simultaneously. A single vanity in a generous size — 48 to 60 inches — provides excellent countertop workspace and storage for one person, and the space saved compared to a double vanity can be directed toward a more generous shower or a better-positioned bathtub.
Vanity Size and Storage Configuration
The size of the vanity should be determined by the wall space available for it and the storage needs of the people using the bathroom, with the countertop workspace requirements as a secondary consideration. A vanity that is too wide for its wall creates a boxed-in feeling in the room. A vanity that is too narrow provides insufficient countertop space for comfortable daily use.
The internal storage configuration of the vanity cabinet matters as much as its external dimensions. A vanity with drawers — particularly wide, deep drawers — provides more practical, accessible storage than one with doors and static shelves. Drawers allow the full contents to be seen and accessed by opening the drawer, while a cabinet with doors requires reaching into the back of the cabinet for items stored behind those in front.
A vanity with a combination of drawer storage on one side and open cabinet space under the basin on the other provides both organized drawer storage for daily-use items and a practical space for cleaning products, spare supplies, and larger items that do not fit in drawers.
Countertop Materials
The countertop of the master bathroom vanity is a surface that is seen constantly and touched multiple times every day. Choosing a material that is both beautiful and practical — that looks as good after two years of use as it did on installation day — requires understanding the practical properties of each material alongside its aesthetic qualities.
Quartz engineered stone is the most practical countertop material for a bathroom vanity in most situations. It is non-porous, resistant to staining from the beauty products, toothpaste, and cleaning agents that regularly come into contact with a bathroom vanity surface, easy to clean with standard products, and available in an enormous range of colors and appearances including convincing replications of natural marble. Quartz does not require sealing and maintains its appearance with minimal maintenance — qualities that make it the most reliable choice for a surface that receives heavy daily use.
Natural marble countertops in a master bathroom are among the most beautiful surface choices available and also among the most demanding in terms of maintenance. Marble is porous and susceptible to etching from acidic substances — the toothpaste, face wash, and makeup products that regularly contact a bathroom countertop are often acidic enough to leave dull marks on an unprotected marble surface. A marble bathroom countertop requires sealing on installation, regular resealing, and careful management of what comes into contact with the surface. For people who are committed to this level of care, marble produces a bathroom of extraordinary beauty. For those who are not, quartz provides a comparable appearance with none of the maintenance demands.
Solid surface materials — such as Corian and similar products — are non-porous, seamlessly joinable, and repairable if scratched or stained. They are available in a range of colors and appearances, can be formed into integrated sink and countertop designs with no visible join between the basin and the counter surface, and clean easily with standard bathroom cleaners. Their limitation is that they lack the visual depth and natural variation of stone materials, which can make them feel slightly flat in comparison.
Concrete countertops provide an industrial, architectural quality that suits contemporary master bathrooms with a design-forward aesthetic. They require sealing and periodic maintenance, are susceptible to cracking if the substrate moves or if the concrete mix is not correctly formulated, and can stain if not properly protected. In the right bathroom and with appropriate maintenance, concrete countertops are striking and genuinely distinctive.
Section 3: The Shower — The Fixture Used Most
Walk-In Shower Design
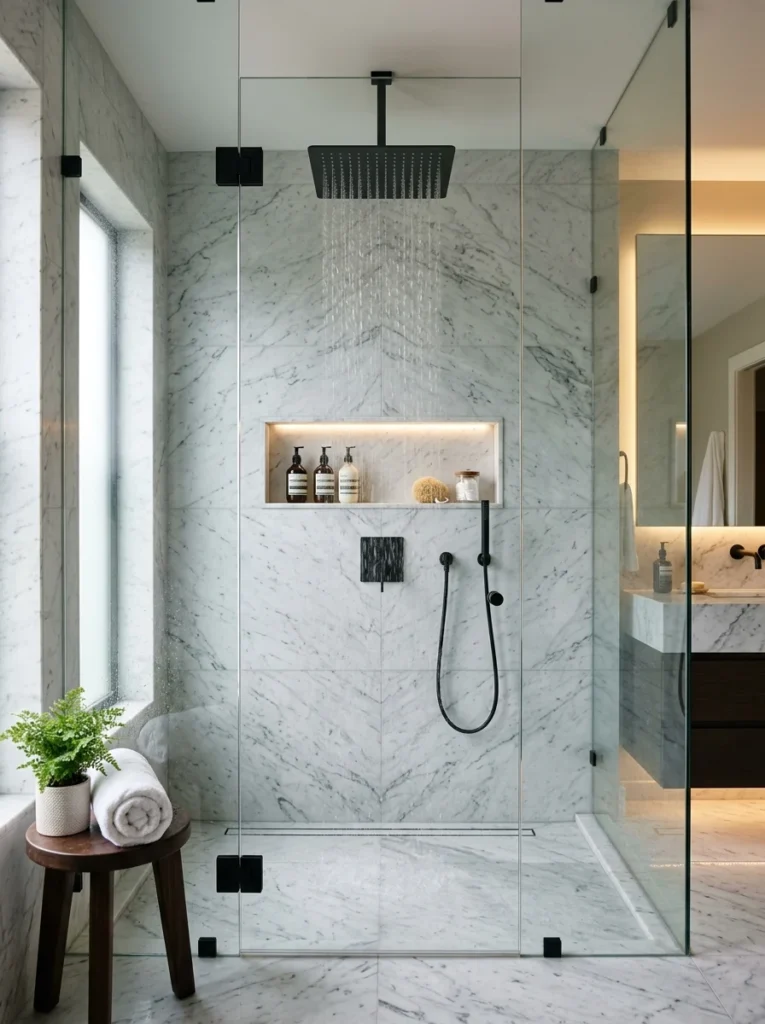
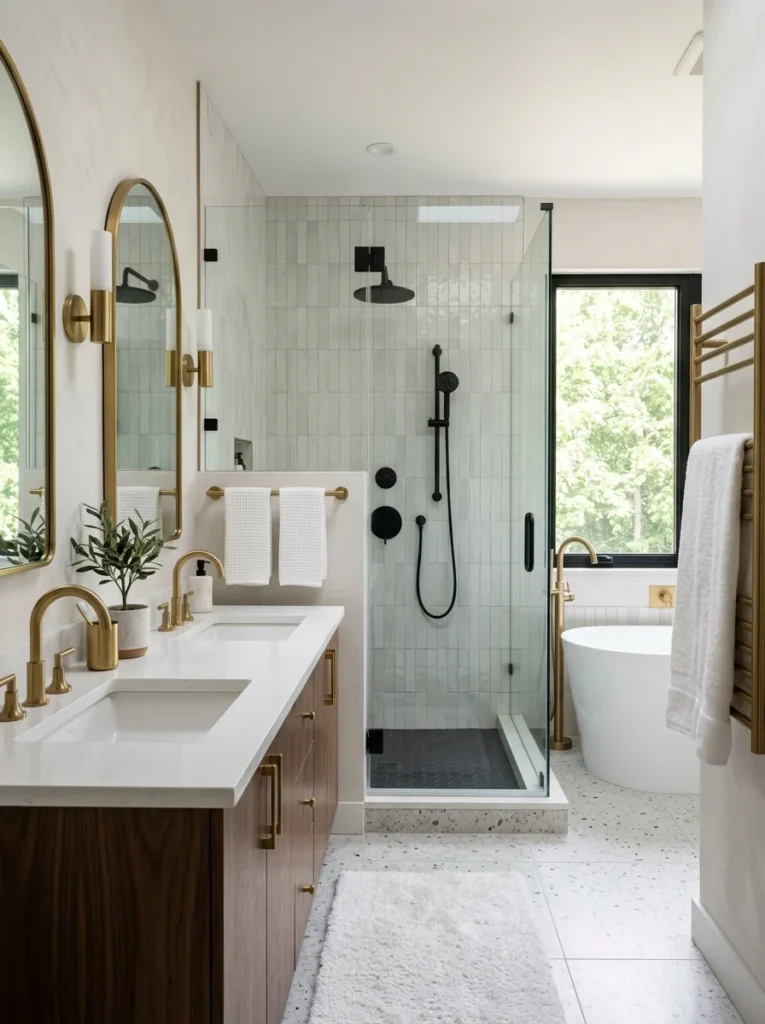
The walk-in shower — a shower without a door, accessed through an open entry — has become the predominant shower format in contemporary master bathroom design, and for good reason. The absence of a door eliminates a maintenance requirement — shower doors accumulate hard water deposits, soap scum, and mold in their frames and seals — and creates a shower enclosure that feels more spacious and more integrated with the bathroom as a whole.
A functional walk-in shower requires careful planning of the water containment zone. Without a door to prevent water from escaping the shower area, the shower floor needs to slope adequately toward the drain, and the shower head needs to be positioned and directed so that water spray falls within the tiled shower zone rather than escaping into the main bathroom area. In practice, a walk-in shower with a rainfall shower head positioned directly overhead, a shower entry that is at least 36 inches deep, and a floor sloped at the appropriate gradient toward the drain functions without any water escaping the shower zone during normal use.
The shower head choice in a master bathroom has a significant effect on the showering experience and deserves more attention than it typically receives. A rainfall shower head — a large, ceiling-mounted head that delivers water from directly above in a wide, gentle spray — is the shower experience most associated with luxury hotels and spa environments, and it produces a genuinely different and more relaxing experience than a standard wall-mounted shower head. The rainfall head works best when installed in the ceiling of the shower zone rather than on a ceiling arm extending from the wall — the ceiling-flush installation looks significantly more refined and ensures that the water falls vertically rather than at an angle.
A handheld shower — a shower head on a flexible hose mounted on a sliding rail — is a practical addition to any shower that provides flexibility for rinsing, cleaning the shower, and bathing children or pets. In a master shower that includes a rainfall ceiling head as the primary fixture, a wall-mounted handheld provides the versatility of a directed spray alongside the luxury of the overhead rainfall — a combination that is both practical and indulgent.
Shower Bench — Practical and Luxurious
A bench within the shower is one of the details that most clearly distinguishes a master shower designed with genuine attention to how it feels to use from one designed primarily for functional adequacy. A shower bench provides a place to sit while showering — for shaving legs, for relaxing under the water, for placing products at a convenient height — and adds a quality of leisured comfort to the shower experience that is difficult to replicate in any other way.
A built-in bench — a bench formed from tiled masonry within the shower enclosure, typically at the end of the shower opposite the shower head — is the most refined and most permanent option. It is part of the shower structure itself, requires no maintenance beyond the same cleaning as the surrounding tiles, and looks completely integrated with the shower design. A built-in bench requires planning from the earliest stage of the bathroom design, as it is part of the construction that precedes tiling.
A teak shower bench — a freestanding bench in water-resistant teak wood — provides the practical function of a shower seat in a form that can be added to any existing shower without structural work. The natural warmth of teak contrasts beautifully with tiled shower surfaces and ages gracefully with regular oiling, developing a silvery patina over time that many people find more attractive than the original golden tone.
Shower Niche Storage
Shower storage — a space for shampoo, conditioner, body wash, and other products — needs to be planned as an integral part of the shower design rather than addressed as an afterthought. Products stored on a surface-mounted shower caddy hanging from the shower head look temporary and create a maintenance challenge as soap and water accumulate around and beneath the caddy.
A recessed niche — a shelf built into the shower wall by cutting between studs and tiling the interior — provides generous product storage flush with the wall surface, with no protrusion into the shower space. The niche is tiled as part of the shower installation and becomes a permanent, integrated storage feature that looks as considered as every other element of the shower.
The niche should be planned in relation to the shower’s tile layout — ideally positioned so that the tiles align with the niche opening and the interior, which requires coordination between the tile layout plan and the niche dimensions from the beginning of the project. A niche positioned without reference to the surrounding tile layout can result in awkward partial tiles around the niche opening that disrupt the visual continuity of the shower wall.
Section 4: The Bathtub — Luxury Versus Practicality
Should Your Master Bathroom Have a Bathtub
The question of whether a master bathroom should include a bathtub is one of the most divisive in residential interior design. The traditional view holds that a bathtub is an essential component of a master bathroom — a feature whose absence diminishes the room’s character and potentially affects the home’s resale value. The contemporary view, increasingly supported by how people actually use their bathrooms, is that a bathtub unused by the household represents a significant floor space commitment that could be better directed toward a larger, more luxurious shower.
The most honest answer to the question is that it depends entirely on whether the household actually uses a bathtub. If both occupants of the master bathroom use the bath regularly — for relaxation, for managing muscle soreness, for genuine restorative bathing rather than simply for washing — then a bathtub is a genuinely valuable fixture that deserves space and budget in the master bathroom. If neither occupant uses the bath except occasionally, a bath that occupies a quarter of the master bathroom’s floor area is a permanent commitment of space to a fixture that delivers no daily value.
Before deciding to include a bathtub in a master bathroom renovation or design, an honest assessment of the household’s bathing habits over the previous year is more useful than any general design advice. If the existing bathtub has been used fewer than ten times in the past year, it is unlikely to be used significantly more in the new bathroom regardless of how beautiful it is.
Freestanding Bathtub — The Visual Centerpiece
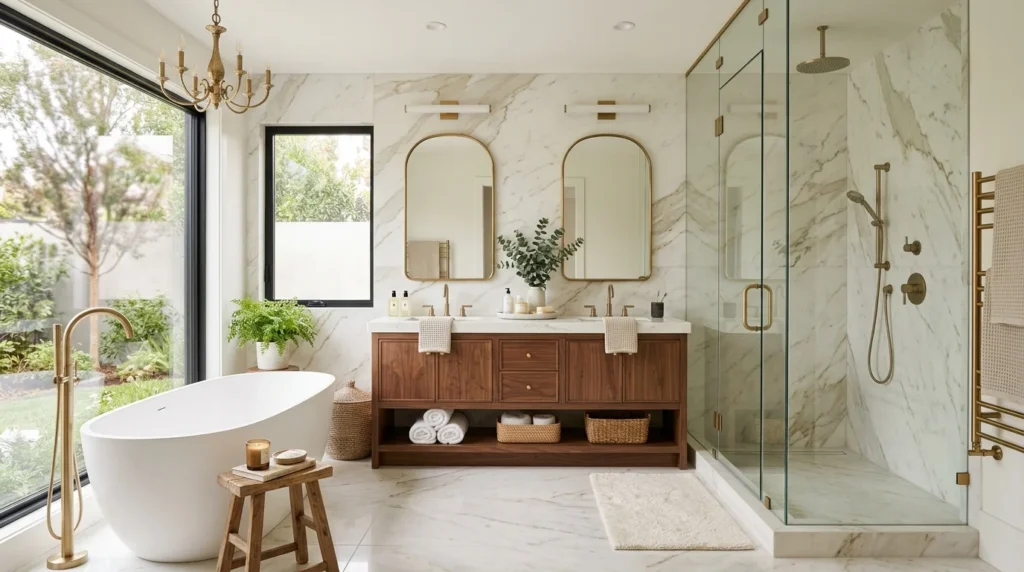
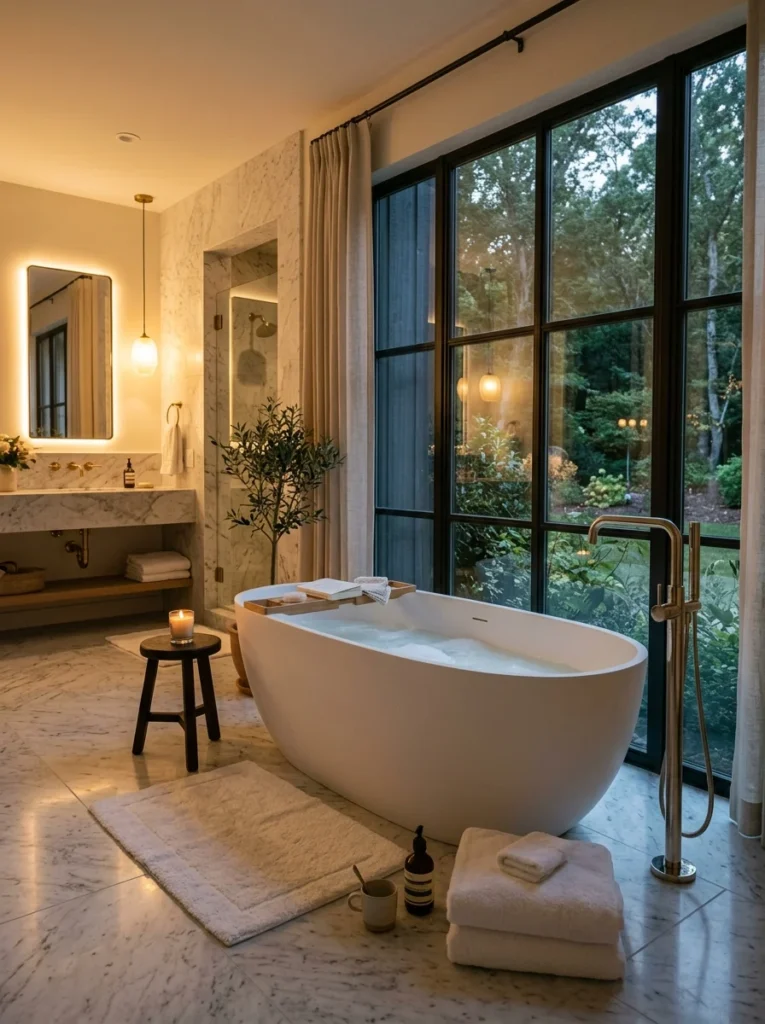
When a bathtub is included in the master bathroom, a freestanding tub — one that stands independently on the floor without being built into a surrounding structure — is the format that most powerfully functions as a design statement. A freestanding bathtub positioned in the bathroom with clear space on all sides is a sculptural object as much as a functional fixture, and the most beautiful master bathrooms in contemporary design typically feature a freestanding tub as their visual centerpiece.
The shape of the freestanding tub affects both its visual character and its practical comfort. Oval tubs are the most classic and the most universally flattering in a range of bathroom styles. Rectangular tubs with clean, geometric lines suit contemporary and minimalist bathrooms. Roll-top tubs with their characteristic curved rims and ball-and-claw feet suit traditional, period, and classic bathroom styles. Asymmetric tubs — with one end shaped to support the back at a reclining angle — prioritize bathing comfort alongside visual interest.
The material of a freestanding tub affects its weight, its heat retention, and its maintenance requirements. Acrylic tubs are lightweight, affordable, available in a wide range of shapes, and retain heat reasonably well — the most practical choice for most situations. Cast iron tubs are extremely heavy — requiring floor structural assessment before installation in upper floor bathrooms — and retain heat exceptionally well, maintaining bath water temperature for significantly longer than acrylic. Stone resin tubs occupy a middle ground between acrylic and cast iron, offering better heat retention than acrylic and significantly less weight than cast iron, with a dense, luxurious feel underfoot when cleaning.
The position of a freestanding bathtub in the master bathroom is a design decision that deserves careful thought. The most common and most visually impactful position is centered on a wall — typically the wall opposite the entrance, or the wall below or beside a window — with the tub as the focal point that is visible from the bathroom entry. A tub positioned in the center of the bathroom floor — accessed from all sides — makes the most dramatic statement but requires the most floor space and works only in rooms large enough to accommodate it without compromising other fixtures.
Built-In Bathtub
A built-in bathtub — one set into a surrounding deck or alcove with tiled or stone surfaces on the sides — is the more space-efficient bathtub option and the more practical choice in bathrooms where the floor area needed for a freestanding tub’s clear surround cannot be justified.
A built-in tub with a tiled deck provides a flat surface alongside the tub that serves as a product shelf, a seat, and a visual platform that gives the tub a more substantial and considered presence than a simple alcove installation. The deck surface needs to be specified in the same tile or stone as the surrounding bathroom surfaces for a cohesive result, or in a contrasting material — a marble deck in a tiled bathroom, for example — for a deliberate material distinction.
The apron panel of a built-in bathtub — the front face of the tub that is visible above the floor — is an opportunity for a design detail that elevates the tub from functional to considered. A tiled apron in the bathroom’s primary tile, a natural stone panel, or a wood panel in a water-resistant species all create a finished, intentional appearance for the built-in tub’s front face.
Section 5: Storage Solutions
His and Hers Storage
In a master bathroom shared by two people, storage planning needs to address each person’s storage needs independently rather than treating the bathroom’s total storage capacity as a shared pool. When storage is shared without clear organization, it inevitably becomes dominated by whichever person’s habits are less organized — products accumulate on surfaces, drawers become mixed and difficult to navigate, and the visual coherence of the bathroom suffers from the accumulated evidence of two people’s routines competing for the same space.
A double vanity with dedicated storage on each side — each person’s basin accompanied by their own drawers or cabinets — is the most direct solution for his and hers storage. Each person’s products, tools, and daily-use items live in their own designated zone, which keeps the countertop clear, the drawers organized, and the bathroom looking intentional rather than accumulated.
In bathrooms with a single vanity, dedicated storage zones can be established within a single cabinet — dedicated drawers for each person, clearly organized and respected by both — or supplemented with additional storage elsewhere in the room. A recessed medicine cabinet above the vanity provides each person’s daily-use products in a separate enclosed space. Dedicated hooks, towel rings, or towel bars for each person’s towels prevents the confusion and hygiene issue of shared toweling.
Linen Storage
A master bathroom that includes storage for fresh towels, spare toiletries, and bathroom linens has a quality of self-containment that makes the daily bathroom routine more comfortable and more efficient. Having to leave the bathroom to retrieve a fresh towel, a spare roll of toilet paper, or a replacement soap dispenser cartridge is a minor friction that occurs repeatedly and accumulates into a significant inconvenience over time.
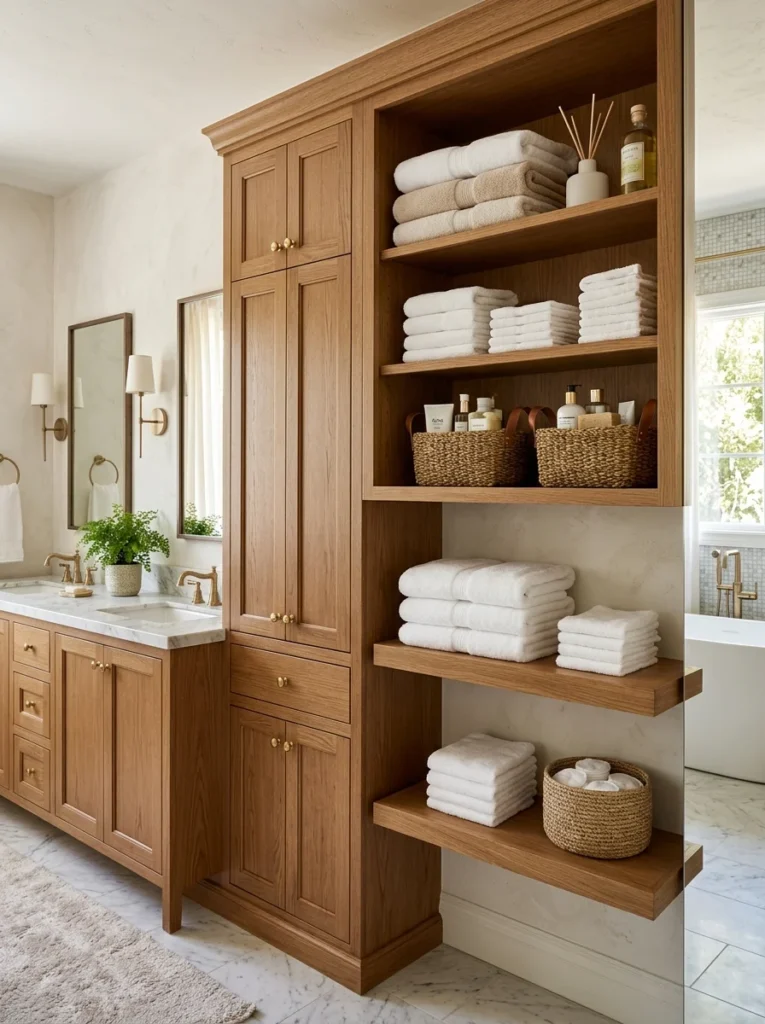
A built-in linen cabinet — floor-to-ceiling cabinetry dedicated to towel and linen storage — is the most generous and most visually resolved storage solution for a master bathroom. Positioned on a wall that is not occupied by wet zone fixtures, a full-height linen cabinet provides storage for a complete supply of fresh towels, bathrobes, spare toiletries, cleaning products, and bathroom accessories in a form that keeps everything out of sight and the bathroom looking calm and uncluttered.
In bathrooms where a full-height cabinet is not possible, open shelving at an appropriate height provides towel storage with a spa-like quality — neatly rolled or folded towels on open shelves are both accessible and decorative, adding warmth and texture to the bathroom without requiring the floor space of a freestanding storage piece.
Section 6: Lighting — The Element That Determines Atmosphere
The Three-Layer Lighting Approach
Good master bathroom lighting requires three distinct types of light, each serving a different function, controllable independently so that the bathroom’s lighting can be adjusted to suit the activity and the time of day.
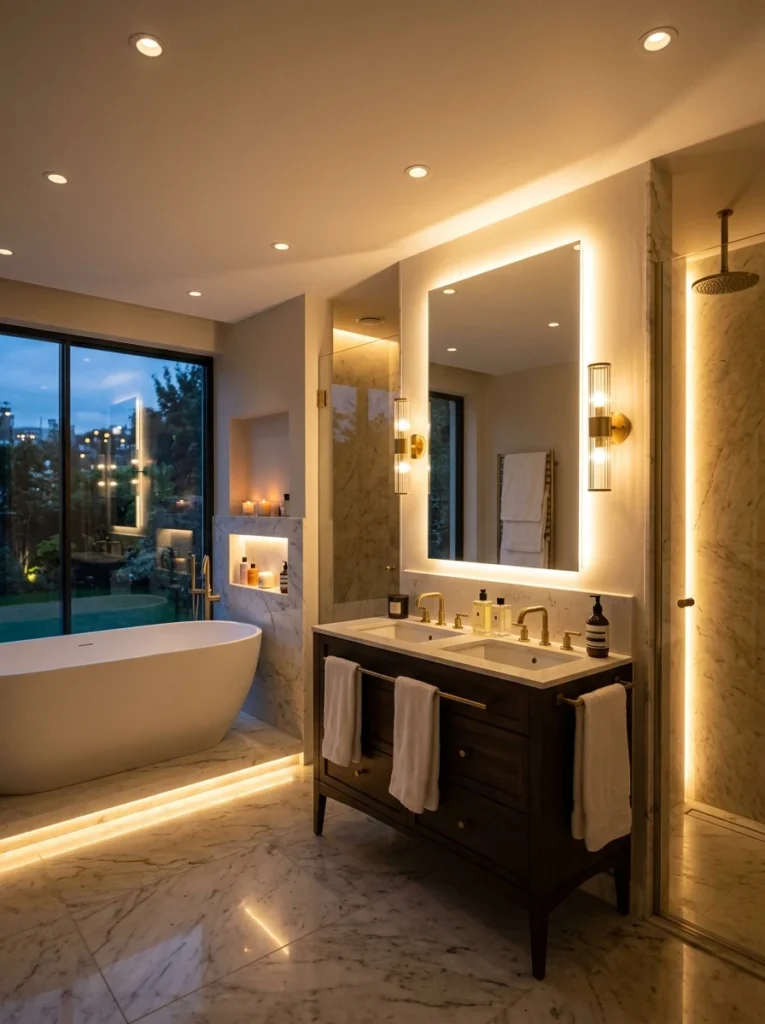
The first layer is ambient lighting — the general illumination that allows the bathroom to be used comfortably and safely. In a master bathroom, recessed ceiling lights distributed across the ceiling provide ambient light without the visual intrusion of surface-mounted fixtures. The number and position of recessed lights needs to be planned to provide even coverage across the floor without dark corners or excessively bright spots.
The second layer is task lighting — the targeted illumination that makes grooming activities possible with the precision they require. The vanity mirror is the location where task lighting is most critical. Mirror lighting — whether integrated into the mirror as a backlit frame, mounted on the wall beside the mirror as flanking sconces, or positioned above the mirror as a dedicated fixture — needs to illuminate the face of the person standing at the mirror without casting shadows and without shining directly into their eyes.
The most effective mirror lighting positions the light source at face height on both sides of the mirror — flanking wall sconces at approximately 60 to 65 inches from the floor — rather than above the mirror, which creates unflattering downward shadows on the face. Backlit LED mirrors provide integrated face-level lighting in a single refined fixture that suits contemporary bathroom aesthetics.
The third layer is accent lighting — the decorative illumination that creates atmosphere and visual interest beyond the functional requirements of the room. In a master bathroom, accent lighting serves the specific purpose of creating the kind of warm, relaxing atmosphere that transforms the bathroom from a functional room into a genuinely restorative one. LED strip lighting beneath the floating vanity creates a warm glow at floor level. LED strip lighting within a shower niche or behind a floating shelf creates a spa-like quality. A decorative pendant light or chandelier above the bathtub is perhaps the most dramatic accent lighting option in a master bathroom — the fixture is both a light source and a visual statement that defines the bathtub zone as a distinct and considered space within the larger bathroom.
Dimmer Switches — The Most Valuable Single Addition
A dimmer switch on every lighting circuit in the master bathroom — ambient, task, and accent — transforms the room’s ability to serve its dual function of energizing morning space and relaxing evening space. At full brightness, the bathroom provides the clinical illumination needed for precise grooming. At low intensity, the same lighting system creates the warm, ambient atmosphere of a spa or a luxury hotel bathroom — the kind of environment where a long, relaxing bath at the end of the day is genuinely appealing rather than merely possible.
The investment in dimmer switches for a master bathroom is modest — the cost of dimmers on every circuit is a small fraction of the total bathroom renovation budget — and the return in terms of how the room feels to use is disproportionately significant. A master bathroom that can be adjusted to exactly the right light level for each use — bright for a quick weekday morning routine, low and warm for a relaxing weekend evening bath — is a room that serves its dual purpose in a way that a bathroom with fixed lighting cannot.
Section 7: Fixtures and Hardware — The Details That Define Quality
Choosing a Hardware Finish
The hardware finish — the metal tone of the taps, the shower fixtures, the towel bars, the toilet roll holder, the cabinet handles, and all other metal elements in the bathroom — is a detail that has an outsized effect on the overall impression of quality and cohesion that the master bathroom creates. A bathroom where every metal element shares the same finish reads as intentionally designed. A bathroom where metal tones mix without intention — chrome taps, brushed nickel towel bars, and gold cabinet handles — reads as assembled without a clear aesthetic vision.
The most consistently beautiful hardware finishes for master bathrooms in contemporary design are brushed brass, unlacquered brass, brushed gold, matte black, and brushed nickel. Each creates a distinct aesthetic character that needs to be chosen in relation to the tile palette, the vanity material, and the overall palette direction of the bathroom.
Brushed brass and unlacquered brass suit warm bathroom palettes — travertine tiles, warm beige walls, natural wood elements — and create a sense of warmth and luxury that polished chrome cannot achieve. Unlacquered brass develops a natural patina over time — darkening and acquiring character in the areas of most frequent contact — which is either beautiful or problematic depending on the preference of the user.
Matte black hardware creates a strong, graphic quality that reads as contemporary and decisive. It suits bathrooms with a clear, clean aesthetic — white tiles, minimal detailing, geometric forms — where the black metal provides a visual anchor against the light background. Matte black requires more frequent cleaning than brushed finishes to prevent water spots from becoming visible on the dark surface.
Brushed nickel is the most neutral and the most versatile hardware finish — it is neither as warm as brass nor as decisive as matte black, which means it suits a broader range of bathroom palettes without making as strong a statement as either of the alternatives. It is the most forgiving choice in terms of maintenance and suits both warm and cool bathroom palettes comfortably.
Mixing Metals
The conventional wisdom in bathroom design holds that all metal finishes should match — every fixture and fitting in the same metal tone. This principle is reliable and produces cohesive results, but it is not absolute. Intentional metal mixing — where two different finishes are used in clearly defined roles with a clear rationale for the distinction — can produce results that are more interesting and more sophisticated than a single finish throughout.
The most successful metal mixing in bathrooms pairs a dominant finish — used for the primary fixtures such as taps, shower controls, and towel bars — with a secondary accent finish used for smaller elements such as cabinet handles, mirror frames, and light fixtures. The two finishes should be clearly distinct — matte black taps with brushed brass cabinet handles, for example — rather than similar tones that appear to be an unintentional mismatch rather than a deliberate choice.
Section 8: The Finishing Details That Make the Difference
Heating — The Undervalued Essential
A warm bathroom floor and warm towels are among the most straightforward and most consistently appreciated luxury details in a master bathroom, and both are achievable at a cost that is modest relative to the overall bathroom renovation budget.
Underfloor heating — electric heating elements installed beneath the tile floor surface — transforms the experience of a tiled bathroom floor. A cold tile floor on bare feet first thing in the morning is one of the most universal bathroom discomforts, and its elimination through underfloor heating creates an immediate and daily quality-of-life improvement that users consistently report as one of the most valued features in a renovated bathroom. The running cost of underfloor heating in a bathroom is modest — bathroom floors are small, the heating is used for limited periods, and modern systems are thermostatically controlled to run only when needed.
A heated towel rail provides warm, dry towels immediately after bathing and simultaneously functions as a bathroom radiator that contributes to the room’s general warmth. In bathrooms without underfloor heating, a heated towel rail is the most valuable single heating addition. In bathrooms with underfloor heating, a heated towel rail complements the floor heating and ensures that towel dryness and warmth are maintained throughout the day.
Plants and Natural Elements
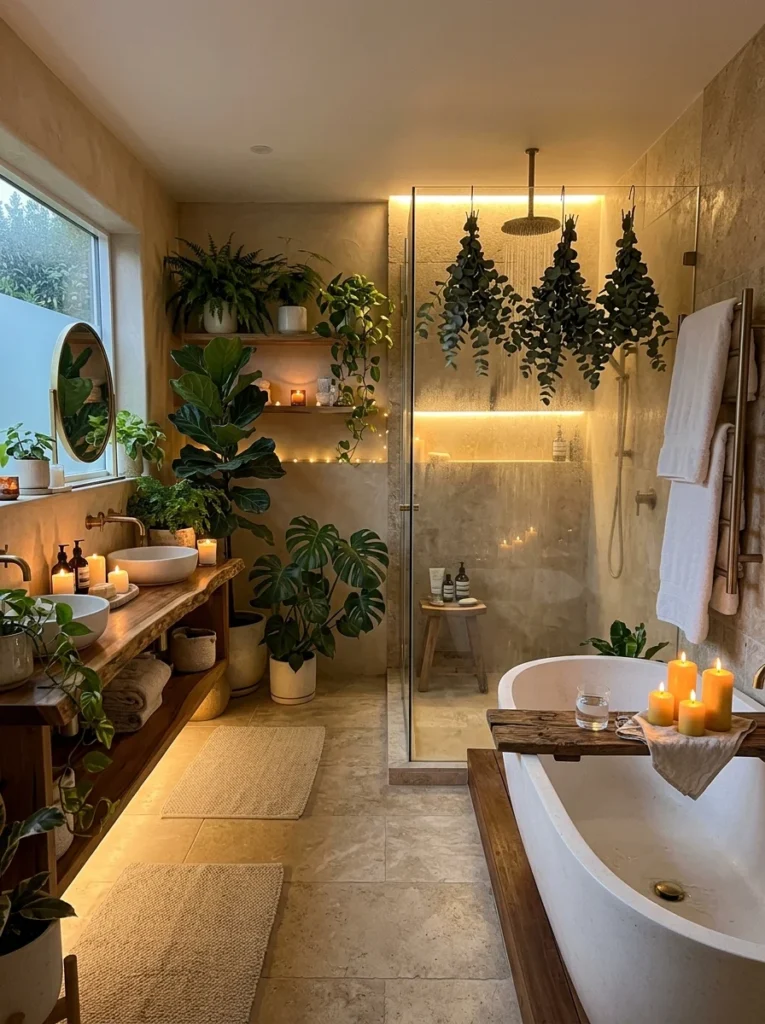
Plants in a master bathroom serve both an aesthetic and a practical function. Aesthetically, plants introduce organic form, natural color, and living texture in a way that manufactured decorative objects cannot replicate. Practically, certain plants thrive in the warm, humid environment of a bathroom and actively benefit from the moisture — making the bathroom one of the most plant-friendly environments in the home.
The plants that perform best in bathroom environments are those that naturally grow in humid, warm conditions with indirect light. Peace lilies, ferns, pothos, snake plants, and orchids all thrive in bathroom conditions. A large peace lily in a simple white ceramic pot positioned in the corner of a master bathroom adds a quality of serene natural beauty that is genuinely difficult to achieve with any other decorative element.
The container matters as much as the plant in a master bathroom context. A beautiful plant in an unattractive plastic nursery pot undermines the careful aesthetic decisions made throughout the rest of the room. A ceramic pot, a stone planter, or a woven basket as a pot cover brings the plant into the room’s overall palette and makes it a designed element rather than an afterthought.
Scent and Atmosphere
The sensory experience of a master bathroom extends beyond the visual — the scent of the room contributes significantly to whether it feels like a genuine retreat or simply a functional space. A bathroom that smells clean and pleasant, with perhaps a subtle fragrance from a diffuser, a candle, or fresh flowers, creates a sensory environment that reinforces the visual and tactile qualities of good design.
A reed diffuser in a simple bottle with minimal visual presence provides continuous fragrance without requiring attention or flame. A large pillar candle or a collection of pillar candles on a bathroom shelf or beside the bathtub contributes both fragrance and warm, flickering light that transforms the bathing experience — particularly in the evening.
Fresh eucalyptus hung from the shower head — a spray of eucalyptus tied with twine and hung to receive steam from the shower — releases its natural fragrance when warmed by the steam and creates a spa-like scent environment in the shower that is both simple and genuinely pleasant. It lasts for approximately two weeks before needing replacement and costs almost nothing relative to the experience it creates.
Conclusion
A master bathroom designed with genuine attention to how it will be used and how it will feel to use — rather than simply to how it will appear in photographs — becomes one of the most valued spaces in the home. The daily ritual of the master bathroom, repeated morning and evening for every day of the life lived in the house, deserves a space that serves it with quality, comfort, and genuine beauty.
The decisions covered in this guide — layout first, fixtures second, storage third, lighting fourth, materials fifth, finishing details last — provide a clear sequence for designing a master bathroom that delivers on all of these qualities. Each decision builds on the ones that precede it, and the result of working through them in order is a bathroom where every element works in relation to every other element, and where the whole is significantly more than the sum of its parts.
A master bathroom designed this way is not a luxury that belongs only to large homes and generous budgets. It is the result of thoughtful decisions made in the right order — decisions that are available to every bathroom renovation regardless of size and budget when the process starts with a clear vision of what the space is meant to be and what it is meant to feel like to use every single day.