
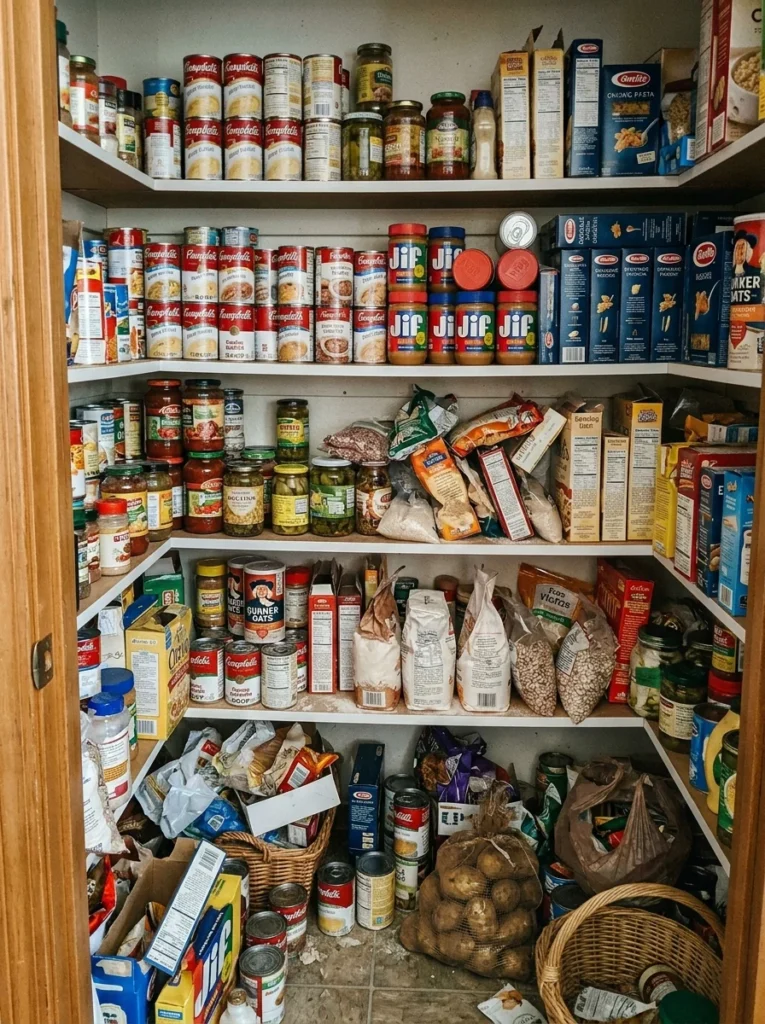
A disorganized pantry is one of the most consistently frustrating experiences in daily home life. It is the place where food goes to be forgotten — where items purchased with good intentions disappear behind other items, where duplicates accumulate because existing stock cannot be found, where expiry dates pass unnoticed, and where the simple act of finding a specific ingredient before cooking becomes a minor ordeal that adds friction to an activity that should be straightforward and enjoyable.
The financial cost of a disorganized pantry is real and measurable. Studies consistently find that the average household wastes a significant proportion of the food it purchases, and pantry disorganization is one of the primary contributors to this waste. When food is not visible, it is not remembered. When it is not remembered, it is not used. When it is not used, it expires and is discarded. The money spent on that food — and on the duplicate purchases made because the original could not be found — is lost entirely.
The good news is that pantry organization is one of the most achievable home improvement projects available. Unlike bathroom renovations, kitchen remodels, or furniture purchases, organizing a pantry requires no structural changes, minimal investment in products, and a single concentrated effort of a few hours that produces immediate and lasting results. A well-organized pantry, maintained with a simple weekly habit, stays organized indefinitely and transforms the daily experience of cooking and meal planning in a way that is disproportionate to the effort required to create it.
This guide takes the pantry organization process from beginning to end in the correct sequence — emptying and assessing first, then categorizing and sorting, then measuring and planning the storage system, then installing and loading the system, and finally establishing the maintenance habits that keep the system working long-term. Every step is covered in practical detail, with specific guidance for pantries of different sizes — from a single dedicated pantry cabinet to a full walk-in pantry room.
Step 1: Empty Everything Out Completelyk
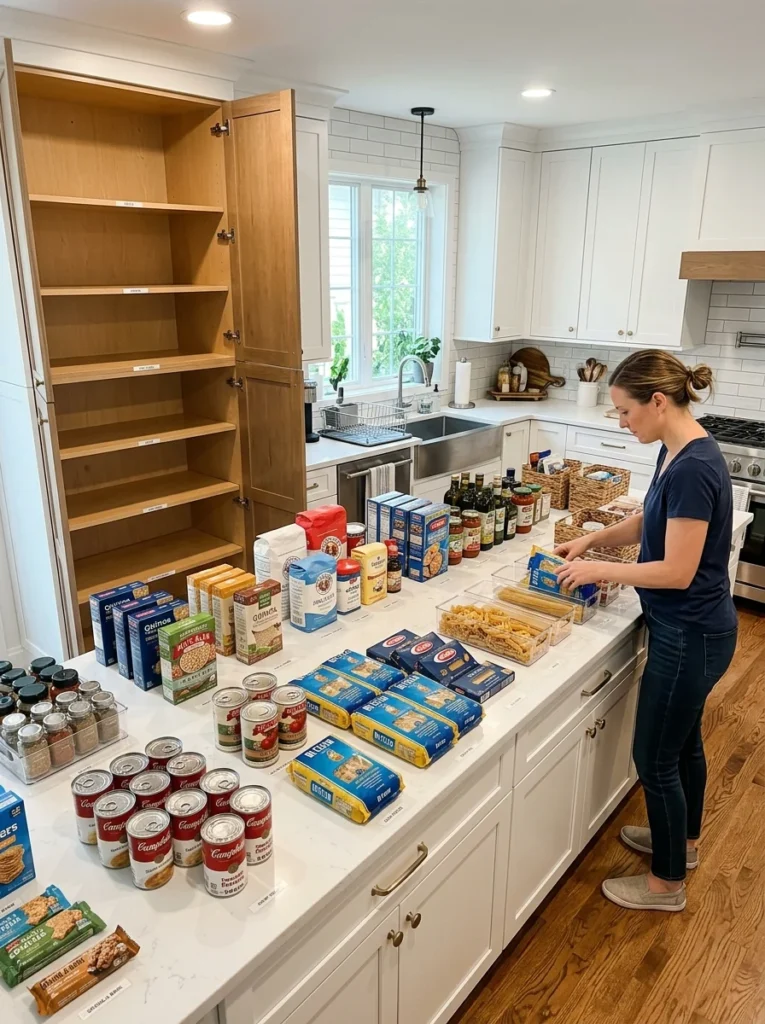
The single most important principle of pantry organization is that it cannot be done effectively without starting from an empty pantry. Reorganizing a pantry while leaving its contents in place produces a rearrangement, not an organization. A genuine organization — one that establishes a clear, logical system that can be maintained — requires seeing everything the pantry contains simultaneously, laid out in a visible way that allows assessment and decision-making.
Empty the entire pantry completely. Remove every item from every shelf, every basket, every container, and every corner. Lay everything out on a table, a countertop, or the kitchen floor in a way that allows every item to be seen and assessed individually. This may feel dramatic, particularly if the pantry is large and its contents are extensive, but it is a non-negotiable first step. The assessment and categorization that follow are only possible when every item is visible simultaneously.
Assess Everything as You Empty It
The emptying process is the opportunity to assess every item in the pantry and make a decision about whether it will return to the pantry. Not everything that comes out of the pantry necessarily goes back in — this is one of the primary ways that pantry organization reduces clutter and improves usability.
Check every item for its expiry date. Discard anything that has expired without hesitation. Expired food is not usable, and its presence in the pantry occupies space and creates visual clutter that makes finding genuinely usable items more difficult. Food that has expired is already a lost financial investment — keeping it in the pantry does not recover the cost, it simply perpetuates the problem.
Assess the condition of every item. Spices that have been open for more than a year have typically lost most of their potency and flavor, even if they have not technically expired. Opened packages of grains, nuts, and dried goods that smell stale or show signs of moisture damage should be discarded. Canned goods with any sign of bulging, rusting, or damage to the seal are unsafe and should be discarded immediately.
Identify duplicates — items of which you have multiple open packages because a new one was purchased before the existing one was finished. Note these for future reference: duplicates are the primary evidence of a pantry that was not organized well enough to make its existing stock visible.
Identify items that do not belong in the pantry at all — cleaning products stored in the food pantry, medicines or supplements mixed with food items, tools or utensils that migrated from the kitchen into the pantry over time. Remove these to their appropriate storage locations permanently.
What remains after this assessment process is the true contents of a functioning pantry — items that are usable, in good condition, and actually belong in the food storage space. This is what will be organized.
Step 2: Sort Into Categories Before Anything Else
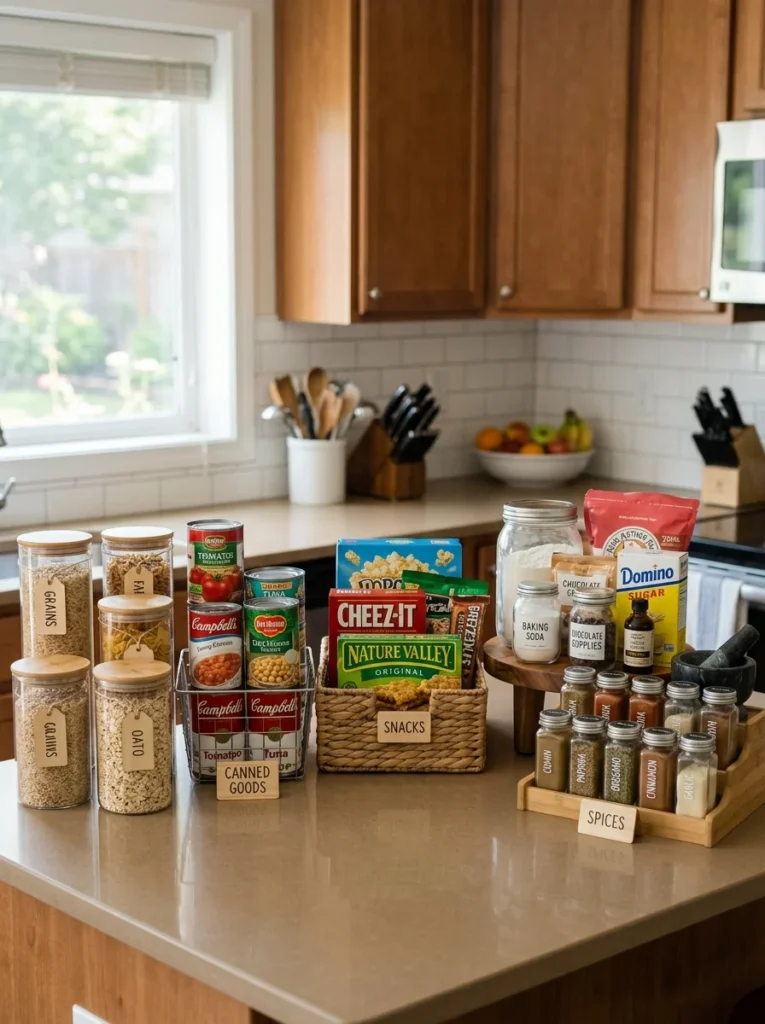
Before any shelf, container, or organizer is installed, every item that will return to the pantry needs to be sorted into categories. Categorization is the intellectual foundation of a functional pantry system — the logic that determines where everything lives and how it can be found reliably.
The categories that work best for a pantry are those that reflect how food is actually used in the kitchen — the way a cook thinks about ingredients when planning and preparing meals — rather than abstract organizational principles that look logical but do not match how the pantry is accessed in practice.
The Core Categories for Most Pantries
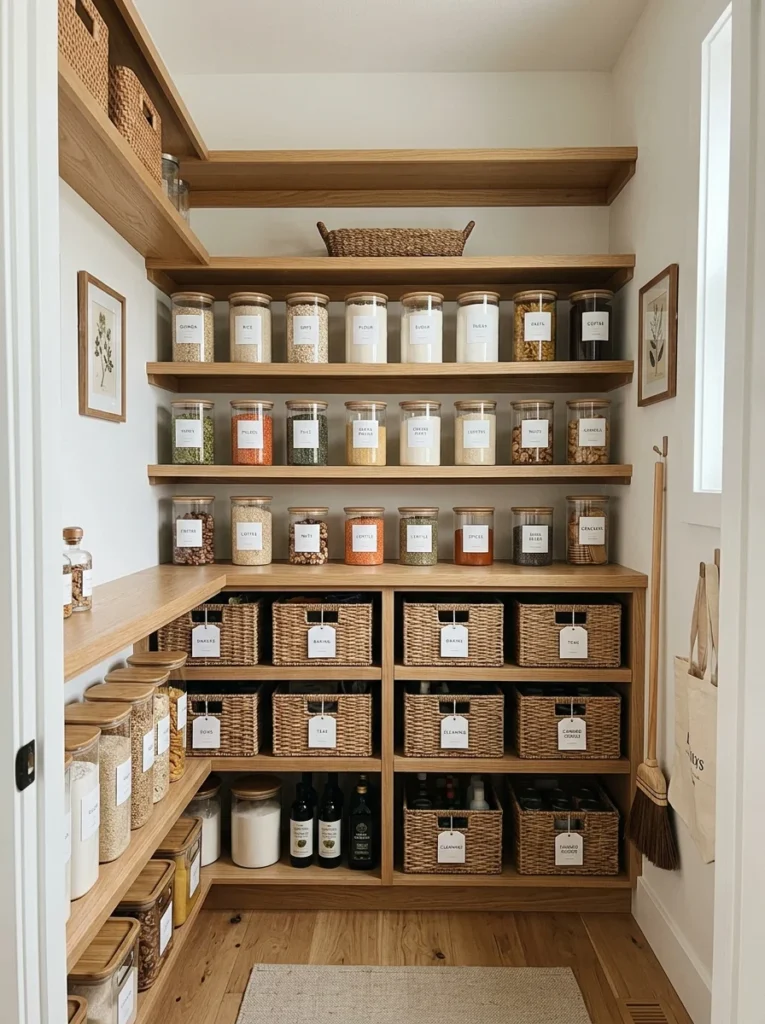
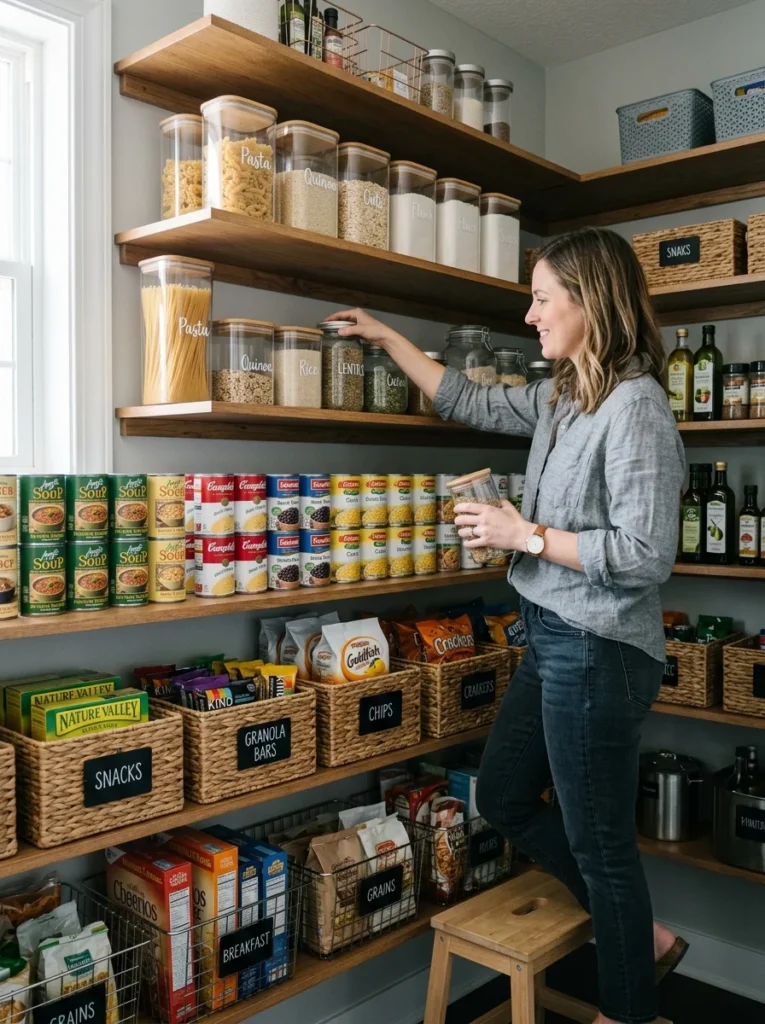
Grains and Pasta: Rice, quinoa, oats, barley, pasta of all types, noodles, and similar starchy staples. This is typically the largest category by volume in most pantries and benefits from a dedicated shelf section with clear containers that show the quantity remaining at a glance.
Canned and Jarred Goods: Canned tomatoes, beans, chickpeas, corn, fish, soups, and broths. Jarred sauces, condiments, preserves, and pickles. This category benefits from shelf organization that allows items at the back to be seen and accessed as easily as those at the front.
Baking Supplies: Flour, sugar, baking powder, baking soda, yeast, cocoa powder, vanilla extract, chocolate chips, and other baking-specific ingredients. This category benefits from being grouped together in one dedicated zone so that everything needed for baking is in one place rather than scattered across the pantry.
Spices and Seasonings: Dried herbs, ground spices, whole spices, salt, pepper, and spice blends. This is the category that most benefits from a dedicated, specifically designed storage solution — a spice drawer, a pull-out spice rack, or a dedicated spice shelf with appropriate organizers.
Snacks and Crackers: Crackers, cookies, chips, nuts, dried fruit, granola bars, and similar packaged snack items. This category benefits from being positioned at an accessible height — a shelf reachable by all household members who snack independently, including children if appropriate.
Breakfast Items: Cereals, granola, oats if used primarily for breakfast rather than baking, pancake mix, and similar breakfast-specific items. Grouping breakfast items together in one zone makes the morning routine faster and more efficient.
Oils, Vinegars, and Condiments: Cooking oils, olive oil, vinegars, soy sauce, fish sauce, and similar liquid cooking ingredients. These items are typically stored in their original bottles and benefit from being grouped on a dedicated shelf with enough depth to accommodate bottles standing upright.
Beverages: Tea bags, coffee, hot chocolate, and any other beverage items stored in the pantry. These benefit from being in one clear zone so that the beverage-making routine does not require searching.
Dried Beans and Legumes: If used regularly, dried beans, lentils, and legumes benefit from a dedicated section alongside grains or as a separate sub-category depending on the household’s cooking habits.
Children’s Items: In households with children, a dedicated zone at child-accessible height for snacks, lunchbox items, and foods that children select independently reduces the daily friction of meal preparation and helps children develop independence in the kitchen.
Adapt Categories to Your Household
The categories above are a reliable starting framework for most households, but the right category structure for any specific pantry is the one that reflects how that household actually cooks and eats. A household that bakes extensively needs a more detailed and more prominent baking category. A household that meal-preps weekly benefits from a dedicated prep ingredients zone. A household with dietary restrictions — gluten-free, dairy-free, or allergen-specific — benefits from clearly separated zones that prevent cross-contamination and confusion.
After sorting everything into categories, assess the volume of each category — how much physical space does each category occupy? This assessment informs the shelf space allocation in the planning step that follows.
Step 3: Measure Your Pantry Before Buying Anything

The most common pantry organization mistake — aside from failing to start from an empty pantry — is purchasing storage products before measuring the space they will go into. Storage containers, baskets, shelf organizers, lazy susans, and drawer inserts are only useful if they fit the specific dimensions of the pantry shelves, drawers, and doors they are intended for. Products purchased without measurement are frequently returned, replaced, or abandoned because they do not fit the space correctly.
Measure every shelf in the pantry — the width, the depth, and the height of the space between each shelf and the one above it. Note these measurements for every shelf because they are rarely uniform throughout the pantry — the bottom shelves are typically deeper and taller than the upper shelves, and the dimensions between shelves often vary based on the original installation.
Measure the inside face of the pantry door if an over-door organizer is planned. Note the width of the door, the depth of the door frame, and the space available between the back of the closed door and the nearest shelf — this space determines whether an over-door organizer can be used without preventing the door from closing.
Measure the floor space of the pantry if a rolling cart or freestanding storage unit is planned.
With all measurements recorded, the storage product selection can be done against specific dimensional requirements rather than by approximation.
Step 4: Plan the Storage System — Zone Placement and Product Selection
With the pantry empty, the categories defined, the volumes assessed, and the measurements recorded, the storage system can be planned in full before any products are purchased or any items are returned to the pantry.
The Zone Planning Principle — Frequency of Use Determines Location
The most important principle of pantry zone planning is that the frequency with which a category is used determines where it lives in the pantry. Items used daily — oils, spices, pasta, canned goods regularly pulled for weeknight dinners — belong in the most accessible zone of the pantry: the shelves between waist height and eye level where items can be seen, identified, and retrieved without bending, reaching, or searching. Items used weekly — baking supplies, specialty grains, less frequently used condiments — belong in the secondary zone: the shelves slightly above eye level and slightly below waist level that require a small reach but are still comfortably accessible. Items used monthly or seasonally — bulk supplies, rarely used specialty items, appliances stored in the pantry — belong in the least accessible zone: the highest shelves that require a step stool to reach and the lowest shelves near the floor.
Applying this principle transforms a pantry from a storage space where items are arranged by convenience of loading to one where items are arranged by convenience of daily use — a significant practical improvement that is immediately felt in the cooking routine.
Shelf Organization Products Worth Investing In
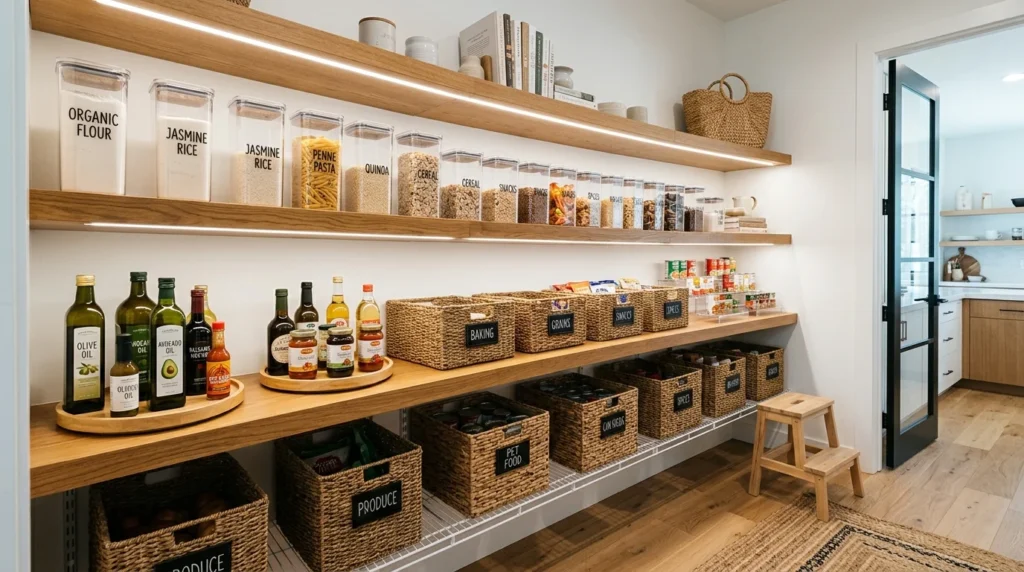
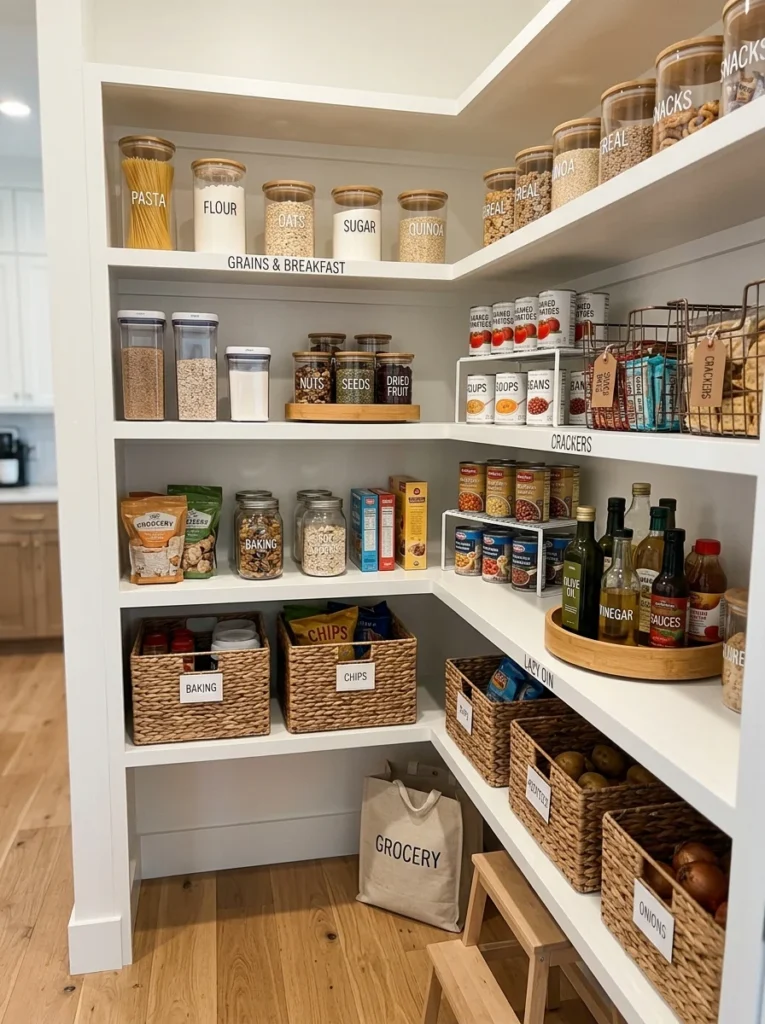
Clear Airtight Containers: Decanting dry goods — grains, pasta, flour, sugar, rice, nuts, and similar items — from their original packaging into clear airtight containers is the single most impactful product investment in pantry organization. Clear containers make the quantity of every item immediately visible, which prevents both running out of items without noticing and purchasing duplicates of items already in stock. Airtight containers protect dry goods from moisture, pests, and the loss of freshness that occurs when items are left in opened original packaging. And a pantry of matching clear containers has a visual coherence and cleanliness that a pantry of mismatched original packages cannot achieve.
When purchasing clear containers for a pantry, consistency of brand and style — using the same containers throughout rather than a mix of different sizes and shapes from different brands — maximizes the visual coherence of the finished pantry and makes stacking and fitting containers on shelves significantly easier.
Lazy Susans: A rotating lazy susan on any shelf that holds bottles, jars, or cans more than one item deep transforms the accessibility of that shelf. Items at the back of the shelf become as accessible as items at the front with a simple spin. Lazy susans are particularly valuable on shelves holding oils and vinegars, spice jars, and canned goods — all categories where items are regularly stored two or three rows deep.
Shelf Risers: A wire or bamboo shelf riser placed on a shelf creates two levels of storage where only one existed before, making use of the vertical space between shelves that is otherwise wasted when all items are the same height. Shelf risers are particularly useful on shelves holding canned goods — cans of the same height can be stored on both the original shelf and the riser simultaneously, doubling the number of cans that fit on the shelf without reducing visibility.
Baskets and Bins: Open baskets and bins group items that do not naturally stack or stand independently — packets of nuts, bags of dried fruit, loose snack bars, packets of soup mix — into contained categories that can be pulled out as a unit for access. A basket labeled “Snacks” or “Baking” can be pulled off the shelf entirely, allowing items at the back to be accessed easily without unpacking the shelf.
Pull-Out Drawers: Freestanding pull-out drawer units placed on lower pantry shelves — or drawer inserts installed within existing cabinet pantries — transform the accessibility of lower shelf storage. Items stored in a pull-out drawer are visible from above and accessible without kneeling or reaching into the back of a deep shelf.
Door-Mounted Organizers: The inside face of the pantry door is a usable storage surface for small items — spice jars, condiment packets, small cans, and foil and wrap rolls. A door-mounted organizer specifically designed for pantry doors holds these small items in accessible pockets or on shallow shelves while keeping the main shelf space free for larger items.
Step 5: Label Everything — The System That Makes Organization Permanent
Labels are the element that transforms a pantry from an organized arrangement that deteriorates over time back into disorder to one that stays organized indefinitely. Without labels, the logic of the organization system lives only in the memory of the person who created it — and memory is inconsistent, especially for household members who did not participate in the organization process. With labels, the system is self-documenting — every container, basket, and shelf zone communicates clearly where it belongs and what goes in it.
What to Label
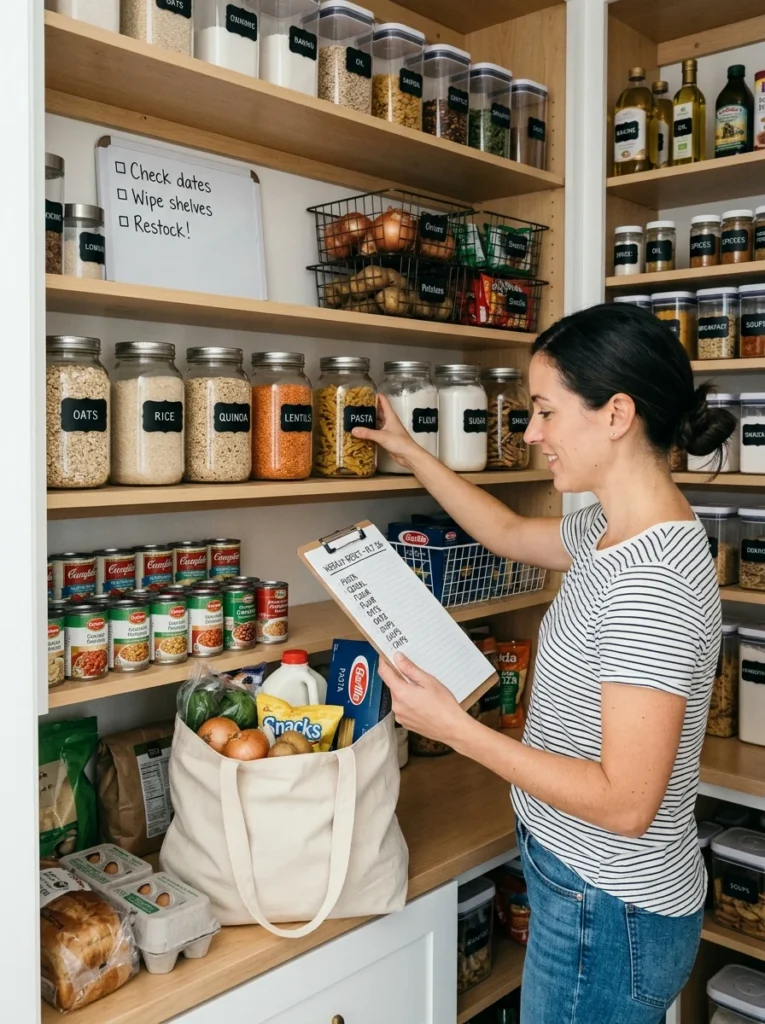
Every container of decanted dry goods needs a label that identifies the contents. This is particularly important for containers holding items that look visually similar — different types of flour, different varieties of rice, different types of sugar — where the label is the only reliable way to distinguish the contents without opening and inspecting the container.
Every basket and bin needs a label identifying its category. The label on a basket ensures that when items are taken out for use and returned to the pantry, they go back to the correct basket rather than being placed wherever is most convenient in the moment.
Every shelf zone benefits from a zone label that communicates what category lives there. A shelf label is particularly useful in a pantry used by multiple household members — it prevents the gradual migration of items between zones that is the primary cause of pantry organization deteriorating over time.
Label Styles
The choice of label style is a personal and aesthetic decision that affects the visual coherence of the finished pantry. Printed labels — created with a label maker or printed on a home printer and applied to the container — are the most consistent and most legible option. Handwritten labels in a clean, consistent handwriting style provide a more personal quality. Chalkboard labels — blackboard-finish adhesive labels that can be written on with chalk and erased for relabeling — provide flexibility for containers whose contents change regularly.
Whatever label style is chosen, consistency throughout the pantry — all labels in the same style, the same font, the same color — contributes significantly to the finished pantry’s visual coherence and the quality of calm it communicates.
Step 6: Load the Pantry in the Correct Order
With the storage system in place and labeled, the pantry is ready to be loaded. Loading the pantry in the correct order — from the back of each shelf forward, and from the lowest frequency items first to the highest frequency items last — ensures that the finished pantry reflects the zone plan accurately and that frequently used items are genuinely in the most accessible positions.
Start by loading the items that belong in the least accessible zones — the highest shelves and the lowest floor-level shelves — with the bulk supplies, seasonal items, and rarely used specialty items that belong there. Then load the secondary zones with the weekly-use items. Finally, load the primary zone — the eye-level and waist-height shelves — with the daily-use items, positioned toward the front of the shelf for maximum visibility and accessibility.
Within each category zone, apply the FIFO principle — First In, First Out. New stock goes behind existing stock, so that older items are always used before newer ones. This simple loading discipline prevents the expiry of items at the back of the shelf that newer stock conceals, which is one of the primary causes of food waste in even well-organized pantries.
Step 7: The Maintenance System — Keeping the Pantry Organized
A pantry organization system is only valuable if it stays organized. The most common failure mode for pantry organization is that the initial effort produces a beautifully organized pantry that gradually deteriorates over the following weeks and months as items are returned to convenient rather than correct locations, as new stock is loaded without applying the FIFO principle, and as the zone logic is forgotten by household members who were not involved in the original organization.
The maintenance system that prevents this deterioration is simple and requires minimal time — but it needs to be consistent to be effective.
The Weekly Five-Minute Reset
Once per week — ideally before the weekly grocery shop — spend five minutes resetting the pantry to its organized state. This means returning any items that have been placed in the wrong zone to their correct location, applying the FIFO principle to any new stock added during the week, and checking the inventory of items that are running low so that they can be added to the shopping list.
Five minutes per week is a genuinely sufficient amount of time for pantry maintenance when the organization system is well-established and the initial effort was done correctly. The weekly reset prevents the small disorganization that accumulates daily from compounding into the significant disorder that eventually requires another full day of reorganization.
The Shopping List Connection
An organized pantry is most useful when it is connected to the household’s grocery shopping routine. Before each grocery shop, a quick pantry check — assessing what is running low and what is well-stocked — prevents the duplicate purchases that are one of the primary indicators of pantry disorganization. A running shopping list kept on the pantry door or in a notes app on the phone, updated whenever a container or category runs low, makes this connection between pantry inventory and shopping routine automatic and frictionless.
The One-In-One-Out Principle
For pantry items with fixed storage — items decanted into specific containers — the one-in-one-out principle prevents containers from becoming overcrowded. When a container is emptied and refilled from a bulk purchase, the refill fills only the container — overflow bulk stock is stored in a designated bulk storage zone rather than crowding the primary storage container. This principle keeps the primary storage zone consistently organized regardless of bulk purchase quantities.
Step 8: Common Pantry Organization Mistakes to Avoid
Buying Storage Products Before Measuring
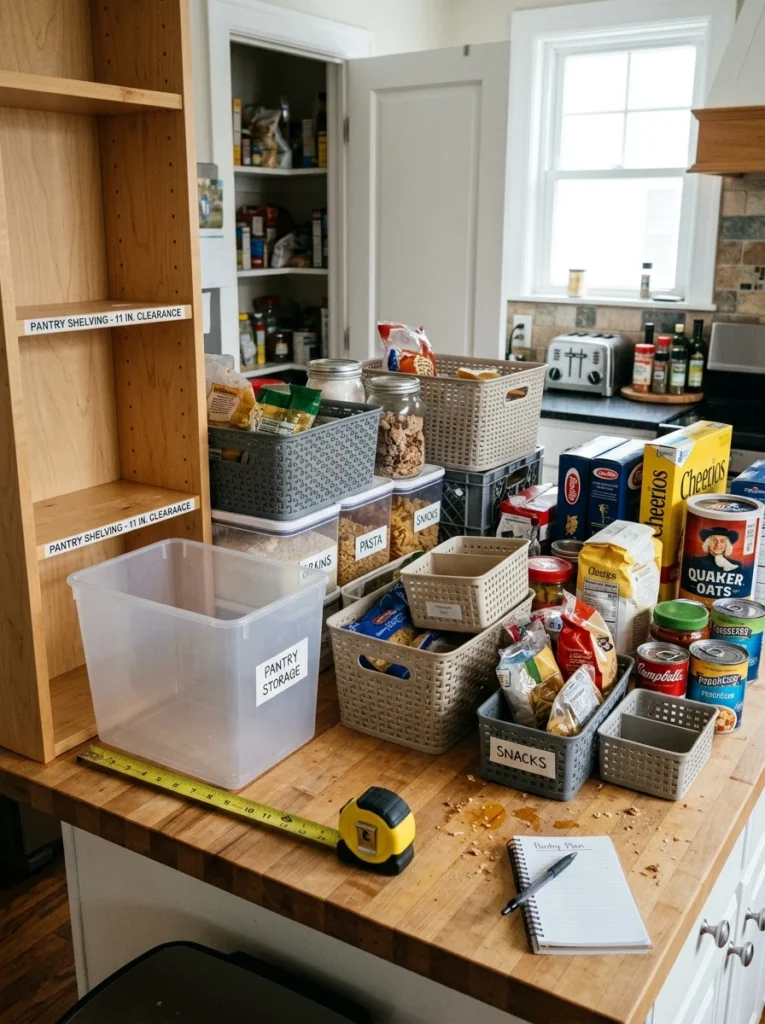
As emphasized in Step 3, purchasing storage products before measuring the pantry is the most common and most avoidable pantry organization mistake. Products that do not fit the specific dimensions of the pantry shelves are worse than no products at all — they create an additional problem of what to do with unusable storage items while solving none of the original organization problems.
Organizing Without Decluttering First
Organizing a pantry without first discarding expired, damaged, and duplicate items is reorganizing clutter rather than creating an organized system. The space and visual clarity gained by discarding items that should not be in the pantry is essential to the success of the organization system — a system that is too full to accommodate everything the pantry holds is not a functional system.
Creating Too Many Small Categories
A pantry divided into too many small, specific categories — with individual zones for every ingredient type rather than broader, logical groupings — becomes difficult to maintain because the precision of the system does not match the imprecision of daily cooking and restocking habits. Categories that are too specific also mean that items that do not fit neatly into a single category have no clear home, which leads to placement based on convenience rather than logic.
Ignoring the Needs of Other Household Members
A pantry organized by one person based solely on their own habits and preferences is a pantry that other household members will not maintain. Involving all regular pantry users in the categorization and zone planning discussions — or at minimum explaining the logic of the system clearly once it is established — ensures that the organization is understood and respected by everyone who uses the space.
Conclusion
An organized pantry is not a luxury or an aesthetic preference — it is a practical system that saves money, reduces food waste, simplifies the daily cooking routine, and makes the experience of being in the kitchen genuinely more pleasant. The one-time effort of organizing a pantry from scratch — following the seven steps in this guide in the correct sequence — produces a result that pays daily dividends for as long as the system is maintained.
The steps are straightforward: empty everything, assess and declutter, sort into logical categories, measure the space accurately, plan and install the storage system, label everything clearly, load in the correct order, and establish a simple weekly maintenance habit. None of these steps is complicated. The only requirement is the commitment to do them in sequence, without skipping the foundational steps of emptying and categorizing in favor of the more immediately satisfying steps of installing storage products and loading the pantry.
A pantry organized this way — systematically, from the beginning, with a clear logic that every household member understands — is a pantry that stays organized. And a pantry that stays organized is one of the most practically valuable improvements that can be made to the daily experience of living in a home.