
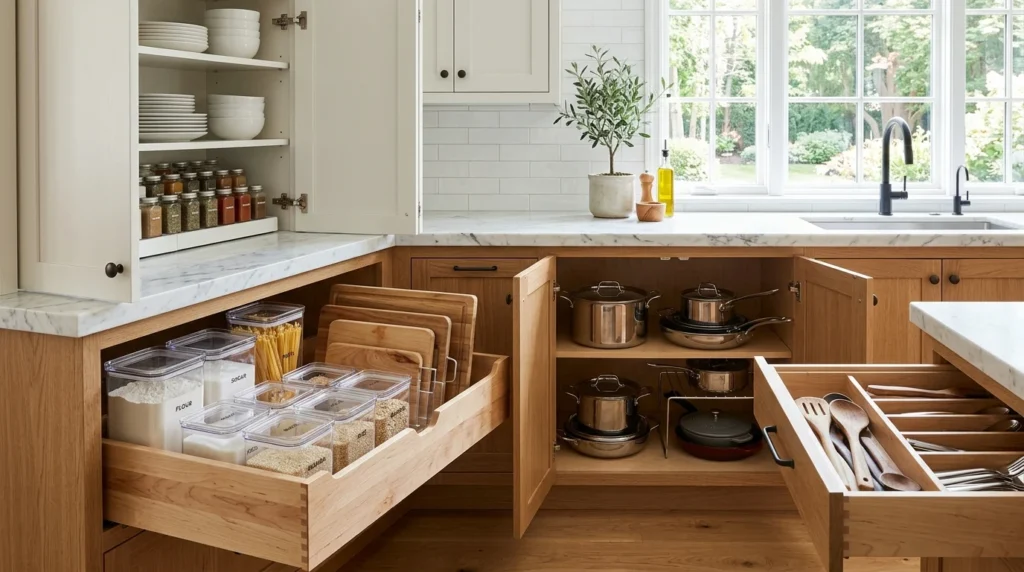
There was a period, right after I moved into this house, when opening my kitchen cabinets felt genuinely stressful, mismatched lids sliding out unexpectedly, pots stacked in a precarious tower that occasionally avalanched the moment I reached for whatever was buried at the bottom. I’d unpacked everything quickly during the move without much thought toward an actual system, just getting items into cabinets so the boxes could be broken down, and then somehow never circled back to organize things properly once the initial chaos of moving had settled. It wasn’t until a particularly bad lid avalanche one morning, scattering across the floor while I was already running late, that I finally committed a full weekend to actually reorganizing every cabinet with genuine intention rather than just cramming things wherever they happened to fit.
If your own kitchen cabinets are still living in that same post-move, thrown-together state, here are 17 ideas, each explained in detail, based on that weekend reorganization project and what I’ve observed working well in other kitchens since.
1. Group Items by Actual Usage Frequency
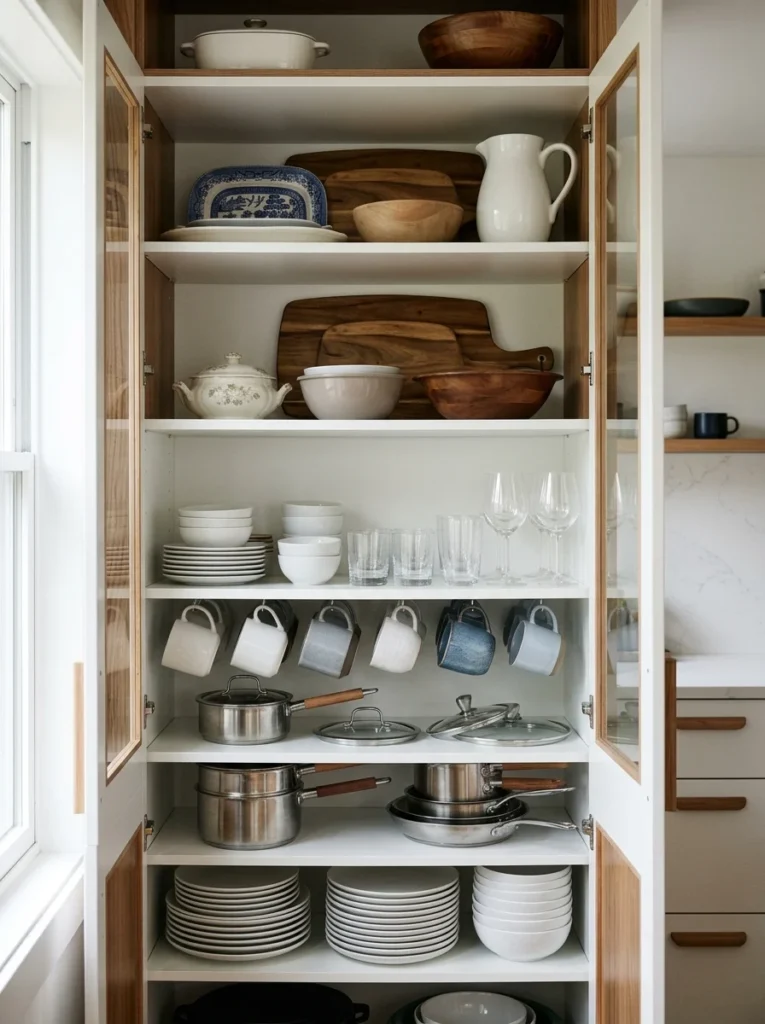
Before reorganizing anything, honestly sorting your kitchen items by how frequently you actually use them, rather than by category alone, determines which cabinets deserve the most accessible, easy-to-reach positioning versus which can reasonably hold items you access only occasionally. I went through this exercise specifically during my own reorganization, discovering that several items I’d been keeping in prime, easily accessible cabinet space were things I genuinely used only a few times a year, while daily essentials were buried in a harder-to-reach upper shelf simply because that’s where they’d initially landed during the original unpacking process. I’d recommend physically sorting items into three rough categories, daily use, weekly use, and occasional use, before deciding on final cabinet placement, since this honest assessment often reveals surprising mismatches between how frequently something is actually used and where it’s currently stored. This foundational step matters more than any specific organizational product or system, since even the best storage solutions won’t meaningfully improve your kitchen’s function if your most frequently used items remain in inconvenient, hard-to-reach locations regardless of how neatly they’re organized within that inconvenient spot.
2. Install Pull-Out Drawers in Lower Cabinets
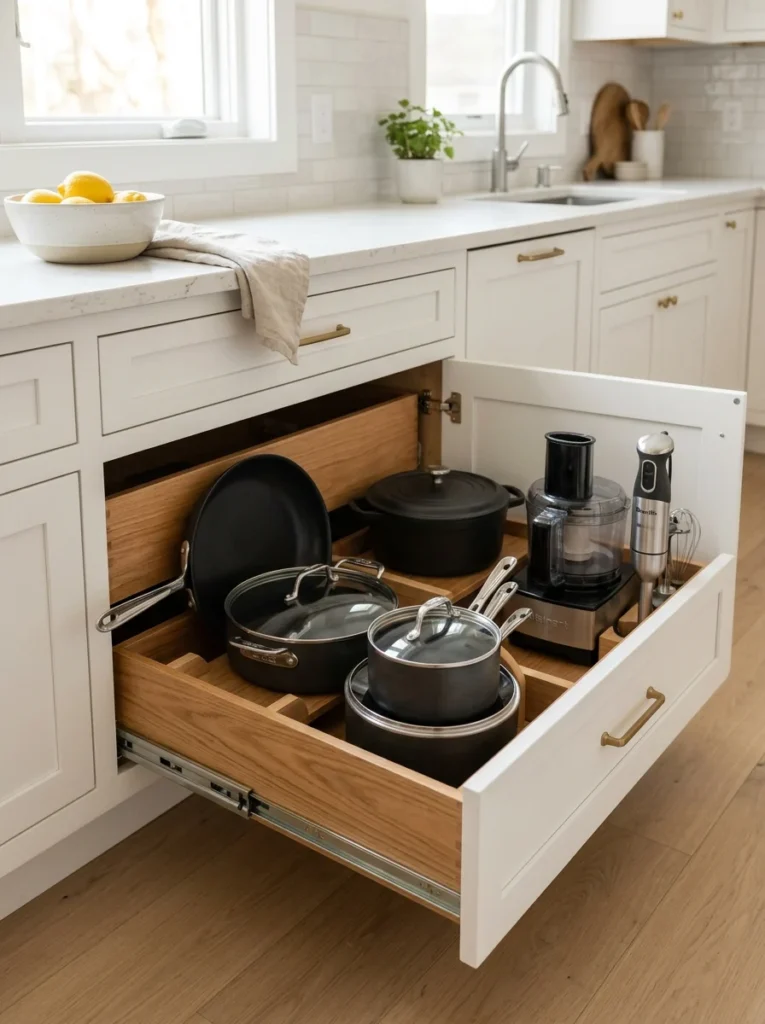
Retrofitting standard lower cabinets with pull-out drawer inserts transforms deep, hard-to-see cabinet space into genuinely accessible storage, eliminating the common frustration of needing to kneel down and reach blindly into a cabinet’s back corners to retrieve items that have inevitably migrated there over time. I had pull-out drawers installed in my two largest lower cabinets during my reorganization project, and the ability to fully extend each drawer and see everything at once has genuinely eliminated the previous problem of forgotten items languishing in the back, sometimes for months, simply because they weren’t visible or easily reachable. I’d recommend this specifically for cabinets storing heavier items, pots, small appliances, since pull-out drawers make retrieving these bulkier, awkward items considerably easier compared to reaching into a standard fixed-shelf cabinet. This represents a moderate investment compared to some of the other ideas on this list, typically requiring either purchasing pre-made drawer inserts sized to your specific cabinet dimensions or hiring a carpenter for custom-built versions, but the functional improvement genuinely justifies that cost for anyone tired of the blind, awkward reaching that standard lower cabinets typically require.
3. Use Vertical Dividers for Bakeware and Trays
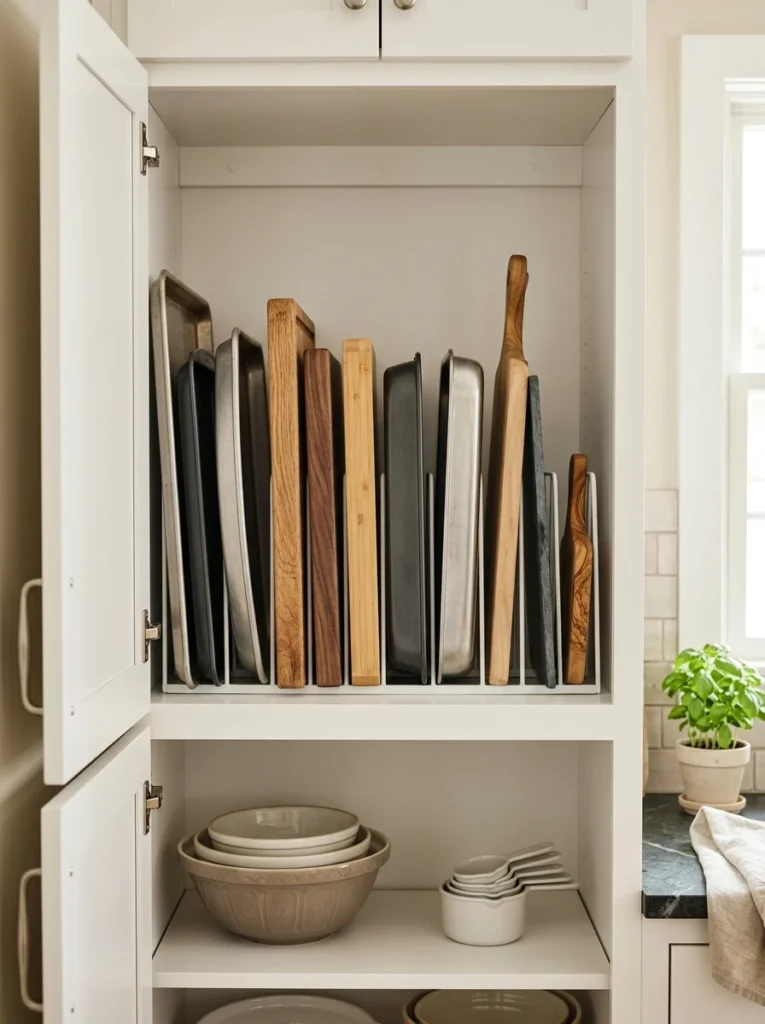
Rather than stacking baking sheets, cutting boards, and trays horizontally in a single precarious pile, vertical dividers installed within a cabinet let you slide each item in and out individually without needing to lift an entire stack just to access whatever’s at the bottom. I added simple vertical divider inserts to my own bakeware cabinet specifically for this purpose, and being able to pull out exactly the tray or cutting board I need without disturbing everything else stacked around it has genuinely eliminated the loud, precarious shuffling that used to accompany any attempt to retrieve something from that particular cabinet. I’d recommend measuring your specific bakeware collection’s dimensions before purchasing divider inserts, since some systems come with adjustable spacing while others have fixed slots that may not accommodate unusually sized or oversized items you might own. This solution works particularly well for cabinets specifically dedicated to flat, awkward-to-stack items, since the vertical orientation these dividers provide is genuinely better suited to that particular category compared to how well it might work for more standard, easily stackable cookware or dishware.
4. Add Lazy Susans for Corner Cabinets
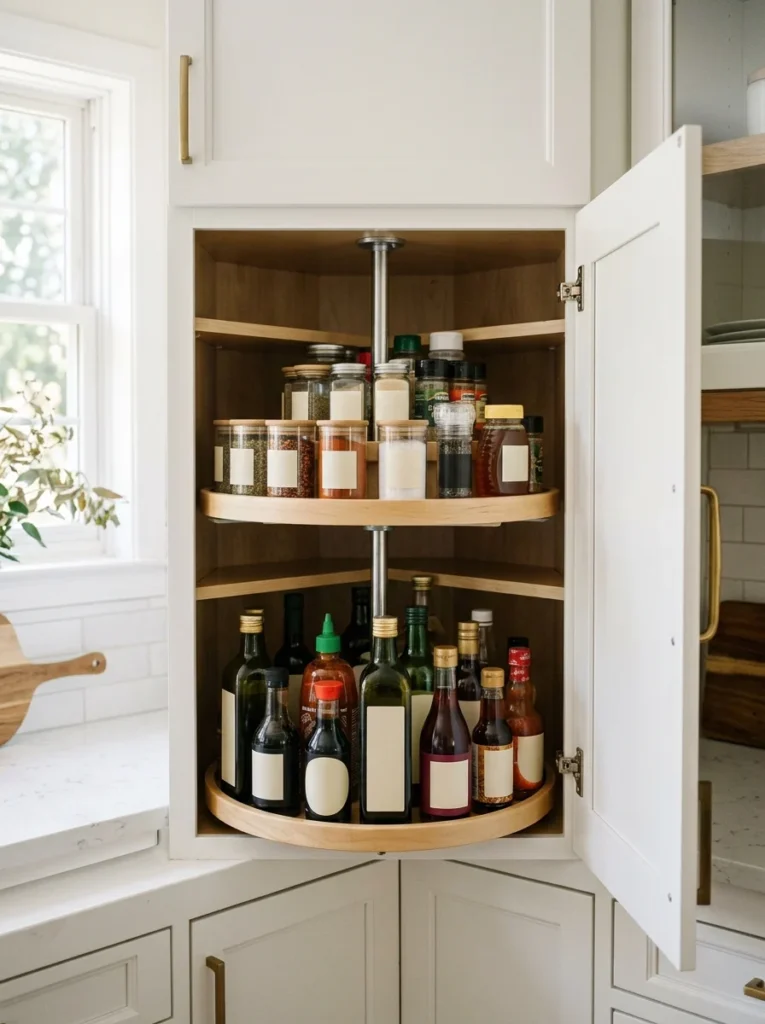
Corner cabinets present a genuine organizational challenge given their awkward, hard-to-reach depth, and installing a rotating lazy Susan specifically addresses this by letting you spin the entire contents into view rather than reaching blindly into that difficult corner space where items easily get lost or forgotten. I installed a two-tier lazy Susan in my kitchen’s corner cabinet specifically for this reason, and the ability to simply rotate the shelf until whatever I need comes into view has genuinely transformed what was previously my most frustrating, least-used cabinet into one of my more functional storage spaces. I’d recommend choosing a lazy Susan sized appropriately to your specific corner cabinet’s dimensions, since an undersized unit wastes available space while an oversized one might not rotate smoothly against the cabinet’s actual walls and shelving. This is one of the most consistently recommended solutions specifically for corner cabinet organization, addressing a genuinely universal kitchen layout challenge that affects most kitchens with this particular cabinet configuration, regardless of the home’s overall age or design style.
5. Install Pull-Down Shelving for High Upper Cabinets
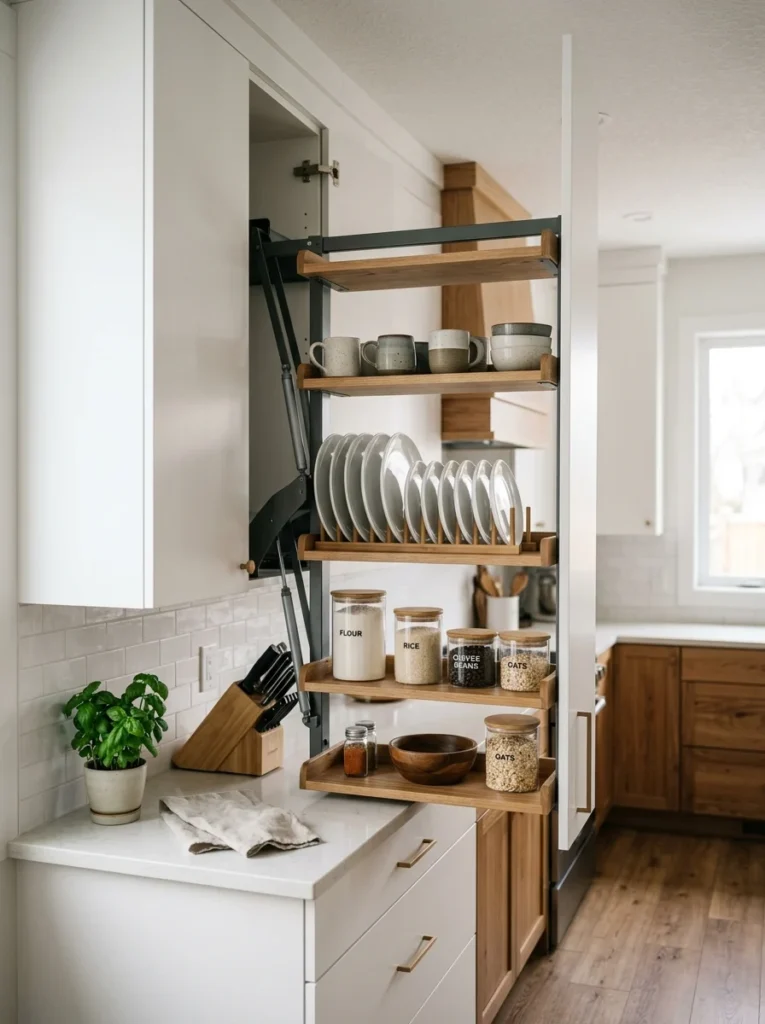
For upper cabinets extending higher than comfortable reach, particularly relevant for anyone on the shorter side or in a kitchen with unusually tall cabinetry, a pull-down shelving mechanism lowers the contents to a more accessible height at the pull of a lever, rather than requiring a step stool for every single retrieval from that upper storage. A friend installed this specifically in her kitchen’s tallest cabinet section, and being able to pull that shelf down to a comfortable height rather than climbing onto a step stool for frequently needed items has genuinely changed how much she actually uses that previously neglected top shelf storage. This represents a more significant investment and installation project compared to some of the simpler organizational additions elsewhere on this list, typically requiring professional installation given the mechanical components involved in the pull-down system itself. I’d recommend this specifically for households where reaching high cabinet space is a genuine, recurring daily frustration, rather than treating it as a universal recommendation for every kitchen, since the cost and installation complexity are really only justified when this particular accessibility problem is a consistent, meaningful issue in your specific daily routine.
6. Use Stackable Shelf Risers for Dishware
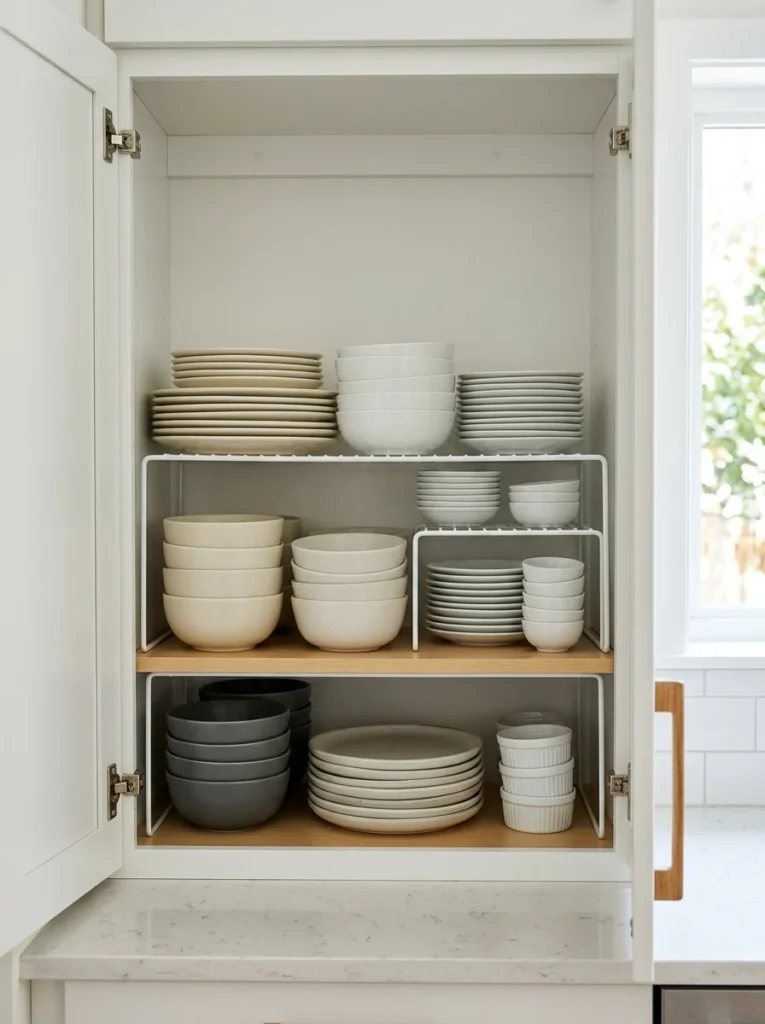
Stackable shelf risers, essentially small platforms that create an additional tier of usable space within a single cabinet shelf, let you store two layers of plates or bowls in the vertical space that would otherwise accommodate only one, maximizing your existing cabinet’s capacity without requiring any structural modification. I added simple wire shelf risers to my dish cabinet specifically for this purpose, and being able to fit considerably more dishware into that same existing cabinet space has meaningfully reduced how cramped and overstuffed that particular storage area used to feel before this relatively minor addition. I’d recommend choosing risers with adequate weight capacity specifically rated for dishware, since some risers designed for lighter items like canned goods may not hold up well under the genuine weight that a full stack of plates represents. This is one of the most affordable, immediately impactful additions on this entire list, typically costing very little while providing a genuinely noticeable increase in your existing cabinet’s practical storage capacity without any need for a larger renovation or structural change.
7. Add Door-Mounted Storage Racks
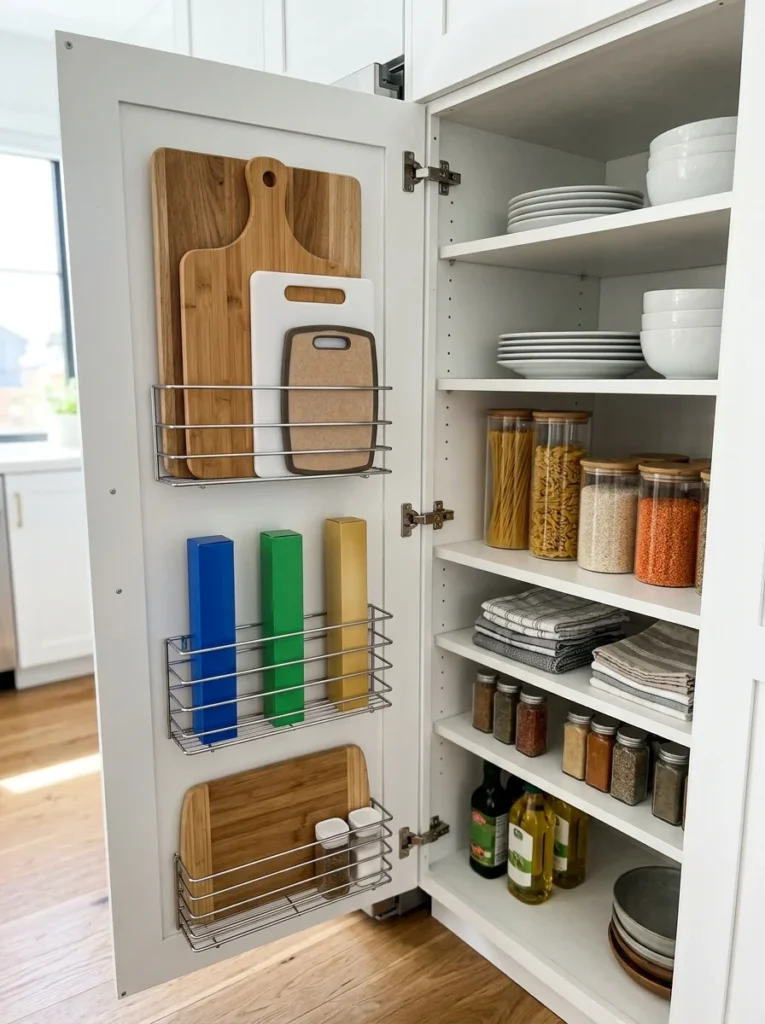
Mounting small wire or plastic racks to the inside of your cabinet doors provides additional storage capacity for smaller items, spice jars, cutting boards, foil and plastic wrap boxes, taking advantage of space that would otherwise remain completely unused every time you open that particular cabinet. I added door-mounted racks specifically to my cabinet housing cutting boards and baking sheets, and the additional capacity these racks provide has meaningfully reduced how crowded the main cabinet interior feels, since several previously loose items now have a dedicated spot on the door itself rather than competing for space within the cabinet’s primary interior storage area. I’d recommend measuring your cabinet door’s specific dimensions and checking for adequate clearance before installing these racks, since items mounted too deep can potentially interfere with the door closing fully or collide with shelving positioned just inside the cabinet’s main interior space. This solution works particularly well for narrow, flat items specifically, foil boxes, cutting boards, thin cookbooks, rather than bulkier items that wouldn’t fit comfortably within a door-mounted rack’s typically shallow depth.
8. Use Clear Bins to Group Small Pantry Items
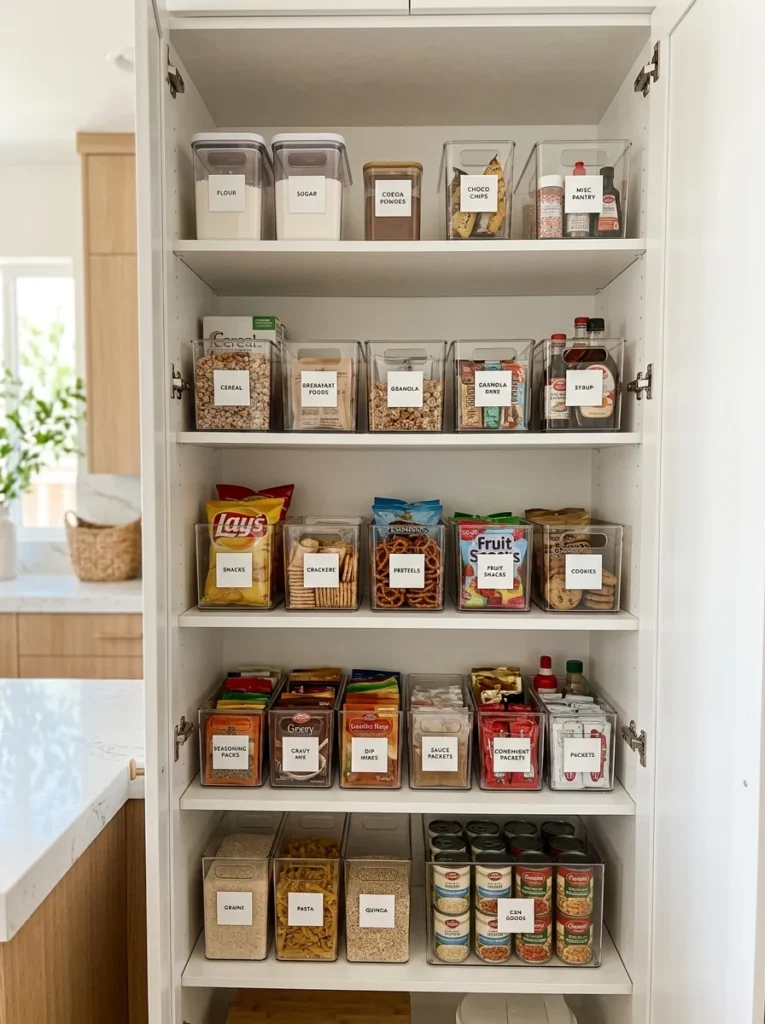
Within pantry-style cabinets specifically, grouping small, loose items, spice packets, snack bars, baking supplies, into clear labeled bins rather than letting them scatter loosely across shelves keeps related items together and makes taking inventory of what you actually have on hand considerably easier at a glance. I switched to this system specifically for my own pantry cabinet, with separate bins for baking supplies, snacks, and breakfast items, and the improvement in how quickly I can locate a specific item, or notice when something’s running low and needs to be added to my shopping list, has been genuinely significant compared to my previous system of loose, ungrouped items scattered across several shelves. I’d recommend choosing bins with a low front lip rather than fully enclosed containers for this particular application, since a low front makes it easier to see and grab items without needing to fully remove the bin from the shelf each time, unlike a fully enclosed container that requires more deliberate removal and searching. This system works particularly well combined with periodic pantry inventory checks, since the grouped, visible organization makes it considerably faster to assess what you actually have on hand before heading out grocery shopping.
9. Install a Pull-Out Trash and Recycling Cabinet
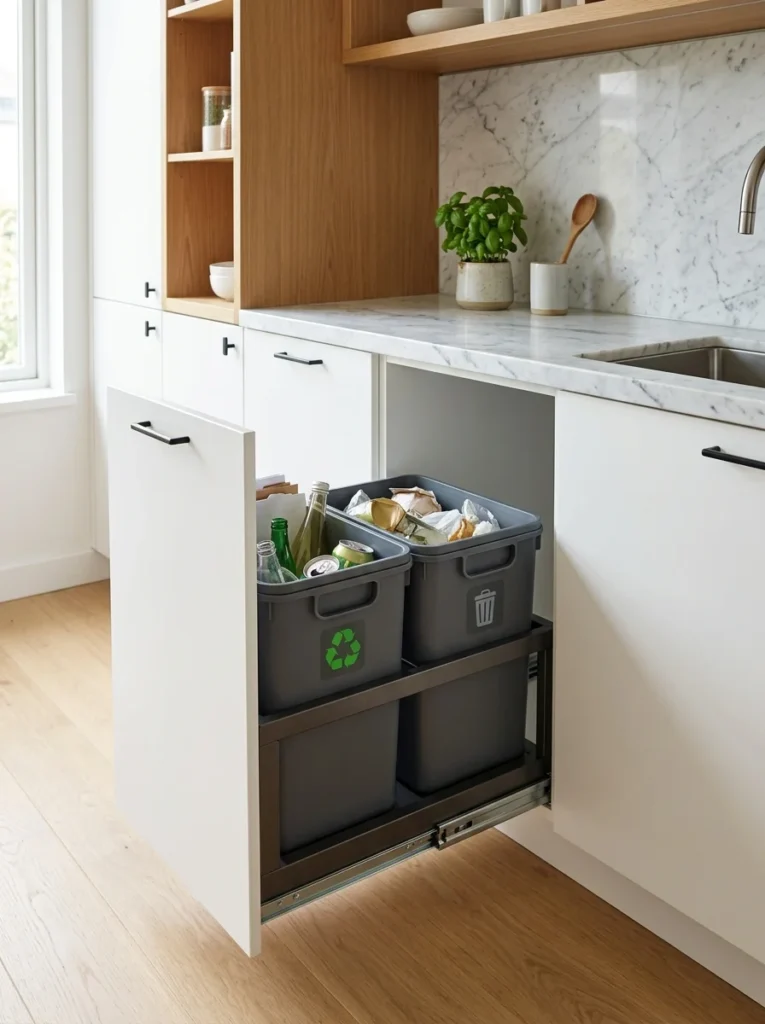
Concealing trash and recycling bins within a dedicated pull-out cabinet, rather than a freestanding bin taking up floor space or an awkward, exposed spot beneath the sink, keeps this necessary but visually unappealing function organized and out of sight while remaining genuinely convenient during actual cooking and cleanup. I converted an existing lower cabinet specifically for this purpose during my reorganization, installing a pull-out frame holding separate trash and recycling bins, and the improved organization has both freed up floor space previously occupied by a standalone bin and kept that necessary function considerably more concealed and tidy in appearance. I’d recommend measuring your specific cabinet’s interior dimensions carefully before purchasing a pull-out bin system, since these frames come in various specific widths and depths, and a mismatch means the system either won’t fit properly or won’t make efficient use of your particular cabinet’s full available capacity. This is a particularly valuable addition for any kitchen still relying on a freestanding trash can taking up otherwise usable floor space, since relocating this function into cabinetry genuinely reclaims that floor area for other purposes.
10. Use Tension Rods to Create Vertical Storage
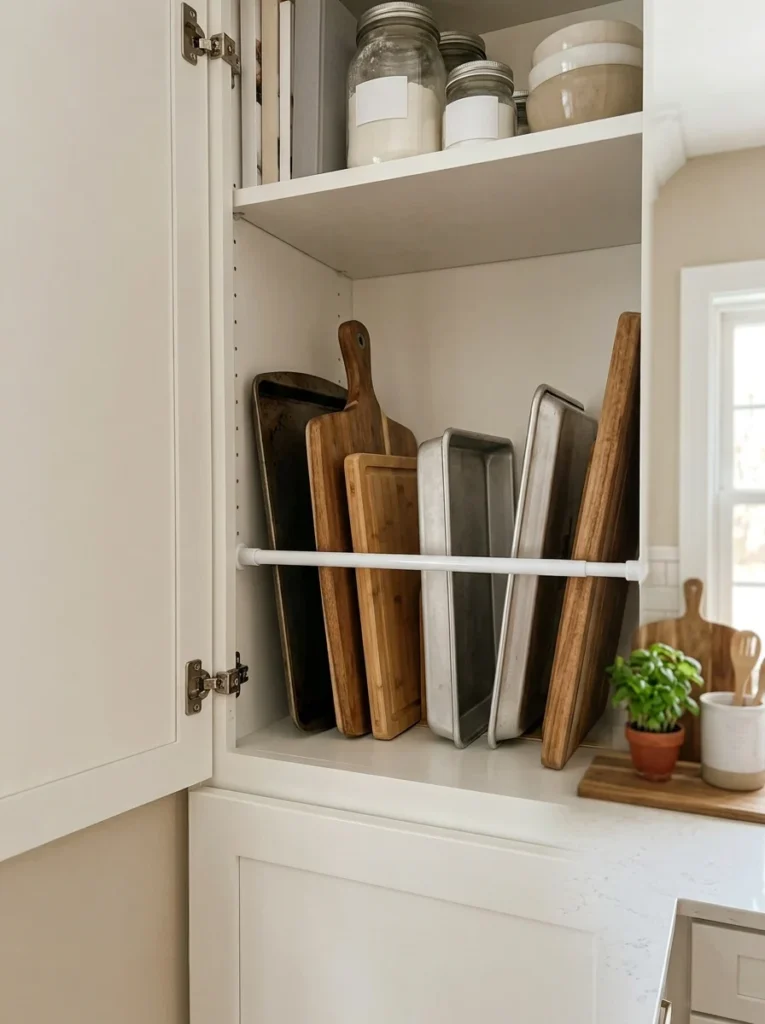
A simple tension rod installed horizontally within a cabinet, positioned just above where flat items like baking sheets or cutting boards sit, creates a makeshift vertical divider that prevents these items from sliding around and stacking messily, achieving a similar organizational benefit to purpose-built dividers but at a fraction of the cost. I used exactly this budget-friendly solution in a smaller secondary cabinet before eventually upgrading to proper dividers, and the tension rod approach genuinely solved the same basic sliding, stacking problem in the meantime without requiring any purchase beyond an inexpensive rod already commonly used for other household purposes. I’d recommend this specifically as a lower-cost starting point for anyone wanting to test whether vertical organization genuinely improves a specific cabinet’s function before investing in more substantial, purpose-built divider systems, since the tension rod approach requires no permanent installation and can be easily removed or repositioned if you decide a different organizational approach ultimately works better for that particular space. This solution works best for lighter items specifically, since a simple tension rod doesn’t provide quite the same structural support that dedicated, properly installed dividers offer for heavier bakeware collections.
11. Add a Spice Drawer Insert Near Your Cooking Zone
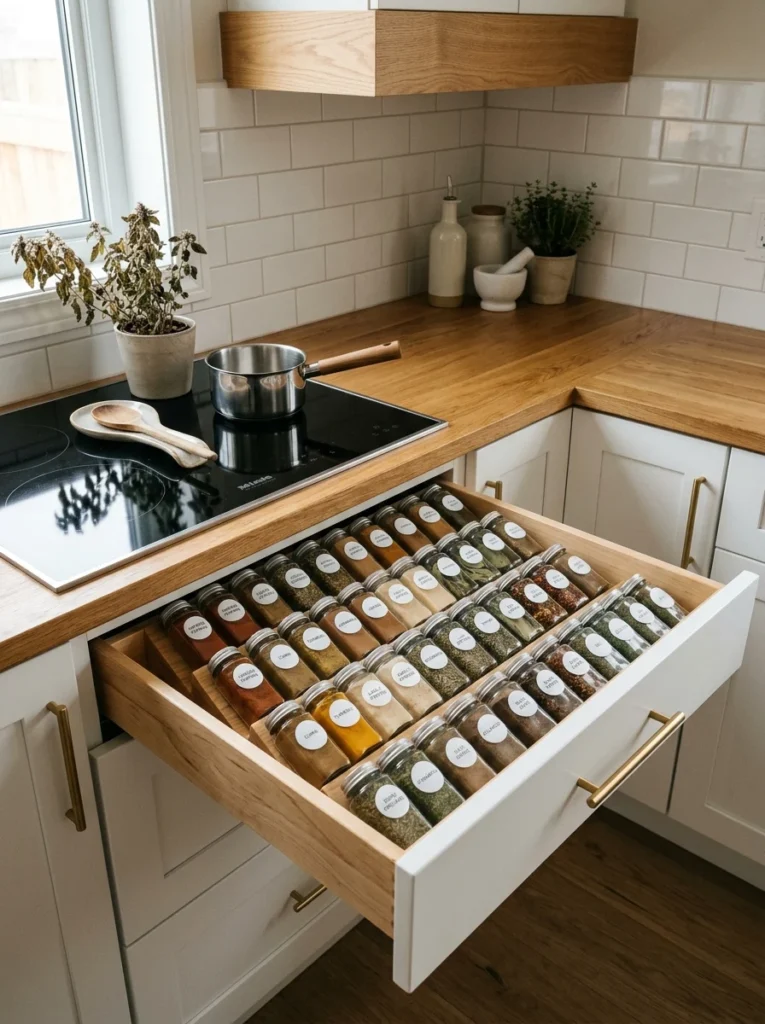
Rather than a spice cabinet positioned somewhere inconvenient relative to your actual stovetop, a dedicated spice drawer insert installed in a drawer close to your primary cooking area keeps seasonings within immediate reach exactly where and when you need them during actual meal preparation. I converted a drawer directly beside my stove specifically into spice storage using a tiered insert that displays each jar’s label clearly from above, and having spices genuinely close at hand during actual cooking has eliminated the previous frustration of needing to walk across the kitchen mid-recipe to retrieve something from a more distantly positioned spice cabinet. I’d recommend choosing a tiered insert specifically designed to show each jar’s label when viewed from above, since a drawer without this tiered visibility requires picking up and checking each individual jar, defeating much of the convenience benefit this particular storage solution is meant to provide. This works particularly well if you already have a drawer positioned conveniently near your stove that’s currently underutilized or storing less frequently needed items, since relocating those items elsewhere frees up genuinely prime real estate for this high-value spice storage application.
12. Use Under-Shelf Baskets for Extra Vertical Capacity
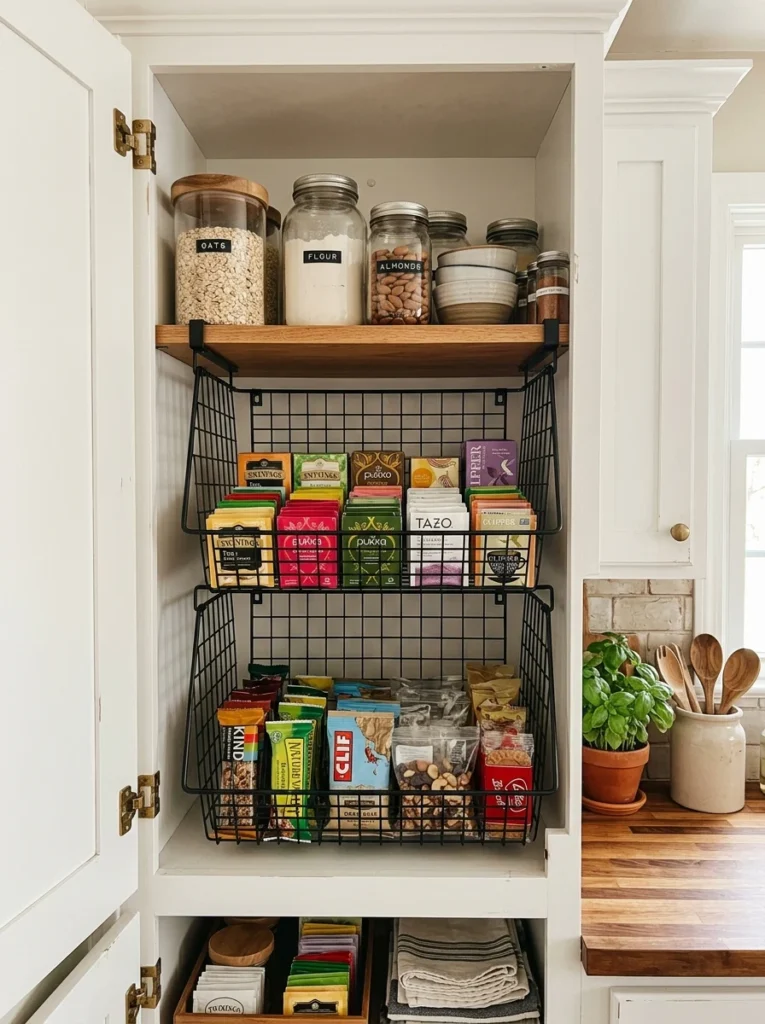
Small wire baskets that hang from the underside of an existing cabinet shelf create an additional storage tier within space that would otherwise remain empty above whatever’s already sitting on the shelf below, maximizing vertical capacity without requiring any permanent modification to the cabinet itself. I added under-shelf baskets to a few of my cabinets specifically for storing smaller, lighter items, packets of tea, small snack bags, that don’t need a full shelf’s worth of dedicated space but still benefit from some organized, contained storage. I’d recommend choosing baskets rated for the specific weight of whatever you’re planning to store within them, since these hanging systems generally aren’t designed for particularly heavy items and work best for genuinely lightweight categories rather than anything substantial like canned goods or cookware. This solution provides a relatively minor but genuinely useful capacity increase, particularly valuable in cabinets where the vertical space between shelves is more generous than necessary for whatever’s currently stored on the main shelf surface below, leaving that additional overhead space otherwise completely wasted.
13. Create a Dedicated Coffee and Tea Cabinet
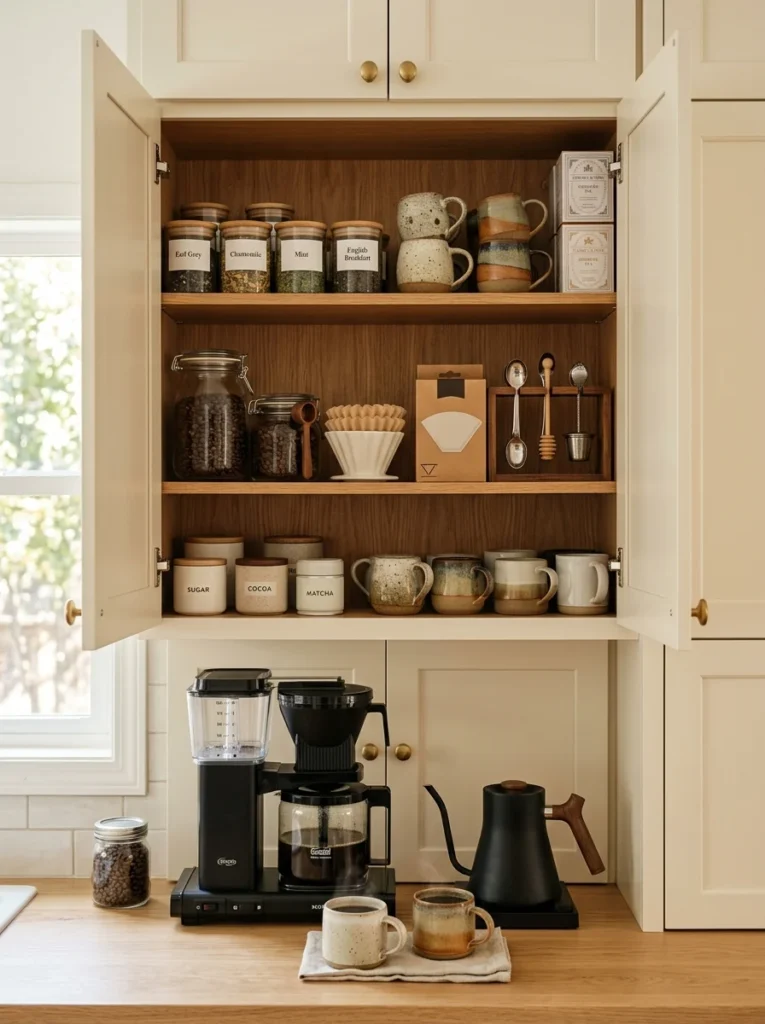
Rather than scattering coffee, tea, mugs, and related accessories across multiple different cabinets, consolidating everything into one dedicated cabinet specifically for this purpose creates a genuine morning routine efficiency, letting you gather everything needed for your first cup without needing to open several different cabinets scattered throughout the kitchen. I reorganized one entire cabinet specifically around this coffee and tea function during my broader reorganization project, and having everything consolidated in one spot has genuinely streamlined my actual morning routine, especially during those groggier, less coordinated early hours when minimizing unnecessary cabinet-opening genuinely matters. I’d recommend positioning this dedicated cabinet as close as possible to your coffee maker or kettle specifically, since the whole point of this consolidation is minimizing unnecessary movement around the kitchen during what’s often a fairly automatic, half-awake morning routine. This idea works particularly well for households with a genuine daily coffee or tea habit, where this specific consolidation addresses a recurring daily task rather than an occasional one, making the organizational investment considerably more worthwhile than it might be for a less frequently repeated kitchen activity.
14. Use Can Organizers for Pantry Cabinet Efficiency
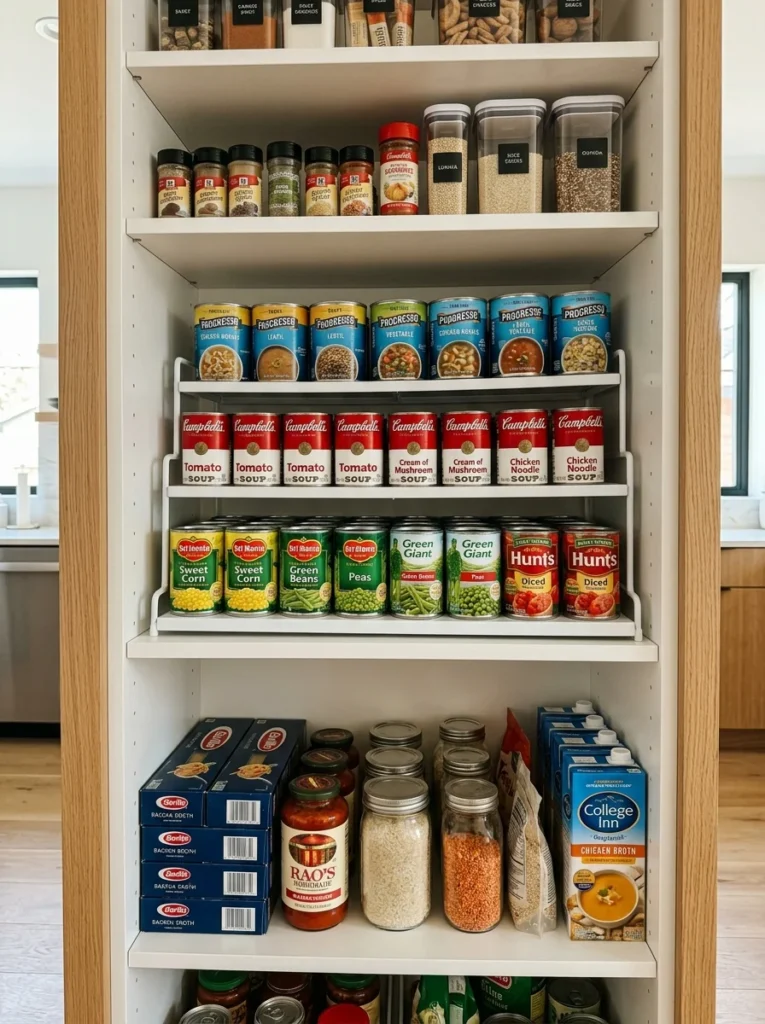
Angled or stepped can organizers, specifically designed to display canned goods with their labels facing forward and visible, prevent cans from rolling around loosely or stacking in a way that hides older items behind newer purchases, a common source of forgotten, eventually expired canned goods in many kitchen pantries. I installed a simple stepped can organizer in my own pantry cabinet specifically for this reason, and being able to see every single can’s label at a glance, rather than needing to pull cans forward to check what’s hidden behind the front row, has genuinely reduced the number of expired, forgotten cans I’ve previously discovered during periodic pantry cleanouts. I’d recommend choosing an organizer with a first-in-first-out design specifically, where new cans loaded from the back naturally push older ones forward for use first, since this passive rotation system helps ensure older purchases actually get used before newer ones, addressing the expiration problem more systematically than organization alone might achieve without this specific rotational mechanism built in.
15. Add Cabinet Lighting for Better Visibility
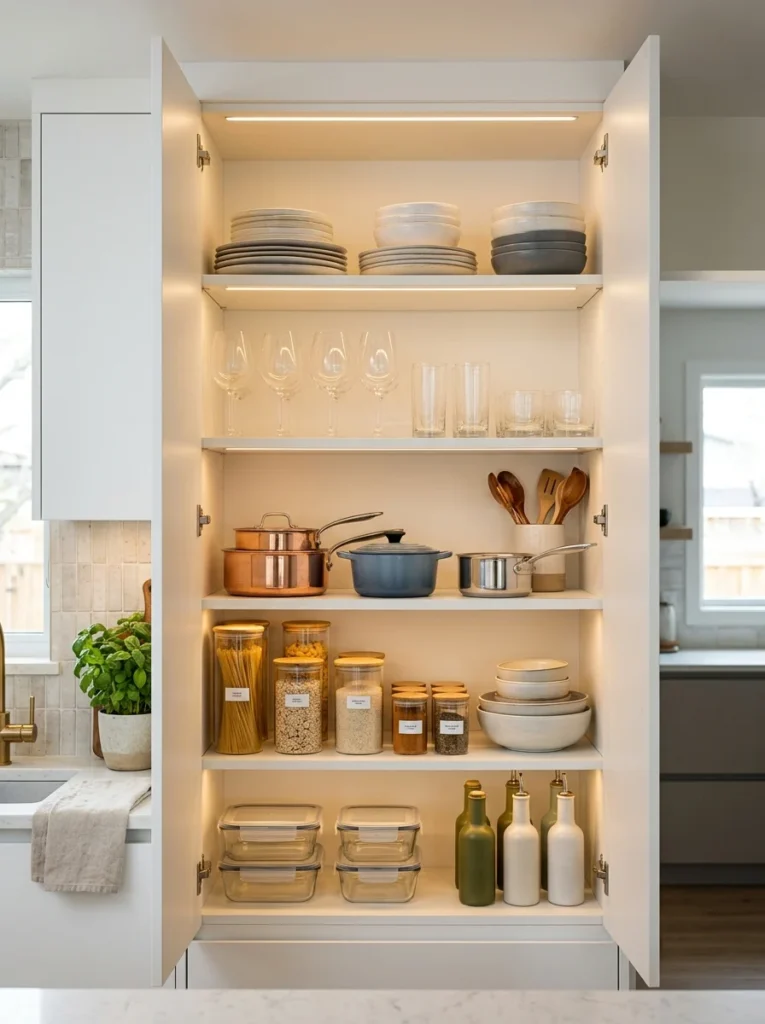
Battery-powered or hardwired LED lighting installed within your cabinets, particularly deeper or darker lower cabinets, makes locating items considerably easier without needing to rely purely on whatever ambient kitchen lighting happens to reach into that enclosed space. I added simple battery-powered puck lights to my darkest, deepest lower cabinets specifically for this purpose, and the improved visibility has genuinely made locating items in those particular spaces faster and less frustrating compared to squinting into shadowy cabinet depths or needing to pull everything out just to see what’s actually back there. I’d recommend motion-activated lights specifically for this application, since they turn on automatically when you open the cabinet door and off again once closed, providing the lighting benefit without requiring you to remember a separate manual switch each time. This is a relatively simple, low-cost addition that provides a genuinely noticeable practical improvement, particularly valuable for cabinets positioned in naturally darker corners of your kitchen or simply deep enough that even good overall kitchen lighting doesn’t adequately illuminate their full interior depth.
16. Group Cookware by How You Actually Cook
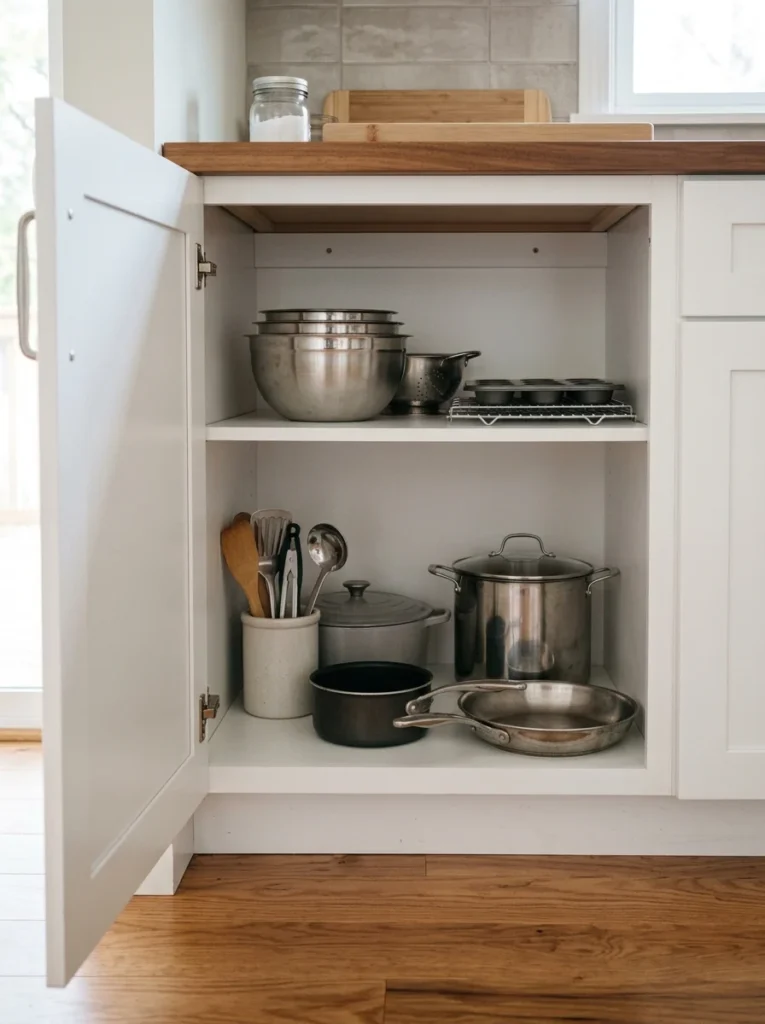
Rather than organizing pots and pans purely by size or type, consider grouping them based on your household’s actual cooking patterns, keeping your most frequently used skillet and saucepan together near the front regardless of their relative size, rather than a strict size-based organizational system that might separate items you actually use together during the same meal preparation. I reorganized my own cookware cabinet this way during my broader project, grouping my daily-use sauté pan and saucepan together at the most accessible front position, while my larger stockpot, used only occasionally, moved to a less convenient back corner despite being organizationally “correct” by size alone in a more traditional system. I’d recommend genuinely observing your own actual cooking habits for a week or two before finalizing this kind of usage-based organization, since it’s easy to assume you use certain items more than you actually do without this kind of honest, observed assessment first. This approach prioritizes real functional convenience over a purely aesthetic or categorically “correct” organizational logic, which ultimately matters more for daily kitchen efficiency than whether your cookware happens to be arranged in a visually tidy, size-based progression.
17. Revisit Your System Seasonally
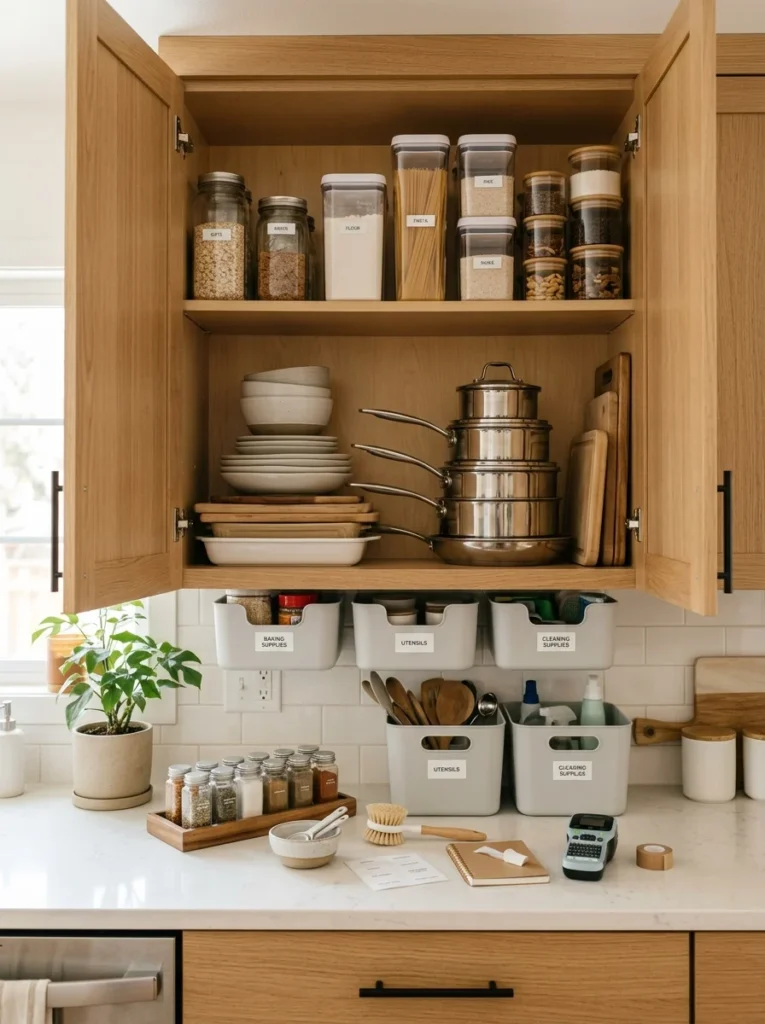
The final piece of advice is recognizing that even a genuinely well-planned cabinet organization system benefits from periodic reassessment, since cooking habits, household size, and specific needs naturally shift over time in ways that can gradually make an initially well-suited system less effective without you necessarily noticing that drift happening. I do a genuine cabinet reassessment roughly twice a year, honestly evaluating whether my current organization still matches how I’m actually cooking and using my kitchen, since habits I had during my initial reorganization weekend have genuinely shifted somewhat in the time since. I’d recommend building this same periodic reassessment into your own routine, perhaps timed alongside a broader seasonal home organizing habit, rather than assuming your initial organizational effort remains permanently optimal without ever needing further adjustment. This ongoing attention is really what prevents even a genuinely thoughtful initial system from gradually drifting back toward the same kind of accumulated disorder that likely motivated the original organizing project in the first place, keeping your kitchen cabinets working as efficiently for your current life as they did on the day you first got them properly organized.
Final Thoughts
Looking back at that morning of the great lid avalanche, scattered mismatched cookware covers across my kitchen floor while I was already running late, it’s genuinely satisfying how much a single dedicated weekend of intentional reorganization changed my daily relationship with my own kitchen cabinets. Between all 17 of these ideas, the underlying theme is really that cabinet organization benefits enormously from actually observing and honoring how you genuinely use your kitchen, rather than defaulting to whatever arrangement happened to result from a rushed, thoughtless unpacking process during an original move or first setup.
If your own kitchen cabinets are still living in that same thrown-together, post-move state, I’d suggest starting with the honest usage-frequency assessment covered in the first idea before purchasing any specific organizational products, since understanding what you actually use daily versus occasionally should genuinely drive every other decision on this entire list. From there, tackle one cabinet at a time rather than attempting the whole kitchen in a single overwhelming session, the same deliberate, cabinet-by-cabinet approach that eventually took my own kitchen from a source of genuine morning stress into a space that now, most days, actually works quietly and reliably in my favor.
