
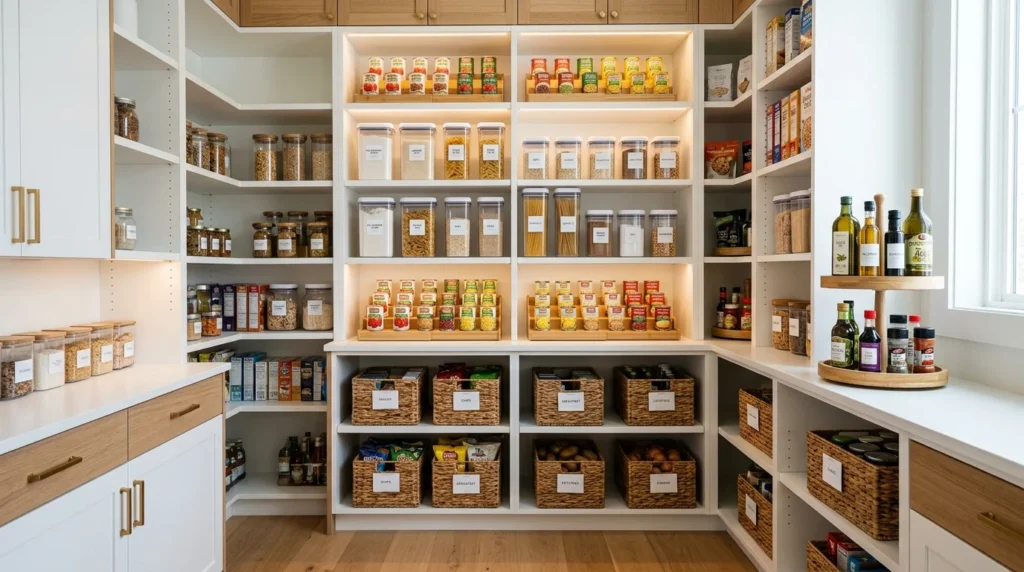
My pantry used to be the room I closed quickly whenever anyone visited, not because it was small, but because opening the door revealed a genuine mess of boxes shoved in sideways, three different half-open bags of the same type of pasta, and at least one item so far past its expiration date that I genuinely couldn’t remember purchasing it. I’d grab what I needed and just shove the door shut again, treating the whole space as something to survive rather than something that could actually work for me. It wasn’t until I found myself buying a third jar of cumin because I genuinely couldn’t locate the two I already owned, somewhere in that chaos, that I finally committed to a real overhaul rather than another halfhearted straightening that would inevitably slide right back into disorder within a few weeks.
If your own pantry is stuck in that same cycle, here are 17 ideas, each explained in detail, based on what actually worked once I finally addressed it properly and what I’ve observed working well in other pantries since. I’ll also answer some of the specific questions people ask most often about this exact project, since a handful of practical concerns come up again and again.
1. Empty the Entire Pantry Before Starting
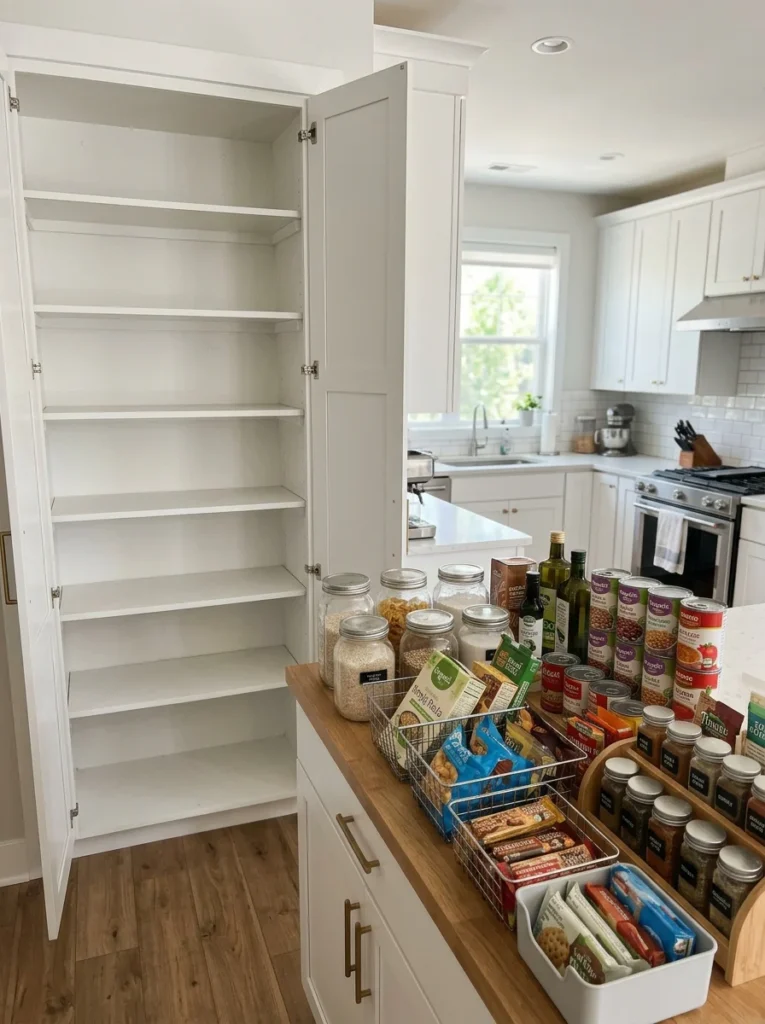
Before organizing anything, pulling every single item out onto your counter or floor and starting from a genuinely empty space lets you actually see the full scope of what you own, including duplicates and expired items you’d otherwise never notice while working around an already-full shelf. I did exactly this during my own overhaul, and confronting the full, honest reality of what I actually had, including that embarrassing third jar of cumin, made every subsequent organizational decision considerably clearer than trying to tidy around an existing, already cluttered arrangement. A question I hear constantly is how long this actually takes for a genuinely full pantry, and I’d recommend blocking out a solid few hours rather than trying to squeeze it into a spare twenty minutes, since rushing this foundational step tends to result in items simply getting shoved back in without the honest evaluation this process is actually meant to provide.
2. Check Expiration Dates as You Go
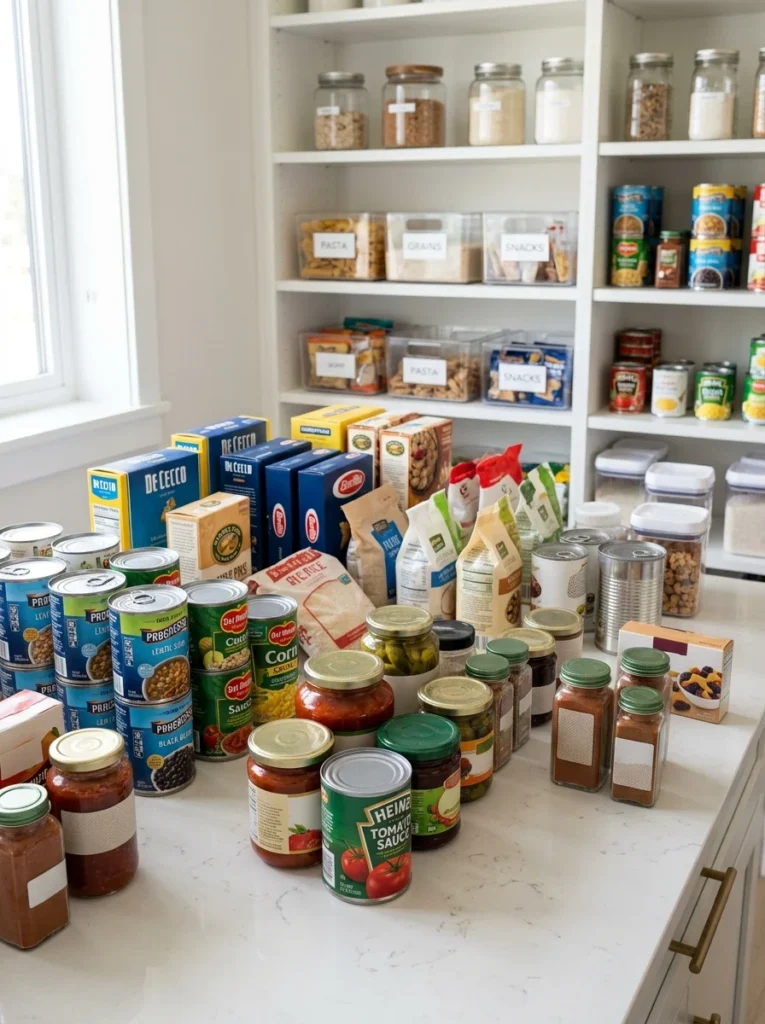
While everything is out and visible, checking expiration dates on each item and discarding anything genuinely past its useful life prevents you from reorganizing and prominently displaying products you’ll never actually use, which defeats much of the purpose of the reorganization in the first place. I found several genuinely expired items during my own cleanout, including that mysterious extra cumin jar, and removing them before reorganizing meant my finished pantry held only things I’d actually cook with going forward. A common question is how strictly to interpret expiration dates on shelf-stable goods specifically, and I’d say most dry goods remain safe somewhat past their printed date if stored properly, though quality genuinely does decline, so I’d recommend using genuine judgment about whether something still smells and looks appropriate rather than treating every date as an absolute, non-negotiable cutoff for otherwise shelf-stable items.
3. Use Clear Containers for Bulk Staples
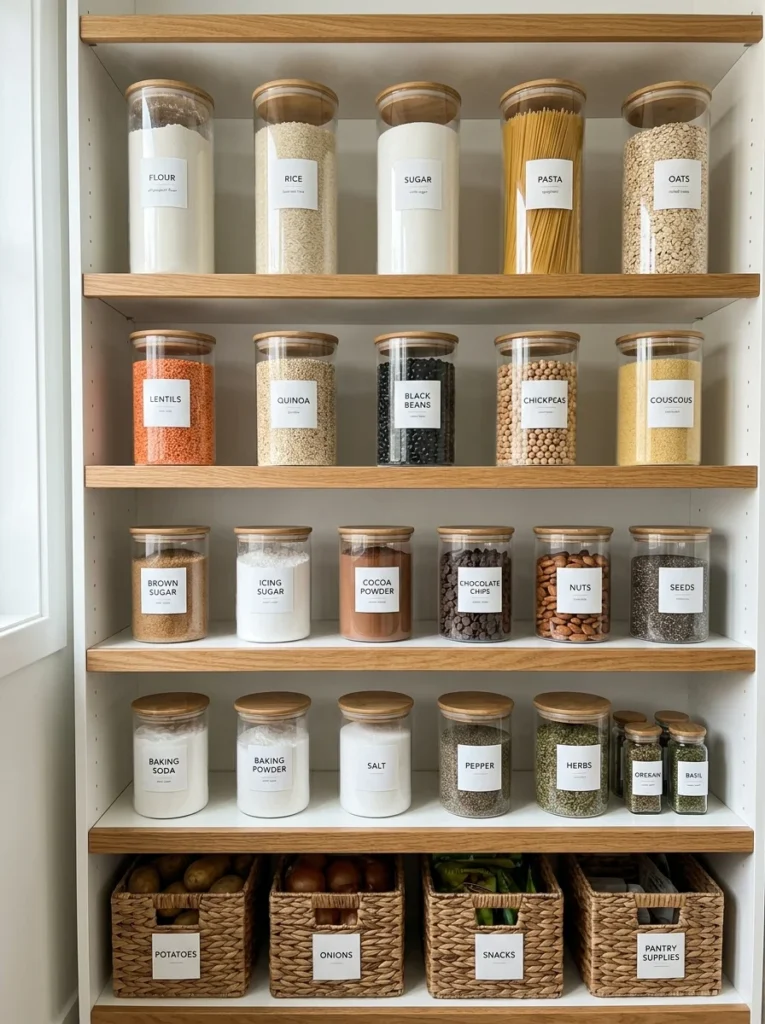
Transferring flour, rice, pasta, and other bulk dry goods into clear, airtight containers rather than leaving them in their original bags accomplishes several things at once, better freshness protection, easier visibility of remaining quantity, and a considerably more polished, cohesive overall appearance compared to a shelf of mismatched packaging. I decanted my own bulk staples into matching clear containers specifically, and being able to see exactly how much rice or flour remains at a glance has genuinely helped me avoid running out mid-recipe more often than I’d like to admit happened under my previous system. A frequent question is whether this decanting process is worth the time investment for busy households, and I’d say start with just your most-used staples specifically, rice, flour, sugar, pasta, rather than attempting to convert your entire pantry at once, since even partial decanting delivers a meaningful visual and functional improvement without requiring a single overwhelming session to complete.
4. Add Labels to Every Container
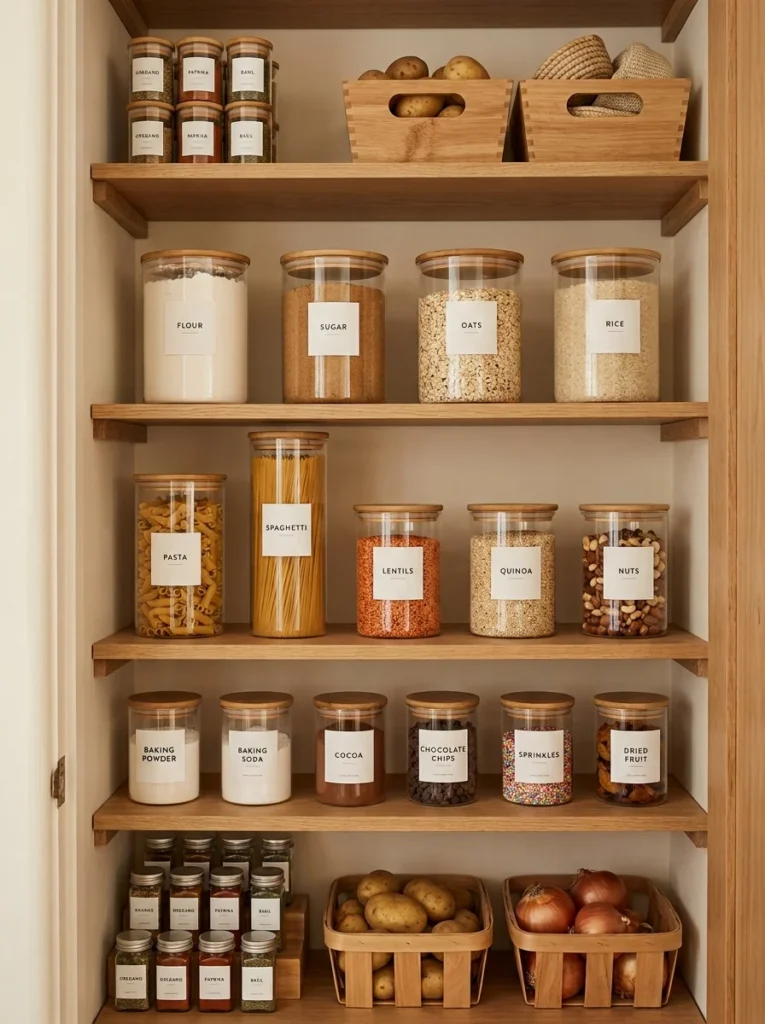
Once items are decanted into matching containers, clear labels identifying contents and, where relevant, expiration dates prevent the genuine confusion that can occur once everything looks visually similar in matching clear packaging, especially for items like different flour types that can be hard to distinguish by sight alone. I label every single container in my own pantry specifically for this reason, and this small addition has eliminated the occasional mix-up between, for example, all-purpose and bread flour that used to happen before I added this clear identification system. A question I hear often is whether handwritten or printed labels work better for this purpose, and I’d genuinely recommend whichever you’re more likely to actually maintain consistently, printed labels look more polished but require more upfront effort, while handwritten labels on a simple label maker or chalkboard-style tape are faster to update but slightly less uniform in overall appearance.
5. Install Adjustable Wire Shelving
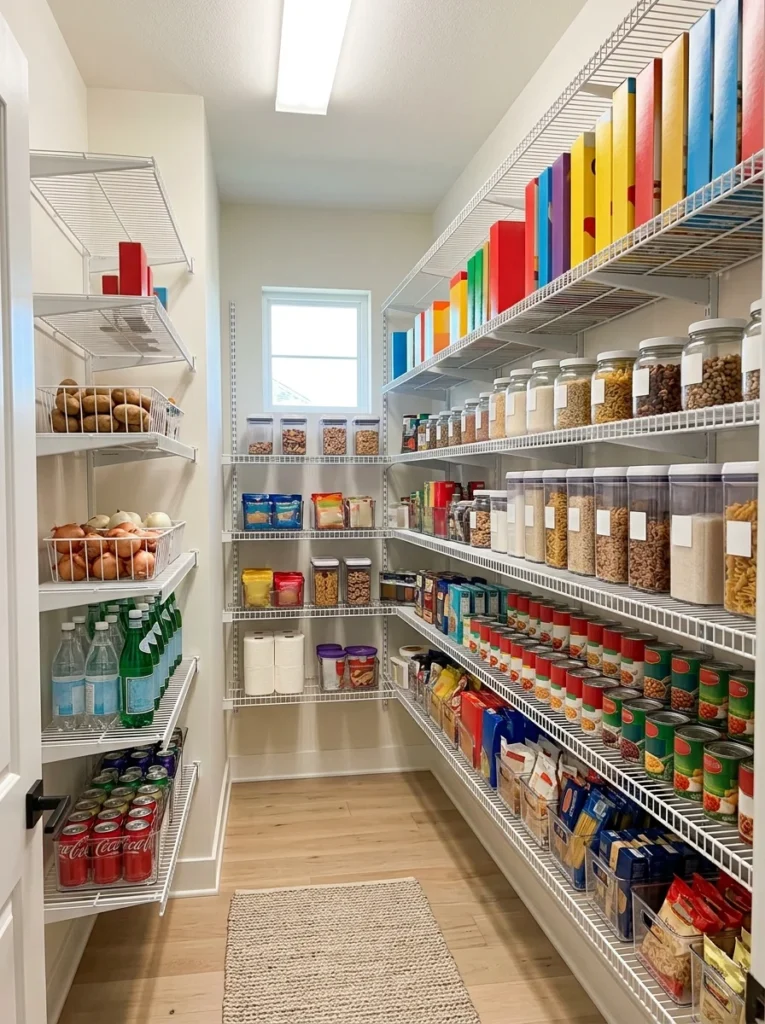
Wire shelving that can be repositioned or added to as needed provides considerably more flexibility than fixed wood shelves, letting you adjust the vertical spacing to match your specific pantry items rather than working around generic, evenly spaced shelving that doesn’t account for your actual product heights. I had adjustable wire shelving installed during my own pantry overhaul, and being able to fine-tune the spacing specifically for my tallest cereal boxes on one section and shorter canned goods on another has made considerably more efficient use of my available vertical space than my previous fixed shelving ever did. A common question is whether wire shelving is genuinely better than solid shelving for a pantry specifically, and I’d say wire offers better airflow, which matters for preventing moisture buildup, while solid shelving prevents smaller items from potentially falling through gaps, so the right choice genuinely depends on what you’re primarily storing and your own personal preference between these two reasonable options.
6. Use Turntables for Awkward Corner Zones
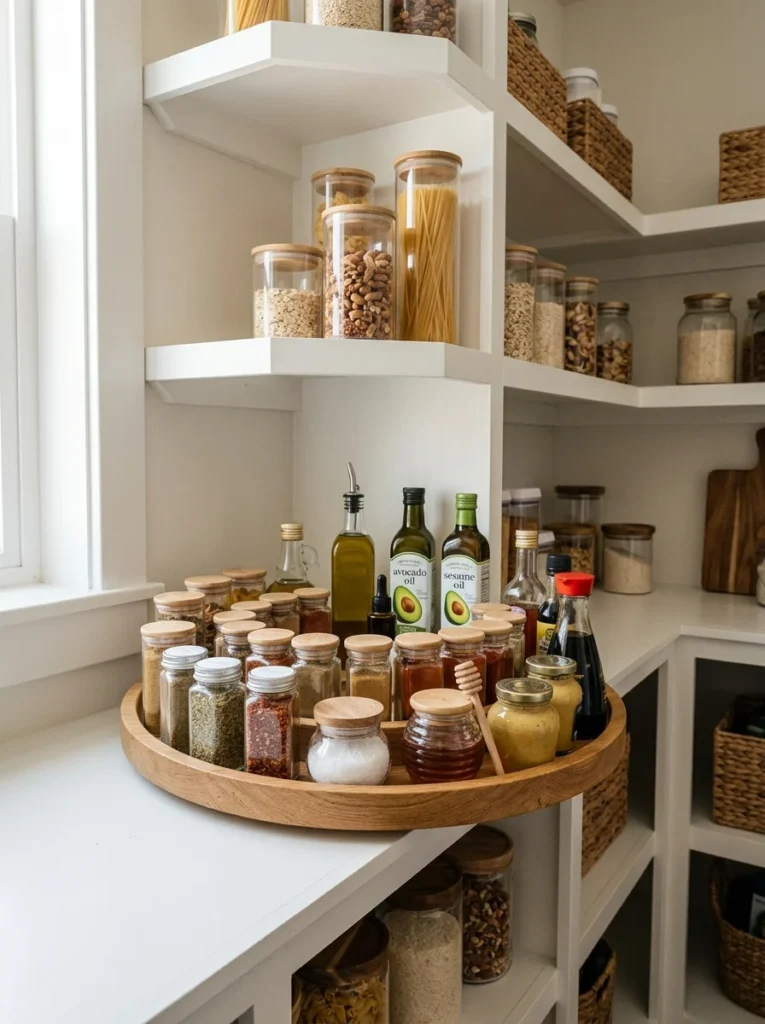
A rotating turntable, similar to a lazy Susan, positioned in a pantry’s awkward back corner or on a deep shelf lets you spin items into view rather than reaching blindly into hard-to-see space where things easily get lost or forgotten for months at a time. I added a turntable specifically to my pantry’s deepest shelf, and being able to simply rotate until I find a specific spice or condiment has genuinely eliminated the previous problem of items disappearing into that deep, dark corner indefinitely. A frequent question is what size turntable works best for this application, and I’d recommend measuring your specific shelf depth carefully before purchasing, since an undersized turntable wastes available space while an oversized one may not rotate smoothly against your shelf’s actual back wall or side edges.
7. Create Dedicated Zones by Category
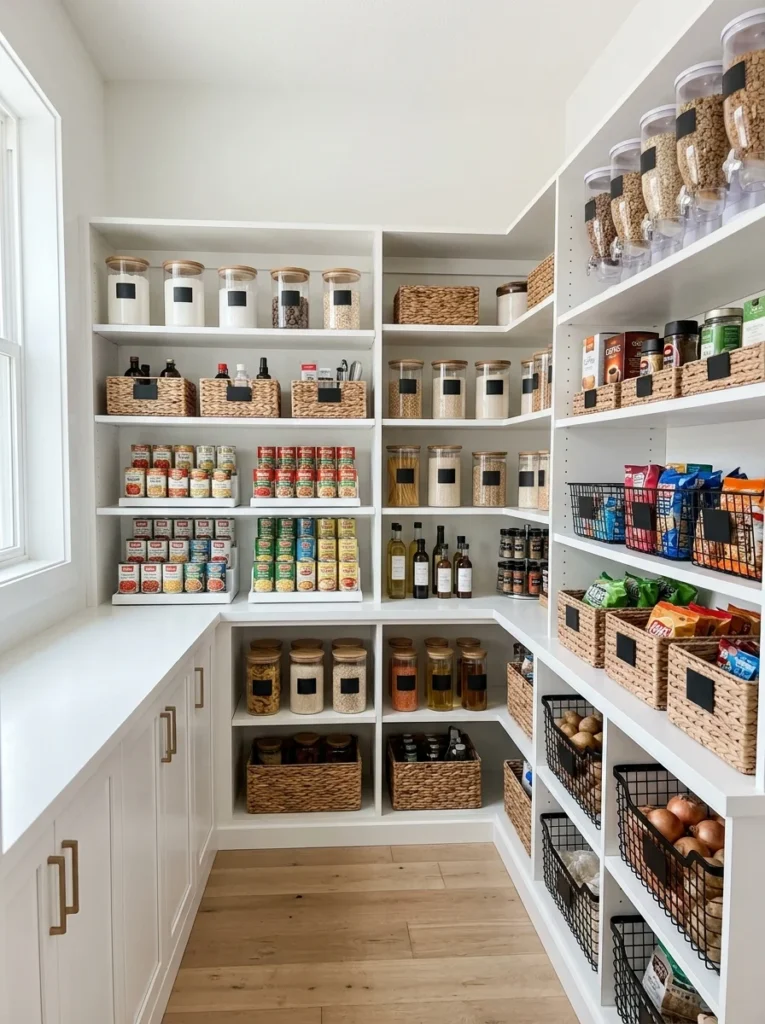
Rather than placing items wherever there happens to be available space, dividing your pantry into clear, consistent zones, baking supplies, canned goods, snacks, breakfast items, means every category has a genuine designated home, making both finding items and putting groceries away considerably faster and more intuitive. I established exactly this kind of zoned system during my own overhaul, and having consistent, predictable zones has meaningfully sped up both my cooking prep and my grocery unloading process compared to my previous, essentially random placement system. A question I hear is how many distinct zones a typical pantry genuinely needs, and I’d say this depends considerably on your specific cooking habits and pantry size, but I’d recommend starting with five or six broad categories rather than over-complicating the system with too many narrow subcategories that become harder to consistently maintain over time.
8. Store Snacks at Kid-Accessible Height
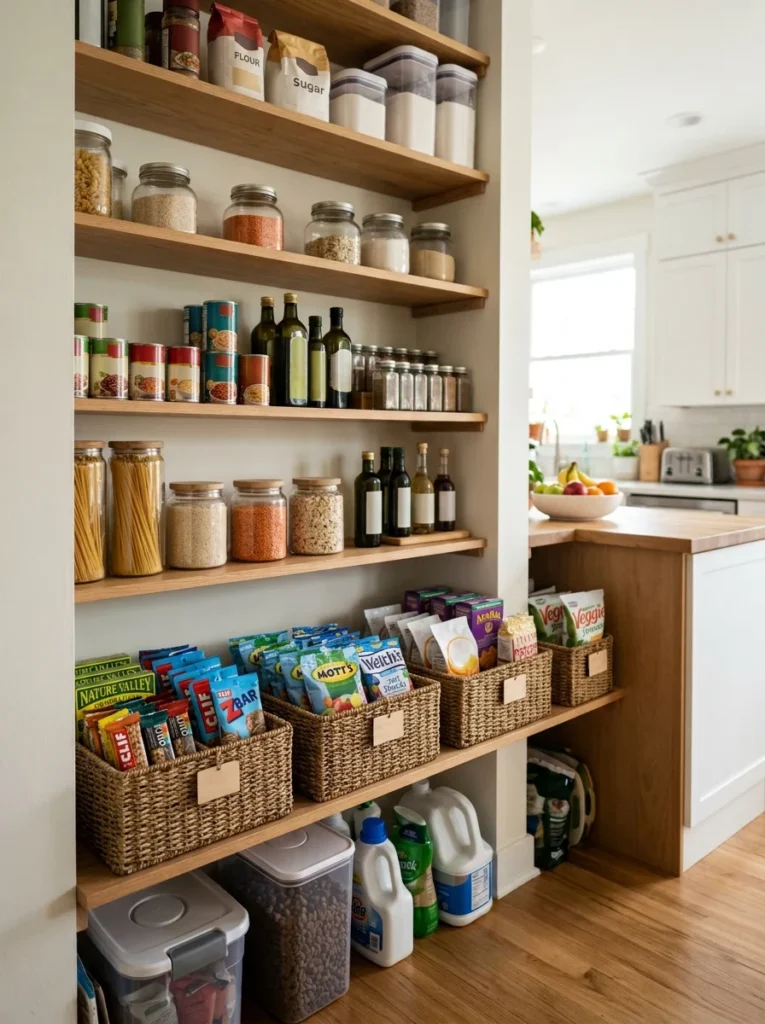
In households with children, positioning a dedicated snack zone at a height kids can genuinely reach independently encourages self-sufficiency around simple snack retrieval while keeping this specific category contained to one predictable spot rather than kids searching through the entire pantry looking for something to eat. We set up exactly this kind of lower snack zone specifically for my daughter, and being able to grab her own approved snack without needing help has genuinely reduced how often I’m interrupted for this particular, fairly routine request throughout the day. A common question is how to prevent kids from also reaching less appropriate items stored at that same accessible height, and I’d recommend keeping this specific lower zone genuinely limited to approved snack options only, storing anything you’d rather they not access independently on higher shelves specifically out of that same easy reach.
9. Use Stackable Bins for Canned Goods
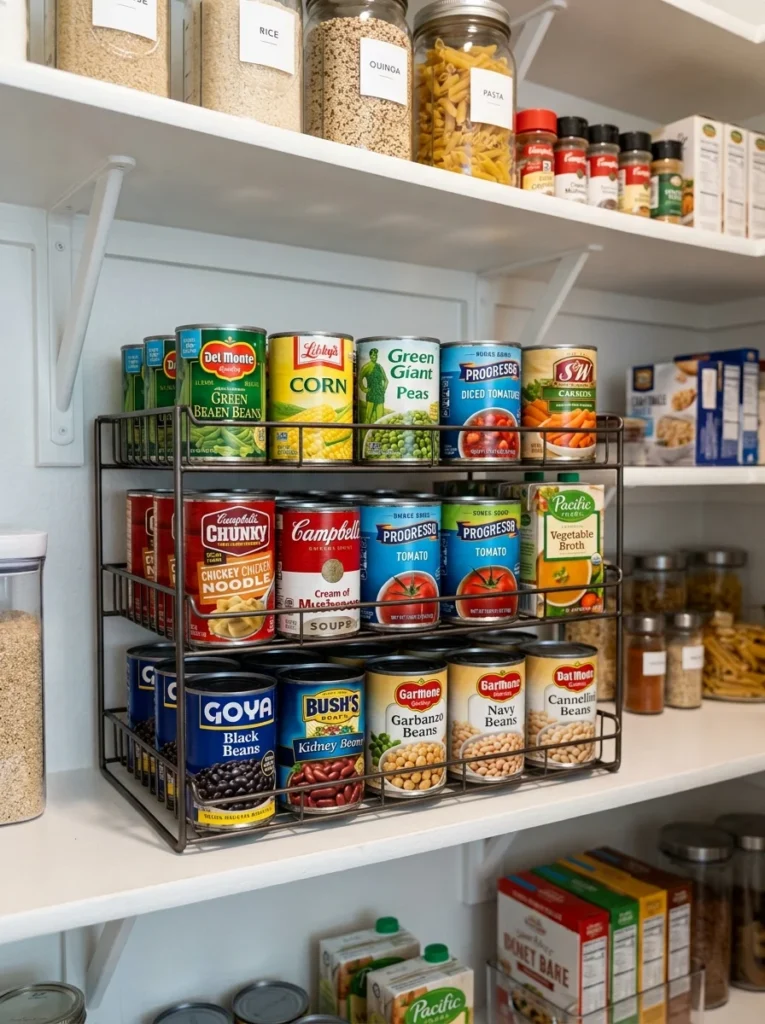
Rather than a single deep shelf where cans get pushed toward the back and forgotten, stackable can organizers, often angled or stepped to display labels facing forward, prevent cans from rolling around loosely while making every single label visible at a glance rather than needing to move cans aside to see what’s hidden behind the front row. I installed exactly this kind of organizer for my own canned goods, and being able to see every can’s label without digging has genuinely reduced the number of expired, forgotten cans I used to discover during periodic cleanouts. A frequent question is whether these organizers genuinely prevent products from expiring unnoticed, and I’d say choosing a first-in-first-out style specifically, where new cans loaded from the back push older ones forward, helps considerably more than simple visibility alone, since it creates a passive rotation system that naturally encourages using older purchases before newer ones.
10. Add a Dedicated Spice Organization System
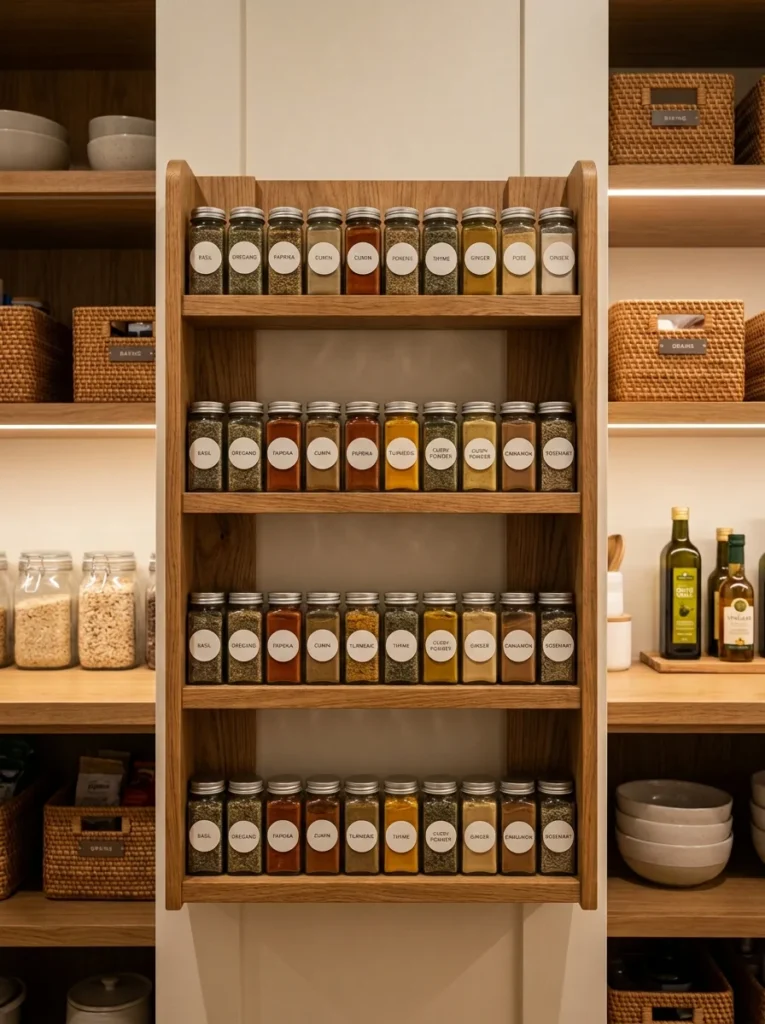
Whether a tiered shelf insert, a drawer system, or a door-mounted rack, giving spices their own dedicated, properly organized storage solution addresses one of the most common sources of pantry chaos, since spice jars are small, numerous, and easily lost among larger items without a specific system designed around their particular size and shape. I moved my entire spice collection to a tiered shelf insert specifically, and being able to see every single label from above rather than needing to pick up and check individual jars has genuinely sped up my cooking prep considerably. A question I hear often is whether alphabetizing spices is worth the effort, and I’d say it depends on your collection size, a smaller collection of a dozen or so spices doesn’t necessarily need this level of system, while a larger, more extensive collection genuinely benefits from alphabetical or category-based organization that makes locating a specific spice considerably faster during actual cooking.
11. Use Baskets for Loose Snack Bags and Pouches
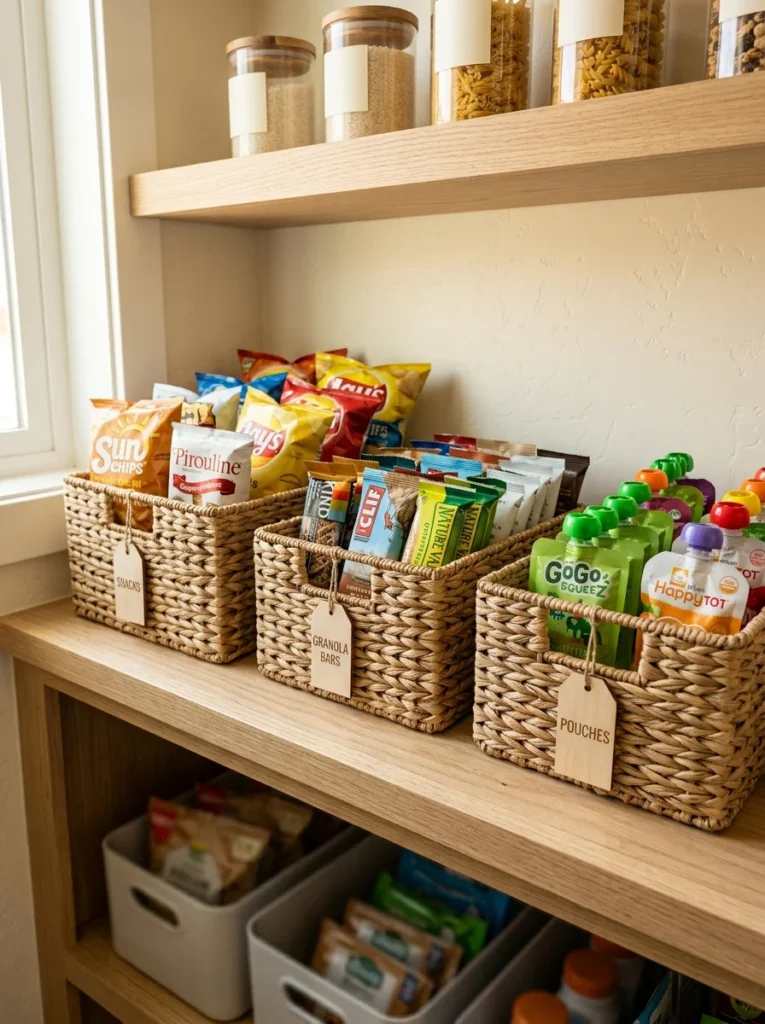
Individual snack bags, granola bars, and similar loose items tend to accumulate into a genuinely disorganized pile if left without any containment system, and grouping them into labeled baskets by type keeps this particular category from taking over adjacent, unrelated pantry space. I use exactly this basket system for my own loose snack items, with separate baskets for granola bars, chip bags, and kids’ pouches specifically, and the contained, grouped approach has genuinely prevented this category from sprawling across multiple unrelated shelves the way it used to before this system was in place. A common question is whether wire or fabric baskets work better for this specific application, and I’d recommend wire specifically for better visibility and airflow, while fabric baskets, though softer looking, can make it slightly harder to quickly assess what’s actually inside without physically digging through the contents.
12. Install Door-Mounted Storage for Small Items
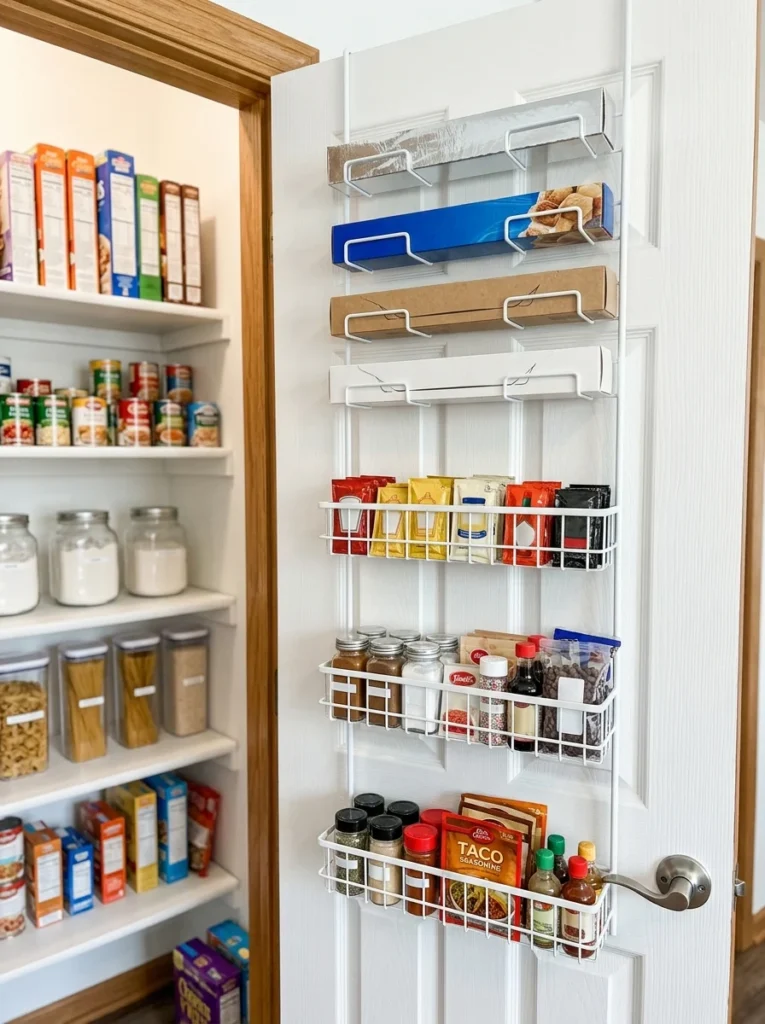
The inside of your pantry door, genuinely unused space in most kitchens, can hold a mounted rack or over-the-door organizer specifically for smaller items, spice packets, small condiment bottles, foil and plastic wrap boxes, taking advantage of storage capacity that would otherwise contribute nothing at all to your pantry’s overall function. I added a door-mounted rack specifically for my foil, plastic wrap, and small baking items, and the additional capacity this provided has meaningfully reduced how crowded my main shelving feels since several previously loose items now have a dedicated spot on the door itself. A frequent question is whether door-mounted storage interferes with the door closing properly once loaded, and I’d recommend checking your specific door’s clearance and choosing a genuinely shallow rack design, since overly deep door storage can indeed prevent the door from closing fully or collide with shelving positioned just inside the pantry’s main interior space.
13. Create an Overflow or Backup Stock Shelf
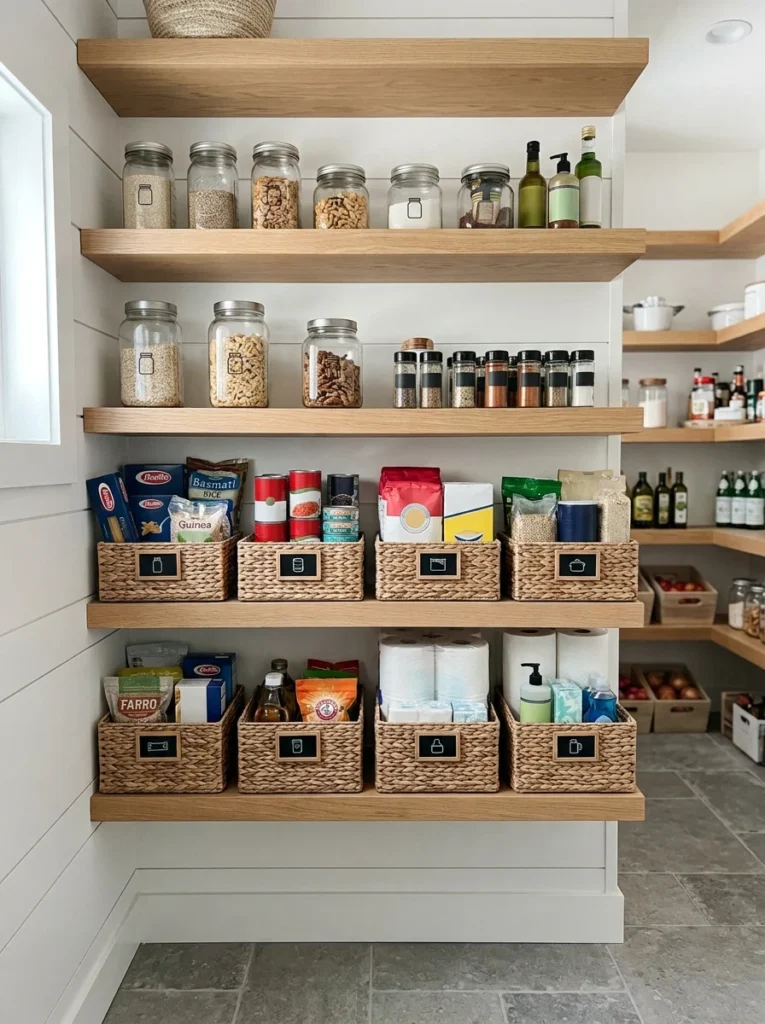
Rather than mixing your currently open products with unopened backup stock, dedicating one specific shelf or section to backup, unopened items keeps your main, everyday shelves from feeling overcrowded while still giving you a clear, organized view of what backup supplies you actually have on hand. I established exactly this kind of dedicated backup shelf, and having a clear separation between what’s currently open and in use versus what’s waiting in reserve has genuinely made my grocery shopping more accurate, since I can quickly glance at this one shelf to check what actually needs replenishing rather than guessing. A question I hear often is whether this backup shelf approach leads to genuinely wasteful overbuying, and I’d say it actually tends to prevent that specific problem, since seeing your existing backup stock clearly, rather than buried and forgotten throughout the pantry, makes you considerably less likely to purchase a duplicate of something you already genuinely have on hand.
14. Use a Chalkboard or Whiteboard for a Running Grocery List
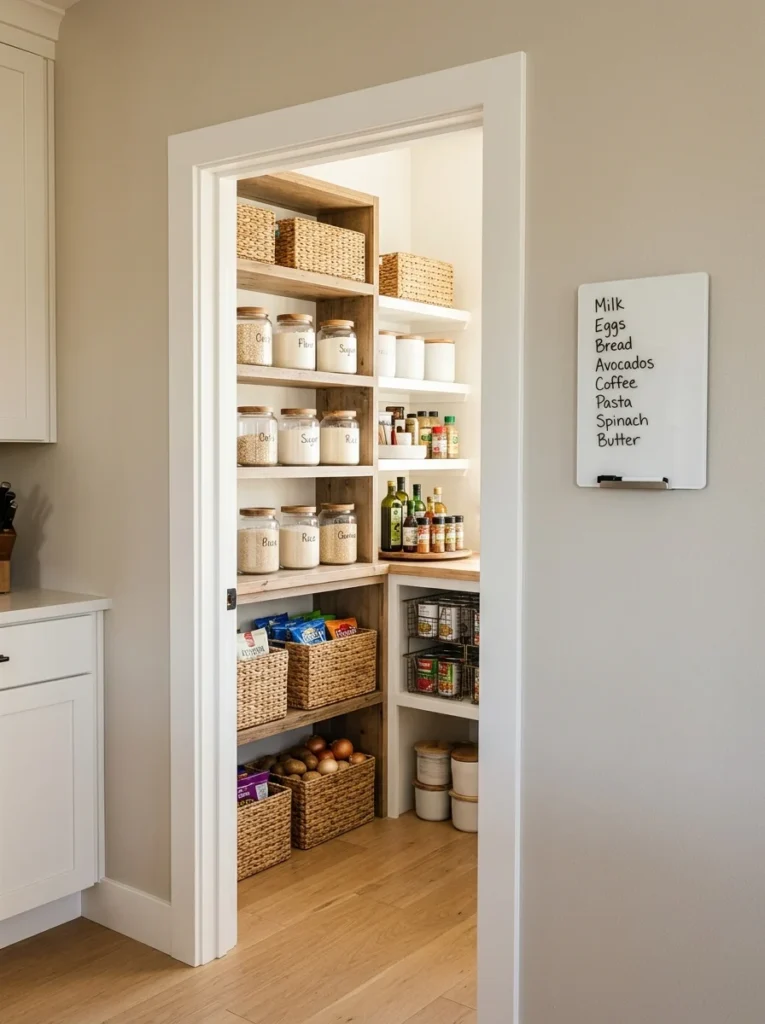
Mounting a small chalkboard or whiteboard inside or near your pantry door provides an immediate spot to jot down items as you notice they’re running low, capturing that thought in the moment rather than relying on memory later when you’re actually at the grocery store. I installed exactly this near my own pantry, and being able to add an item to the list the instant I notice it’s running low has genuinely reduced how often I get home from shopping only to realize I forgot something I’d meant to buy. A common question is whether a digital shared grocery list app accomplishes the same thing more effectively, and I’d say either genuinely works, the physical board’s advantage is its immediate, no-phone-required accessibility right at the point where you actually notice you’re running low, while a digital list offers easier sharing among household members who aren’t physically home to see the board themselves.
15. Store Baking Supplies Together in One Zone
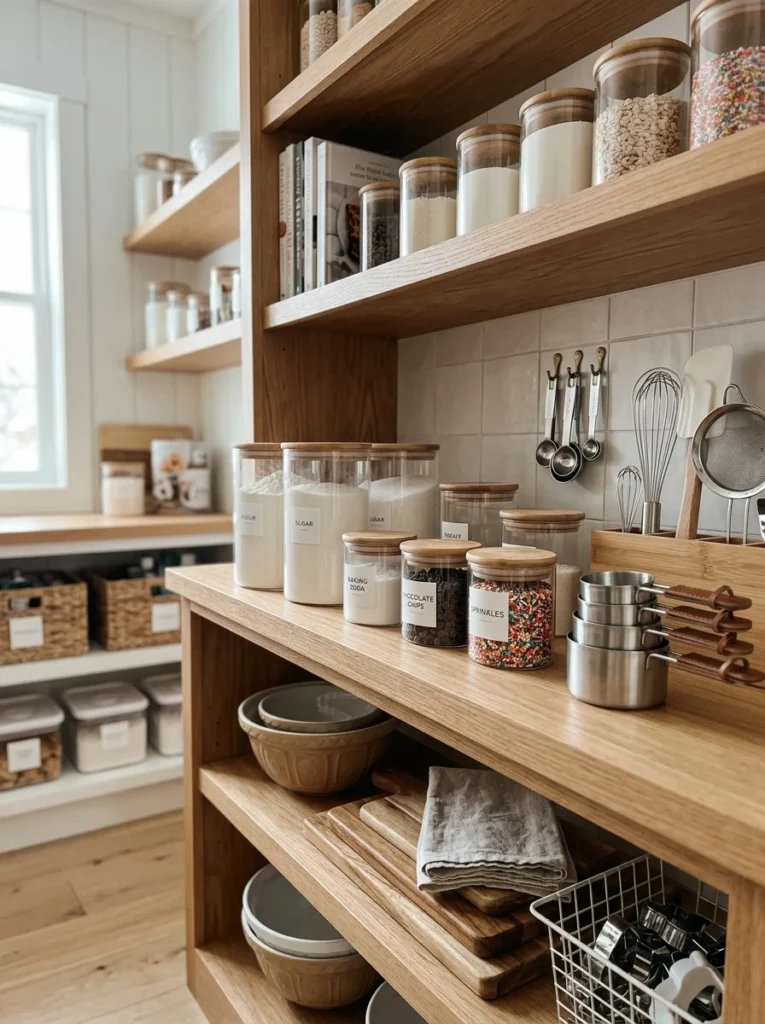
Consolidating flour, sugar, baking soda, chocolate chips, and other baking-specific ingredients into one dedicated zone means you can gather everything needed for a recipe in one trip rather than searching across multiple, scattered shelves throughout the pantry. I organized my own pantry with exactly this kind of dedicated baking zone, and being able to grab everything I need for a batch of cookies from one consolidated section has genuinely streamlined my actual baking process compared to my previous, more scattered arrangement. A frequent question is whether this zone should include baking tools as well as ingredients, and I’d say if you have adequate space, keeping measuring cups and mixing bowls nearby, even if not stored on the exact same shelf, creates an even more efficient baking zone overall, though this genuinely depends on your pantry’s available space and whether that overlap makes sense for your particular layout.
16. Add a Step Stool for High Shelf Access
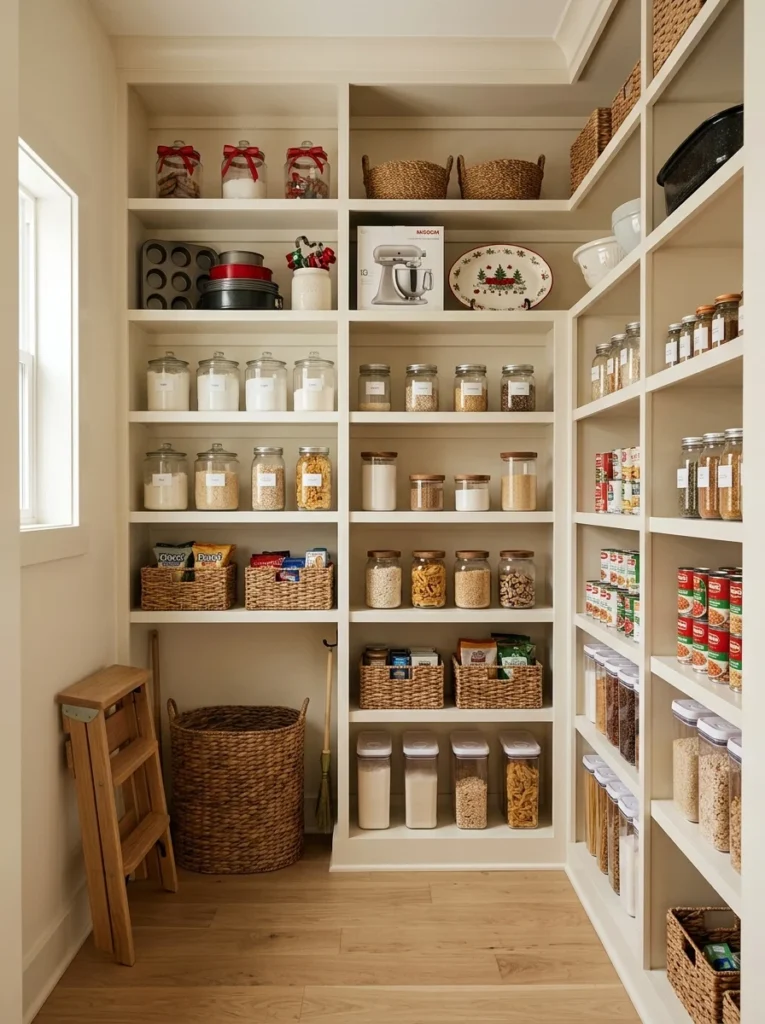
If your pantry includes genuinely high shelving, keeping a small, dedicated step stool within or near the pantry itself ensures safe, immediate access to that higher storage rather than needing to fetch one from elsewhere in the house each time, or worse, resorting to standing on a lower shelf to reach something up top. I keep a small folding step stool tucked into the corner of my own pantry specifically for this reason, and having it genuinely within reach has made me considerably more willing to actually use my highest shelf for appropriate, less frequently needed storage rather than avoiding that space out of pure inconvenience. A question I hear is what belongs on that high, step-stool-required shelf specifically, and I’d recommend reserving it for genuinely infrequent items, holiday baking supplies, large serving dishes, rather than anything you reach for even weekly, since that higher shelf’s inherent inconvenience should match how rarely you actually need to access whatever’s stored there.
17. Reassess Your System Every Few Months
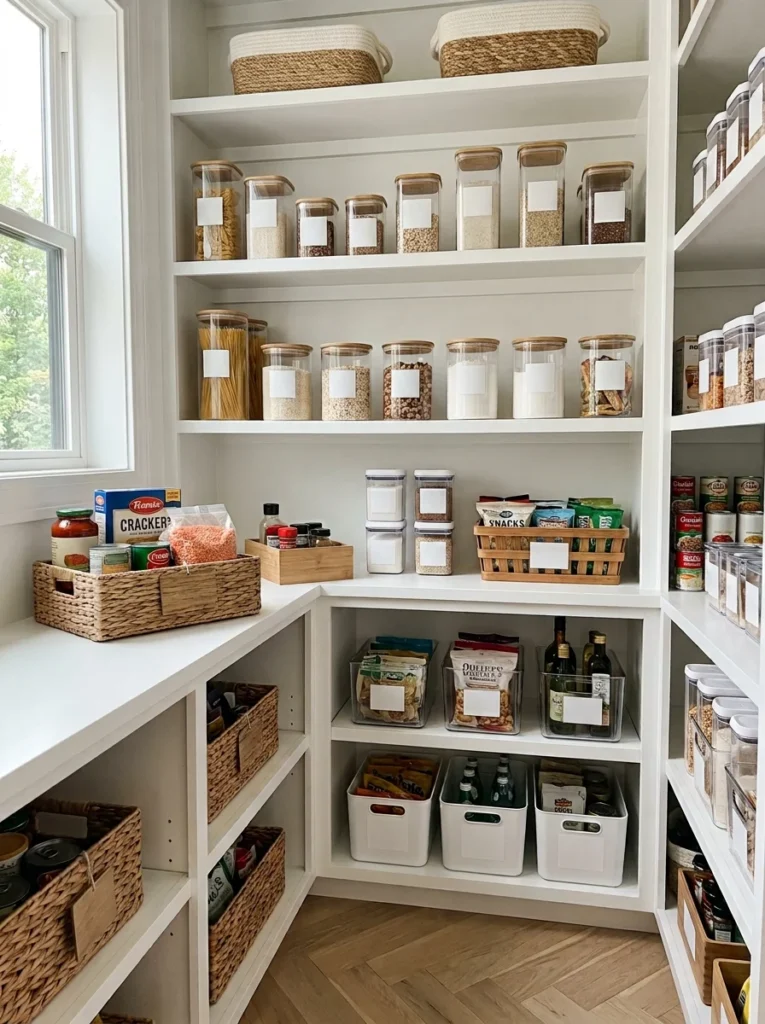
The final piece of advice is recognizing that even a genuinely well-planned pantry system benefits from periodic reassessment, since eating habits, household size, and specific dietary needs naturally shift over time in ways that can gradually make an initially well-suited system less effective without you necessarily noticing that drift happening. I do a genuine pantry review roughly every three months, honestly evaluating whether my current zones and organization still make sense given how my household’s actual cooking and eating habits have evolved since my last check. A common question is how to know it’s genuinely time for this kind of reassessment, and I’d say if you notice yourself repeatedly reaching past or around a particular section to find what you actually need, or if you’re rediscovering forgotten items during a grocery trip you didn’t realize you already owned, those are both clear signs the system has drifted and deserves another honest look.
Final Thoughts
Looking back at that pantry I used to close quickly before anyone could see inside, genuinely embarrassed by the chaos hiding behind that door, it’s remarkable how much a real organizational system changed both how efficiently I cook and how confidently I can now actually open that door in front of guests. Between all 17 of these ideas, the underlying theme is really that pantry organization rewards genuine, honest evaluation of what you actually own and use, rather than simply shoving groceries in wherever there happens to be available space and hoping for the best.
If your own pantry is stuck in that same cycle of chaos, I’d suggest starting with the complete cleanout and expiration check covered in the first two ideas before purchasing any specific organizational containers or products, since understanding exactly what you own should genuinely drive every other decision on this entire list. From there, build the system out zone by zone, the same gradual approach that eventually transformed my own pantry, until opening that door stops being something you brace for and simply becomes an easy, functional part of getting dinner started.
