
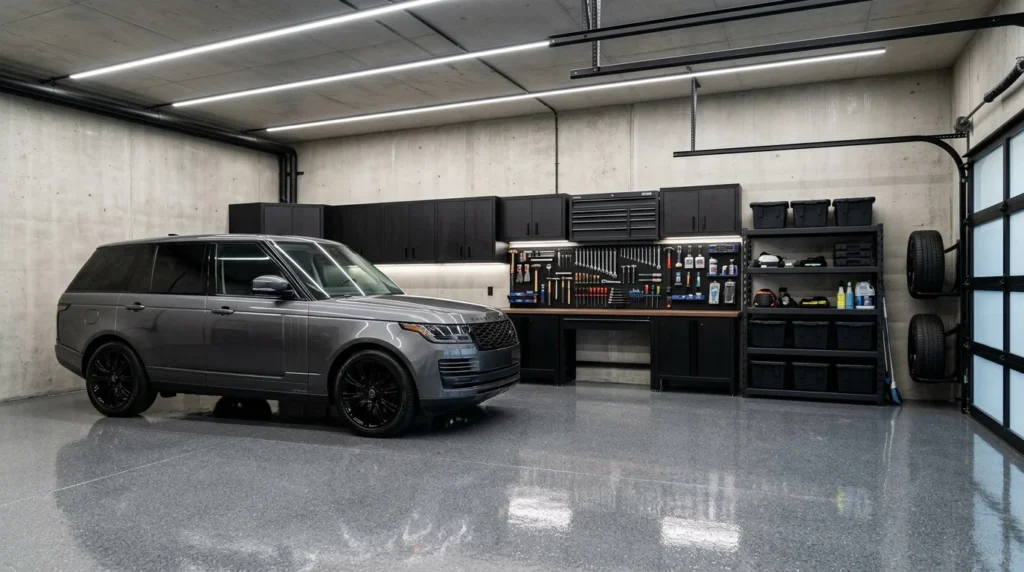
For the first three years I owned my house, my garage floor was just bare, cracked concrete with an oil stain shaped vaguely like a rabbit that I’d honestly grown a little fond of, in a strange way. It wasn’t until I started using the garage as more than just a place to park, a workshop corner, a spot for my kids’ bikes, somewhere to actually spend time on weekends, that the floor’s condition started genuinely bothering me. What began as a simple weekend project to patch a few cracks turned into a much deeper rabbit hole of research into garage flooring options, and by the time I finally settled on a solution, I’d learned more about epoxy, tiles, and concrete coatings than I ever expected to know.
If your garage floor is in that same rough, neglected state mine used to be, here are 25 options, each explained in detail, based on what I researched, tested, and ultimately chose for my own space, along with what I learned from a few contractor friends along the way.
1. Epoxy Floor Coating
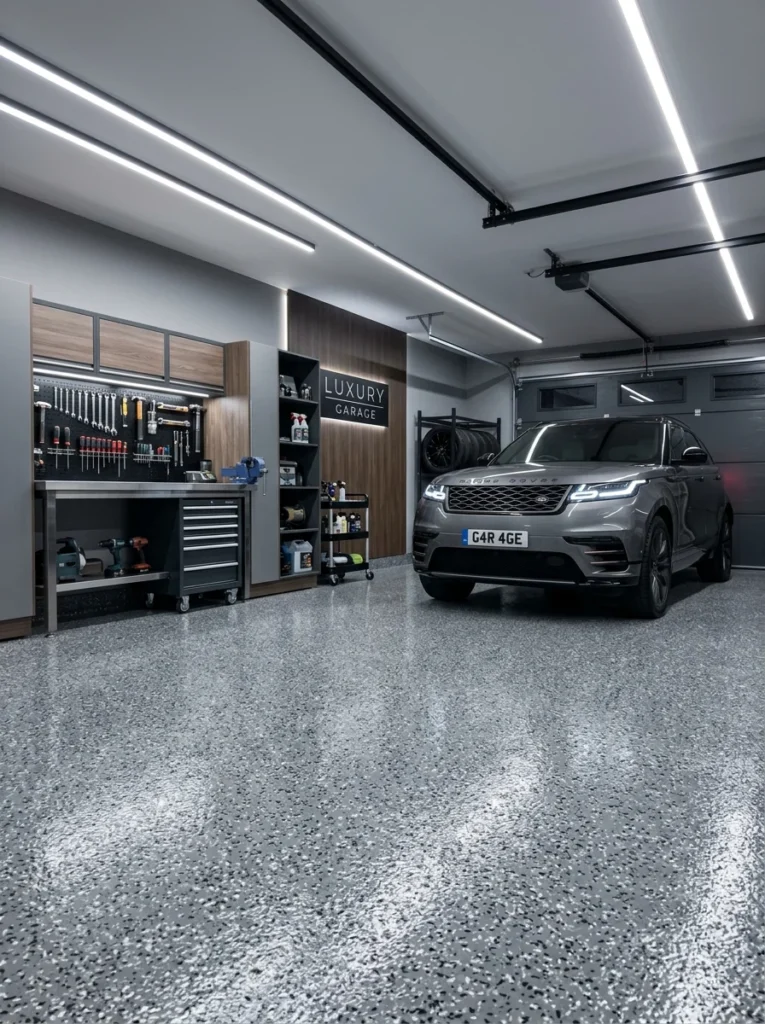
Epoxy ended up being the option I chose for my own garage, and it’s still the most popular modern garage flooring solution for good reason. It’s a two-part resin coating applied directly over prepared concrete, creating a smooth, glossy, and remarkably durable surface that resists oil stains, chemical spills, and the general wear of parking a car day after day. The application process genuinely matters here, and I learned this the hard way on my first attempt, since proper concrete preparation, including acid etching or mechanical grinding to open up the pores of the concrete, is essential for the epoxy to bond correctly rather than peeling within a year or two. My second attempt, done more carefully with proper prep, has held up beautifully for several years now with just occasional cleaning. Epoxy comes in a huge range of colors and finishes, from solid colors to metallic, marbled effects that genuinely look like polished stone. The main downside is the application process itself, which typically requires the garage to be completely empty and unused for at least 24 to 72 hours depending on the specific product and weather conditions during curing.
2. Polyaspartic Coating
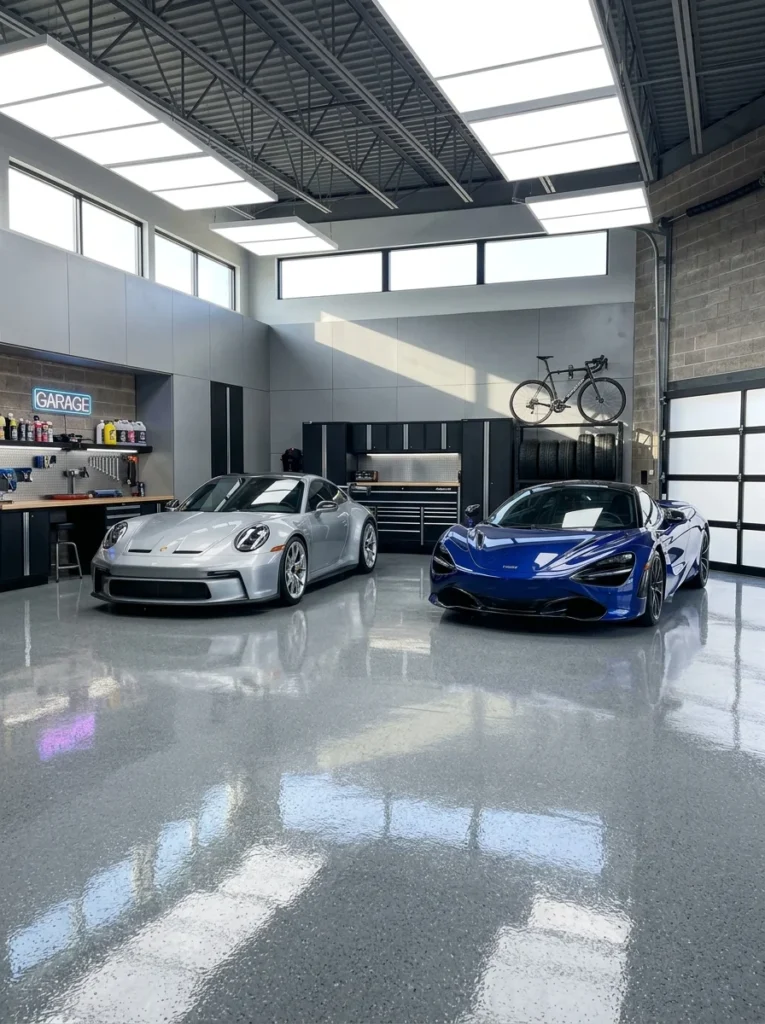
Polyaspartic coatings are a newer alternative to traditional epoxy that a contractor friend recommended when I was doing my research, and while I ultimately went with epoxy for budget reasons, I’d genuinely consider polyaspartic if I were redoing the floor today. The biggest advantage is cure time, polyaspartic coatings can often be walked on within hours and fully cured within a day, compared to the multi-day process typical of epoxy. It’s also more UV stable than epoxy, meaning it won’t yellow over time if your garage gets direct sunlight through windows or an open door, which is a real issue with some epoxy formulations after a few years. The tradeoff is cost, polyaspartic coatings typically run noticeably more expensive than standard epoxy, and the faster cure time means less room for error during application, which might push some DIYers toward hiring a professional rather than attempting it themselves. For anyone who can’t afford to have their garage out of commission for several days, the dramatically faster cure time alone might justify the extra cost compared to traditional epoxy.
3. Interlocking Garage Floor Tiles
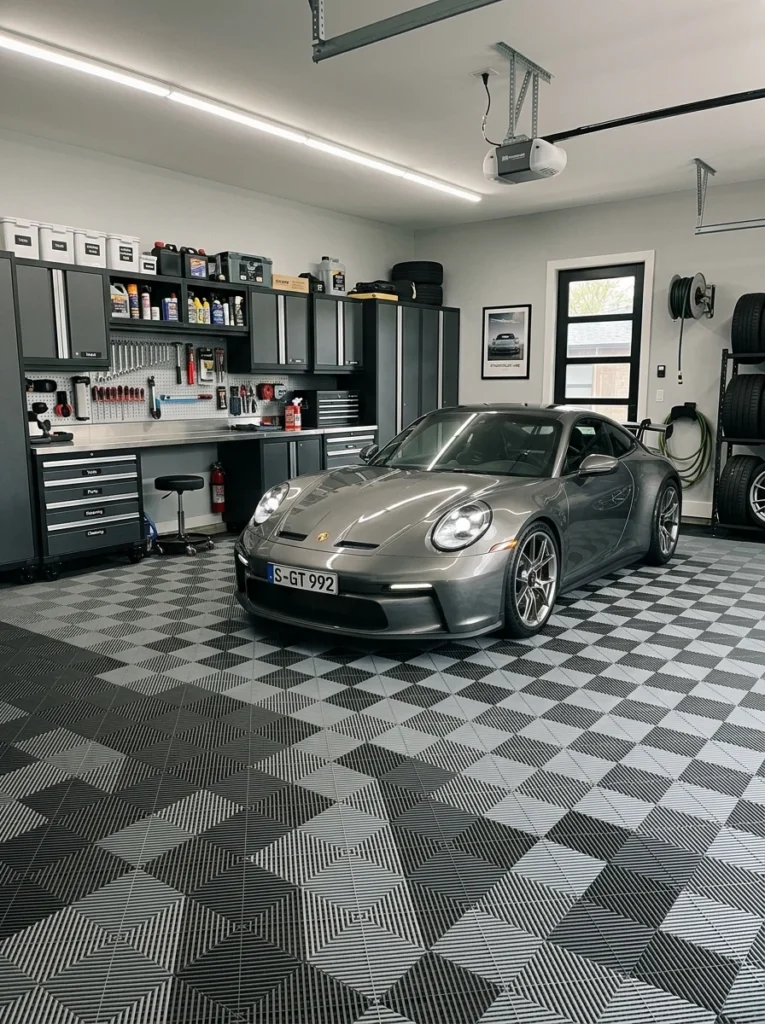
Before committing to epoxy, I seriously considered interlocking PVC tiles, which snap together like puzzle pieces directly over your existing concrete without any adhesive, grinding, or curing time required at all. A friend installed these in his garage over a single weekend, and the process really was as simple as it sounds, cutting a few edge pieces to fit around the garage’s perimeter and snapping the rest into place. Beyond the easy installation, interlocking tiles have the advantage of being genuinely repairable, if one tile gets damaged or badly stained, you can simply pop it out and replace that single piece rather than redoing an entire coated surface. They also provide a bit more cushioning underfoot compared to a hard epoxy or bare concrete floor, which matters if you spend a lot of time standing in the garage working on projects. The main downside is that tiles can shift slightly under heavy vehicle weight if not installed correctly, and the seams between tiles can eventually collect dirt and debris that requires occasional cleaning attention.
4. Rubber Garage Flooring Rolls
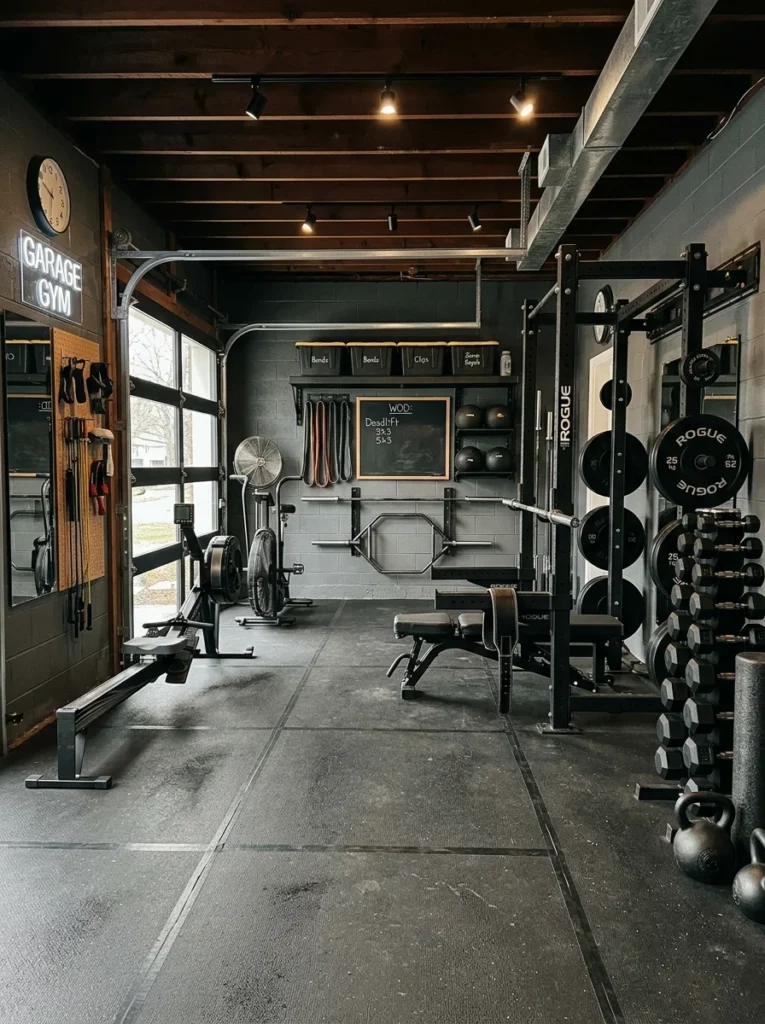
Rubber rolls, essentially large sheets of rubber flooring installed much like carpet, offer one of the most affordable and forgiving garage floor options, particularly for anyone using their garage as a home gym or workshop space where dropped tools and equipment are a regular concern. I tested a small section in my own garage before deciding on epoxy for the main space, and the rubber genuinely absorbed impact and sound in a way that hard flooring options simply can’t match. Installation is relatively straightforward, typically involving rolling out large sheets and trimming them to fit your garage’s specific dimensions, though very large garages may require seaming multiple rolls together. Rubber flooring also provides noticeably better traction than smooth epoxy, particularly in colder climates where a garage floor might occasionally get wet from melting snow or ice tracked in on tires and boots. The main tradeoff is aesthetics, rubber flooring tends to have a more utilitarian, gym-like appearance compared to the sleeker, glossier look of epoxy or polyaspartic coatings, which matters if you’re using your garage as more of a showroom space for a prized vehicle.
5. Polished Concrete
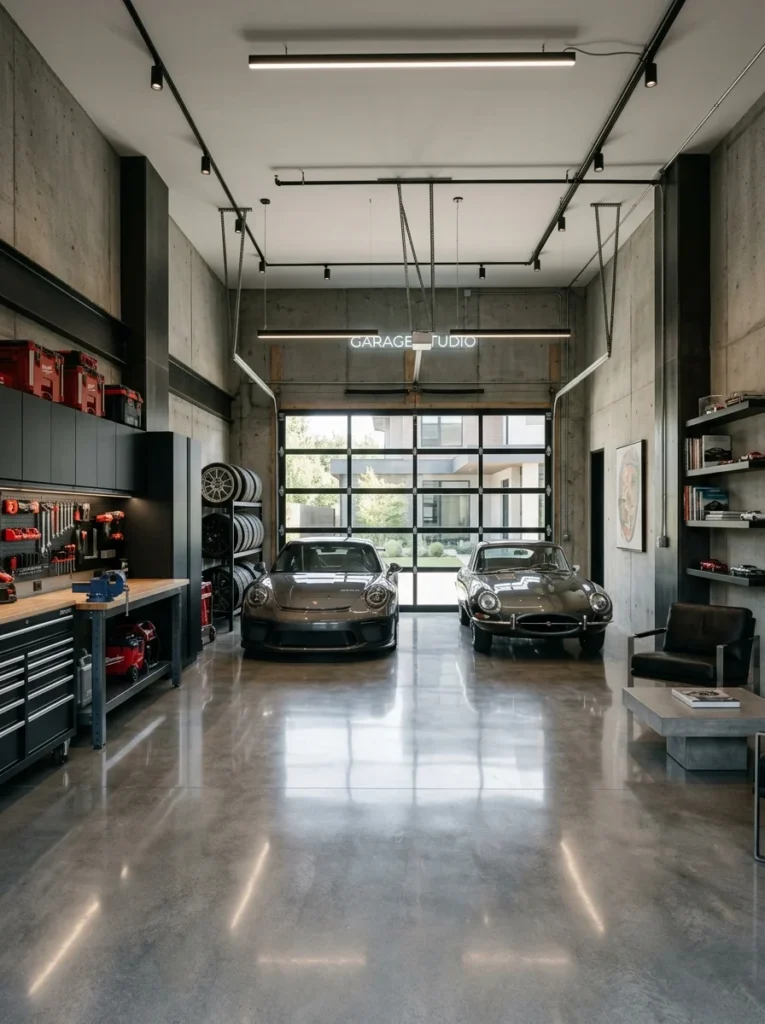
For anyone who likes the industrial, minimalist look of raw concrete but wants something more refined than the standard rough, unfinished slab, polished concrete uses mechanical grinding and progressively finer polishing pads to bring out a smooth, sometimes glossy sheen directly from the existing concrete itself, without adding any coating on top. A neighbor had this done throughout his entire garage and workshop, and the result genuinely looks like something out of a high-end architectural magazine, with the natural variation and subtle marbling of the concrete itself becoming the main visual feature rather than a uniform painted color. This process requires professional equipment and expertise to execute properly, since achieving a genuinely smooth, glossy polish involves multiple passes with increasingly fine diamond grinding pads, not something realistically achievable with typical homeowner tools. Polished concrete is also remarkably durable and low maintenance once completed, requiring just occasional damp mopping rather than the periodic recoating that some other options eventually need. The main consideration is that this process works best on concrete that’s already in reasonably good condition, since significant existing cracks or damage will still be visible, even accentuated, once the surface is polished.
6. Stained Concrete
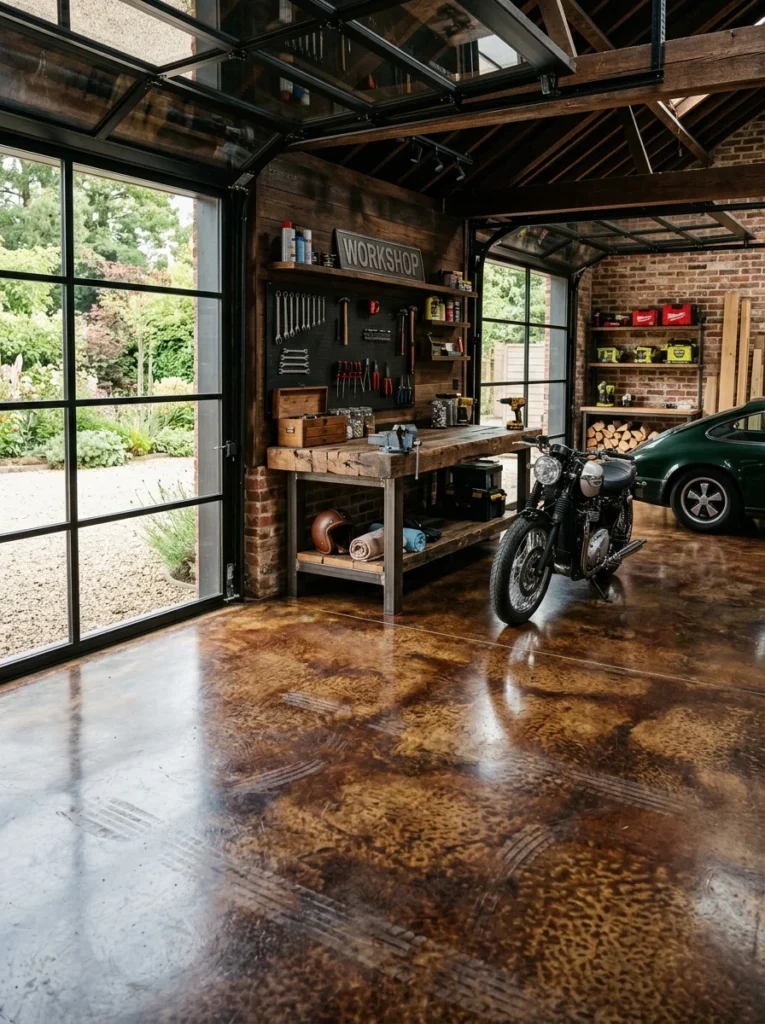
Rather than covering the concrete with a solid coating, acid or water-based concrete stains penetrate directly into the surface, creating rich, variegated color that highlights the natural texture and slight imperfections of the concrete rather than hiding them completely. I’ve seen this done in a friend’s garage using a deep, mottled brown stain that genuinely resembles natural stone or leather, and the effect is considerably more organic and less uniform than a solid epoxy color. Because the stain penetrates rather than sitting on top like a coating, it won’t peel or chip the way epoxy sometimes can if not applied correctly, though it also doesn’t provide quite the same level of protection against oil stains and chemical spills without an additional sealer applied afterward. This is generally a more budget-friendly option than epoxy or polyaspartic coatings, particularly if you’re comfortable applying the stain yourself, though achieving an even, professional-looking result does take some practice and patience with test patches before committing to the full floor. Stained concrete pairs particularly well with a garage that’s being converted into a more finished living or workshop space, since the organic, variegated coloring feels less purely utilitarian than a flat, solid-colored coating.
7. Metallic Epoxy Flooring
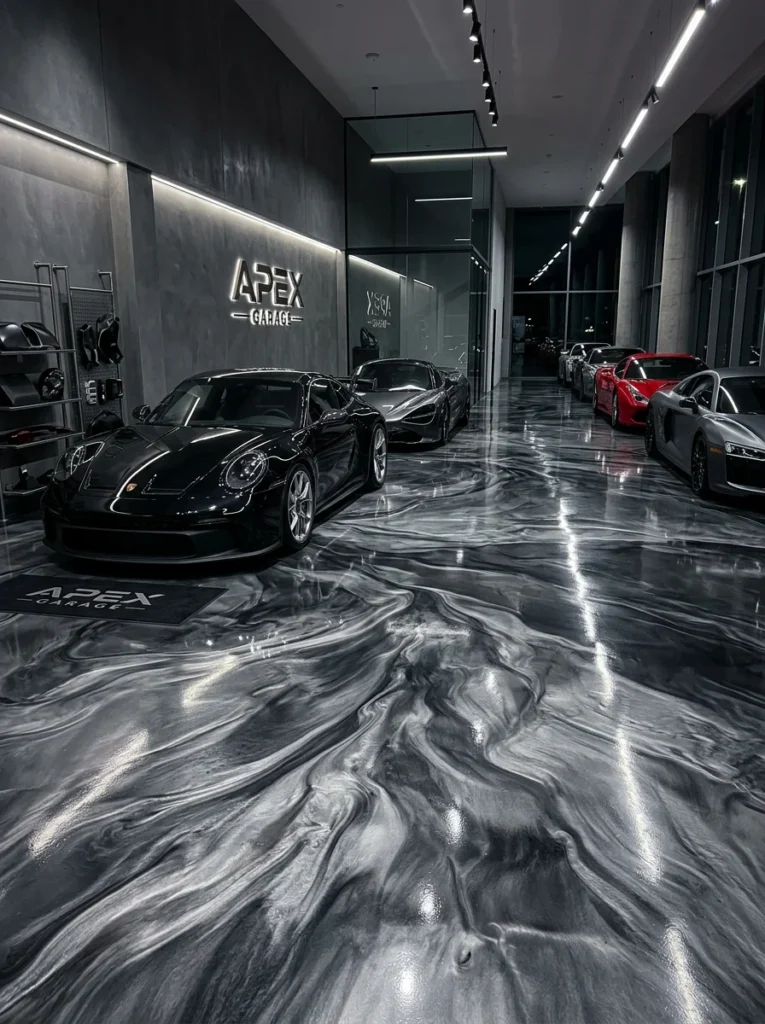
Metallic epoxy takes the standard epoxy coating concept and adds specialized metallic pigments that create swirling, three-dimensional patterns genuinely reminiscent of flowing lava or ocean waves, depending on the specific technique and colors used during application. I saw this done in a showroom garage that housed a car collector’s prized vehicles, and the effect is dramatic enough that it functions almost like art on the floor rather than purely functional flooring. This is a more advanced technique than standard epoxy application, since achieving those swirling patterns requires specific application methods, often involving pushing and manipulating the wet epoxy with tools or even a leaf blower to create the characteristic flowing patterns before it cures. Given the complexity, this is generally a project best left to experienced professional installers rather than a first-time DIY attempt, and the cost typically runs higher than standard solid-color epoxy as a result. For anyone treating their garage as a genuine showpiece, whether for car collecting, entertaining, or just personal pride in the space, metallic epoxy delivers a level of visual drama that few other flooring options can match.
8. Chip Flake Epoxy Systems
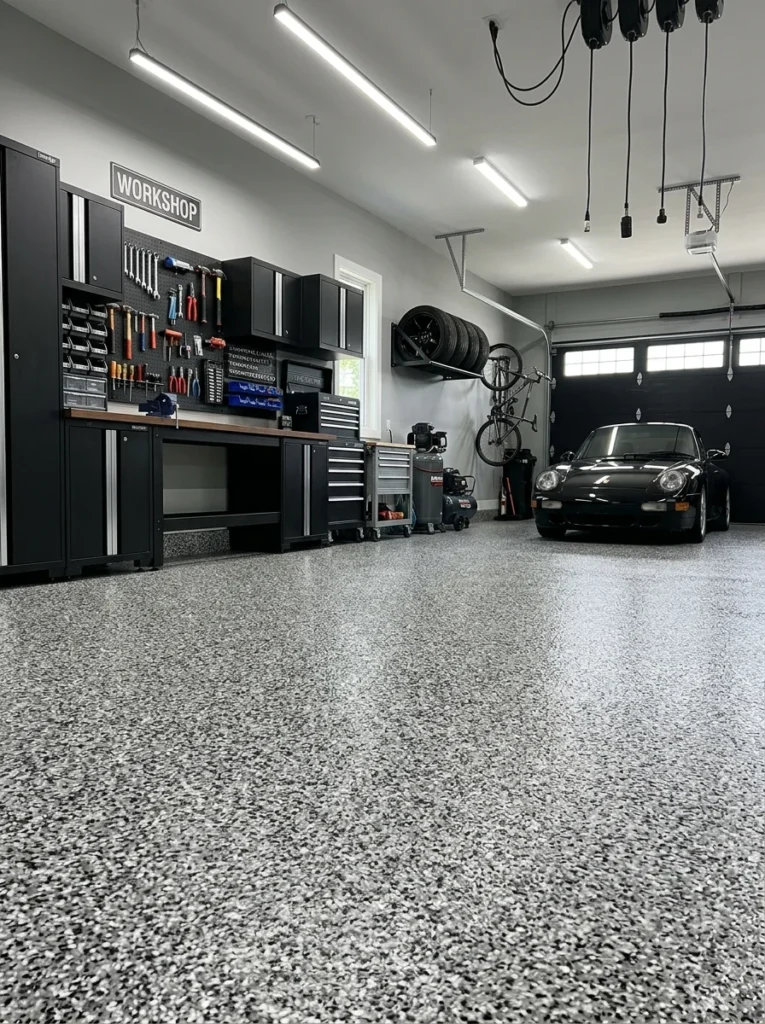
A step up from solid-color epoxy in terms of texture and visual interest, chip flake systems involve broadcasting colored vinyl or paint flakes into the wet epoxy base coat before it cures, then sealing everything with a clear topcoat. My own garage floor actually uses this approach, a grey and charcoal flake blend broadcast over a lighter grey base coat, and the resulting texture does a remarkably good job of hiding dirt, dust, and minor debris between cleanings compared to a completely smooth solid color. The flakes also add meaningful slip resistance, which I appreciated once I actually started using the space more regularly, since a smooth, glossy solid-color epoxy can become genuinely slippery when wet. There’s a wide range of flake density and color combination options, from a light, sparse scatter to a completely saturated, full-coverage look, giving you considerable control over the final aesthetic. This system does add a bit more complexity and cost compared to solid-color epoxy alone, since it involves the additional step of broadcasting and later scraping excess flakes before applying the final clear topcoat, but the added durability and texture made it worth the extra effort in my own experience.
9. Quartz-Filled Epoxy Systems
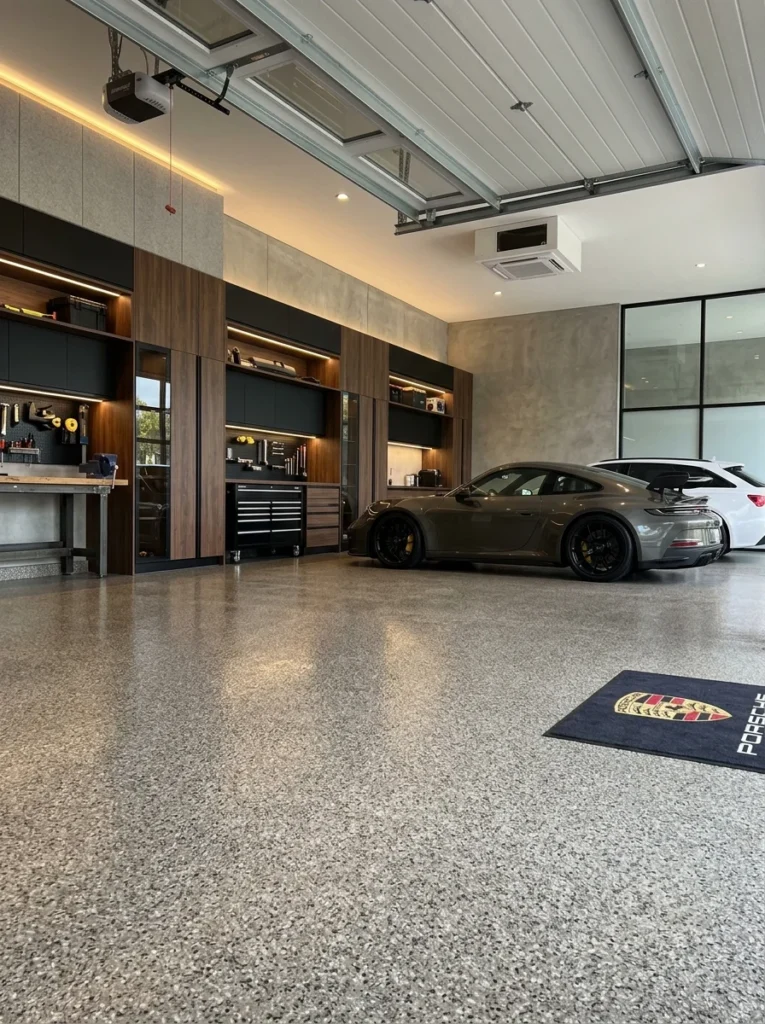
For garages that see particularly heavy use, whether from a home workshop, frequent vehicle maintenance, or just a lot of daily foot traffic, quartz-filled epoxy systems incorporate colored quartz aggregate directly into the epoxy for a surface that’s noticeably more slip-resistant and abrasion-resistant than standard flake or solid epoxy alone. A contractor I spoke with during my research specifically recommended this option for commercial and heavy-use residential garages, citing its resistance to hot tire pickup, a common issue where fresh asphalt residue transfers onto standard epoxy and creates a sticky, marked appearance over time. The quartz texture also provides genuinely better traction underfoot compared to smoother epoxy finishes, which matters considerably in garages that occasionally get wet from weather or washing vehicles. This system tends to run on the higher end cost-wise compared to standard epoxy, reflecting both the material cost of quartz aggregate and the more involved application process, but for a genuinely heavy-use garage, the added durability can offset that higher upfront investment over the surface’s lifespan.
10. Concrete Overlay Systems
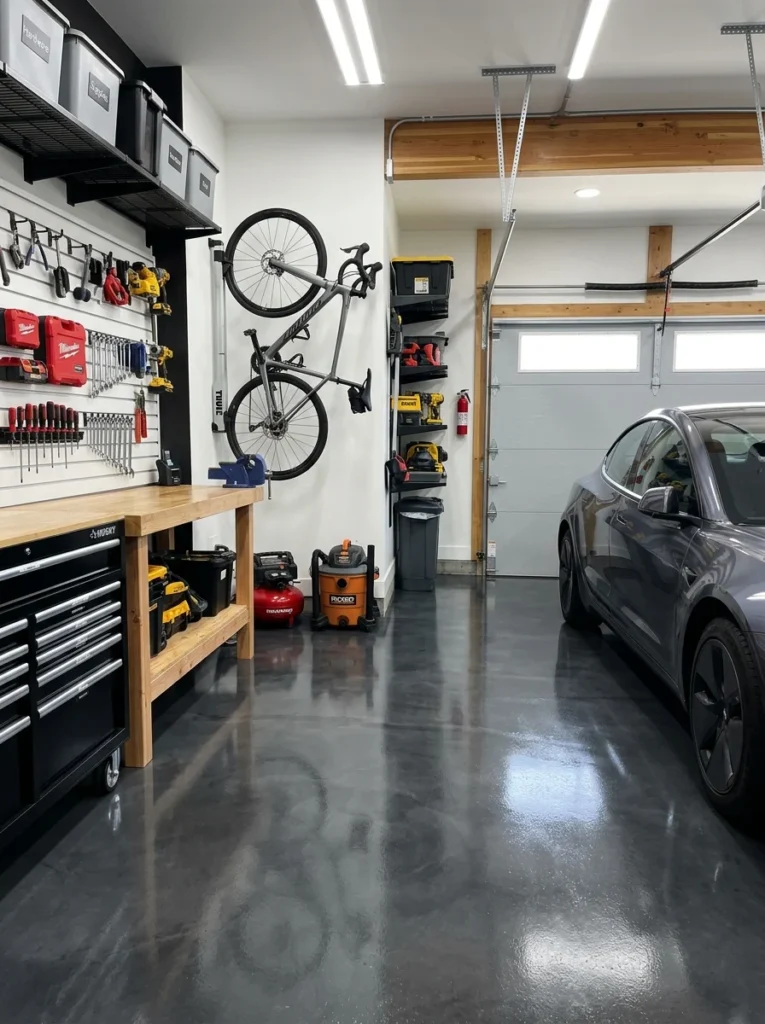
For garage floors with significant existing damage, deep cracks, extensive spalling, or uneven surfaces that would be difficult to fully address through patching alone, a concrete overlay involves applying an entirely new thin layer of specialized concrete or cementitious material directly over the existing slab, essentially giving you a fresh surface to work with. I considered this option briefly when I discovered my garage floor had more underlying damage than I initially realized, though I ultimately addressed the cracks through more targeted repair before proceeding with epoxy instead. Overlay systems can be finished with various textures and colors depending on the specific product used, and they’re often a more cost-effective alternative to fully replacing a severely damaged concrete slab, which is a considerably more invasive and expensive undertaking. This process does require professional application in most cases, since achieving proper adhesion and an even thickness across the entire surface takes specialized equipment and experience that’s difficult to replicate with typical homeowner tools. If your garage floor has damage beyond what standard crack filling and patching can reasonably address, this is worth discussing with a concrete contractor before assuming a full slab replacement is your only option.
11. Garage Floor Paint
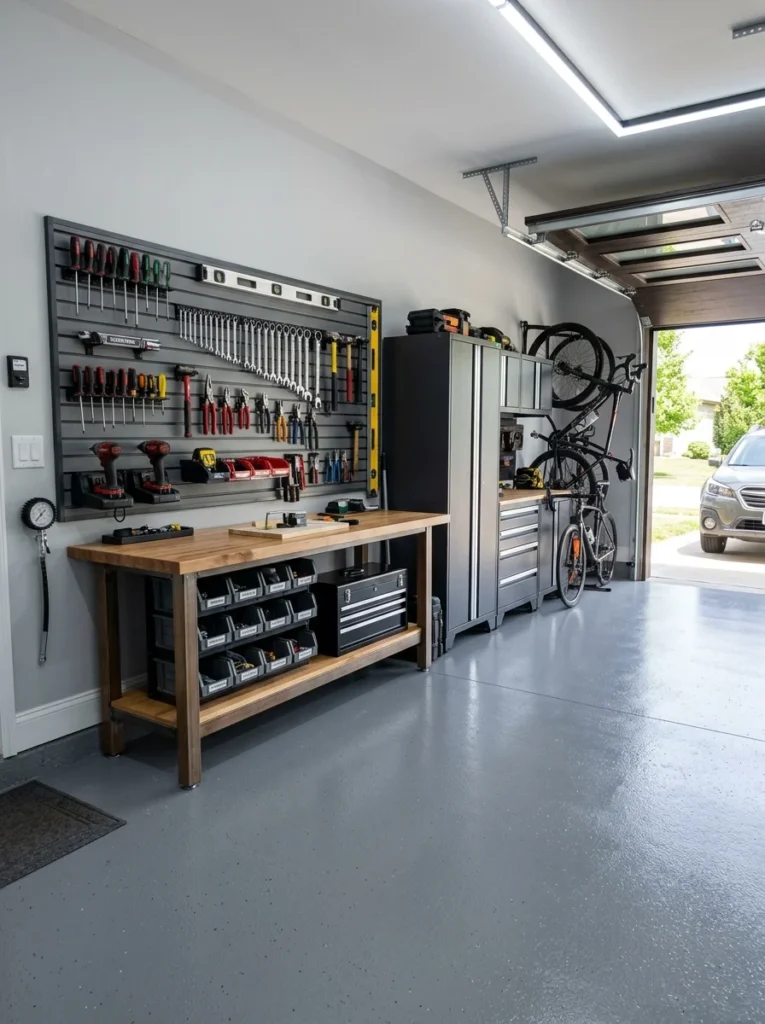
The most budget-friendly and accessible option on this entire list, standard garage floor paint, typically a specially formulated acrylic or latex paint designed to handle the wear and chemical exposure of a garage environment, offers a genuine improvement over bare concrete without the cost or complexity of epoxy or polyaspartic systems. I used this as a temporary solution in my garage for about a year before eventually upgrading to full epoxy, and it held up reasonably well for basic foot traffic, though it did show wear more quickly than I’d hoped once I started regularly parking a vehicle over the same section. Proper surface preparation still matters significantly here, even more so than with some epoxy systems, since floor paint doesn’t have quite the same self-leveling, gap-filling properties, so any existing cracks or imperfections in the concrete will remain visible after painting. This is genuinely the best entry point for anyone wanting to test whether they like a colored garage floor before committing to a more expensive, longer-lasting system, and it’s also a reasonable option for garages that see lighter use and don’t need the industrial-grade durability of epoxy or polyaspartic coatings.
12. Stamped Concrete Patterns
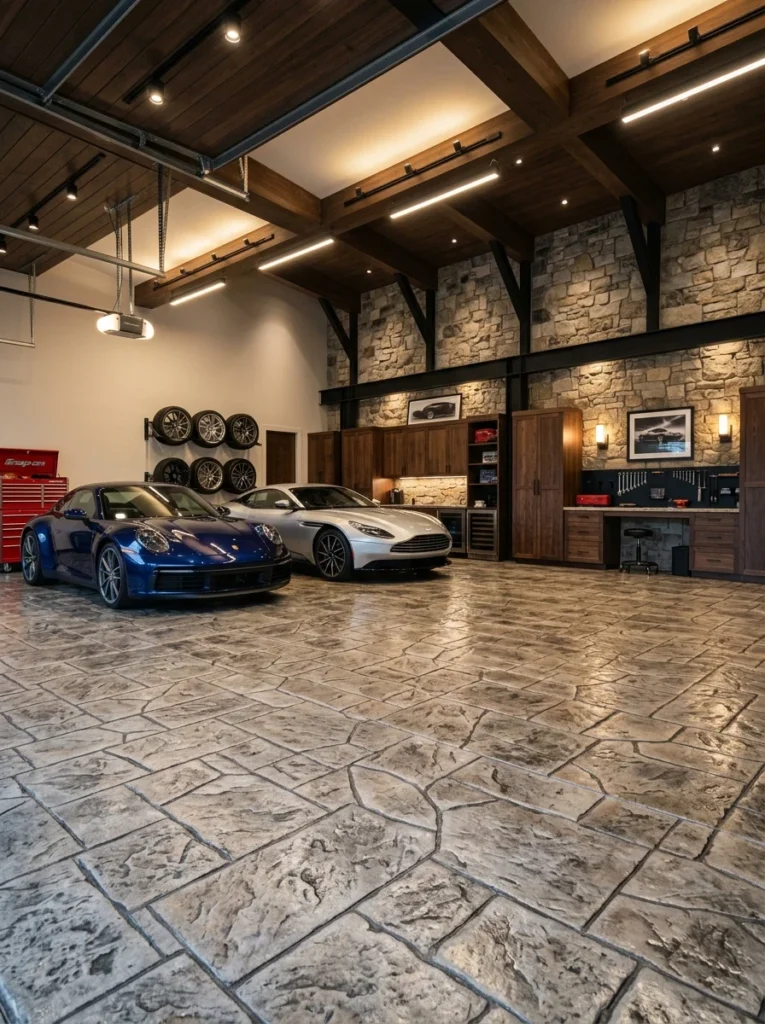
For garages that connect directly to outdoor living spaces or driveways with existing stamped concrete, extending that same stamped pattern, often designed to mimic natural stone, brick, or tile, into the garage itself creates a seamless visual transition between indoor and outdoor areas. A neighbor did exactly this, extending a stamped pattern that mimics large-format slate tile from his driveway straight through his open garage door, and the continuity genuinely makes the whole space feel more architecturally cohesive rather than like two separate, disconnected areas. This process needs to happen during the initial concrete pour or a full resurfacing project, since stamping requires access to the concrete while it’s still wet and workable, making it impractical as a simple update to an existing, already-cured garage floor without a more involved overlay process first. Stamped concrete does require sealing to protect the textured surface and maintain its color over time, similar to stained concrete, and that sealer typically needs reapplication every few years depending on the level of use and exposure to the elements. This option works best as part of a larger renovation or new construction project, rather than a standalone garage floor update, given the specific timing requirements involved.
13. Terrazzo-Style Epoxy Flooring
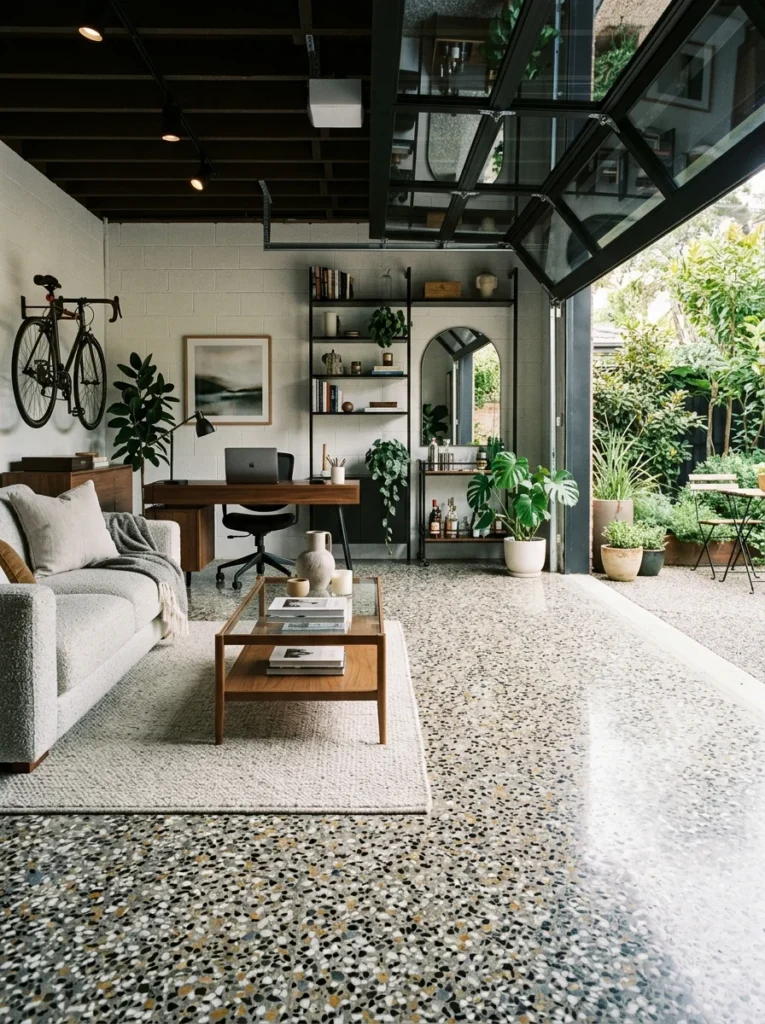
Terrazzo, traditionally made from marble or stone chips set in cement, has a modern epoxy-based equivalent that achieves a similar speckled, aggregate look through embedded chips within a resin base, offering a more refined, almost luxurious aesthetic compared to standard flake epoxy systems. I saw this used in a converted garage that now functions as a home studio space, and the sophisticated, speckled pattern genuinely elevated the room beyond what most people picture when they hear the word “garage floor.” This system typically involves a more labor-intensive application and finishing process compared to standard epoxy, often including a final grinding and polishing step to expose and smooth the embedded aggregate for that characteristic terrazzo appearance. Given the more involved process and generally higher-end aesthetic goal, this tends to be a more expensive option overall, making it better suited for garages being converted into more finished, multi-purpose living spaces rather than a purely functional vehicle storage area. If you’re planning to eventually use your garage as more than just parking, a home gym, studio, or entertainment space, this option bridges the gap between purely industrial flooring and something that would feel at home in a more traditionally finished interior room.
14. Vinyl Garage Flooring Rolls
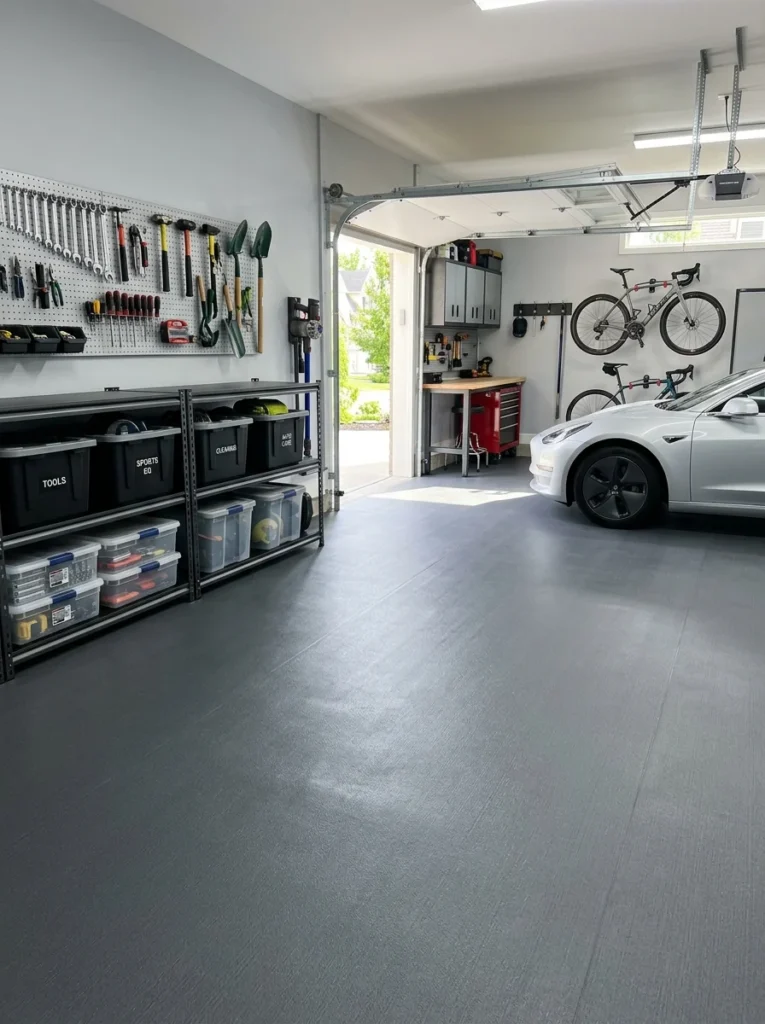
Similar in concept to interlocking tiles but installed as continuous sheets rather than individual pieces, vinyl flooring rolls offer a smooth, seamless surface with considerably easier installation than epoxy while still providing better chemical and stain resistance than basic rubber rolls. A friend installed this in her garage specifically because she wanted something she could remove entirely if she ever sold the house and wanted to take the flooring investment with her, which isn’t realistically possible with epoxy or stained concrete. The rolls typically come in large widths, minimizing seams across most standard single-car garage widths, and installation generally just requires trimming to fit and securing the edges rather than any adhesive across the entire surface. Vinyl does show wear from heavy vehicle traffic somewhat faster than harder-cured options like epoxy or polyaspartic coatings, making it a better fit for garages used more for storage, workshops, or hobby spaces rather than daily vehicle parking. The relatively low cost and easy installation make this an appealing middle-ground option for anyone wanting a meaningful upgrade over bare concrete without the time, cost, or permanence of a fully coated floor system.
15. Herringbone Tile Patterns
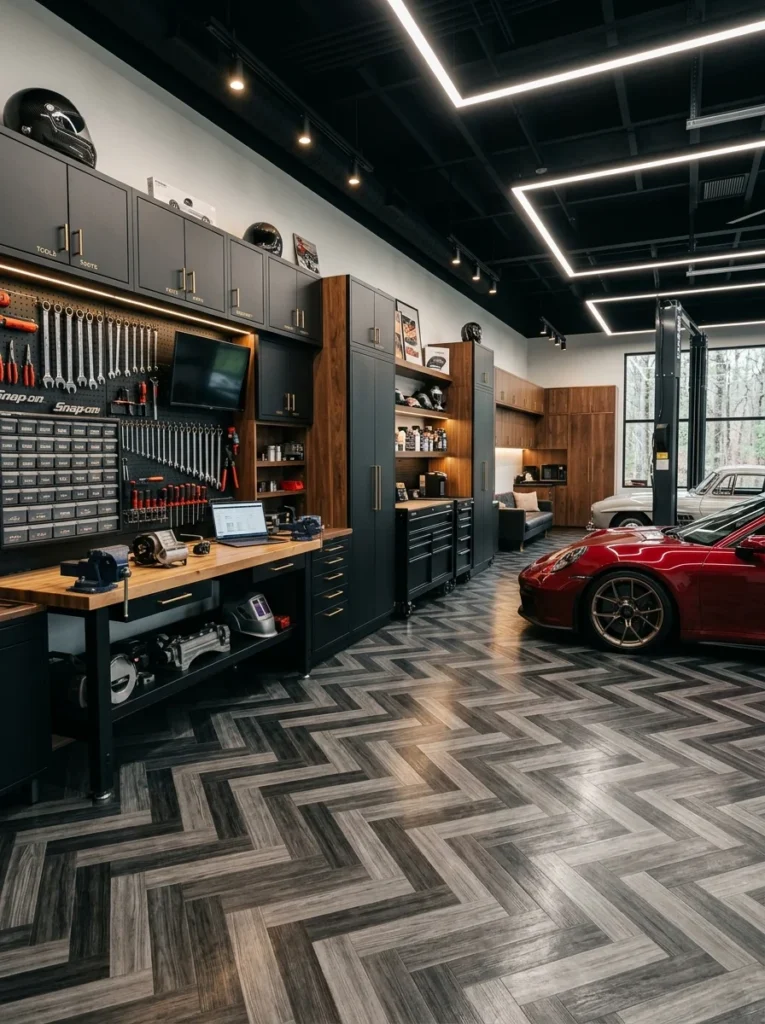
Moving beyond standard grid-laid interlocking tiles, arranging garage floor tiles in a herringbone pattern adds a level of visual sophistication that elevates the space considerably, an approach I’ve increasingly seen in garages that double as home gyms or workshops where the owner wants the space to feel genuinely designed rather than purely functional. This pattern works with several of the tile-based systems already mentioned, whether that’s rigid PVC interlocking tiles or more flexible rubber tile options, and the installation process is only moderately more complex than a standard grid layout, mainly requiring more precise cutting at the room’s edges to maintain the pattern. The visual effect is genuinely striking, adding dynamic movement and a sense of craftsmanship to the floor that a simple grid pattern in the same exact tiles simply doesn’t achieve. I’d recommend this specifically for garages being used as more of a lifestyle space, home gym, workshop, or hangout area, since the extra visual effort makes more sense in a space you’re spending real time in versus a garage used purely for parking and quick in-and-out storage access.
16. Two-Tone Border Designs
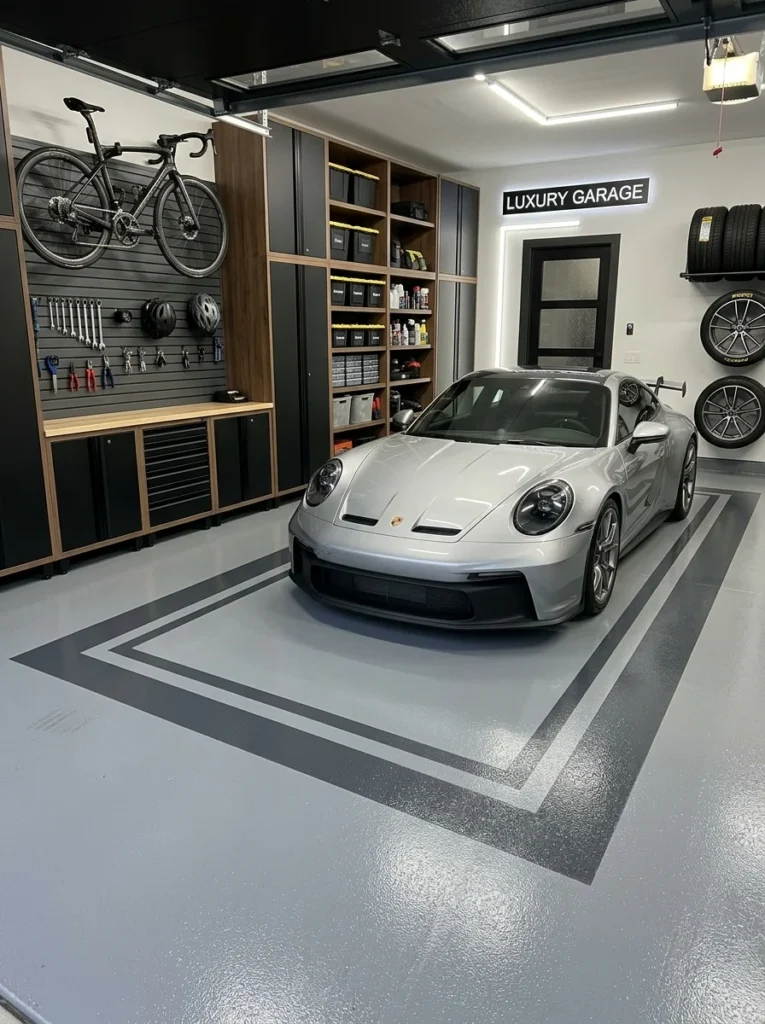
A relatively simple but visually effective technique involves using a contrasting color epoxy or paint border around the perimeter of the garage floor, framing the main floor color the same way a rug frames a room. I did a version of this in my own garage, a slightly darker charcoal border around my main grey flake floor, and the framing effect genuinely makes the space feel more finished and intentional, almost like the floor was custom-designed for the room rather than just a single flat color extending edge to edge. This technique also serves a practical purpose in some garages, using a contrasting color to clearly mark designated parking zones or walkways, which can be genuinely useful in a shared garage space or one used for multiple vehicles. The additional cost and complexity compared to a single solid color is fairly minimal, mainly requiring careful taping to achieve clean, straight lines between the two colors during application. This is a good option for anyone who likes the idea of a more polished, custom look but isn’t ready to commit to a more complex pattern like herringbone tiles or a fully custom logo or design element.
17. Custom Logo or Design Inlays

For car enthusiasts or anyone wanting a genuinely personalized touch, epoxy systems allow for custom vinyl logo inlays, whether that’s a favorite sports team, a car manufacturer’s emblem, or a completely custom family or business logo, embedded directly into the cured floor beneath the clear topcoat. A car collector I spoke with during my research had his garage floor done with a large custom compass rose design centered beneath his main vehicle’s parking spot, and the level of personalization genuinely transforms the space into something that feels distinctly his rather than a generic garage. This process requires precise placement of the vinyl decal during the epoxy application process, typically handled by professional installers who have experience working around the timing and layering required to properly seal the design beneath the clear coat without bubbling or shifting. Given the added complexity and typically the need for professional installation, this tends to be one of the pricier customization options on this list, but for anyone who genuinely values that level of personalization in their space, it’s a distinctive way to make a garage floor feel unmistakably yours rather than something anyone else could have.
18. Anti-Slip Textured Coatings
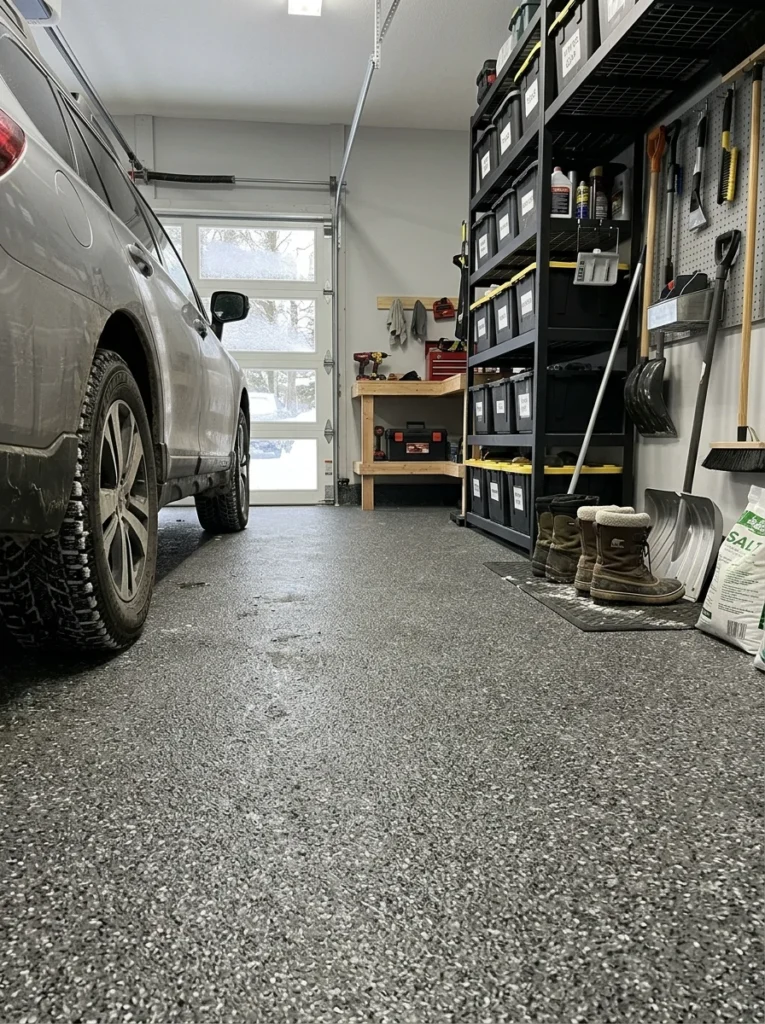
For garages in climates with regular snow, ice, or rain, where tracked-in moisture becomes a genuine safety concern, specialized anti-slip additives can be incorporated into epoxy, polyaspartic, or even standard floor paint to significantly increase traction without sacrificing the overall aesthetic of your chosen coating. I added a fine anti-slip additive to my own epoxy topcoat specifically because my garage floor slopes slightly toward the door, and standing water during winter months made the smooth epoxy alone noticeably slippery before I addressed it. These additives typically come in varying grit levels, and I’d recommend erring toward a finer texture for most residential applications, since overly aggressive grit can actually become uncomfortable underfoot for bare feet or in socks, while still providing more than adequate traction improvement over a completely smooth finish. This is a relatively minor addition to the overall cost of most coating systems, and given the genuine safety benefit, I’d consider it worth including as a standard addition for most garage floors rather than treating it as an optional upgrade, particularly in regions with real winter weather.
19. Radiant Heated Flooring Systems
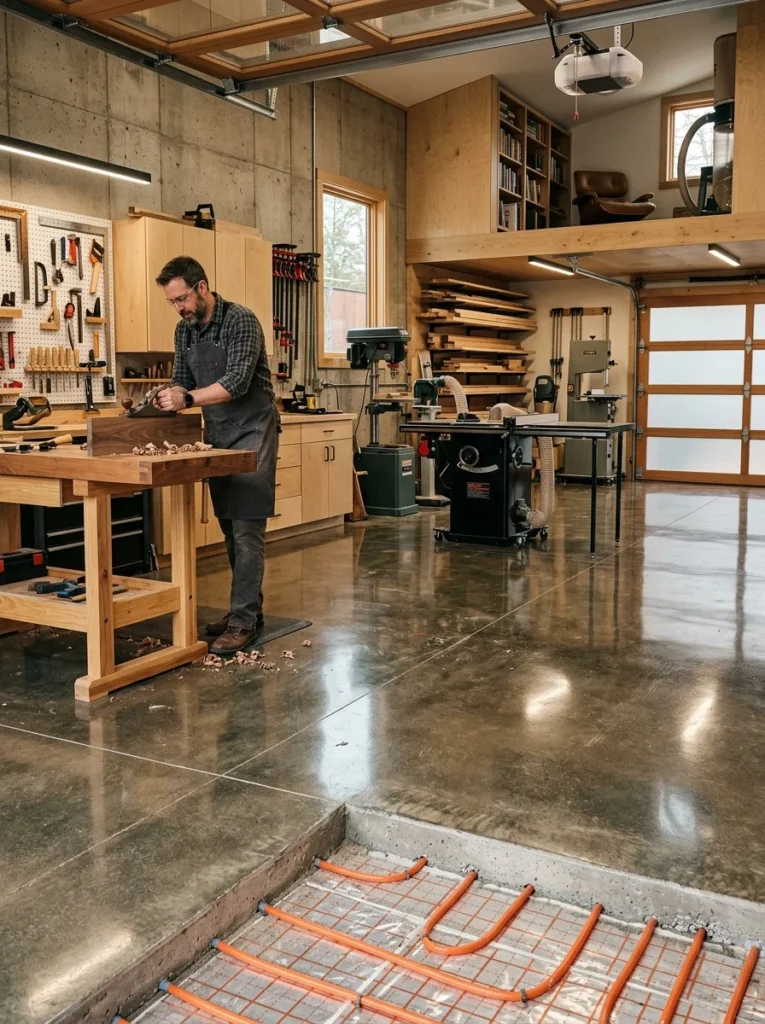
For garages converted into genuine year-round living or workshop spaces, installing radiant heating elements beneath the floor surface, whether that’s electric heating cables or hydronic tubing, before applying your final flooring finish transforms the space from merely tolerable in cold months into a genuinely comfortable environment to spend extended time in. A friend who converted his garage into a woodworking shop had this installed beneath a polished concrete finish, and he’s mentioned repeatedly how much more he actually uses the space now that standing on a cold concrete floor for hours isn’t part of the experience anymore. This needs to be planned and installed before your final flooring surface goes down, making it a significantly bigger undertaking than simply choosing a coating or tile system for an already-finished floor, and it typically requires professional installation for both the heating system itself and the electrical or plumbing work involved. Given the substantial investment involved, this option makes the most sense for garages being genuinely converted into functional living or working spaces used year-round, rather than a garage used purely for occasional vehicle parking where the added comfort wouldn’t be utilized often enough to justify the cost.
20. Water-Based Epoxy Systems
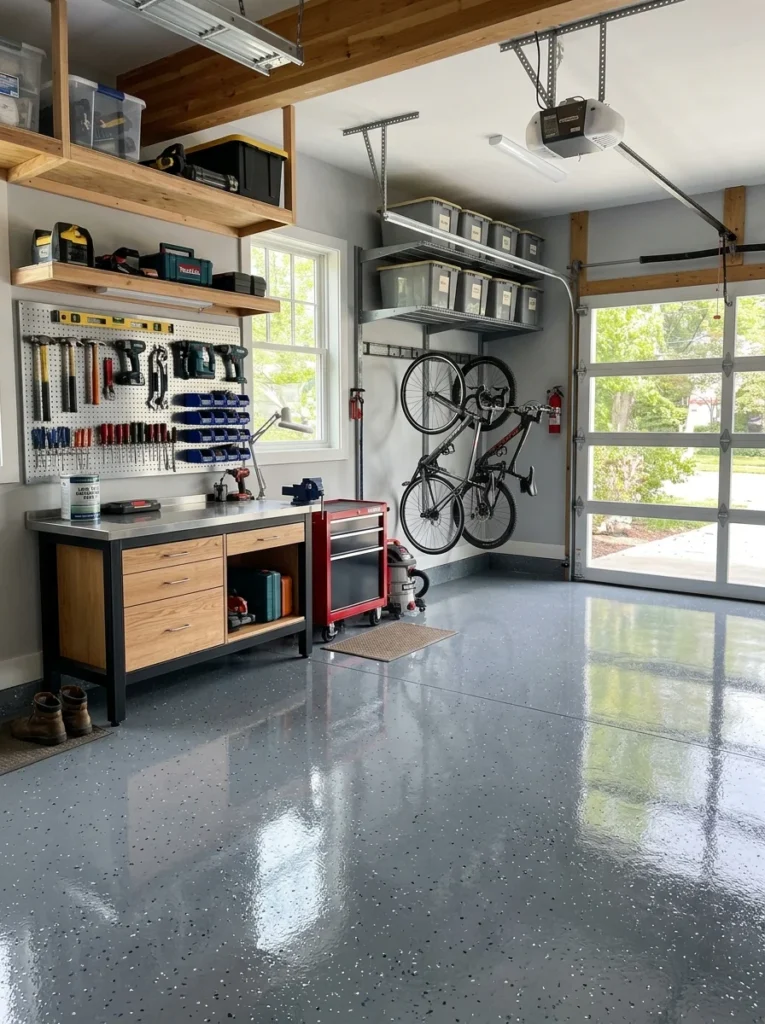
For anyone concerned about the strong fumes associated with traditional solvent-based epoxy during application, water-based epoxy formulations offer a considerably lower-odor alternative that’s become increasingly popular for residential DIY projects, particularly in attached garages where fumes can more easily migrate into the connected living space. I specifically chose a water-based formulation for my own garage for exactly this reason, since my garage shares a wall directly with my kitchen, and the reduced fume concern made the multi-day curing process considerably less disruptive to daily life at home. Water-based epoxy is generally considered slightly less durable and chemical-resistant compared to solvent-based formulations, though the gap has narrowed significantly as the technology has improved in recent years, and for typical residential use, most homeowners won’t notice a meaningful difference in long-term performance. This is genuinely the better choice for most DIY homeowners specifically because of the more manageable fumes and generally more forgiving working time during application, even if professional installers sometimes still prefer solvent-based systems for certain heavy-duty commercial applications.
21. Brick or Cobblestone-Look Overlays
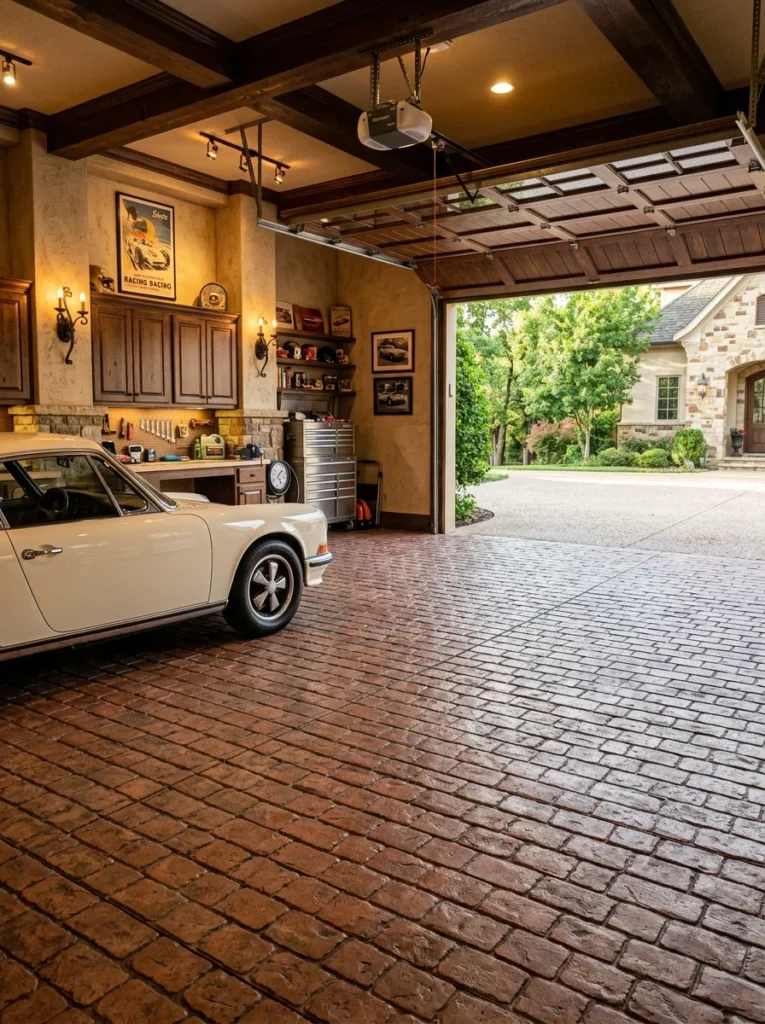
For garages seeking a more traditional, old-world aesthetic rather than the sleek, modern look of glossy epoxy, specialized concrete overlay systems can be textured and colored to closely mimic natural brick or cobblestone, offering that traditional visual character without the maintenance challenges and uneven surface that actual brick or stone pavers would present in a garage setting. I saw this used beautifully in a converted carriage house garage that the owners specifically wanted to feel consistent with the historic character of their older home, and the overlay achieved that traditional look while still providing the smoother, more practical surface needed for actually parking and maneuvering a vehicle. This process shares similarities with stamped concrete in terms of technique, using textured stamps or molds pressed into the overlay material before it cures, then finished with appropriate staining or coloring to enhance the brick or stone appearance. Given the specialized texturing equipment and expertise required, this is generally a professional installation project rather than a realistic DIY undertaking, and it tends to command a higher price point reflecting both the material and labor involved in achieving a convincing, well-executed traditional look.
22. Garage Floor Mats for Zone Protection
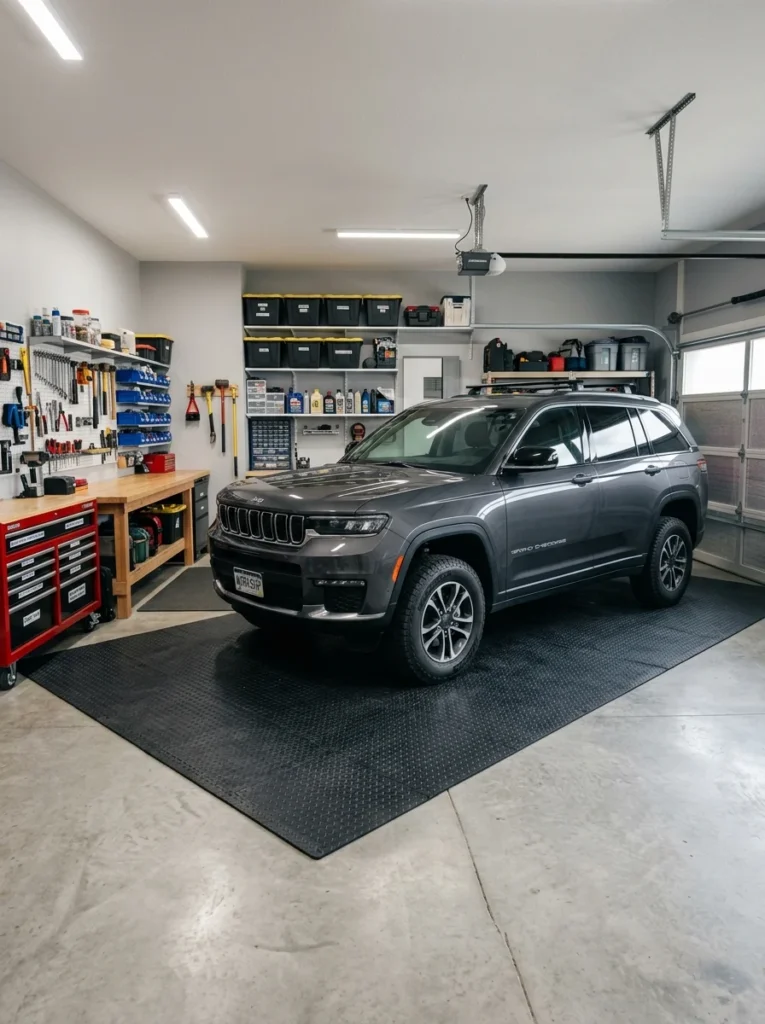
Rather than committing to a full floor renovation, targeted heavy-duty rubber or PVC mats placed specifically beneath parking spots or workbench areas offer a lower-commitment way to protect high-wear zones of an otherwise untreated concrete floor. I used this approach in a portion of my garage for about a year while saving up for the full epoxy project, placing large containment mats specifically under where I park to catch drips and provide a slightly more finished look without any actual floor work required. This is genuinely the most flexible, lowest-commitment option on this entire list, since mats can be repositioned, replaced, or removed entirely without any lasting impact on the underlying concrete, making it a particularly good choice for renters or anyone not ready to commit to a permanent flooring decision. The tradeoff is that this approach doesn’t address the overall aesthetic or condition of the garage floor as a whole, only specific protected zones, so it functions better as a practical, protective measure than as a genuine design upgrade for the space as a whole.
23. Garage Floor Drains with Sloped Coating
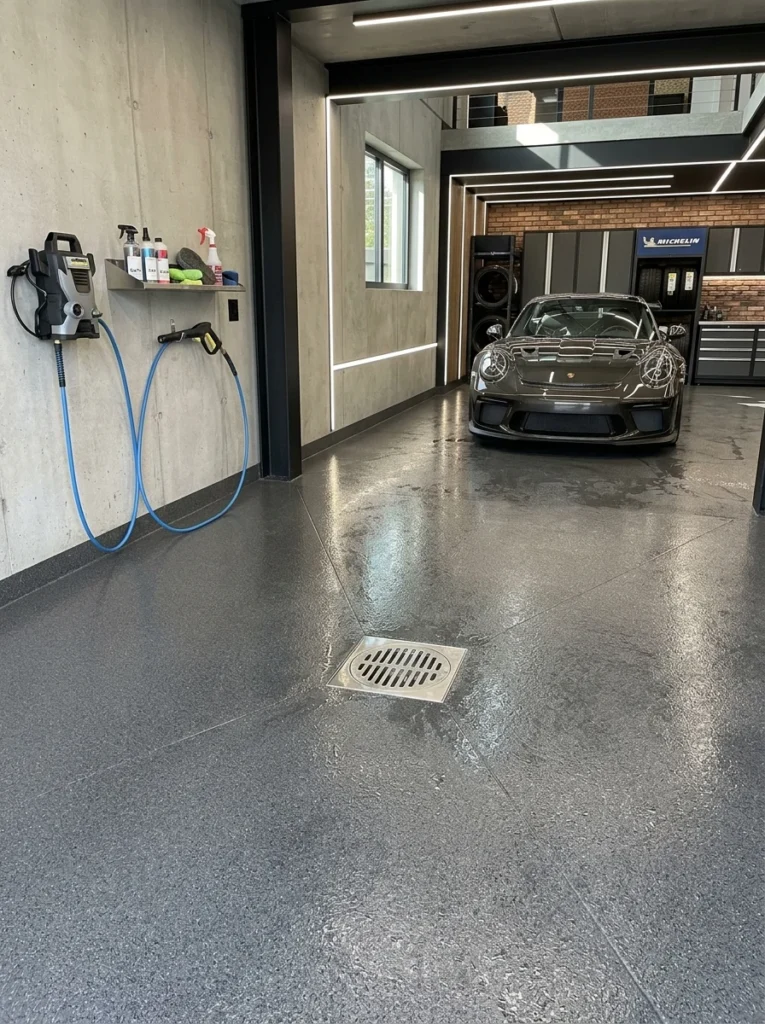
For garages regularly used to wash vehicles or that deal with significant water intrusion from snow and rain, incorporating a properly sloped floor coating that directs water toward a centrally located drain solves a genuine functional problem that purely aesthetic flooring choices don’t address on their own. A contractor friend specifically recommended addressing floor slope and drainage during any major coating project if standing water has historically been an issue, since correcting this after the fact, once a coating is already applied, is considerably more difficult and costly. This typically involves either working with the garage’s existing slight slope, most concrete floors have some grade built in during original construction, or in more significant renovation cases, actually regrading the concrete surface before applying a final coating to properly direct water flow. This is more of a functional consideration than a purely visual design choice, but for anyone dealing with genuine water pooling issues in their garage, addressing drainage as part of a larger flooring project prevents ongoing frustration that no coating color or texture choice alone can solve.
24. Hybrid Polyurea-Polyaspartic Systems
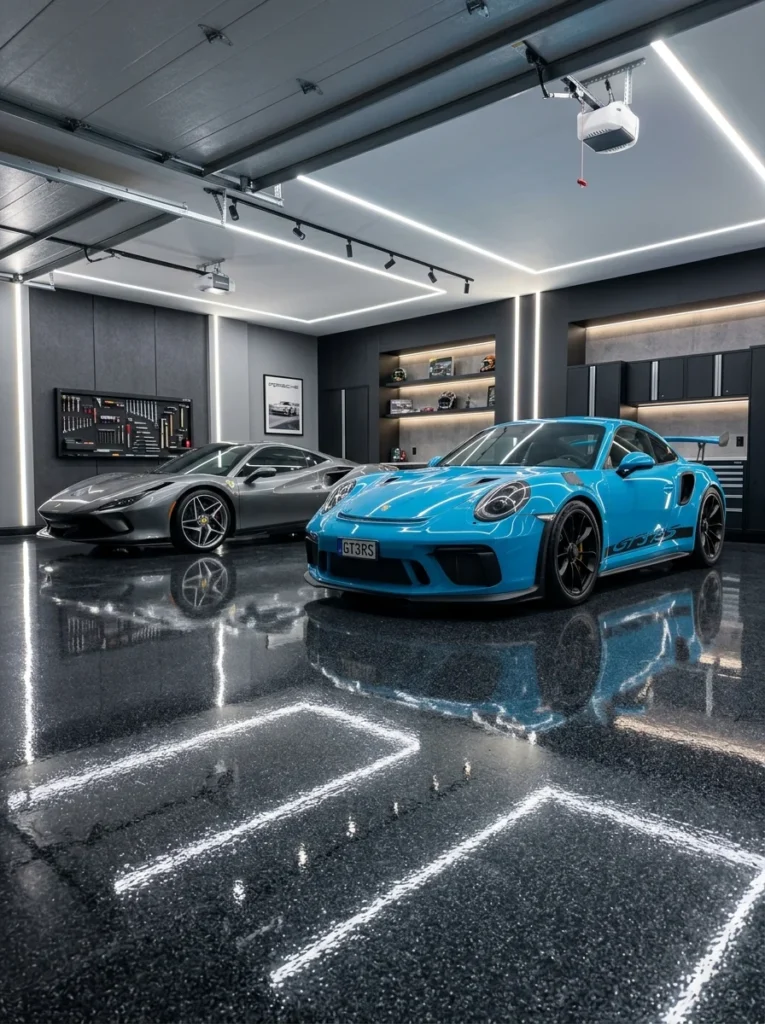
Combining elements of both polyurea and polyaspartic technology, hybrid coating systems aim to capture the rapid cure time and UV stability of polyaspartic with some of the flexibility and impact resistance characteristics of polyurea, resulting in what many contractors now consider among the most durable options currently available for residential garage floors. A contractor I consulted specifically mentioned this as his top recommendation for clients wanting the absolute best long-term durability and willing to pay a premium for it, noting that these hybrid systems tend to resist chipping and impact damage from dropped tools or equipment better than standard epoxy alone. This tends to be among the more expensive options on this entire list, generally requiring professional installation given the more technical, fast-curing nature of the materials involved, which leaves considerably less margin for error during application compared to traditional epoxy. For anyone treating their garage floor as a genuine long-term investment and prioritizing maximum durability over initial cost, this hybrid approach represents the current high end of what’s realistically available for residential applications as of now.
25. Do-It-Yourself Kit Systems
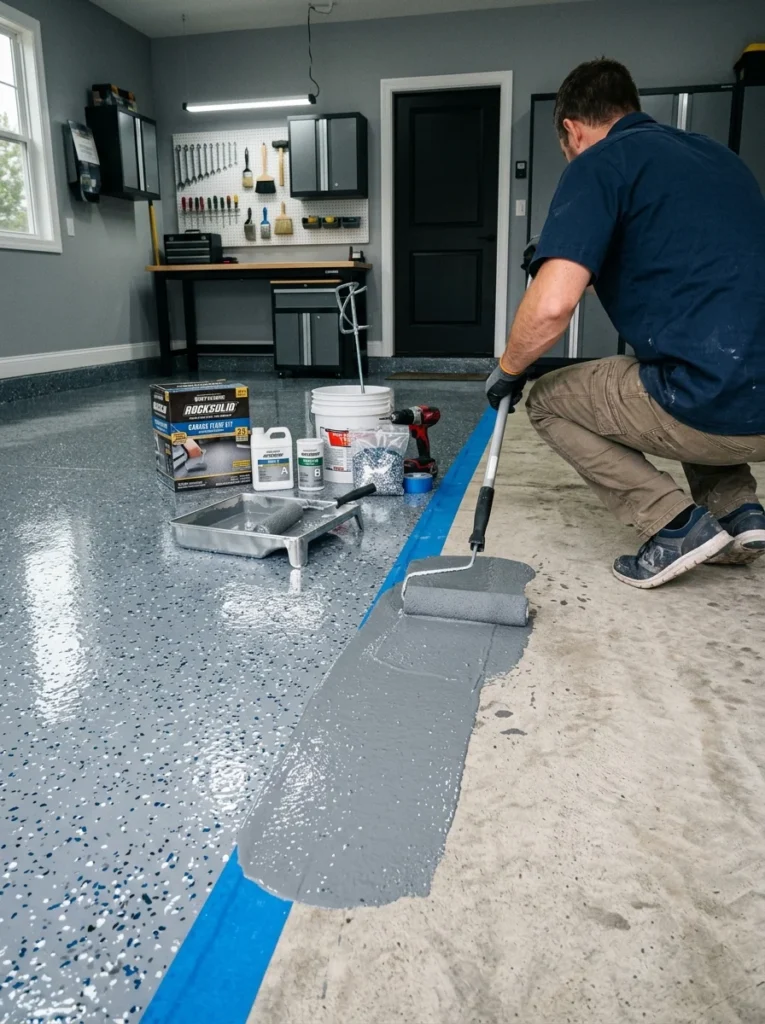
For anyone wanting to attempt an epoxy or polyaspartic-style finish without hiring a professional, complete DIY kits, including all necessary cleaning solutions, primers, base coats, and topcoats packaged together with detailed instructions, have become considerably more accessible and beginner-friendly in recent years compared to sourcing individual components separately. My own garage floor was actually completed using one of these DIY kits, and while the process took an entire weekend and considerably more patience than I initially expected, particularly around proper surface preparation, the final result held up well and cost significantly less than hiring a professional crew. I’d strongly recommend watching several detailed video tutorials specific to your chosen kit brand before beginning, since small details, like exact working time before the epoxy starts to set or the correct technique for broadcasting flakes evenly, make a meaningful difference in the final outcome and aren’t always fully covered in the printed instructions alone. This remains the most accessible entry point for anyone wanting a genuinely durable, professional-looking garage floor without the cost of professional installation, provided you’re willing to invest the time in proper preparation and are comfortable working through a moderately involved weekend project.
Final Thoughts
Looking back at that cracked concrete floor with its rabbit-shaped oil stain, it’s honestly a little strange how much research and consideration eventually went into replacing it. But a garage floor genuinely takes more daily wear than almost any other surface in a home, and between all 25 of these options, the right choice really comes down to how you actually use the space, whether that’s daily vehicle parking, a dedicated workshop, a home gym, or something closer to a genuine extension of your living space.
If you’re standing in your own garage right now, staring at bare or damaged concrete, I’d suggest starting by honestly assessing how you use the space and what budget you’re realistically working with, rather than jumping straight to whichever option looks best in photos. That’s ultimately what led me to a straightforward flake epoxy system rather than some of the flashier options on this list, and years later, it’s still holding up exactly the way I’d hoped when I finally got around to fixing that floor.
