
For years, my sewing machine lived on the kitchen table. I’d drag it out on Saturday mornings, spread my fabric across every open surface I could find, and then pack it all back into a plastic bin by dinnertime so we’d have somewhere to eat. It worked, technically, but it also meant I rarely sewed anything that took more than an afternoon, because setting up and tearing down the whole operation twice a day killed my motivation before I even threaded the needle.
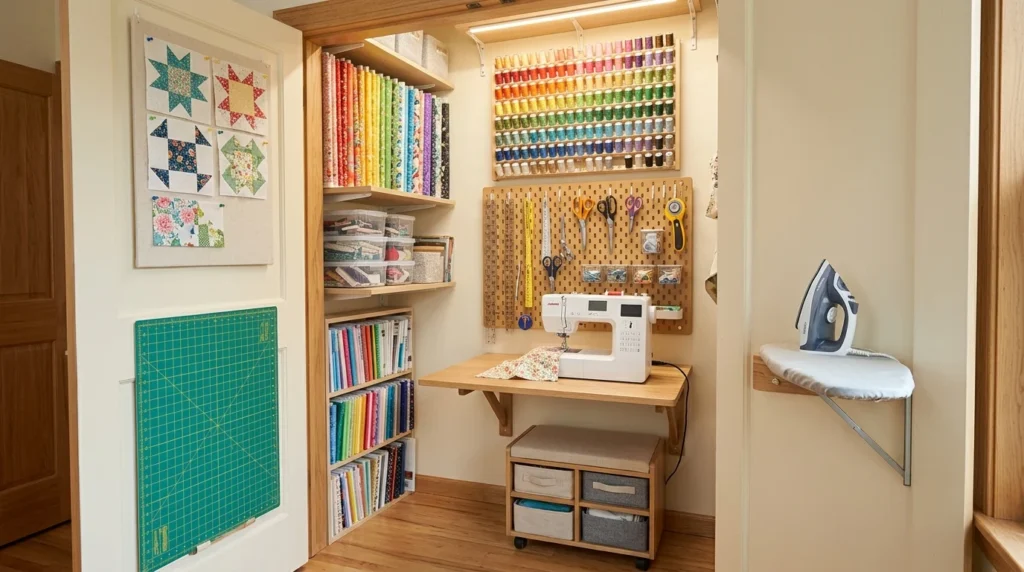
Everything changed when we converted a spare closet — genuinely just a closet, about five feet wide — into a dedicated sewing nook. It wasn’t glamorous, and it definitely wasn’t Pinterest-perfect, but having a space that stayed set up permanently changed how often I actually sewed. Since then I’ve helped reorganize two more small sewing spaces for friends, one in a converted laundry alcove and one in the corner of a guest bedroom, and I’ve learned a lot about what actually matters when your square footage is limited. None of it requires a big room or a big budget. It just requires being intentional about every inch you do have.
Start by Mapping Your Workflow, Not Your Furniture
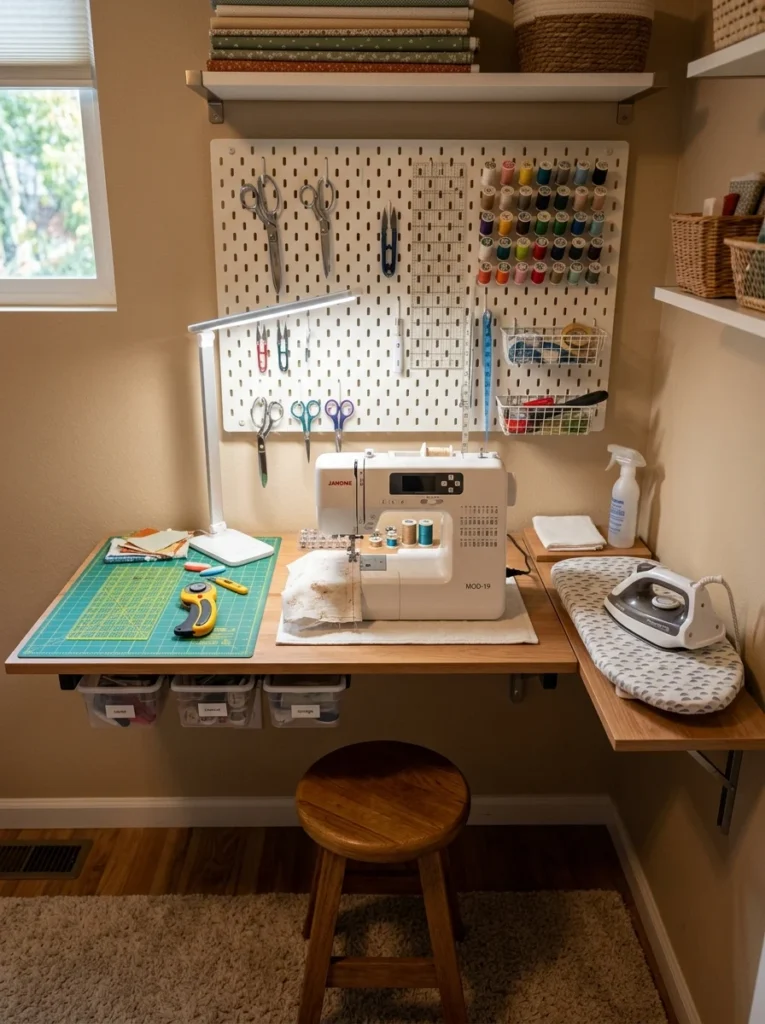
Before buying a single shelf or table, I sat down and thought through exactly how I move through a sewing project: cutting fabric, pinning a pattern, sewing at the machine, pressing seams, then trimming threads. In my old setup, those steps happened in four different rooms, which is part of why projects took forever. In the closet space, I arranged everything so those steps could happen in a small loop — cutting mat on one side, machine directly in front of me, iron within arm’s reach on a fold-down shelf. Thinking about workflow before furniture meant I didn’t waste space on things that looked nice but didn’t actually support how I work.
Choose a Fold-Down or Wall-Mounted Table
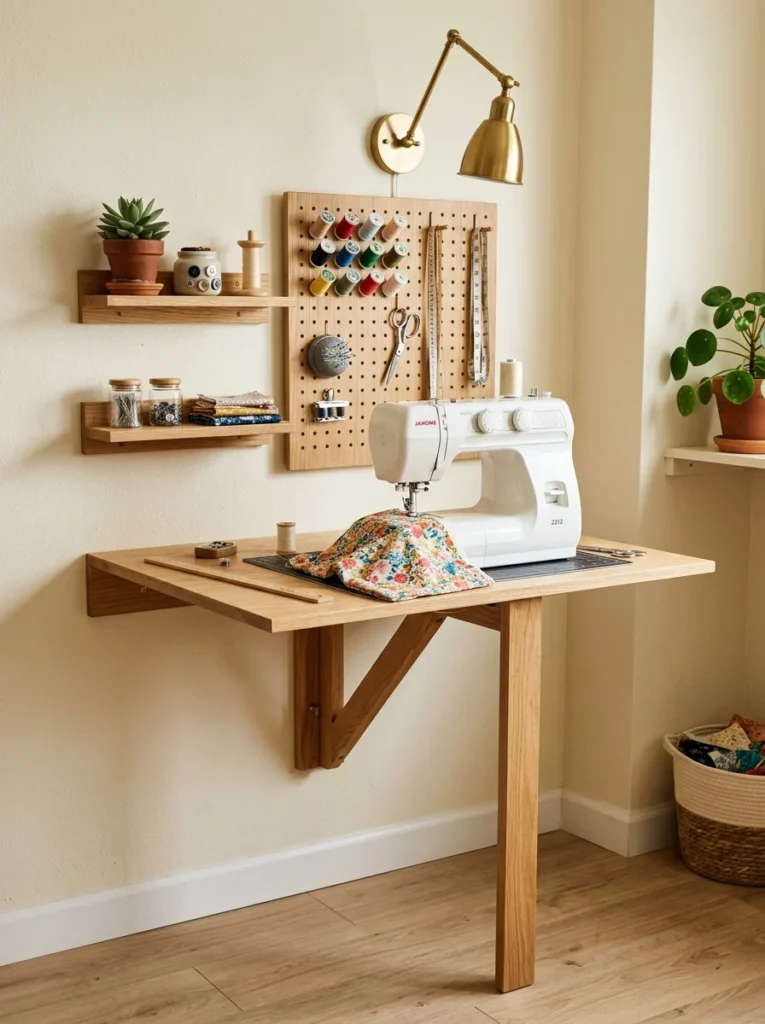
Floor space is the most valuable resource in a small sewing room, and a fold-down table solved that problem for me almost entirely. I mounted a simple wall-hinged table with a folding leg, and when I’m not sewing, it collapses flat against the wall, giving the room back to whatever else it needs to be, like a walk-in closet on the days I’m not using it. If you have even a little more room to spare, a narrow rolling cart with a table top can serve a similar purpose while still being movable.
Use Pegboard for Tool Storage Instead of Drawers
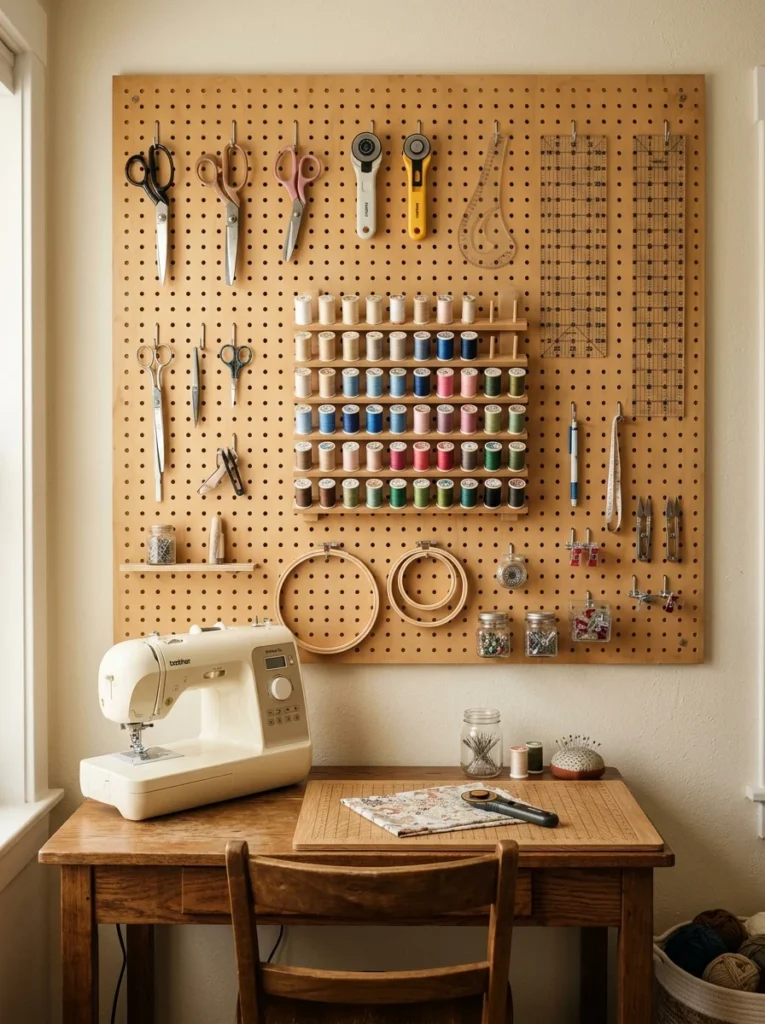
Drawers eat up depth that a small room usually can’t spare, so I installed a pegboard on one wall instead. Scissors, rulers, seam rippers, and spools of thread all hang in clear view, which sounds like a small thing but actually saved me an enormous amount of time. I used to lose ten minutes at the start of every project just hunting for the right tool in a jumble of drawers. Now everything has a hook, and everything goes back on that hook the moment I’m done with it.
Store Fabric Vertically, Not in Stacked Piles
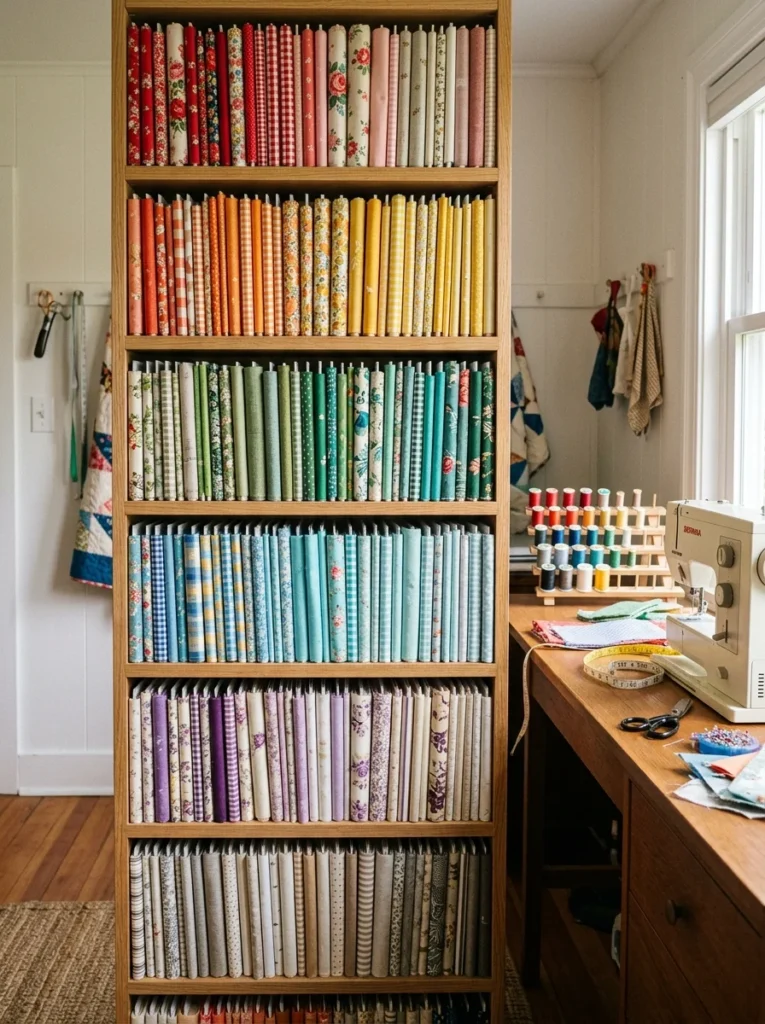
My fabric used to live in stacked bins that I’d have to dig through, pulling out six wrong pieces before finding the one I actually wanted. Switching to vertical fabric storage, where each cut of fabric is folded around a comic book board and stood upright like books on a shelf, completely solved this. I can see every fabric at a glance, and pulling one out doesn’t disturb the others. It also turned out to look surprisingly nice, almost like a little library of colors and patterns.
Mount a Cutting Mat Storage Rack Behind a Door
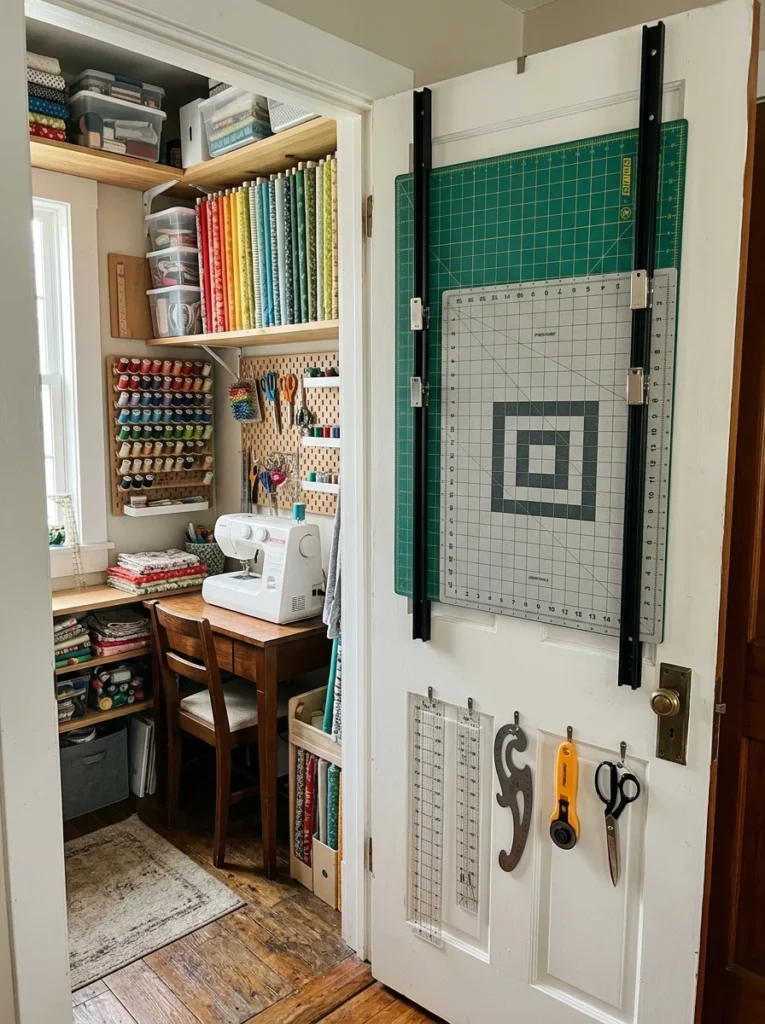
Self-healing cutting mats are large and awkward, and mine used to lean against a wall where it constantly got knocked over. I added a slim rack on the inside of the closet door specifically sized to hold the mat flat and upright. It takes up zero usable floor space since it’s mounted on a surface that would otherwise be wasted, and the mat is always within reach the moment I need it.
Add a Design Wall Using Foam Insulation Board
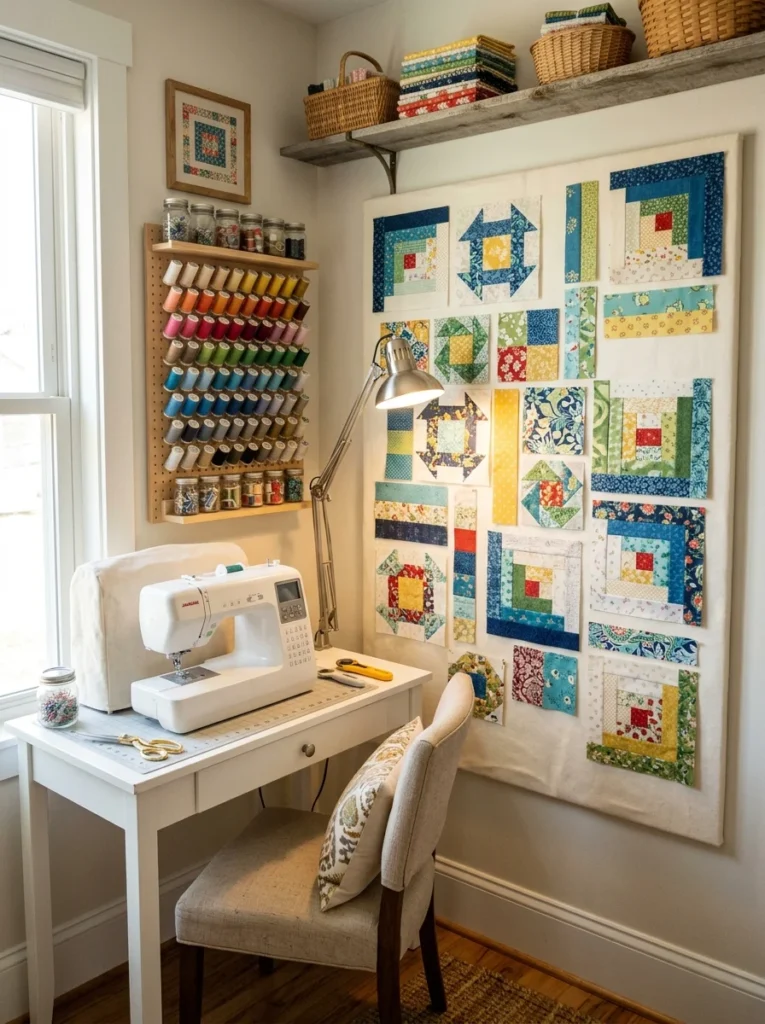
One of my favorite additions, and one I never would have thought of on my own, was a design wall made from a sheet of foam insulation board covered in a plain flannel sheet, leaned against the back wall of the closet. Fabric pieces stick to the flannel without pins, which let me arrange a quilt layout right there in that tiny space instead of needing an entire spare bedroom floor to lay pieces out, the way I used to before.
Use a Rolling Cart for Your Machine
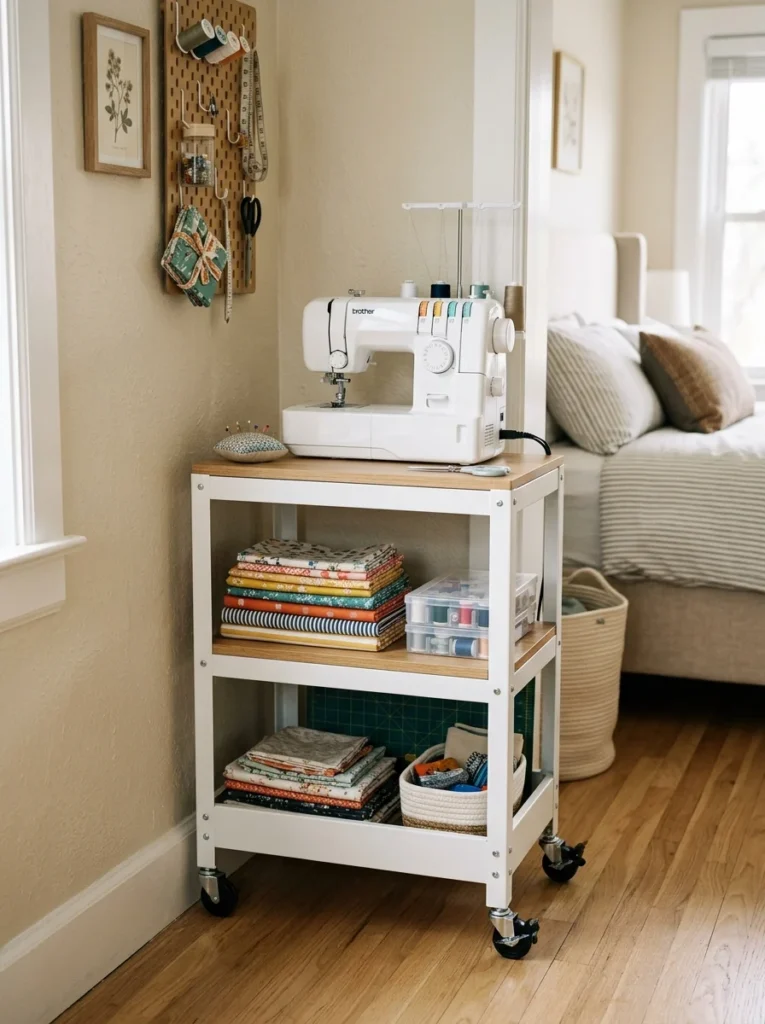
Rather than a permanent table, my friend with the laundry alcove sewing space uses a small rolling cart that holds her machine, and she simply wheels it out into the hallway when she needs slightly more elbow room, then tucks it back against the wall when she’s done. It’s a great option if your space genuinely can’t fit a dedicated table, since the cart doubles as both storage and workstation without requiring it to stay in one fixed spot.
Install Under-Shelf Lighting
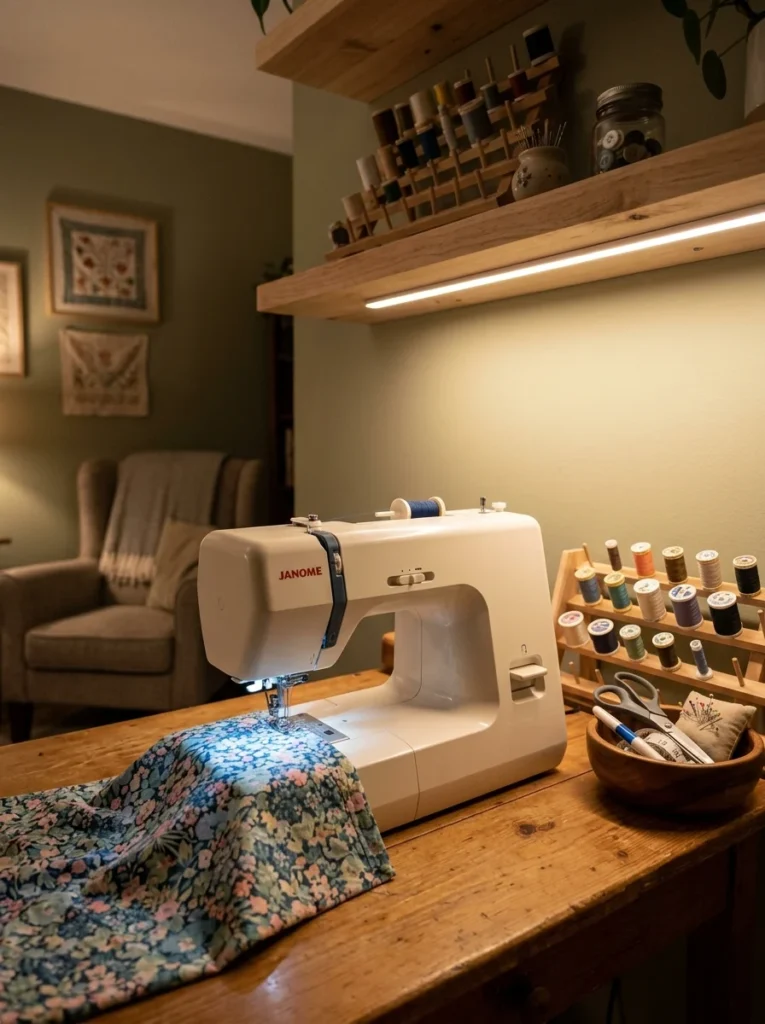
Small sewing rooms are often small precisely because they used to be closets or corners with no dedicated overhead light. I added a battery-powered LED strip under the shelf above my machine, and it made an enormous difference for close detail work like threading needles or matching thread colors, which is nearly impossible to do accurately under dim, indirect light from another room.
Keep a Rolling Ottoman as Extra Seating and Storage
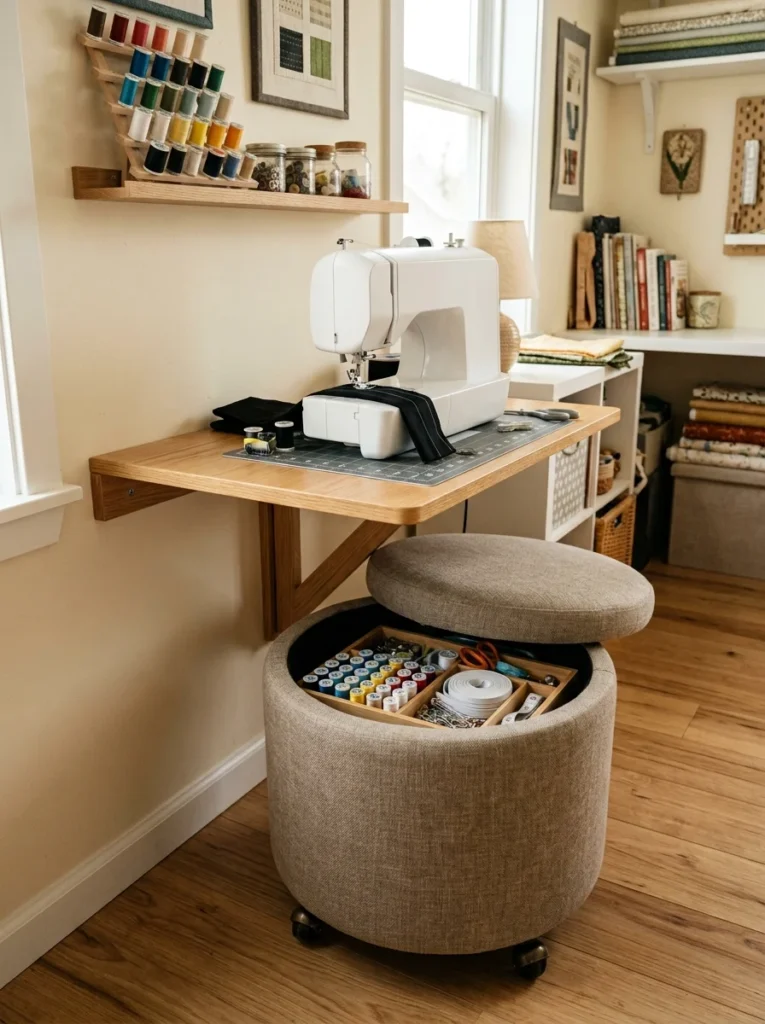
Instead of a bulky chair that would have blocked the doorway when not in use, I use a small rolling ottoman that tucks under the fold-down table. It doubles as extra seating when a friend stops by to sew with me, and it has a hollow interior where I keep spare bobbins and elastic. When I’m not using it, it rolls neatly out of the main walking path.
Use Clear Stackable Bins for Notions
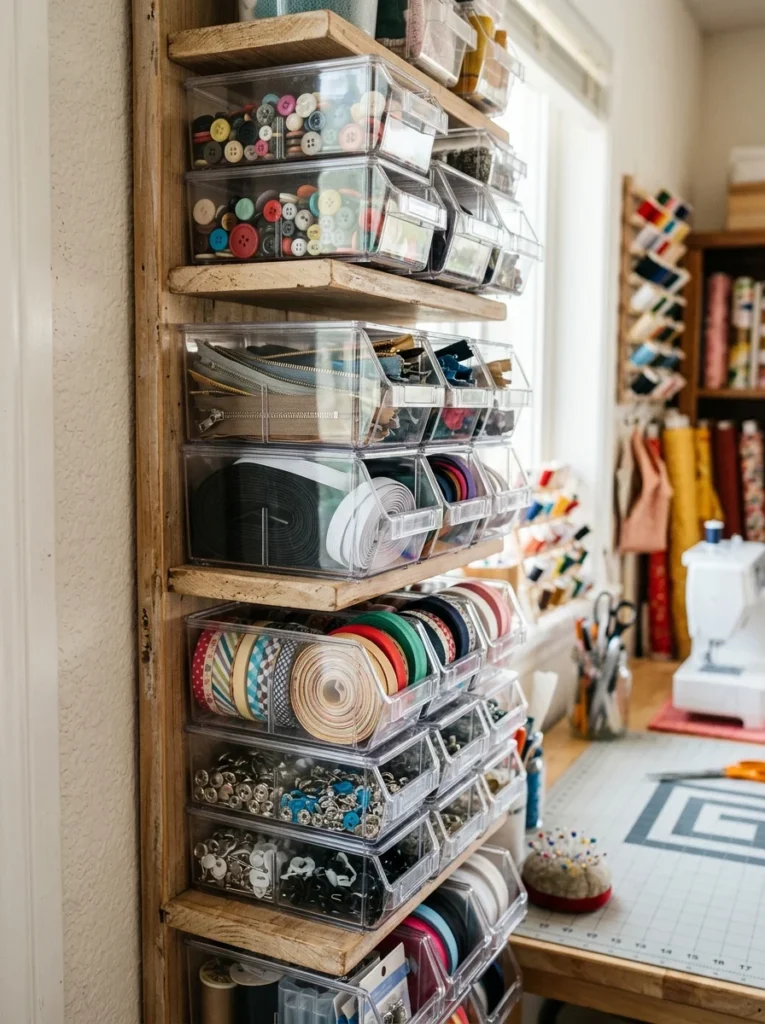
Buttons, zippers, elastic, and bias tape all used to live in one chaotic junk drawer. Switching to small, clear, stackable bins on a single shelf let me actually see what I had, which meant I stopped buying duplicates of things I already owned but couldn’t find. Labeling each bin took maybe twenty minutes total and has saved me countless trips to the fabric store since.
Add a Magnetic Strip for Pins and Needles
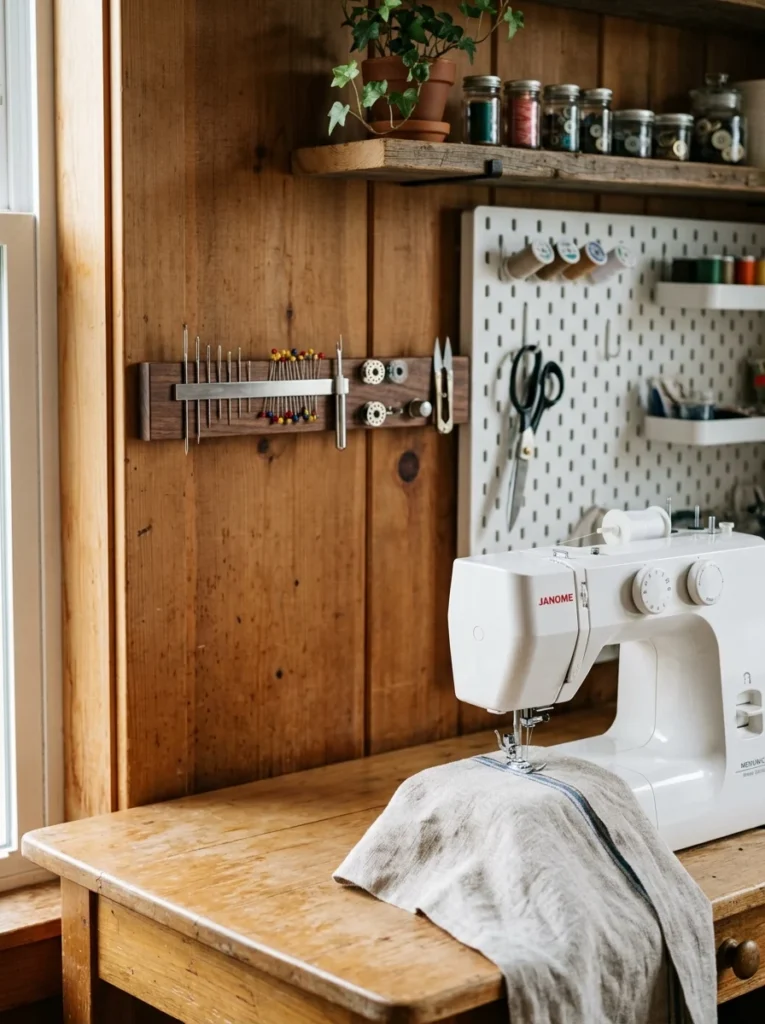
A slim magnetic strip mounted at eye level holds my pins, needles, and seam ripper without needing a pincushion taking up table space. It’s one of the smallest changes on this list, but it’s also one I use every single time I sit down to sew, and it keeps sharp objects safely off the work surface where they used to get buried under fabric scraps.
Choose a Narrow Bookshelf for Pattern Storage
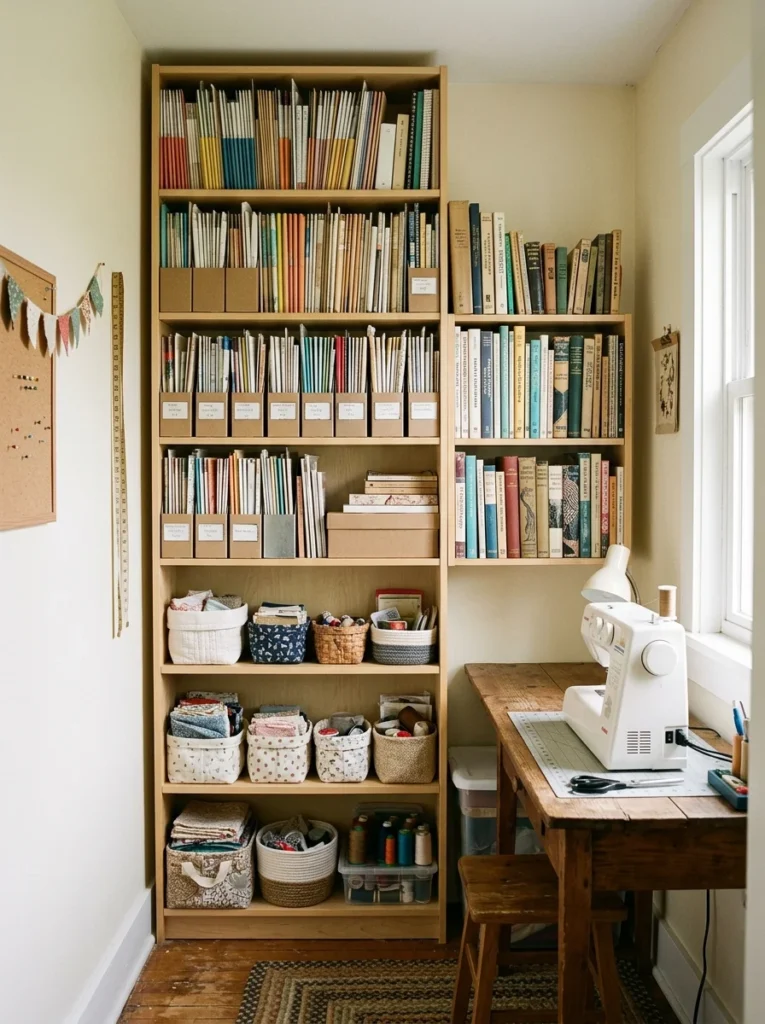
A slim, deep bookshelf tucked into the one open corner of my closet holds sewing patterns standing upright like files, along with a few sewing reference books I actually use. Because it’s tall rather than wide, it takes up almost no floor footprint while still holding a surprising amount, which matters enormously in a room where every square foot is already accounted for.
Use a Tension Rod for Ribbon and Trim
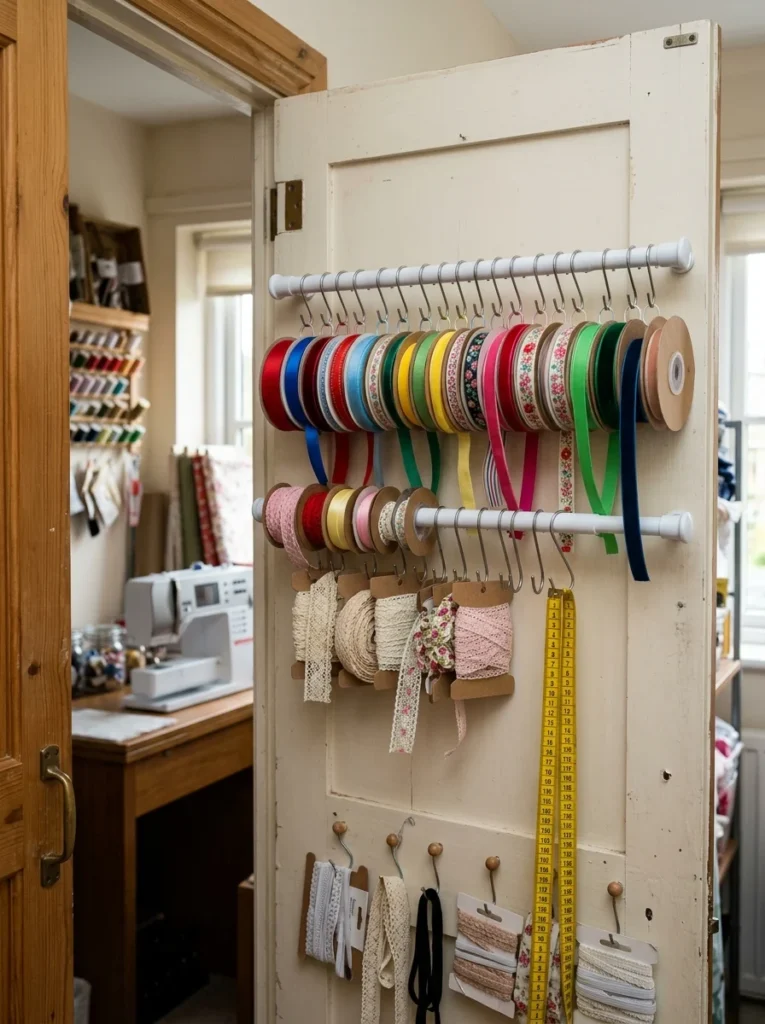
An inexpensive tension rod mounted inside the closet door holds spools of ribbon and trim on hooks, keeping them visible and untangled without needing an extra shelf. It’s a five-minute setup that solved a mess I’d been dealing with for years, since ribbon spools always seemed to end up in a tangled pile at the bottom of a bin otherwise.
Add a Fold-Out Ironing Board
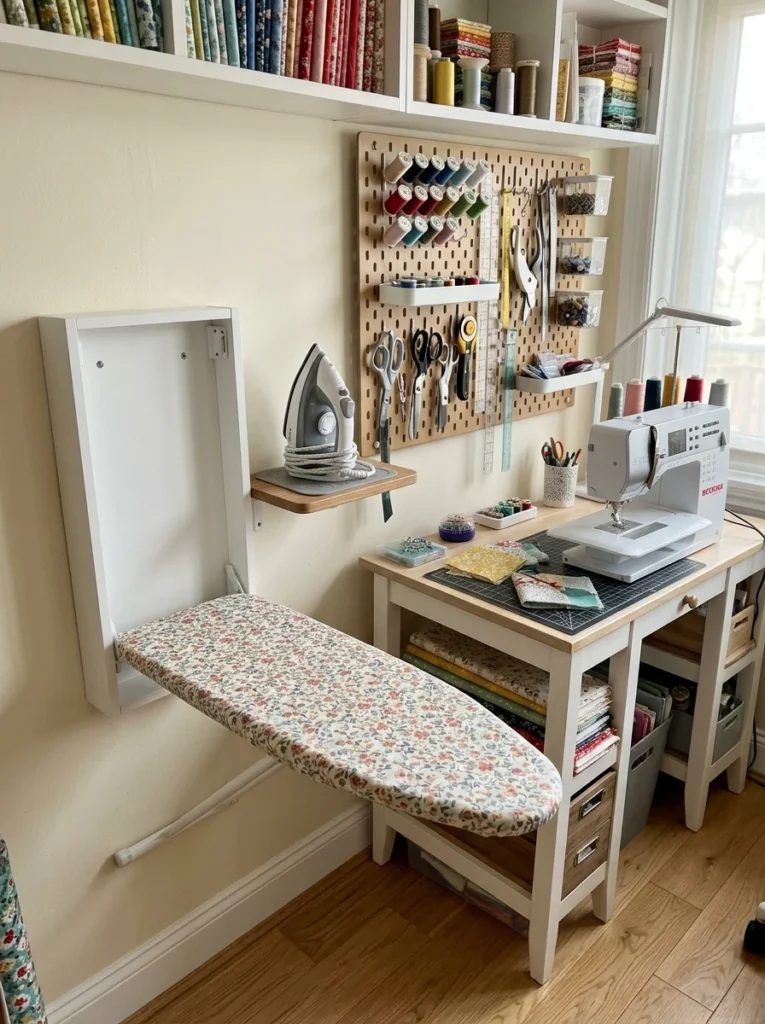
Rather than a full-size ironing board, which simply doesn’t fit in a five-foot-wide closet, I installed a small fold-out ironing surface that mounts to the wall and flips down when needed. It’s sized for pressing seams rather than full garments, which is really all a dedicated sewing space needs most of the time anyway, since larger pressing jobs can still happen elsewhere.
Keep a Small Trash and Thread Catcher Nearby
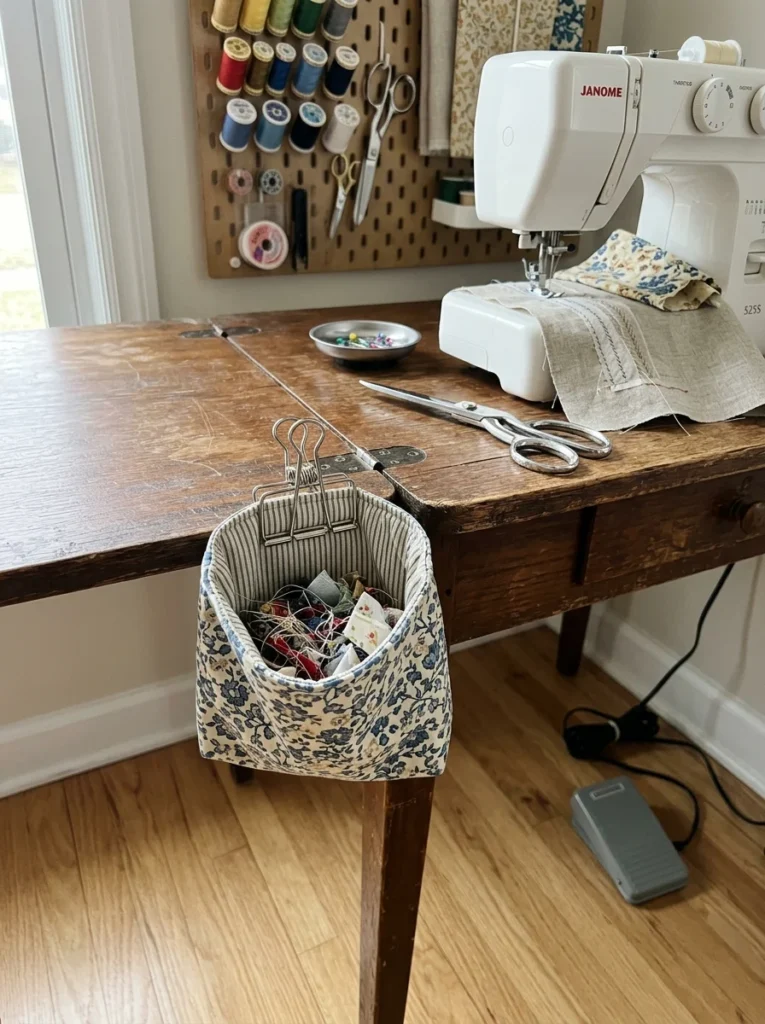
A tiny bin clipped to the side of my sewing table catches thread trimmings and scraps as I work, which sounds minor but has kept the whole space noticeably tidier. Before I added it, thread ends would end up scattered across the floor and stuck to socks for days afterward, which was a small but constant annoyance I don’t miss.
Use Door Space for a Full-Length Mirror
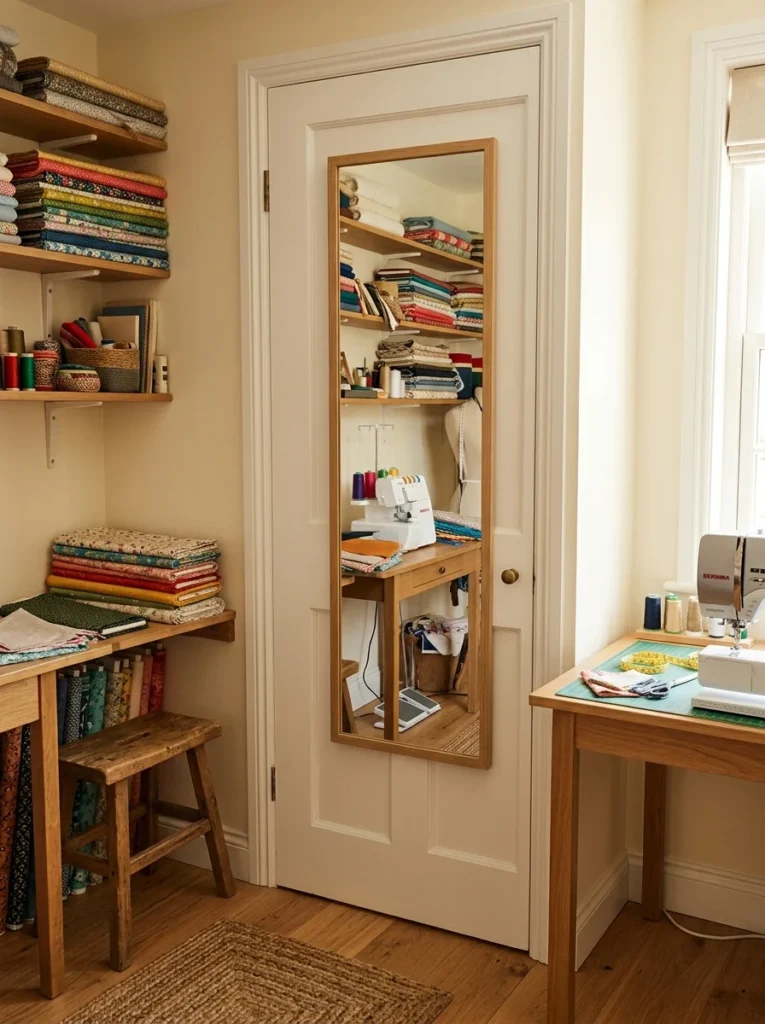
If your sewing room doubles as a fitting space, mounting a mirror on the back of the door makes it possible to check garment fit without leaving the room, and it takes up no floor space at all since it’s attached to a surface that’s already there. I added this after one too many trips back and forth to the bathroom mirror mid-project, and it’s become one of those additions I wonder how I lived without.
Store Thread on a Vertical Spool Rack
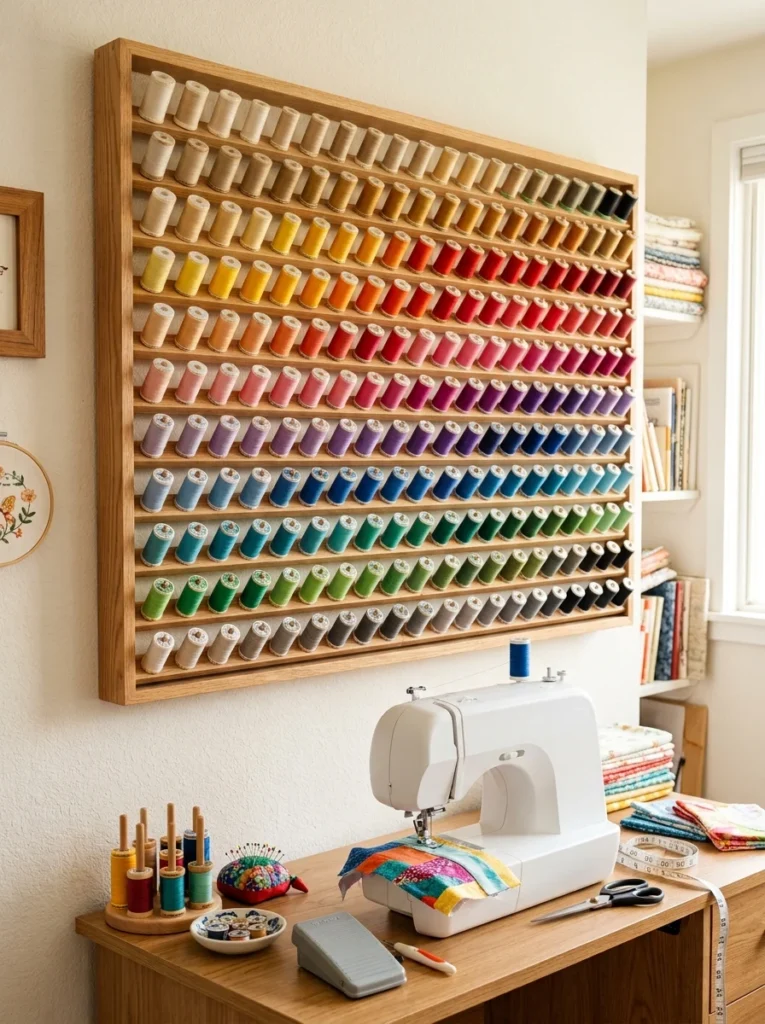
A wall-mounted wooden spool rack holds around fifty spools of thread standing on individual pegs, sorted roughly by color. It replaced a drawer that used to hold thread in a tangled jumble, and now choosing a matching thread color takes seconds instead of several minutes of digging.
Add a Curtain Instead of a Door if Space Allows
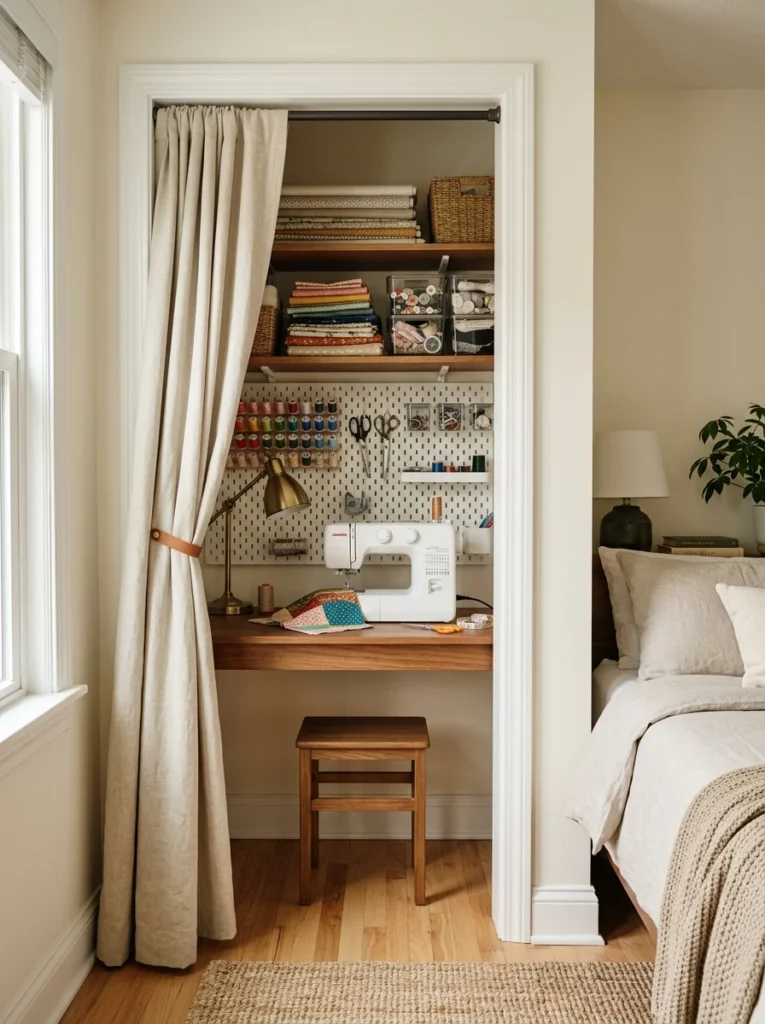
In the guest bedroom sewing corner I helped set up for a friend, we replaced a bulky folding closet door with a simple curtain on a tension rod. It freed up floor space that the swinging door had been eating into, and it let the sewing corner feel visually separated from the rest of the bedroom without the hardware and clearance a real door requires.
Use the Back of the Door for a Ruler and Template Rack
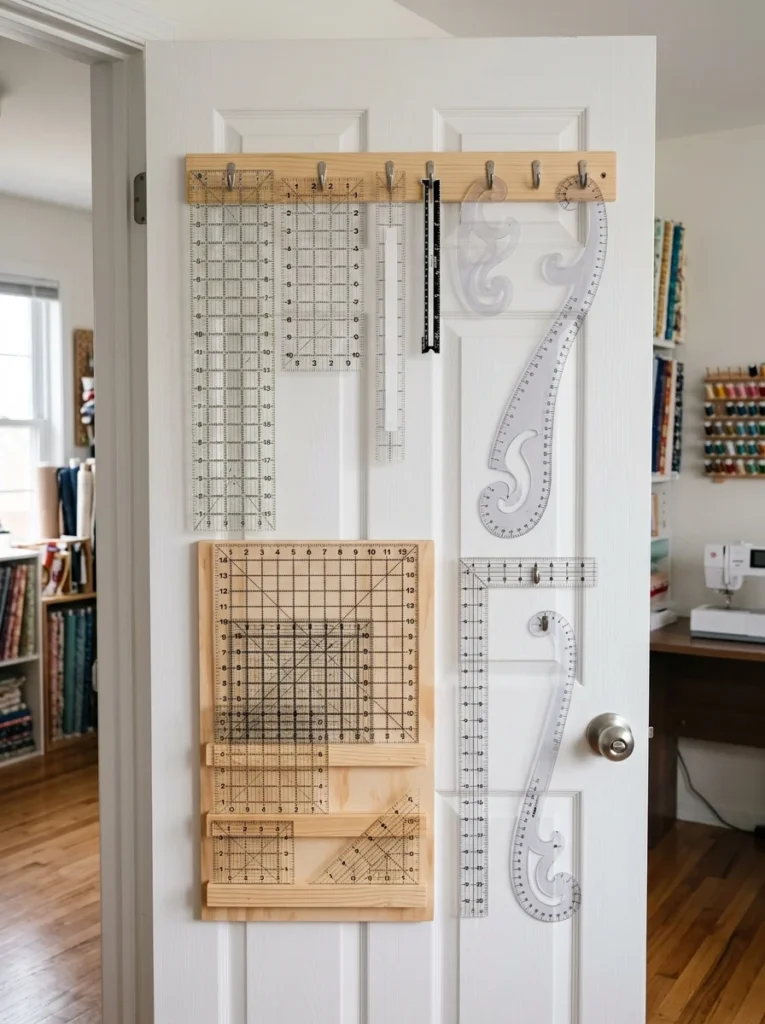
Quilting rulers and templates are flat, awkward to store, and easy to lose in a drawer. A simple set of hooks or a shallow rack on the back of the door keeps them flat, visible, and completely out of the room’s usable floor space, which in a tiny sewing area matters more than almost anything else on this list.
Keep a Small Whiteboard for Project Notes
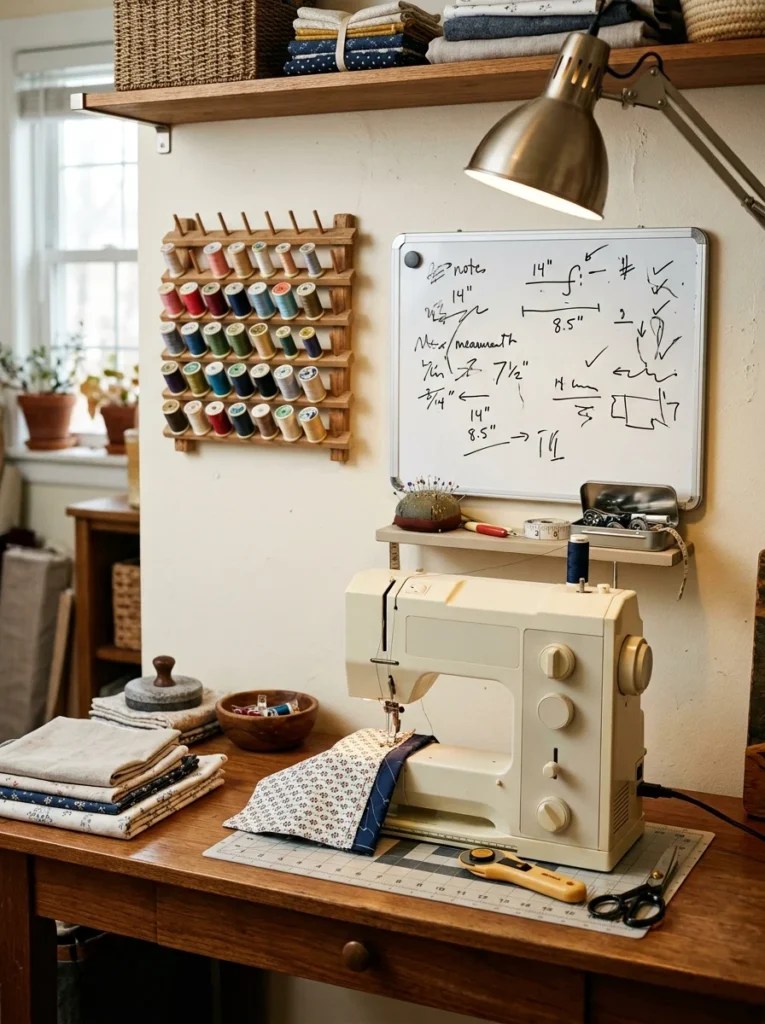
A little whiteboard mounted near my machine holds measurements, fabric requirements, and reminders for whatever project I’m currently working on. It’s replaced the sticky notes that used to get lost under fabric scraps, and being able to glance up and see my notes without digging through papers has kept me from re-measuring the same piece of fabric more times than I’d like to admit.
Use a Pull-Out Drawer for Your Sewing Machine
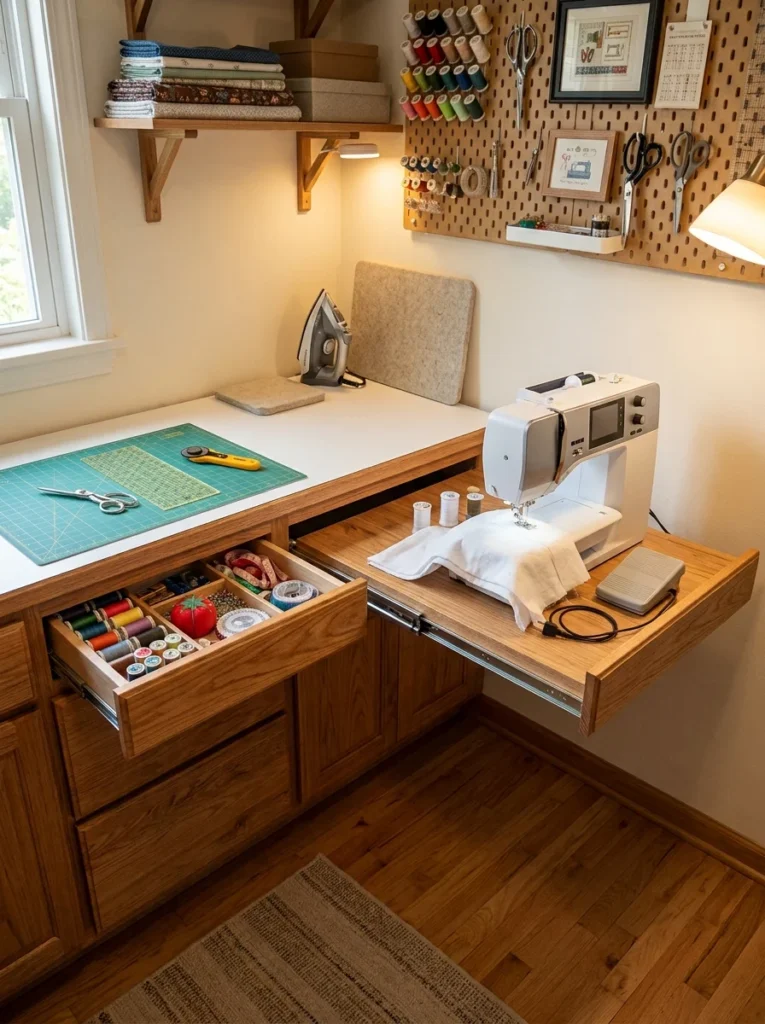
If your closet or corner has a low cabinet already built in, consider mounting your machine on a pull-out platform drawer rather than leaving it sitting on top of a table permanently. I added this to the second sewing space I helped set up, and it meant the machine could be tucked completely out of sight when not in use, freeing the counter for cutting or pressing instead of having the machine take up permanent real estate on the one flat surface available.
Add Corner Shelving for Awkward Angles
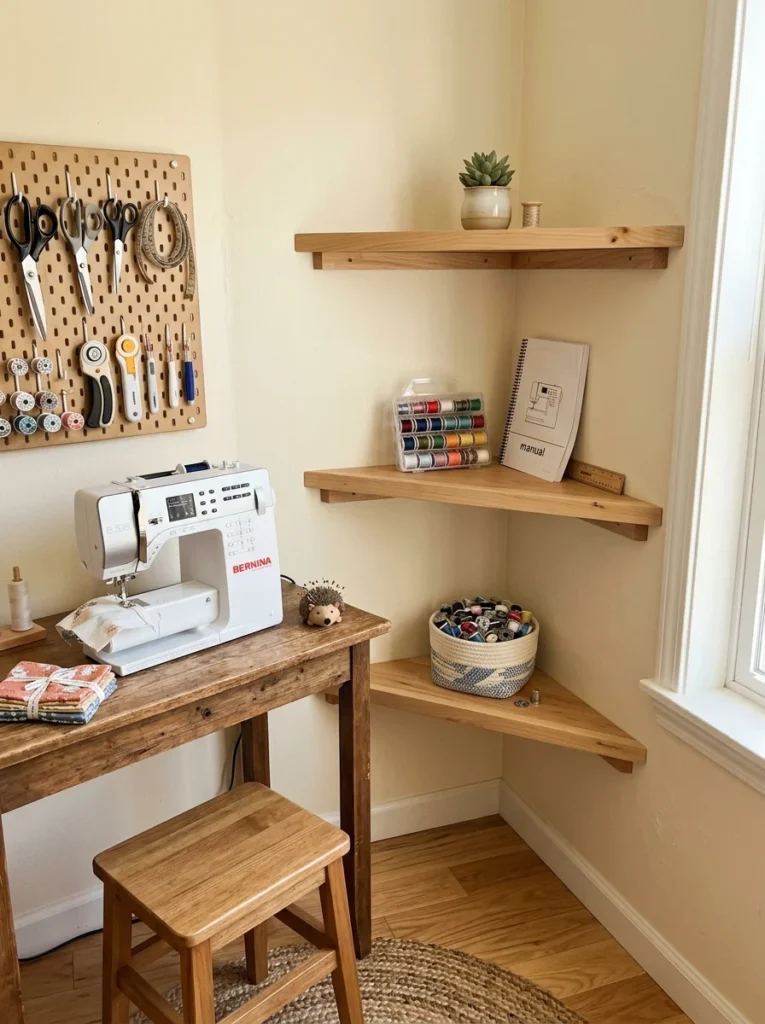
Small rooms almost always have at least one awkward corner that’s too shallow for a normal shelf but too big to ignore. A set of simple corner shelves, cut to fit the angle exactly, gave me a spot for my sewing machine manual, extra bobbins, and a small plant that made the whole space feel less clinical. Custom-cut corner shelving is inexpensive to have made at a hardware store and uses space that would otherwise sit completely empty.
Choose a Multi-Outlet Power Strip With a Timer
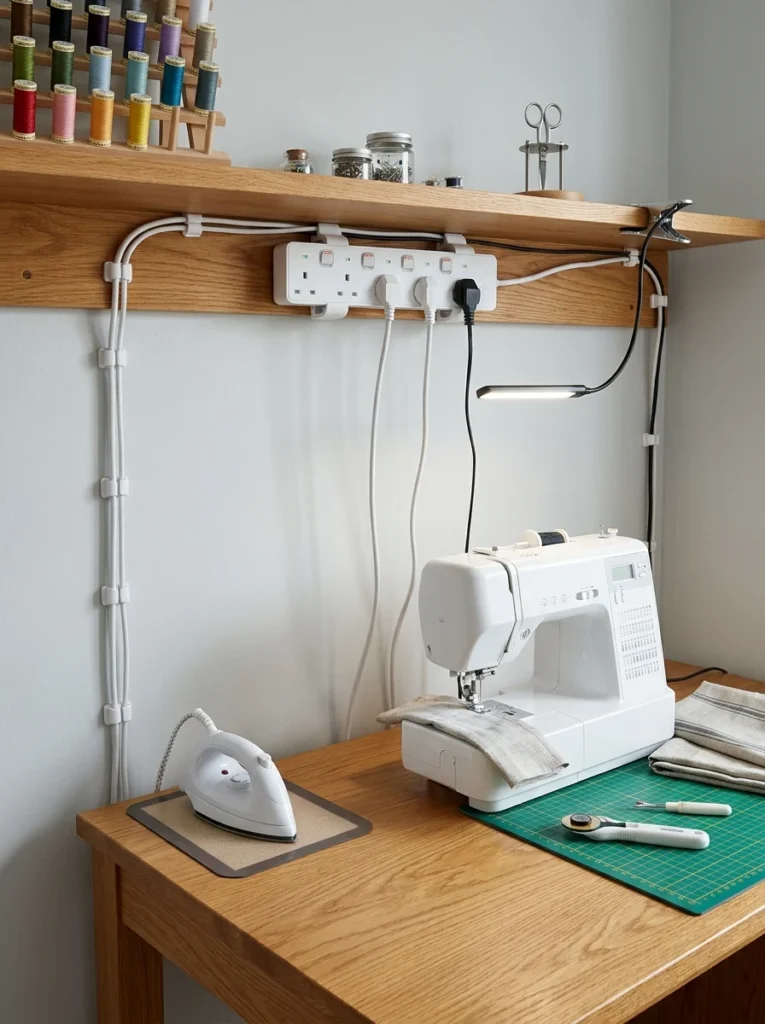
Sewing spaces tend to have several plugged-in tools at once: the machine, the iron, task lighting, sometimes a small fan. I mounted a power strip with a built-in timer directly under my shelf, which meant I stopped worrying about whether I’d left the iron on after leaving the room, and it also meant I wasn’t crawling around on the floor searching for an outlet every time I needed to plug something in.
Use a Slimline Bookshelf as a Room Divider
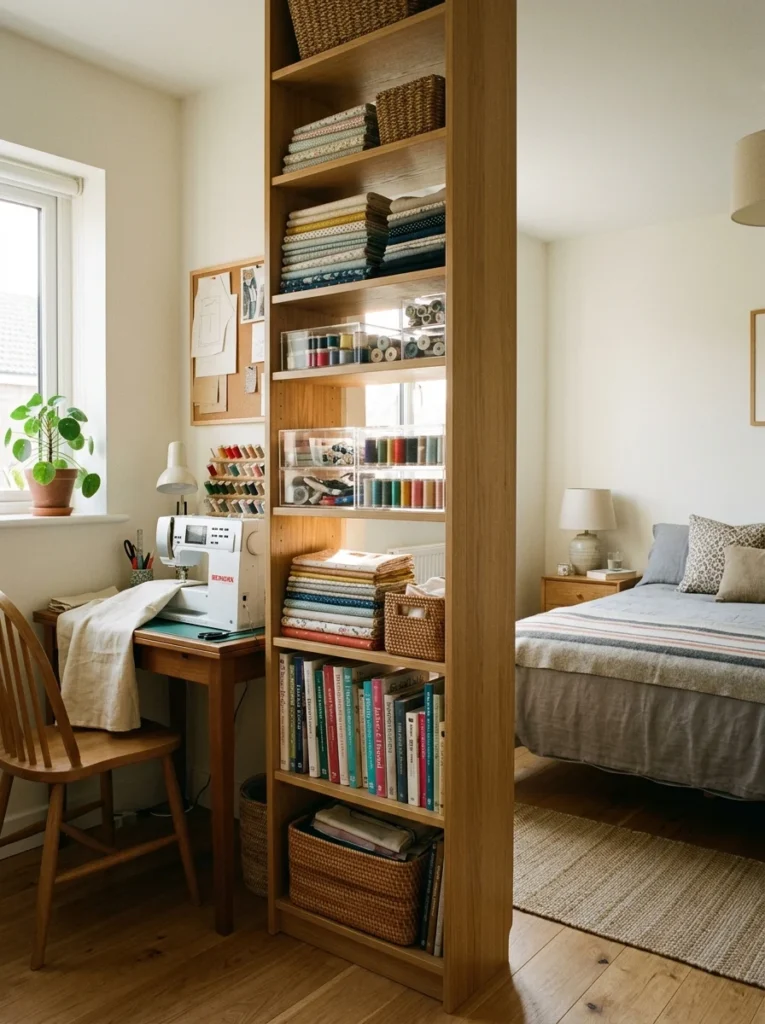
In the guest bedroom setup, instead of a solid wall, we used a narrow, open-backed bookshelf to visually separate the sewing corner from the rest of the room while still letting light pass through. It holds fabric and notions on one side and doubles as a subtle boundary that makes the space feel like its own room, even though it’s technically just a section of a larger bedroom.
Common Mistakes to Avoid in a Small Sewing Space
Setting up three different small sewing spaces now, for myself and two friends, has taught me a handful of mistakes that are easy to make and just as easy to avoid once you know to look out for them.
Buying furniture before measuring properly. In the very first version of my closet setup, I bought a small table that turned out to be two inches too deep, which meant the door couldn’t close all the way. Measuring the exact width, depth, and door swing before buying anything saved a lot of frustration in every project after that first mistake.
Storing fabric where you can’t see it. Fabric that’s out of sight in opaque bins tends to get forgotten and rebought unnecessarily. Once I switched to open, visible vertical storage, I stopped buying duplicate fabric I already owned but had simply forgotten about.
Skipping proper lighting. A small space with only ambient light from another room makes detail work genuinely difficult and, over time, discouraging enough that you stop wanting to sew at all. Dedicated task lighting, even a simple battery-powered strip, made more difference to how often I actually used the space than almost any storage solution did.
Trying to fit full-size furniture into a small footprint. Standard sewing tables and ironing boards are designed for larger rooms, and forcing one into a tight space usually means sacrificing the walking room you need to actually move and work. Scaled-down, fold-away, or wall-mounted versions of the same tools almost always work better in a genuinely small space.
Frequently Asked Questions
How much space do you actually need for a sewing room? Based on my own closet setup, I’d say you can get a genuinely functional sewing space in as little as four to six feet of width, as long as you’re deliberate about vertical storage and fold-down furniture. It’s tight, but it’s enough for a machine, a small cutting surface, and storage for fabric and tools.
What’s the biggest mistake people make in small sewing rooms? In my experience, it’s trying to keep everything out and visible on flat surfaces, the way you might in a larger craft room. In a small space, that clutter builds up fast and makes the room feel unusable within a couple of weeks. Vertical storage and closed bins make a much bigger difference than open shelving does once space gets tight.
Can a sewing space really work inside a closet? It genuinely can. My own sewing space started as an ordinary closet, and with a fold-down table, wall-mounted storage, and better lighting, it functions just as well for me as a dedicated room would, without requiring us to give up an entire bedroom to make it happen.
Do I need a dedicated sewing room at all, or is a corner enough? Based on the guest bedroom setup I helped put together, a corner is absolutely enough, as long as it’s treated as its own zone with its own storage, lighting, and workflow rather than just a machine sitting on the edge of someone else’s desk. What matters far more than square footage is whether the space stays set up and ready to use, since packing everything away after each session is usually what kills momentum on a project.
Final Thoughts
Looking back at that closet now, full of neatly folded fabric and a machine that stays set up and ready every single day, it’s hard to believe it started as an awkward, unused storage space we almost filled with holiday decorations instead. The size of a sewing room matters far less than how thoughtfully it’s organized, and in some ways, working within a small footprint forced me to be more intentional about storage and workflow than I ever was when I had the whole kitchen table to spread out across.
If you’re working with a small space of your own, my advice is the same thing I told both friends I helped set theirs up: start with vertical storage and a fold-down surface before you buy anything else. Everything else on this list can be added gradually, piece by piece, but those two changes alone will do more to make a small sewing room actually usable than almost anything else you could spend money on.
It’s also worth reminding yourself, especially in the early stages of setting a space like this up, that it doesn’t need to look finished right away. My own closet went through several rough versions before it settled into the layout I use now, and most of the improvements came from actually using the space and noticing what kept getting in my way, rather than from planning everything perfectly on paper beforehand. A small sewing room is something you tend to refine over months of real use, not something you get exactly right on the first weekend, and that’s genuinely part of what makes it feel like yours by the time it’s done.
