
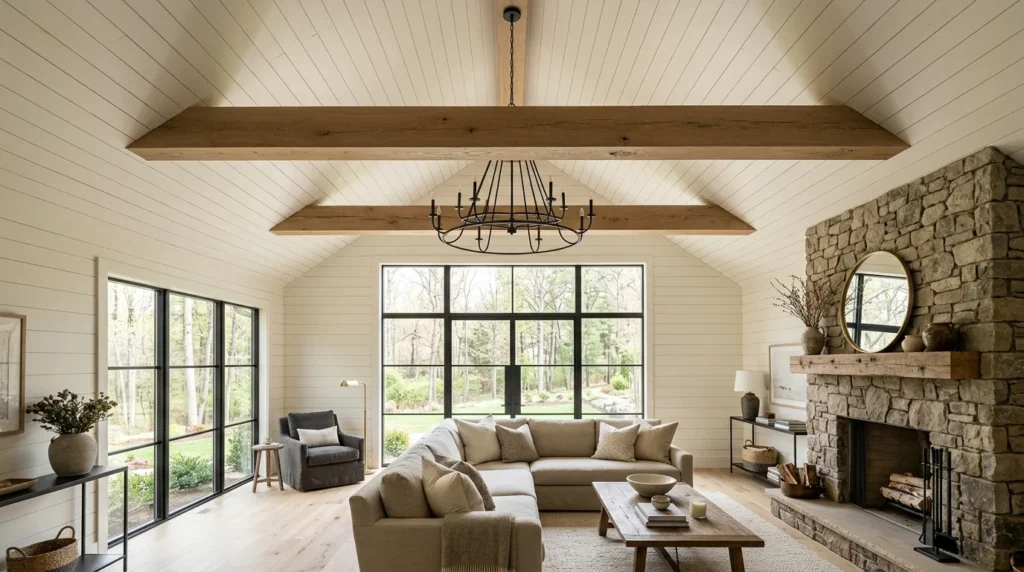
I resisted shiplap for a long time, mostly because it felt like a trend that had already peaked by the time I finally got around to my own renovation. Every home show and design blog seemed to have moved on to something else, so I almost skipped it entirely when I was planning updates to our sunroom ceiling. What changed my mind was seeing it used on a ceiling rather than a wall in a friend’s farmhouse-style kitchen, at a small dinner party where I spent more time looking up at her ceiling than actually talking to anyone. Something about the horizontal lines running overhead instead of vertically down a wall felt fresh again, even though the material itself has been around for well over a century.
That sunroom ceiling became the first of what turned into four different shiplap ceiling projects across our house over the following two years, each one a slightly different color, spacing, or finish depending on the room. What I’ve learned through all of them is that shiplap on a ceiling reads very differently depending on a handful of small decisions, and getting those details right is really what separates a ceiling that looks timeless from one that looks like it’s chasing a trend that’s already passed. Here are 18 ideas based on what’s actually worked in our home and a couple of projects I’ve helped friends with since.
1. Classic White Shiplap in a Sunroom
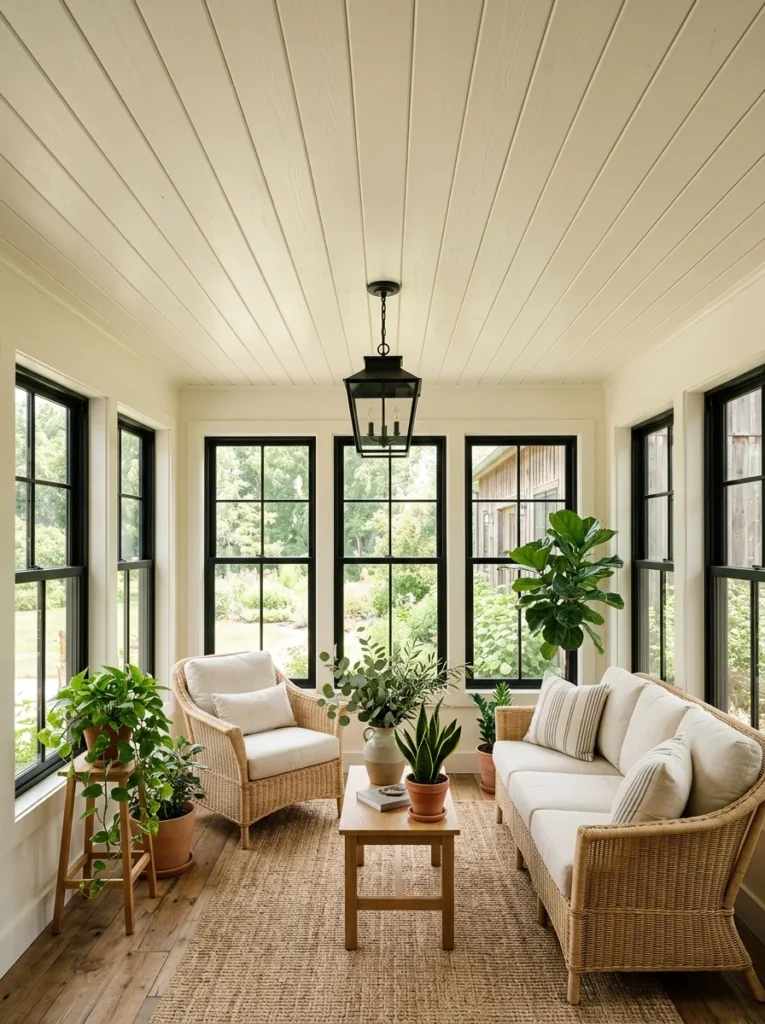
Our first shiplap ceiling, painted a soft, warm white rather than a stark bright white, brightened our sunroom considerably while still leaving the wood grain and plank lines visible up close. The horizontal lines drew the eye across the room rather than up toward a single point, which made the relatively small space feel wider than it actually is.
2. Natural Stained Wood in a Rustic Kitchen
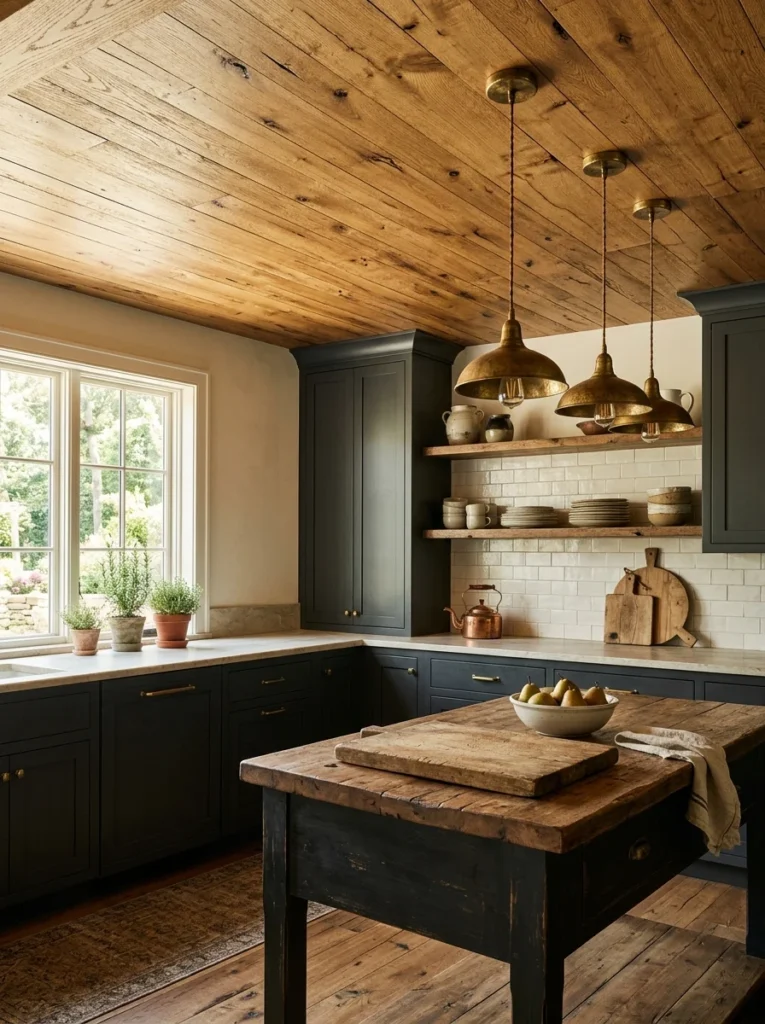
For a friend’s farmhouse kitchen, we left the shiplap in its natural, lightly stained state rather than painting it, which let the wood grain and slight color variation between boards become part of the ceiling’s character. Paired with dark cabinetry below, the warm wood tone overhead balanced the room without competing with the darker elements at eye level.
3. Dark Charcoal Shiplap for Drama
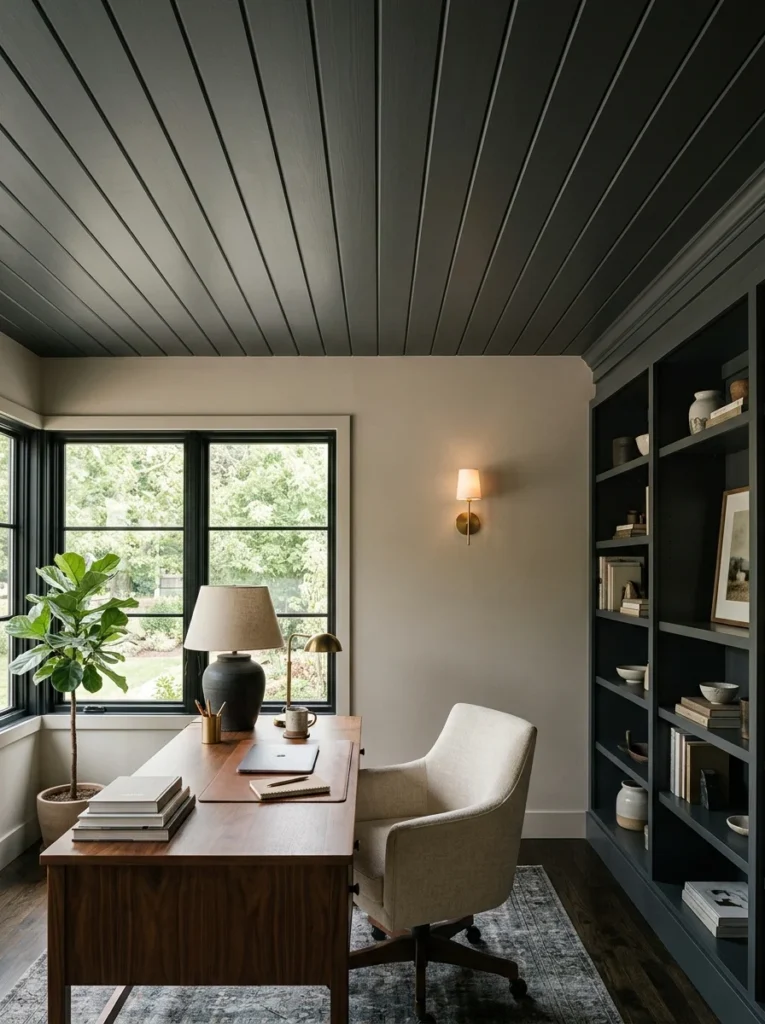
In our home office, I painted the shiplap ceiling a deep charcoal gray instead of the expected white. It’s a bolder choice, and one that only works well in a room with good natural or artificial light, but the result feels intentional and moody in a way that a plain flat ceiling never could.
4. Vaulted Shiplap Ceiling With Exposed Beams
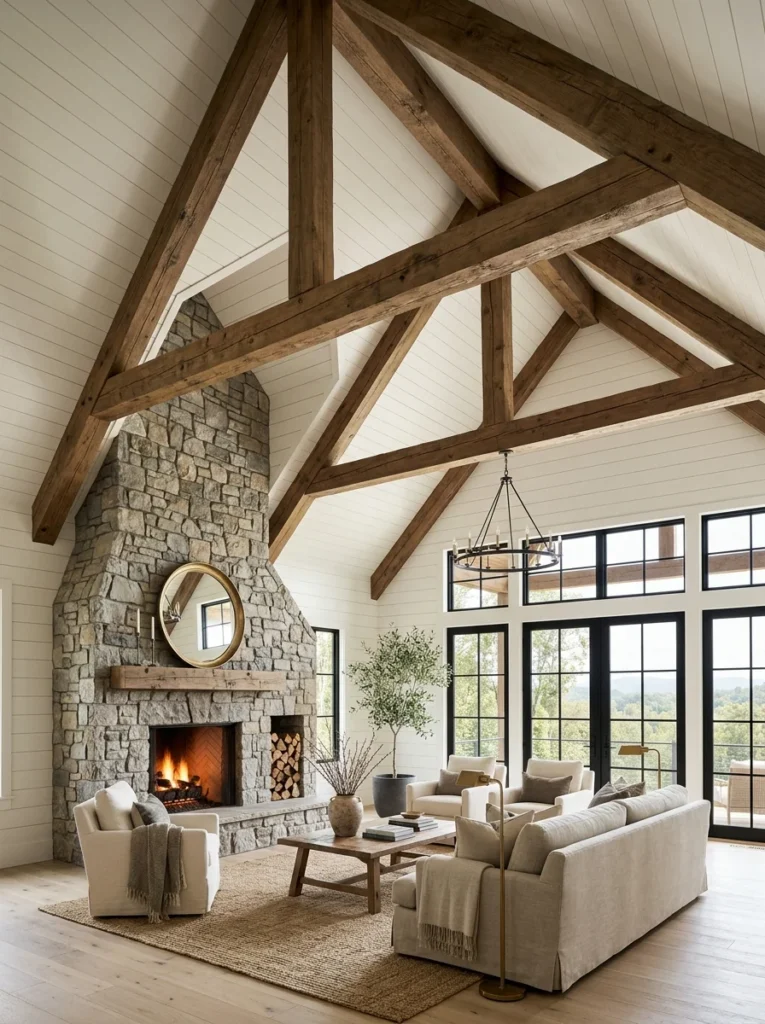
Combining shiplap with a few exposed wood beams across a vaulted ceiling gave our living room a genuine architectural focal point. The beams break up the horizontal lines of the shiplap and add a sense of structure, almost like the ceiling itself became a design feature rather than just a surface overhead.
5. Shiplap in a Sloped Attic Bedroom
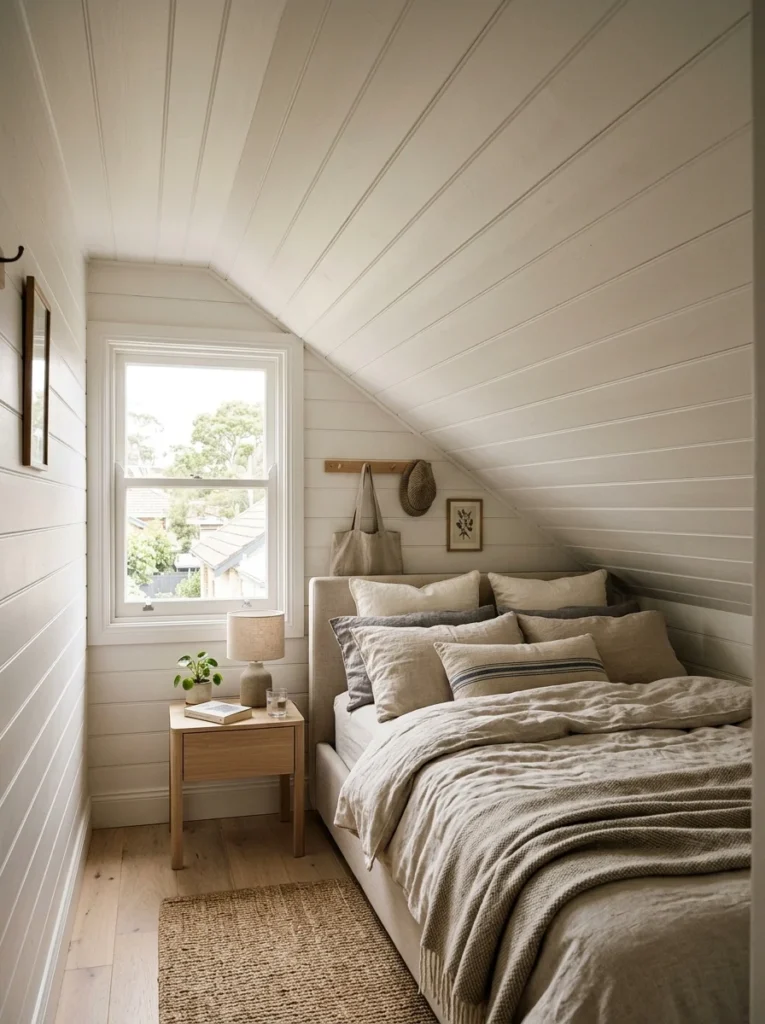
A converted attic bedroom with a sloped ceiling was one of the trickiest spaces we’ve tackled, since the angles meant every board needed careful cutting. The finished result, though, made the awkward slope feel like an intentional design choice rather than an architectural limitation, and the horizontal lines actually helped the low ceiling feel less oppressive.
6. Two-Tone Shiplap and Drywall Combination
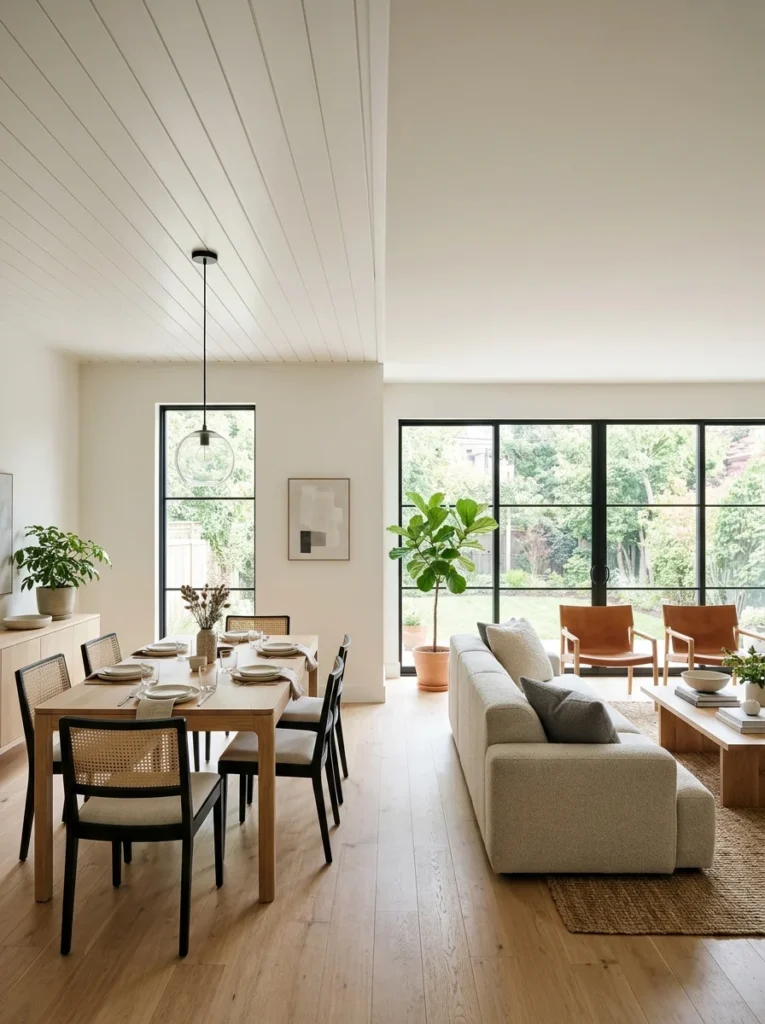
Rather than covering an entire ceiling, we ran a section of shiplap along one side of our dining room ceiling and left the rest as smooth drywall, creating a subtle zone division without a physical wall. It’s a technique that works particularly well in open-concept spaces where you want to visually separate areas without closing them off.
7. Shiplap Ceiling With a Statement Chandelier
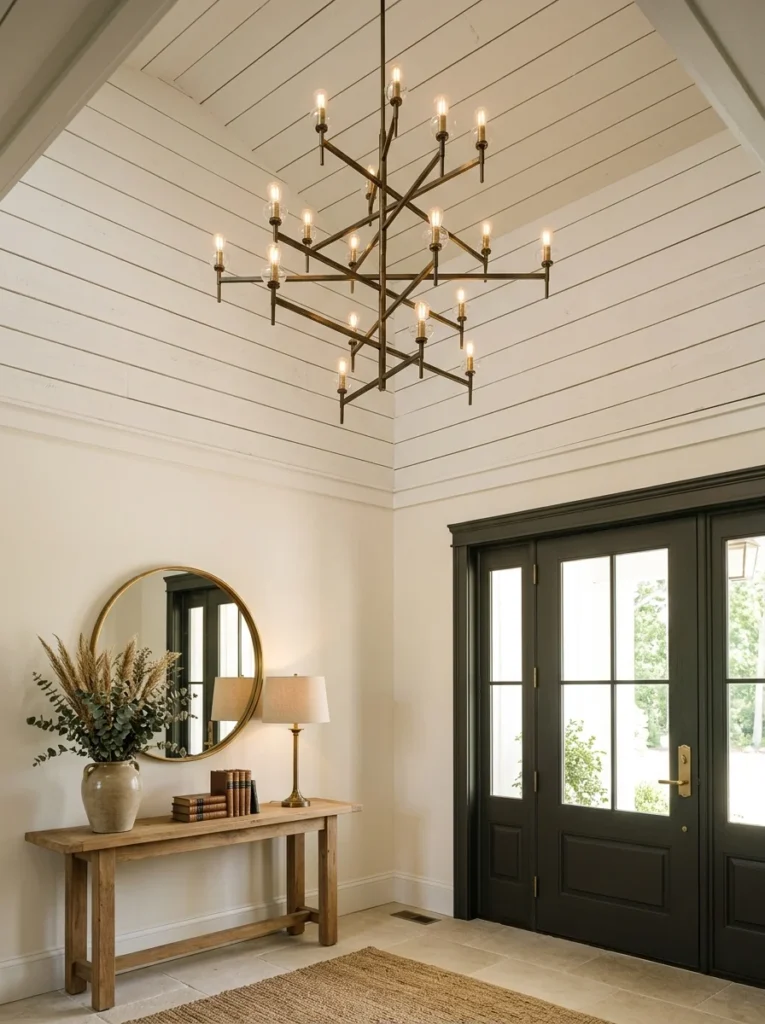
In a friend’s entryway, shiplap overhead became the backdrop for a large statement chandelier, and the texture of the wood planks gave the fixture something visually interesting to contrast against, rather than disappearing into a flat, featureless ceiling the way it might have otherwise.
8. Wide-Plank Shiplap for a Modern Farmhouse Feel
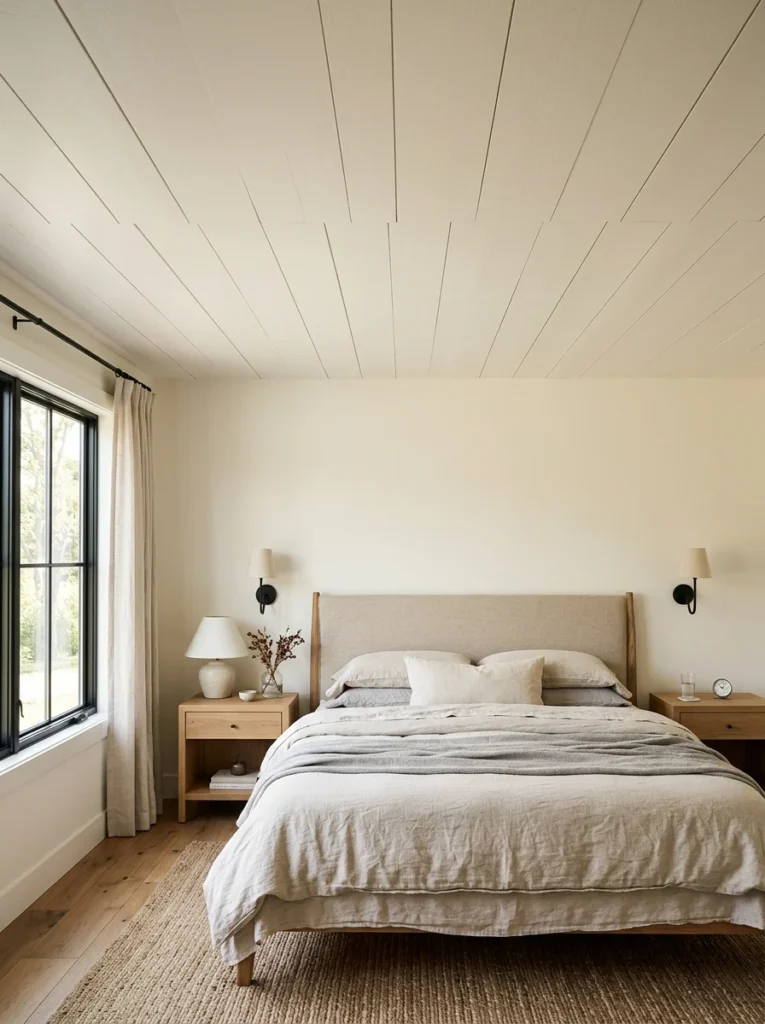
Using wider boards than the traditional narrow shiplap profile gave one bedroom ceiling a slightly more modern, less busy look. Fewer seams across the same ceiling area created a cleaner, calmer visual effect that worked well in a room meant to feel restful rather than richly textured.
9. Narrow Shiplap for Added Texture
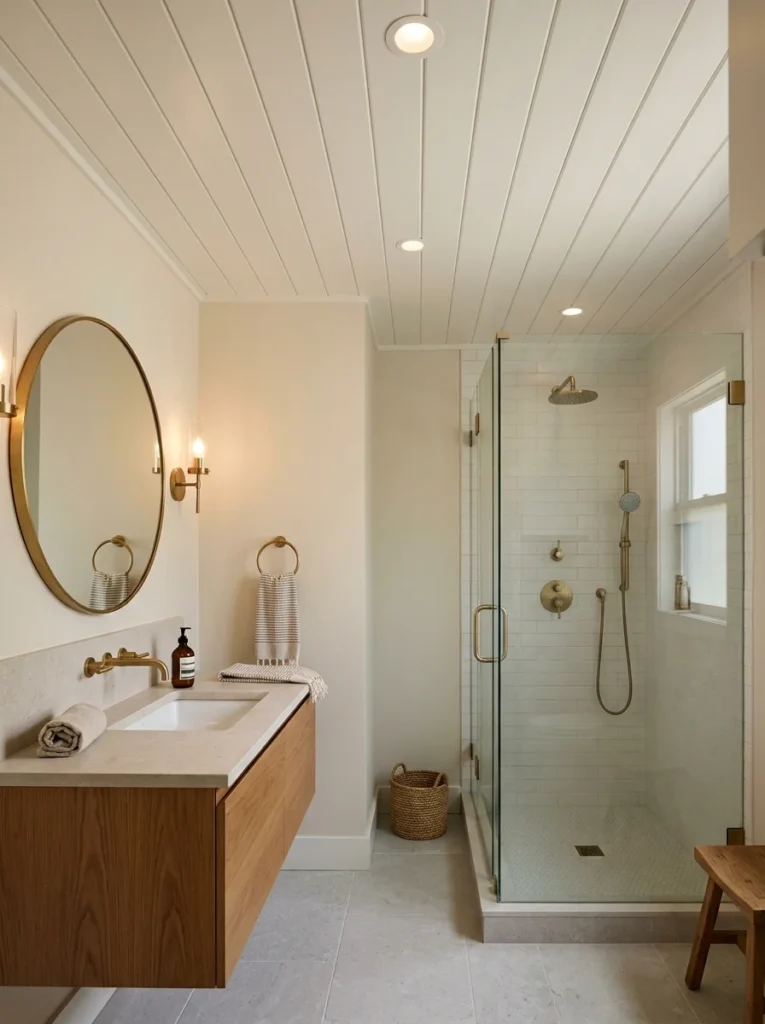
In contrast, a narrower board width in our bathroom ceiling created much more visual texture and shadow lines across the same square footage. In a smaller room, that extra texture became a real design feature rather than something that felt busy or overwhelming.
10. Shiplap Painted to Match the Walls
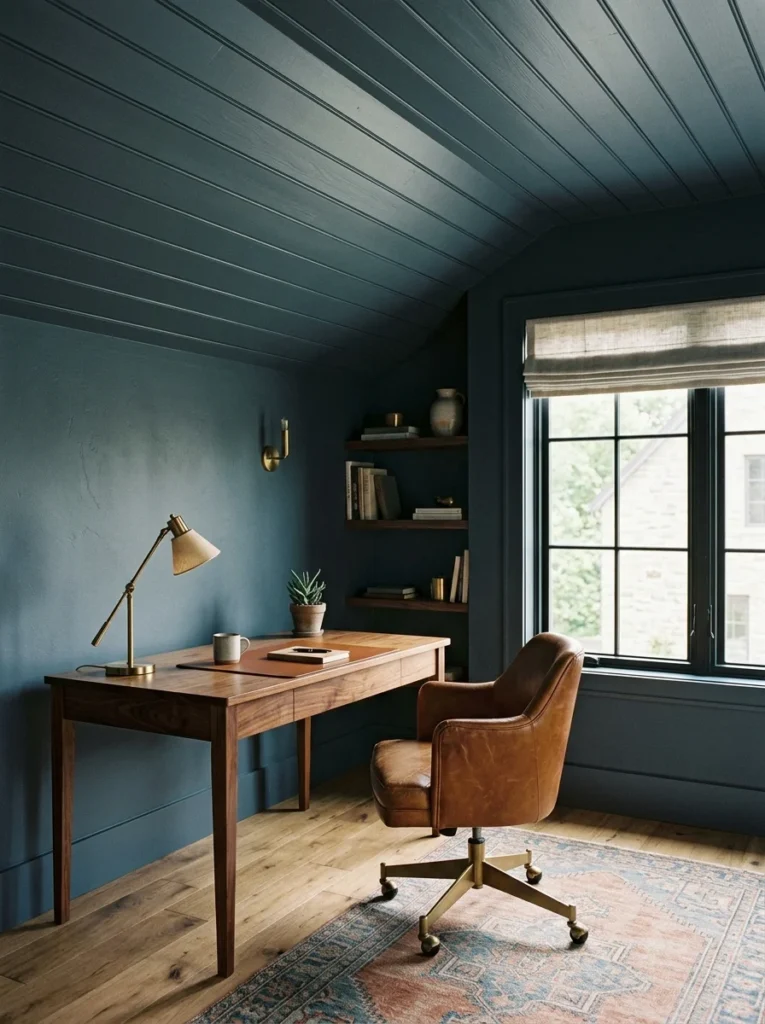
Painting the ceiling shiplap the exact same color as the walls in our home office created a cocooned, enveloping feel that made the relatively small room feel intentional and cozy rather than cramped. The subtle texture of the shiplap kept the ceiling from disappearing entirely, even in the same color as everything around it.
11. Whitewashed Shiplap for a Coastal Look
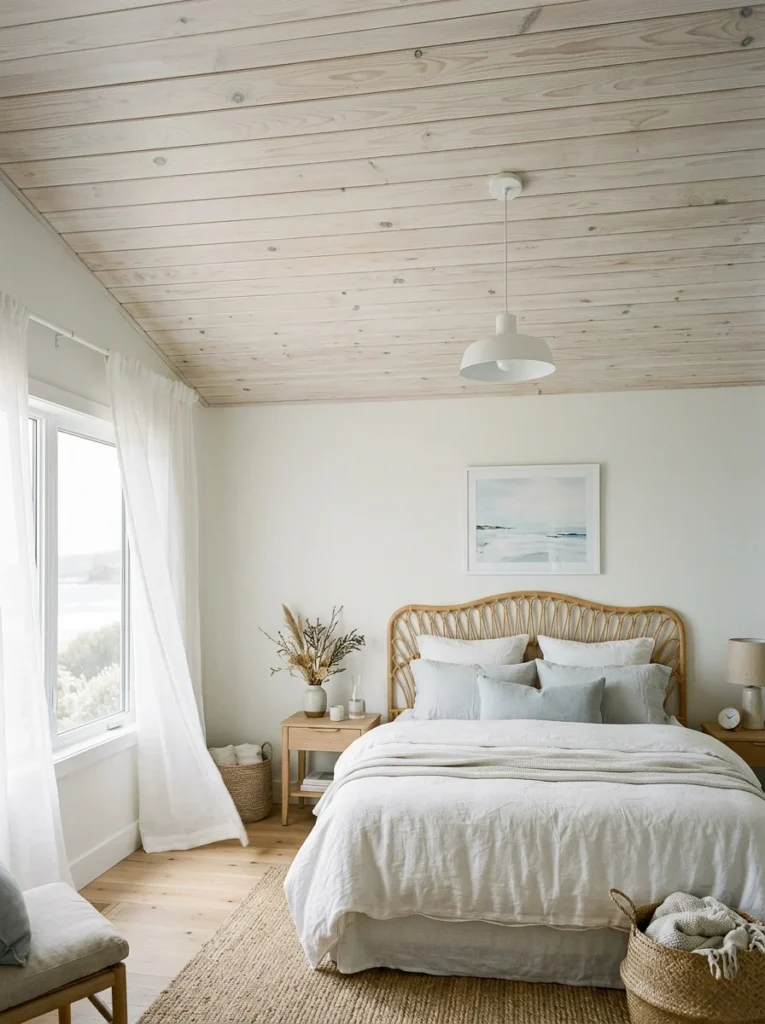
A light whitewash technique, where thinned white paint is brushed on and partially wiped away before drying, let the natural wood grain show through while still brightening the ceiling considerably. This approach worked particularly well in a beach house guest room we helped a friend redo, tying into the overall coastal theme of the space.
12. Shiplap With Recessed Lighting
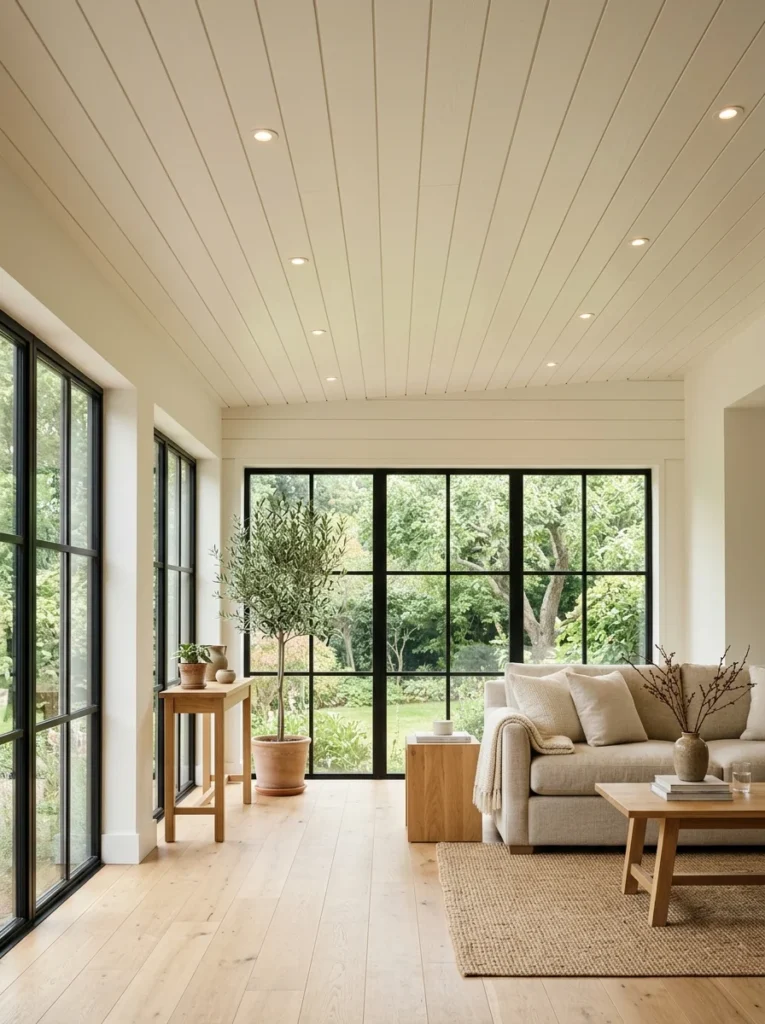
Rather than a single central fixture, we cut in several small recessed lights across our sunroom shiplap ceiling. The flush-mounted lights kept the clean horizontal lines of the shiplap uninterrupted, unlike a hanging fixture would have, while still providing even, functional lighting throughout the room.
13. Shiplap Ceiling in a Nursery
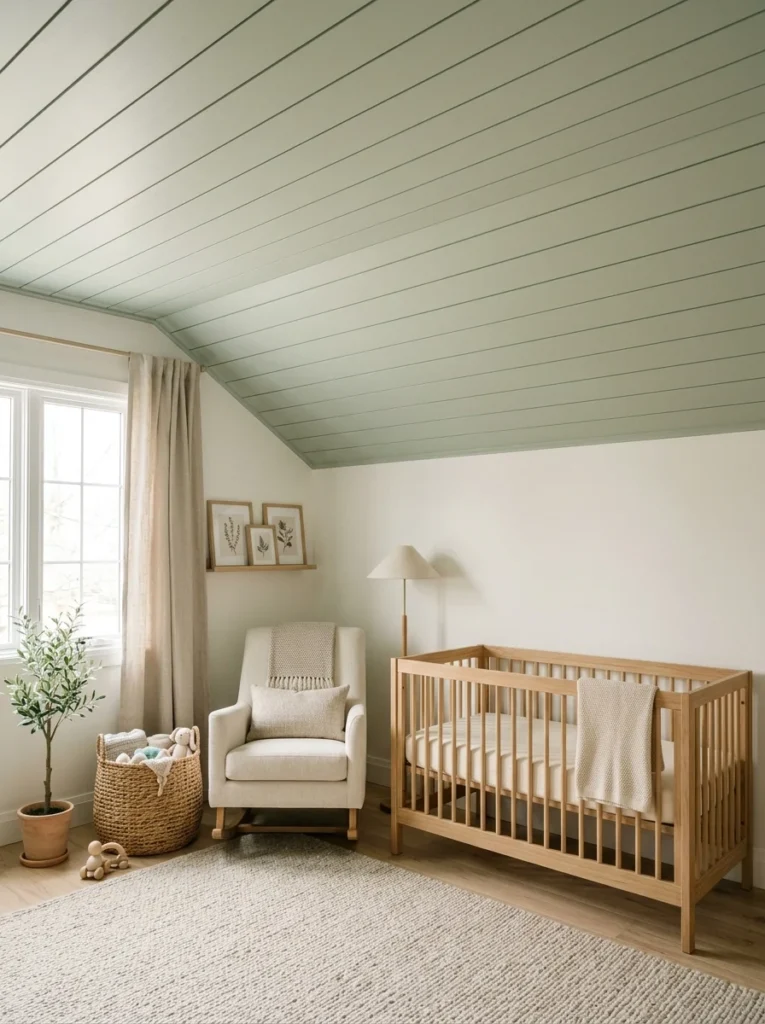
A soft, pale sage-painted shiplap ceiling became the calming backdrop for a friend’s nursery. The subtle texture added visual interest without the boldness of a patterned wallpaper, which felt like a better fit for a room where a soothing, uncomplicated atmosphere mattered more than a dramatic style statement.
14. Shiplap Running Perpendicular to the Room’s Length
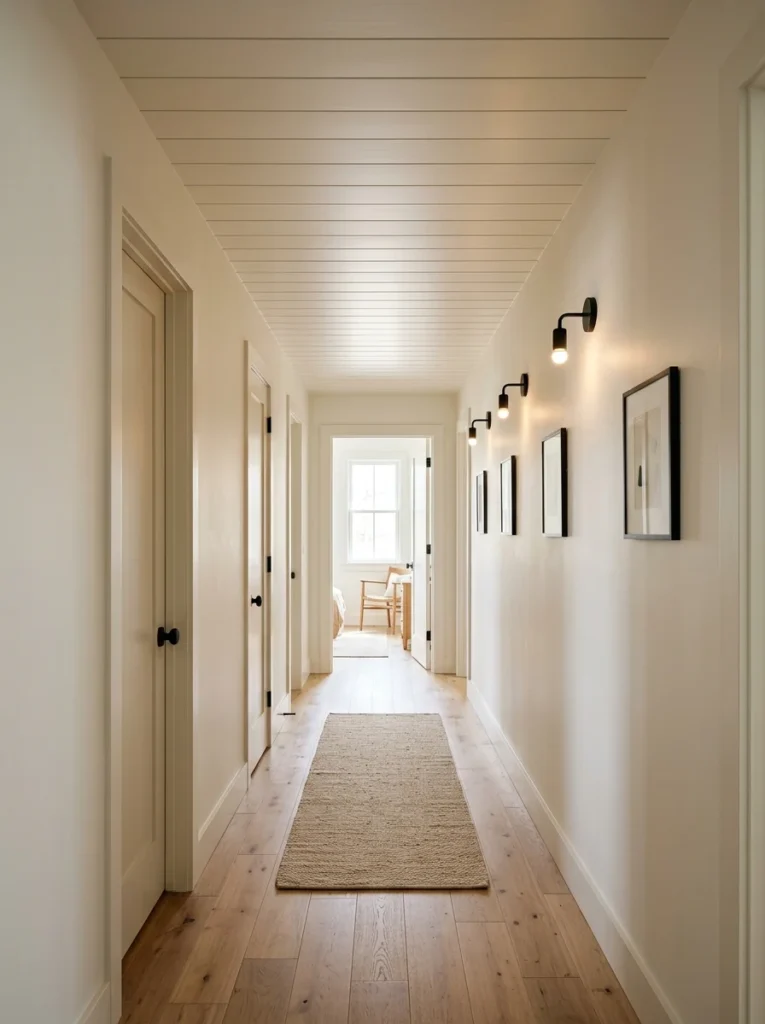
Most shiplap ceilings run boards along the shorter dimension of a room, but running them the opposite direction in our long, narrow hallway actually helped make the space feel wider rather than emphasizing how long and narrow it already was, which was the opposite effect the more traditional orientation would have created.
15. Shiplap Combined With a Ceiling Fan
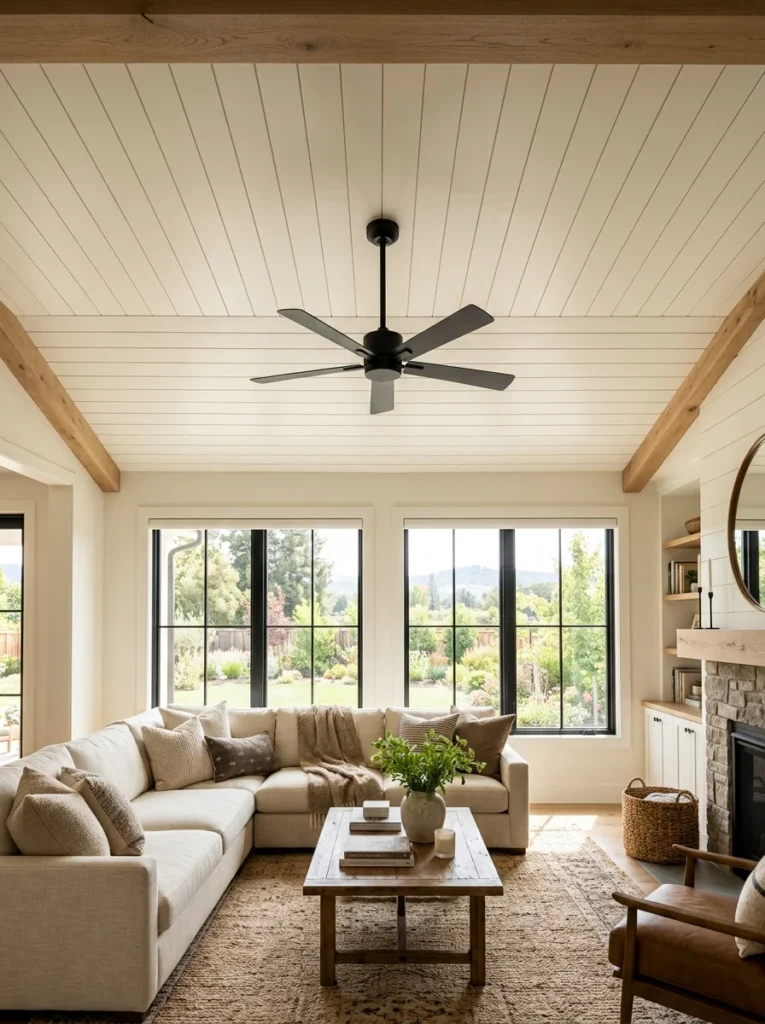
In our living room, we made sure to plan the shiplap board layout around the ceiling fan’s mounting point before installation, ensuring the seams lined up symmetrically around the fixture instead of looking randomly placed. That small bit of planning made a big difference in how finished and intentional the final ceiling looked.
16. Faux Shiplap Using MDF Panels
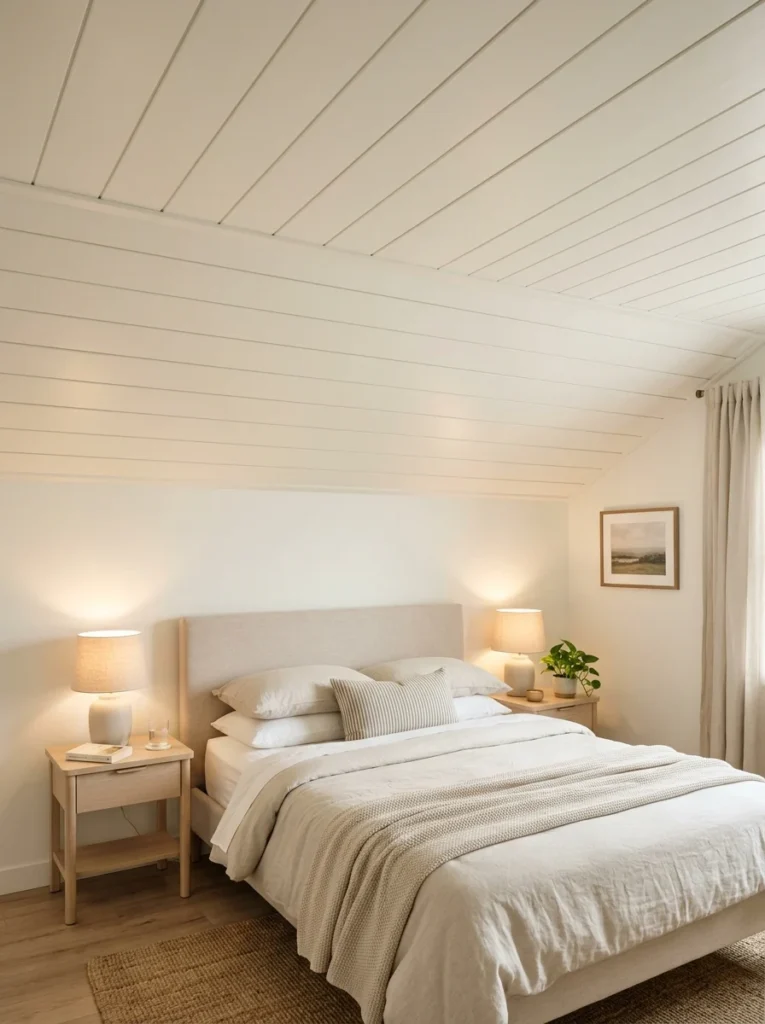
For a lower-cost alternative to solid wood boards, pre-primed MDF shiplap panels gave a friend’s guest bedroom the same visual effect at a noticeably lower material cost. They install similarly to real wood planks and take paint beautifully, though they don’t offer quite the same natural wood grain texture that a stained finish would show.
17. Shiplap Ceiling With a Wood Tone Accent Beam
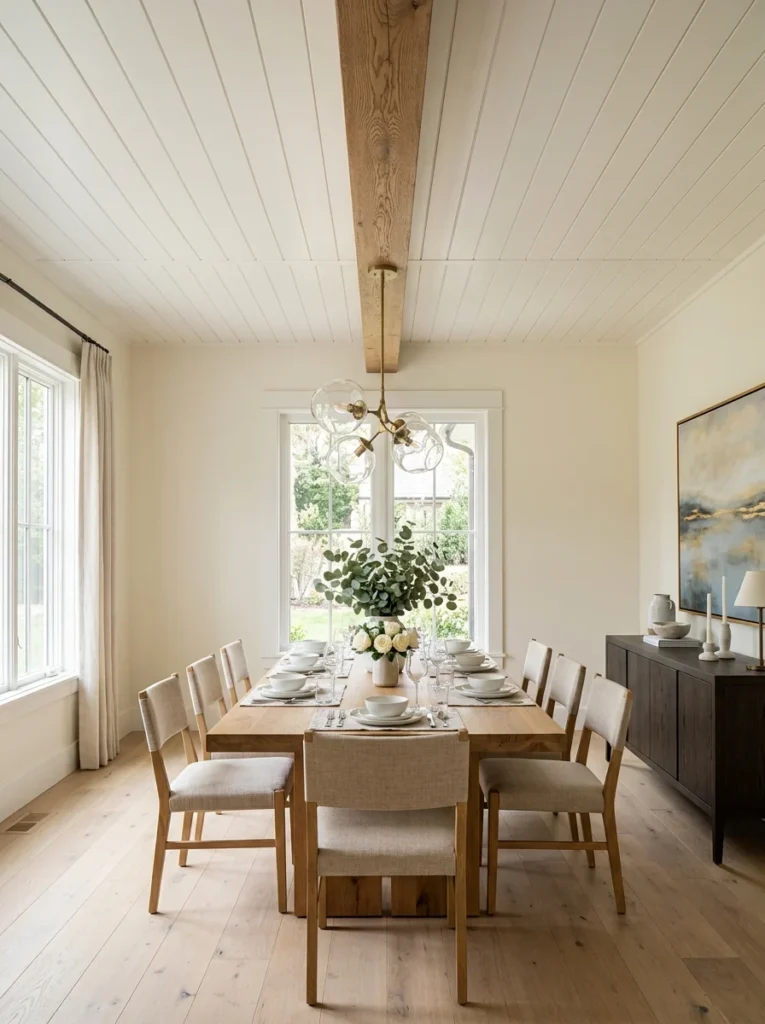
A single stained wood beam running across an otherwise white-painted shiplap ceiling in our dining room added warmth and a focal point without committing to staining the entire ceiling in that darker tone. It’s a middle-ground option for anyone who likes the idea of exposed wood tone but doesn’t want it dominating the whole room.
18. Shiplap in a Covered Outdoor Porch Ceiling
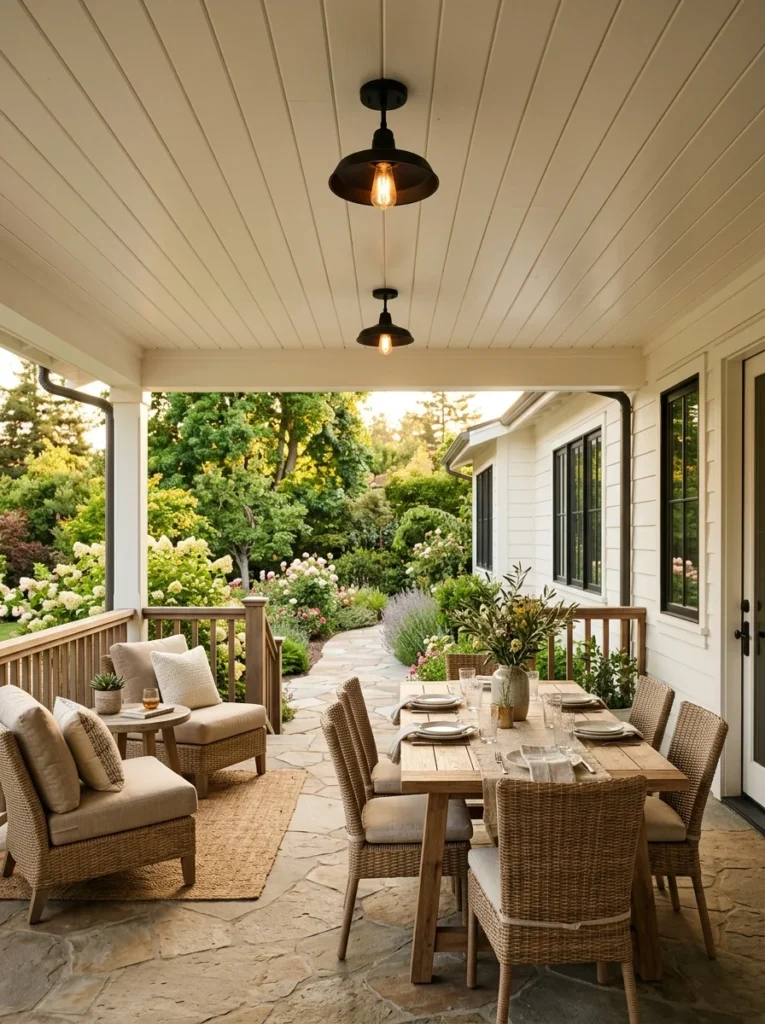
On our covered back porch, exterior-rated shiplap boards gave the ceiling the same classic look as our indoor projects while standing up to outdoor humidity and temperature swings. It’s become one of my favorite additions to the whole house, especially with a couple of simple pendant lights installed between the boards for evening use.
Getting the Installation Details Right
After four different shiplap ceiling projects, a few installation details have made a consistent difference in how professional the final result looks. Blind-nailing through the tongue of each board, rather than face-nailing straight through the visible surface, keeps the finished ceiling free of visible nail holes that would otherwise need filling and touch-up painting afterward.
Leaving a small gap, roughly the width of a nickel, between each board also matters more than it might seem. Wood expands and contracts with humidity changes, and skipping that gap on our very first project led to a couple of boards buckling slightly during a particularly humid summer, a mistake we haven’t repeated since. Finding the ceiling joists ahead of time with a stud finder, and marking their locations on the wall before starting, also made the actual installation go far more smoothly than trying to locate them board by board partway through the project, which is how our very first attempt started before we got smart about planning ahead.
Priming and painting the boards before installation, rather than after, is another detail that made a noticeable difference in the finished look of our painted ceilings. Painting after installation meant fighting with a roller overhead, straining to reach into every groove between boards evenly, while pre-painting each board on a workbench before it ever went up gave us a far more even, professional-looking finish with a fraction of the overhead effort.
Choosing Between Real Wood and Engineered Alternatives
Real wood shiplap offers the most authentic texture and the option to stain rather than paint, which matters if you want to show off natural wood grain the way we did in our friend’s farmhouse kitchen. Engineered options like primed MDF planks, on the other hand, tend to be more dimensionally stable, which means less risk of the gapping or warping that solid wood can be prone to in rooms with fluctuating humidity, like bathrooms or kitchens.
For ceilings specifically, where the material is fighting gravity rather than just sitting on a wall, we’ve found that lighter engineered options are also considerably easier to install solo, since solid wood boards overhead can be awkward and heavy to hold in place while fastening compared to the same task on a vertical wall. That weight difference became especially noticeable during our vaulted living room ceiling project, where working at height on a ladder while wrestling with solid pine boards was genuinely one of the more physically demanding parts of the entire renovation.
Cost also factors into this decision more than most people expect going in. Solid wood typically runs higher per square foot than engineered alternatives, though the price gap has narrowed somewhat in recent years as more manufacturers have entered the shiplap panel market. For a first-time project, I’d generally recommend starting with an engineered option in a lower-stakes room, like a closet or small bathroom, before committing to solid wood on a larger, more visible ceiling where mistakes are both more expensive and more noticeable.
What a Shiplap Ceiling Typically Costs
Cost varies quite a bit depending on whether you choose real wood or an engineered alternative, and whether you hire the work out or install it yourself. Our sunroom project, done ourselves using pine boards, came in considerably cheaper than the quote we’d gotten for a professional installation of the same square footage, though it did require a full weekend of our own time and a few basic tools we already had on hand, including a nail gun and a good miter saw for clean, precise cuts around corners and fixtures.
The MDF panel option we used in a friend’s guest bedroom brought the material cost down even further compared to solid pine, which made it an appealing choice for a room where budget mattered more than the ability to stain the wood in its natural tone. Paint and primer added a modest amount to every project regardless of material choice, and it’s a cost that’s easy to forget about when budgeting for the boards themselves.
Labor, if you choose to hire it out rather than tackle it yourself, tends to be the largest variable in the total cost. Ceilings generally take longer to install than walls because of the overhead work involved, so getting a specific quote for a ceiling project rather than assuming it will cost the same per square foot as a wall installation is worth doing before committing to a budget.
Maintaining a Shiplap Ceiling Over Time
Once installed, a shiplap ceiling requires surprisingly little ongoing maintenance compared to what I expected going into our first project. Dusting occasionally with a long-handled duster keeps the grooves between boards from collecting visible buildup, which is really the only regular upkeep our painted ceilings have needed over the past two years.
For a natural stained wood ceiling like the one in our friend’s kitchen, occasional reapplication of a protective finish, roughly every few years depending on the room’s humidity and sun exposure, keeps the wood looking fresh and prevents it from drying out or fading unevenly. Kitchens and bathrooms, where humidity fluctuates more than in other rooms, tend to need slightly more frequent attention than a dry sunroom or bedroom ceiling would.
Touch-up painting around light fixtures or vents is the most common maintenance task we’ve run into, simply because those areas see more handling during bulb changes or filter swaps than the rest of the ceiling. Keeping a small amount of the original paint color on hand after finishing a project has saved us from needing to color-match years later when a touch-up became necessary.
Frequently Asked Questions
Does a shiplap ceiling make a room feel smaller? In our experience, it depends heavily on color and board width. A light-colored, wider-plank shiplap ceiling tends to open a room up, similar to what we saw in our sunroom, while a dark, narrow-board version can make a room feel cozier and more enclosed, which isn’t necessarily a bad thing depending on the mood you’re going for in that specific space.
Is shiplap on a ceiling still considered stylish, or has the trend passed? Trends around any single design element tend to shift over time, but a well-installed shiplap ceiling, especially one that uses color and finish thoughtfully rather than defaulting to the most common bright white look, has held up well in our home for over two years now without feeling dated. Choosing a less expected color or pairing it with beams or lighting in a considered way seems to be what keeps it from reading as an obvious trend piece.
How long does a typical shiplap ceiling installation take? Our sunroom ceiling, roughly a ten by twelve foot room, took a full weekend for a first-time installation, including cutting, fitting, and priming the boards beforehand. Later projects went faster once we’d worked through the initial learning curve, with our smaller bathroom ceiling taking closer to a single day from start to finish.
Final Thoughts
Looking back at how close I came to skipping shiplap entirely because I assumed the trend had already passed, I’m glad that farmhouse kitchen ceiling changed my mind. What I’ve learned across four different rooms is that shiplap’s staying power really comes down to the choices made around it, the color, the board width, the finish, and how it’s paired with lighting and other architectural details, rather than the material itself ever really going out of style.
If you’re considering a shiplap ceiling of your own, my advice is to resist defaulting straight to bright white simply because it’s the most common version you’ve seen online. Spend some time thinking about the mood you actually want that specific room to have, and choose a color, finish, and board width that supports that mood rather than following whatever look happens to be trending at the moment. That’s the approach that’s kept every one of our shiplap ceilings feeling intentional rather than dated, more than two years after the first one went up.
What surprised me most, looking back across all four projects, was how differently the same basic material could read depending entirely on the decisions built around it. The charcoal home office ceiling and the whitewashed coastal guest room came from the exact same starting material, yet they feel like they belong to two completely different homes. That range is really the biggest argument I’d make for shiplap over a plain, flat ceiling: it gives you a foundation that can be shaped into almost any mood a room calls for, rather than locking you into a single fixed look the moment the boards go up
I resisted shiplap for a long time, mostly because it felt like a trend that had already peaked by the time I finally got around to my own renovation. Every home show and design blog seemed to have moved on to something else, so I almost skipped it entirely when I was planning updates to our sunroom ceiling. What changed my mind was seeing it used on a ceiling rather than a wall in a friend’s farmhouse-style kitchen, at a small dinner party where I spent more time looking up at her ceiling than actually talking to anyone. Something about the horizontal lines running overhead instead of vertically down a wall felt fresh again, even though the material itself has been around for well over a century.
That sunroom ceiling became the first of what turned into four different shiplap ceiling projects across our house over the following two years, each one a slightly different color, spacing, or finish depending on the room. What I’ve learned through all of them is that shiplap on a ceiling reads very differently depending on a handful of small decisions, and getting those details right is really what separates a ceiling that looks timeless from one that looks like it’s chasing a trend that’s already passed. Here are 18 ideas based on what’s actually worked in our home and a couple of projects I’ve helped friends with since.
